Table of Contents
Advertisement
Advertisement
Table of Contents

Related Manuals for DirecTV D11


Summary of Contents for DirecTV D11
- Page 2 Safety & Care Safety & Care Your DIRECTV Receiver has been designed and manufactured to stringent quality and safety WARNING To reduce the risk of fire or electric standards. You should, however, be aware of the following important precautions for safe and optimal shock, do not expose this product to rain or moisture.
- Page 3 • CAUTION: Avoid moisture to reduce the risk of fi re or electric shock. The DIRECTV Receiver should not be used near water (for example, kitchen sink, bathtub, pool, damp basement). Also, never spill liquid on the receiver, and do not place vases or other vessels containing liquid on top of it.
- Page 4 • Never insert objects of any kind into any openings in the DIRECTV Receiver (other than the • Place it on a fl at, hard surface — do not operate the DIRECTV Receiver on a carpet or other • Always unplug your DIRECTV Receiver before moving it.
- Page 5 • Always unplug the DIRECTV Receiver, TV and other equipment before you connect or disconnect any cables. • Leave the main power connector accessible the mains connector at the back of the unit in case of emergency shutdown • CAUTION: Electric Shock — never attempt to disassemble the DIRECTV Receiver yourself;...
- Page 6 Tune to a channel directly; also input numbers and letters when needed in onscreen menus POWER Turns other equipment on and off, as selected with MODE switch TV POWER ON/OFF AV1 AV2 TV Turns your TV and DIRECTV Receiver on and off POWER ADVANCE PLAY FFWD RECORD LIST...
-
Page 8: Table Of Contents
Contents Chapter 1 – Getting Started Chapter 2 – What’s On viii viii Welcome ... 2 Making the Right Connections ... 3 Hardware Reference ... 4 Getting Familiar ... 7 Choose Your Setup ... 10 Guided Setup & Activation ... 18 Programming Your Remote Control ... - Page 9 Caller ID & Messages ... 39 Parental Controls ... 40 Chapter 4 – Other Information Troubleshooting ... 46 Limited 90-Day Warranty ... 55 Product Information ... 60 DIRECTV PROTECTION PLAN ... 61 FCC Customer Information ... 63 Index ... 67 Section Title Contents Chapter 1...
-
Page 11: Welcome
Chapter 1 Welcome Making the Right Connections Hardware Reference Getting Familiar Choose Your Setup Guided Setup & Activation Programming Your Remote Control... - Page 12 225 channels, including over 30 premium movie channels, with all the convenience of DIRECTV updates at DIRECTV.com. service. DIRECTV ® Pay Per View off ers a handy choice in recent hit movies, plus exciting live sports, concerts and specials. Th ere’s exclusive sports subscriptions for every taste and team. Even access to 36 commercial-free music channels! To deliver this unique programming and enhance your entertainment experience, the DIRECTV ®...
- Page 13 Making the Right Connections When you are ready to connect your DIRECTV® Receiver and your other components, whether you’re having your system professionally installed or handling it yourself, be sure to read over the following few pages to familiarize yourself with some important tips for safety and care.
-
Page 14: Hardware Reference
This is your “dish” and related hardware, affi xed to your roof or other surface, which picks up the broadcast signals from our satellites. DIRECTV Receiver (or Satellite Receiver) Your DIRECTV Receiver picks up the signal from your satellite dish antenna and translates it into viewable TV programming. Access Card Contains information about your DIRECTV®... - Page 15 Audio/Video (A/V) cables provide very good picture quality and stereo sound, and should be used if your TV does not have S-Video jacks. The DIRECTV Receiver’s A/V jacks are color coded (yellow for video, red for right audio and white for left audio). If your TV has only one input for audio (mono), connect it to the left (white) audio jack on the DIRECTV Receiver.
- Page 16 The telephone line cord is required to connect your DIRECTV Receiver to a land-based telephone line if you choose to subscribe to DIRECTV programming. The phone line connection is used to periodically call DIRECTV. You will need an RJ11-type modulator jack (the most common type Phone of phone jack).
-
Page 17: Getting Familiar
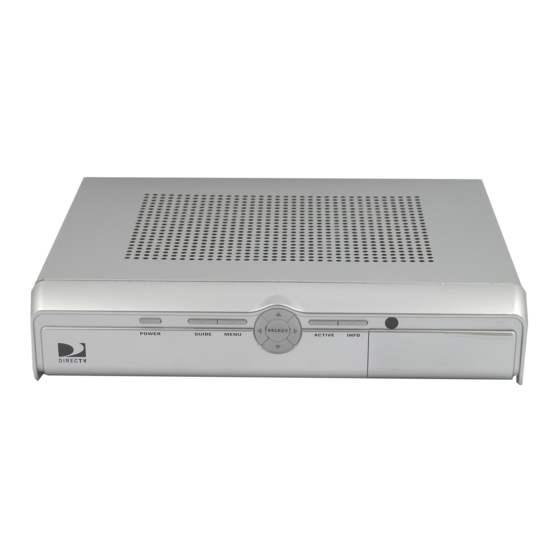
Getting Familiar DIRECTV Receiver Front Panel POWER – Turns your DIRECTV Receiver on or off. Your DIRECTV Receiver still tunes and receives messages when powered off. REMOTE SENSOR – The infrared sensor picks up commands from the remote control. GUIDE – Displays the onscreen program guide. - Page 18 1) SATELLITE IN – Use to connect the DIRECTV Receiver to the satellite dish antenna. 2) OUT TO TV – Connects the DIRECTV Receiver to your TV or VCR using RF coaxial cable. 3) OFF-AIR IN – Connect a standard TV antenna or cable feed to the DIRECTV Receiver using 4) 3/4 CHANNEL SWITCH –...
- Page 19 You can connect a second set of audio cables to another component, such as a VCR or stereo. 8) USB PORT – For future use. 9) PHONE – Connects the DIRECTV Receiver to a telephone wall jack. We require a land-based telephone connection to communicate periodically with your DIRECTV Receiver.
-
Page 20: Choose Your Setup
Note that the back panels of your TV and other equipment may not exactly match those illustrated. All A/V jacks and inputs Connecting Your DIRECTV Receiver to the Satellite Dish are color coded. Always match the color of the... - Page 21 Connecting Your DIRECTV Receiver to your TV or VCR Depending on the connections on the back of your TV or VCR, you have the following options: • S-Video & A/V Audio Connection (Best Quality) • A/V Connection (Better Quality) • RF Coaxial Connection (Good Quality) These connections are described on the following pages.
- Page 22 Using the A/V cable, connect the white and red plugs from one end of the A/V cable to the AUDIO L (white) and R (red) jacks on the back of the DIRECTV Receiver. Connect the plugs from other end of the A/V cable to the corresponding audio input jacks on your TV or VCR. Do not plug the video (yellow) into either the DIRECTV Receiver or the TV.
- Page 23 Choose Your Setup BEST QUALITY CONNECTION – Television S-Video & A/V Audio The back panels of your equipment may not look exactly like those illustrated. ® DIRECTV Receiver Chapter 1...
- Page 24 Now, continue on page 16, “Connecting Your DIRECTV Receiver to Your Telephone Line.” came with your TV. Note Choose Your Setup If your TV only has one audio input jack use AUDIO L (white) jack on the back of the DIRECTV Receiver to make the connection.
- Page 25 Choose Your Setup VERY GOOD QUALITY CONNECTION – A/V Television The back panels of your equipment may not look exactly like those illustrated. ® DIRECTV Receiver Chapter 1...
- Page 26 A/V cables, connect the audio L (white), R (red) and video (yellow) plugs from one end of the A/V cable to the AUDIO 1 L and R and VIDEO 1 jacks on the back of the DIRECTV Receiver. Connect the other end of the A/V cable to...
- Page 27 Television Television ® ® DIRECTV DIRECTV Receiver Receiver Choose Your Setup GOOD QUALITY CONNECTION – RF Coaxial The back panels of your equipment may not look exactly like those illustrated. 17 17 Chapter 1...
-
Page 28: Guided Setup & Activation
In order to protect your TV screen from burn-in (a side-effect caused when a stationary image is displayed for too long), the DIRECTV Receiver interface automatically goes into screen saver mode, and displays a black screen with a moving logo when no key is pressed for 5 minutes or more while a stationary image is displayed on the TV. To dismiss the screen saver and return to what you were doing, press any key on the remote. - Page 29 Activate Your DIRECTV Service Once all the setup processes are complete, all that’s left to do is activate your DIRECTV service. Before you make the call, be sure to: 4 Tune to Channel 100 and be sure you’re picking up a satellite signal (DIRECTV channel).
-
Page 30: Programming Your Remote Control
VOL and MUTE keys to. Point the remote away from your DIRECTV Receiver and press and hold MUTE and SELECT until the light near the slide switch blinks twice (about 5 seconds). Enter 9-9-3. Th e light will blink twice, indicating the VOL and MUTE are now locked to the chosen component, no matter what position the slide switch is in. - Page 31 To reset all the functions of the remote control to the factory defaults, follow these steps: 1) Point the remote away from your DIRECTV Receiver and components. Press and hold MUTE and SELECT until the light above the slide switch on the remote fl ashes twice (about 5 seconds).
- Page 32 Getting Started Chapter 1...
-
Page 33: Watching Tv
Chapter 2 Watching TV The Guide Autotune Pay Per View... - Page 34 With the MODE switch to the left (under the DIRECTV logo), press TV POWER ON. To access the channel of your choice, simply key in its numbers on your remote (the channel will appear in a few seconds, or press ENTER after the numbers and it will appear right away).
- Page 35 5) Audio options – Two states: bright and dim. If displayed brightly, alternate audio options are available. 6) Messages – Two states: bright and dim. If displayed brightly, there are new DIRECTV messages in Caller ID & Messages. 7) Parental Controls – Parental Controls lock status. Th ree states: Locked, unlocked and temporarily unlocked.
- Page 36 What’s On The Guide Overview of the DIRECTV Advanced Program Guide Th e Guide displays listings of current and upcoming programs for up to 3.5 days in advance. Find out what’s on (now or later), change the channel, fi nd and purchase a pay per view movie or event, or search for a program you’re interested in.
- Page 37 Getting Around in the Guide Press the GUIDE key on your remote, then choose how you want to fi lter the Guide. Select All Channels, or channels in a specifi c category. Moving through the Guide is simple: 4 Th e UP, DOWN, LEFT and RIGHT arrow keys move you through listings and time slots. Highlight a program or channel cell to view its description.
- Page 38 Autotune is a great way to see your favorite programs on your schedule. You won’t miss your favorite series because it moved to a diff erent day or time, or miss your team’s playoff game because you had to work late. Just set a program to autotune and your DIRECTV ®...
- Page 39 To record a program on your VCR, make sure you’ve connected your VCR properly to your DIRECTV Receiver, then set up your VCR to record at the same time as a scheduled autotune and you’re set. See your VCR User’s Guide for information on how to set it up for scheduled or manual recording.
-
Page 40: Pay Per View
You don’t have to go out for the best and biggest movies and special events! Recent hits and events like sports, comedy and more are available 24 hours a day on DIRECTV listed in the Guide in the 100s, with previews on channel 100. -
Page 41: Using The Quick Menu
Chapter 3 Using the Quick Menu Settings Audio Options Category Sort Pay Per View Find By Date & Time Favorites Caller ID & Messages Parental Controls... -
Page 42: Using The Quick Menu
The Quick Menu Using the Quick Menu Press MENU on your remote to easily access DIRECTV features. Once the Quick Menu is displayed, use the UP and DOWN arrows to highlight a desired menu item, then press SELECT to access that item. Some menu items will display a submenu, others will take you directly to a new screen. - Page 43 Access Card Follow the onscreen directions to replace your access card. You will need your old and new access cards to complete this process. (Note: DIRECTV will provide new access cards and instructions when necessary.) Reset From here you can restart the receiver, reset to factory defaults, or reset everything.
-
Page 44: Parental Controls
The Quick Menu Favorites Check the current status of your Favorites list(s) by clicking here, and make changes if you like. See page 38 for more details. Parental Controls Check the current restrictions of your Parental Controls by clicking here, and make any adjustments. -
Page 45: Audio Options
Audio Options Audio Options Some programs have alternate audio available (such as other language tracks or Dolby Digital). Th is option only appears in the Quick Menu over Live TV when the current program has alternate audio. You can set the default so that whenever a program has alternate audio available, it automatically plays this audio, or you can change the alternate audio temporarily for the program you are watching. -
Page 46: Category Sort
Press GUIDE to return to the regular Guide, or EXIT to return to live TV. Pay Per View Th is option enables you to check out DIRECTV Pay Per View listings by category. While in the Guide, press MENU, then select Pay Per View. You will see three choices for sorting the listings. -
Page 47: Favorites
Find By Would you like to locate a particular program, movie or sports event you want to see — even shows starring a favorite actor, or games with your favorite team? Find by off ers some easy ways to spot just what you want to watch. -
Page 48: Date & Time
The Quick Menu Date & Time Th is option gives you a convenient way to look several days ahead in the Guide, without having to scroll through pages of programs. Favorites Favorites allows you to set up special, customized Guide that shows only those channels you choose. So you can have easy access to the channels you like best, or perhaps a grouping of family channels just for the kids. -
Page 49: Caller Id & Messages
Caller ID & Messages Th is feature lets you get messages from DIRECTV. If you have Caller ID service*, you can also view phone calls you’ve received or turn call notifi cation on or off . Press MENU to display the Quick Menu, select Caller ID &... -
Page 50: Parental Controls
The Quick Menu DIRECTV Messages Th is feature lets you view a listing of current DIRECTV messages waiting for you. Simply highlight and select a message in the list to read, then you’ll have the choice to keep or delete it. - Page 51 Ratings Here you can set rating limits for Movies and TV: 1) SELECT Ratings. 2) Move to the right to SELECT the another tab. Note: You can use RED or GREEN to cycle tabs. Movies Highlight and select the Movies tab, then set the overall rating limit you wish to impose Brief descriptions of the ratings appear for your guidance.
- Page 52 The Quick Menu Channel Blocks You can block viewing of a certain channel or channels from this menu. SELECT Chan Blocks in the left menu, then scroll down the channel list to SELECT those you wish to block, or key in channel numbers for quicker access. Use Block All or Allow All to save time if you wish to aff...
- Page 53 Now, lock it Once you’ve set the restrictions you want, choose Lock Now from the left menu. You’ll be directed to create a passcode (which you’ll want to make easy enough to remember, but hard enough that the little ones won’t guess it!). Th is passcode will be your entry to unlocking and adjusting limitations in the future.
- Page 54 The Quick Menu 2) Various options for removing restrictions temporarily or permanently will appear. Select one and enter your password. Also note: If you have Parental Controls set and temporarily unlocked, turning the receiver power off will relock the box. If anyone tries to unlock restrictions using an invalid passcode, there’s a time delay that’s added with each additional attempt to discourage them.
-
Page 55: Troubleshooting
Chapter 4 Troubleshooting Limited 90-Day Warranty 60 Product Information 61 DIRECTV PROTECTION PLAN 63 FCC Customer Information 67 Index... - Page 56 4 Running the System Test (later in this section) can also help you diagnose and solve many System Upgrades Your DIRECTV Receiver is able to receive upgrades or modifi cations to some of its features and functions. Th ese modifi cations will occur automatically, usually at times when the receiver would likely be turned off...
- Page 57 Wrong picture, blue screen, snow or black/blank picture Th e DIRECTV Receiver and most TVs and VCRs let you toggle between video sources. If you don’t see the signal you think you should be seeing, try using these buttons to toggle between the signals: 4 Press the TV/VCR button on the VCR remote or on the VCR’s front panel.
- Page 58 DIRECTV Receiver will not turn on 4 Check to make sure the power cord is plugged into the DIRECTV Receiver and the wall outlet. 4 Check the wall receptacle (or extension cord) to make sure it is “live” by plugging in something else.
- Page 59 4 Electronic protection circuit may have been activated because of a power surge. Wait 30 seconds, then turn on again. 4 Unplug DIRECTV Receiver for a few minutes, then plug back in. If this happens frequently, the voltage in your house may be abnormally high or low.
- Page 60 4 If the DIRECTV Receiver is connected to the RF input of your TV, makes sure that the TV channel matches the 3/4 RF switch on the back panel. 4 Press the TV INPUT key on the remote to make sure your TV input is set to the TV input your DIRECTV Receiver is connected to.
- Page 61 4 Try changing channels. 4 Press LIST, then EXIT. 4 If neither of those work, restart your DIRECTV Receiver. Press MENU, press SELECT on Settings, then SELECT Setup. Select the Reset item from the left menu and follow the onscreen instructions.
- Page 62 Problems with the remote control 4 Check that nothing is between the remote control and the remote sensor. 4 Make sure the remote control is in DIRECTV mode. Slide the mode switch to the DIRECTV position so the remote will control the DIRECTV Receiver.
- Page 63 Running the System Test Th e System Test allows you to run a basic diagnostics check on your DIRECTV Receiver. If you are experiencing any trouble with your receiver, run the system test. It will also allow you to get your access card and receiver ID numbers or to initiate diagnostic procedures on your digital satellite receiver.
- Page 64 7) If you continue to have problems, call DIRECTV Customer Service at 1-800-DIRECTV. You should run a system test several times before concluding that there is a problem. Occasional fl uctuations in the phone line or satellite signal can give temporary false readings.
- Page 65 (whichever is deemed necessary) if it becomes defective or inoperative. Th is exchange is done without charge to you for parts and labor. You will be responsible for the cost of shipping to and from the location designated by DIRECTV. If DIRECTV cannot reasonably repair or replace the Receiver then DIRECTV may, at its sole discretion, refund the price you paid for the product or the current retail price of the product.
- Page 66 4 Any modifi cations or other changes to the product, including but not limited to software or hardware modifi cation in any way other than as expressly authorized by DIRECTV will void this limited warranty. Except in the case of...
- Page 67 Also keep the original box and packing material in case you need to return your product. Before Requesting Repair Service... Please check the troubleshooting section of this guide. Th is may save you a call to DIRECTV Customer Care. Limited 90-Day Warranty...
- Page 68 To Get Warranty Service... Warranty service will be provided by DIRECTV. If you believe you need service for your Receiver, contact DIRECTV at 1-800-DIRECTV. A representative will go through a diagnostic checklist with you. If it is determined that the product needs to be returned for service or exchanged, you will receive a return authorization number.
- Page 69 Limited 90-Day Warranty RETAIL PRICE OF THE DIRECTV RECEIVER. DIRECTV SHALL NOT BE LIABLE FOR ANY INCIDENTAL OR CONSEQUENTIAL DAMAGES FOR BREACH OF ANY EXPRESS OR IMPLIED WARRANTY ON THE DIRECTV RECEIVER. SOME STATES DO NOT ALLOW LIMITATIONS ON WARRANTIES, SO THE ABOVE LIMITATIONS MAY NOT APPLY TO YOU.
-
Page 70: Product Information
Other Information Product Information Keep your sales receipt to obtain warranty parts and service and for proof of purchase. Attach it here and record the serial and model numbers in case you need them. Th ese numbers are located on the product. Model No. -
Page 71: Directv Protection Plan
4 Cables, switches, and associated wiring throughout home 4 Defective remote control replacements Get ALL THAT FOR JUST $5.99 a month for accounts with standard DIRECTV Receivers and only $7.99 a month for accounts with DIRECTV Plus ® Receiver, DIRECTV DIRECTV Receiver with UltimateTV Service. - Page 72 *A fee of $49 for standard IRD equipment, $249 for DIRECTV DVR, DIRECTV Plus Receiver or Ultimate TV equipment, $400 for HD equipment, or $1,000 for DIRECTV HD DVR equipment will be charged to your DIRECTV bill if the defective equipment that we are replacing for you is not returned within 30 calendar days. The plan will provide a return box for the defective equipment and even pick up the shipping costs.
-
Page 73: Fcc Customer Information
El Segundo, CA 90245 1-800-DIRECTV 4 Trade Name: DIRECTV 4 Type of Equipment: DIRECTV Satellite Receiver 4 Model Number: D11 Federal Communications Commission (FCC): Th is equipment complies with both Part 15 and Part 68 of the FCC rules. Th is equipment has been tested and found to comply with the limits of a Class B digital device, pursuant to part 15 of the FCC Rules. - Page 74 4 Increase the separation between the equipment and the DIRECTV Receiver. 4 Connect the equipment into an outlet on a circuit diff erent from that to which the DIRECTV Receiver is connected. 4 Consult the dealer or an experienced radio/TV technician for help.
- Page 75 Th e digits represented by ## are the REN without the decimal point (e.g., 03 is a REN of 0.3). If this DIRECTV Receiver causes harm to the telephone network, the telephone company will notify you in advance that temporary discontinuance of service may be required. But if advance notice isn’t practical, the telephone company will notify the customer as soon as possible.
- Page 76 El Segundo, CA 90245 1-800-DIRECTV If your home has specially wired alarm equipment connected to the telephone line, ensure the installation of this DIRECTV Satellite Receiver does not disable your alarm equipment. If you have questions about what will disable alarm equipment, consult your alarm company, telephone company or a qualifi...
-
Page 77: Index
Index Date & Time 31 Access card 7, 8, 19, 53, 54 DIRECTV mode 48, 52 ARROW keys 7 DIRECTV PROTECTION PLAN Audio options 25, 35 Language 35 DIRECTV Receiver Problems 47 Autotune 28 Dish-pointing coordinates 53 Back panel 50... - Page 78 Other Information Notifi cation 39 Parental Controls 25, 31, 34, 40, 43, 44 channel blocks 25, 31, 34, 40, 43, ratings 25, 31, 34, 40, 43, 44 spending limits 25, 31, 34, 40, 43, 44 unlocking 25, 31, 34, 40, 43, 44 unrated programs 25, 31, 34, 40, 43, 44 viewing hours 25, 31, 34, 40, 43,...
- Page 79 Satellite Data Acquisition 19, 47 Unlock a particular program 43 Satellite Setup 53 User profi le Scheduler 33 Search 26, 37 Settings 18, 44, 54 Setup 1, 10, 12, 14, 15, 16, 17, 18, 19, 50, 51, 53, 54 Warranty 6, 45, 55, 56, 57, 58, 60 Showings 26 Spending limit 42 System Test 46, 53, 54...
- Page 80 Notes...
- Page 81 Notes...
- Page 82 PAYMENT MAY BE REQUIRED. Programming subject to change. DIRECTV services not available outside the U.S. DIRECTV pro- gramming is sold separately and independently of DIRECTV System hardware. A valid programming subscription is required to operate DIRECTV System hardware. Activate your DIRECTV programming today at 1-800-DIRECTV (1-800-347-3288). ©2005 DIRECTV, Inc.
- Page 83 Icon Reference Arrow Icons Indicate that a show’s start or end time is earlier or later than is visible in the Guide program cell. LEFT and RIGHT arrows on the remote off er special functionality. Objects are scrollable above or below the visible window.