Table of Contents
Advertisement
Advertisement
Table of Contents

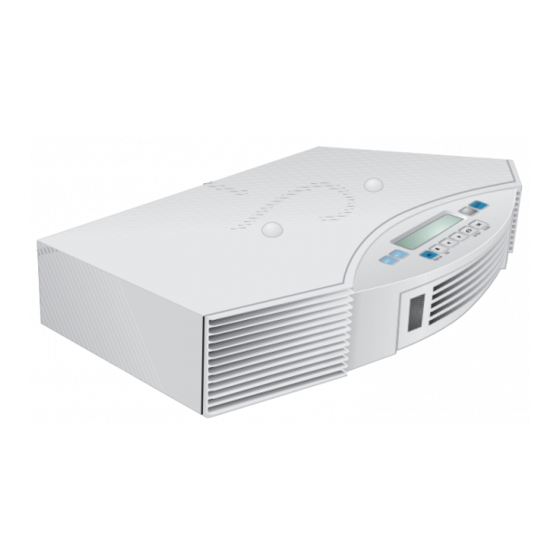
Summary of Contents for Bose Acoustic Wave CD3000
- Page 1 ® Acoustic Wave Multi-Disc Changer Owner’s Giuide...
-
Page 2: Safety Information
Conformity can be found at www.bose.com/static/compliance/index.html. ©1994-2003 Bose Corporation. No part of this work may be reproduced, modified, distributed or otherwise used without prior written permission. All trademarks referenced herein are the property of Bose Corporation. The Acoustic Wave music system design is a trademark of ®... -
Page 3: Table Of Contents
Bose Corporation........ -
Page 4: Setting Up Your Multi-Disc Changer
Check to be sure you received the parts identified in Figure 1. If any part of the product appears damaged, do not attempt to use it. Notify Bose customer service immediately (see phone numbers on the inside back cover). -
Page 5: Selecting A Location For Your Music System And Changer
Setting Up Selecting a location for your music system and changer The Acoustic Wave ® multi-disc changer is designed to fit right under your Acoustic Wave ® music system. Before you connect the two, however, select a good location for the stacked units. -
Page 6: Connecting The Multi-Disc Changer To Your Acoustic Wave
Setting Up ® Connecting the multi-disc changer to your Acoustic Wave music system On the back of the multi-disc changer there are two cables (Figure 3) that connect to your Acoustic Wave ® music system. 1. Insert the two connectors of the AUX input cable into AUX IN jacks on the back of the Acoustic Wave ®... -
Page 7: Operating With One Remote Control
® Using Your Acoustic Wave Multi-Disc Changer Operating with one remote control The remote control included with your Acoustic Wave ® multi-disc changer allows you to con- ® trol functions of both the multi-disc changer and your Acoustic Wave music system. There- ®... -
Page 8: Turning Your Complete System On And Off
Using Your Acoustic Wave ® Multi-Disc Changer Turning your complete system on and off To turn on both the changer and the Acoustic Wave ® music system, press the Play/Pause button (Figure 6) on the changer console. Figure 6 Play/Pause button on the Acoustic Wave ®... -
Page 9: Two Display Panels, Two Sets Of Information
® Using Your Acoustic Wave Multi-Disc Changer Figure 7 Inserting a disc into the CD changer LED indicators Green light indicates the slot is in use after the CD is inserted Note: To keep track of the order of CDs in the slots, you may find it useful to keep the CD cases stacked in the same order near the multi-disc changer. -
Page 10: Using Your Acoustic Wave Multi-Disc Changer
Using Your Acoustic Wave ® Multi-Disc Changer Playing the multi-disc changer Use buttons on the multi-disc changer remote or console, as shown below. AUX 1 AUX 2 ON/OFF Play/Pause Stop Next Disc CD Mode Function Remote control Changer console To play the selected CD......Changer Results: Play/Pause... -
Page 11: Playing The Other Sound Sources
® Using Your Acoustic Wave Multi-Disc Changer AUX 1 AUX 2 ON/OFF Play/Pause Stop Next Disc CD Mode Function Remote control Changer console Not available To change the mode of CD play....CD Mode Press again to cycle through the choices, which appear on the console display. -
Page 12: Controlling Both Units As A Complete System
Using Your Acoustic Wave ® Multi-Disc Changer Controlling both units as a complete system The Acoustic Wave ® multi-disc remote control can change some of the Acoustic Wave ® music system settings and select and play its sources, as well as operating the changer functions. Note: For details on how the Acoustic Wave ®... -
Page 13: Adding External Components
Using External Components Connecting other sound sources This new changer provides a hub for other component connections. CAUTION: Before connecting additional components, and to protect your components from damage, be sure to unplug the multi-disc changer from the AC (mains) wall outlet if it is plugged in. -
Page 14: Making The Power Connection Last
Playing an auxiliary component Note: To play a component connected to the changer, you must first turn the component on. ® Neither of the Bose remote controls can turn an auxiliary component on or off, or change its settings or selections. -
Page 15: Maintaining Your System
Mishandling the remote control battery may cause a fire or chemical burn. Keep the battery away from children. Do not recharge, disassemble, heat above 212˚F (100˚C), or incinerate the battery. Dispose of the used battery promptly and responsibly. For more information, call Bose ® customer service. Refer to the phone numbers on the inside... -
Page 16: Troubleshooting
LEDs is lit Customer Service For additional help in solving problems, contact Bose ® customer service. Refer to the address list on the inside back cover of this guide. -
Page 17: Warranty
MERCHANTABILITY OR FITNESS FOR A PARTICULAR PURPOSE. BOSE CORPORATION’S MAXIMUM LIABILITY SHALL NOT EXCEED THE ACTUAL PURCHASE PRICE PAID BY YOU FOR THE PRODUCT. IN NO EVENT SHALL BOSE BE LIABLE FOR SPECIAL, INCIDENTAL, CONSEQUENTIAL, OR INDIRECT DAMAGES. This warranty does not cover a defect that has resulted from improper or unreasonable use or maintenance, accident, improper packing, or unauthorized tampering, alteration, or modifica-... -
Page 18: Bose Corporation
1-800-637-8781 USA & Canada Service Bose Corporation, The Mountain Framingham, MA 01701-9168 1-800-637-8781 or 508-879-7330, x63055 European Office Bose Products B.V., Nijverheidstraat 8 1135 GE Edam, Nederland 0299-39011155 FAX 0299-390114 Australia Bose Pty Limited Unit 3/2 Holker Street Newington NSW, 2127... - Page 19 ©2003 Bose Corporation The Mountain, Framingham, MA 01701-9168 USA 303025 AM Rev. 00 JN30964...


