Table of Contents
Advertisement
Available languages
Available languages
Quick Links
WARNING: For
outdoor use only.
IMPORTANT: Read and understand this manual before
assembling, starting or servicing heater. Improper use
of heater can cause serious injury. Keep this manual for
future reference.
Do not store or use gasoline or other flammable vapors
and liquids in the vicinity of this or any other appliance.
If you smell gas:
1. Shut off gas to the appliance.
2. Extinguish any open flame.
3. If odor continues, immediately call your gas
supplier.
For more information, visit www.desatech.com
MODEL TD120A
FOR YOUR SAFETY
FOR YOUR SAFETY
Save this manual for future reference.
Heat-N-Go Portable
Propane/LP Heater
Owner's Manual
Advertisement
Chapters
Table of Contents

Related Manuals for Outdoor Leisure Heat-N-Glo TD120A


Summary of Contents for Outdoor Leisure Heat-N-Glo TD120A
- Page 1 1. Shut off gas to the appliance. 2. Extinguish any open flame. 3. If odor continues, immediately call your gas supplier. Save this manual for future reference. For more information, visit www.desatech.com Heat-N-Go Portable Propane/LP Heater Owner’s Manual MODEL TD120A FOR YOUR SAFETY FOR YOUR SAFETY...
-
Page 2: Table Of Contents
WARNING: Improper installation, adjustment, altera- tion, service or maintenance can cause injury, property damage, or death. Read the installation, operating, and maintenance instructions thoroughly before installing or servicing this equipment. Specifications ... 2 Safety ... 2 Propane/LP Safety ... 4 Unpacking... -
Page 3: Safety
This is a propane, direct-fired heater. Propane is heavier than air. If propane leaks from a connection or fitting, it sinks to the floor, col- lecting there with the surrounding air, forming a potentially explosive mixture. Obviously, propane leaks should be avoided, so set up the propane supply with utmost care. -
Page 4: Propane/Lp Safety
• Refer to the Specifications, page 2, heater data plate or contact dESA heat- ing, LLC to determine combustion air ventilation requirements of the heater. • Lack of proper ventilation air will lead to improper combustion. -
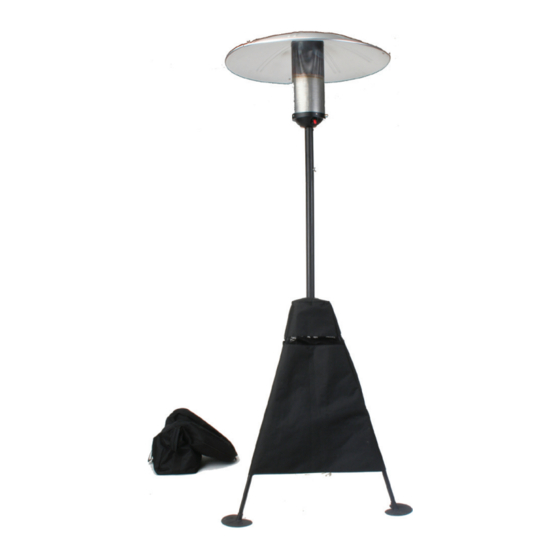
Page 5: Assembly
ASSEMbLy 1. Install threaded poles into triangular base as shown in Figure 1. Be sure to seat poles fully inside base. 2. Install lower legs by pressing push tab release and inserting into upper pole (see Figure 2). Be sure push button is locked in place. - Page 6 ASSEMbLy Continued 5. Install tank straps to base as (see Figure 5). 6. Install tank restraint to tank and fasten restraint straps around legs as shown in Figure 6. 7. Install the tank cover (see Figure 7). 8. Assemble reflector with small wing nuts and bolts as shown in Figure 8.
- Page 7 ASSEMbLy Continued 10. Inspect length of gas hose on bottom of burner assembly for any cracks, cut, holes or excessive wear. Do not use heater if hose is damaged. 11. Sliding hose into upper pole, install burner and reflector assembly to base (see Fig- ure 10).
-
Page 8: Operation
OPErATiON WARNING: If you smell gas: • Shut off gas to the appliance. • Extinguish any open flames. • If odor continues, immediately call your gas supplier. See safety warnings and pre- cautions starting on the front page of this manual for more information. -
Page 9: Storage
You may have further questions about installa- tion, operation, or troubleshooting. If so, con- tact DESA Heating, LLC at 1-866-672-6040. When calling please have your model and serial numbers of your heater ready. You can also visit DESA Heating, LLC’s web site at www.desatech.com. www.desatech.com... -
Page 10: Parts
MOdEL Td120A PArTS www.desatech.com 122139-01A... - Page 11 This list contains replaceable parts used in your heater. When ordering parts, follow the instructions listed under Replacement Parts on page 9 of this manual. MOdEL Td120A NO. PART NO. 121014-01 121015-01 121016-01 121017-01 121018-01 121019-01 121020-01 121021-01 121022-01 122412-01...
-
Page 12: Warranty
Proof of purchase must be presented with the heater. The heater will be inspected. A defect may be caused by faulty materials or workmanship. If so, DESA Heating, LLC will repair or replace the heater without charge. - Page 13 2. Extinga las llamas al descubierto. 3. Si el olor persiste, llame inmediatamente al distribui- dor de gas. guarde este manual para referencia futura. para obtener más información, visite www.desatech.com Manual del propietario del calentador portátil de propano o gas lp Modelo td120a Heat-n-go...
- Page 14 ADVERTENCIA: La instalación, ajuste, alteración, servi- cio o mantenimiento inadecuados pueden causar lesiones, daños a la propiedad o la muerte. Lea las instrucciones de instalación, operación y mantenimiento minuciosamente antes de instalar o dar servicio a este equipo. Especificaciones ... 2 Seguridad ...
-
Page 15: Seguridad
seguridad Continuación Este es un calentador de propano de caldeo directo. El propano es más pesado que el aire. Si hay una fuga de propano en una de las conexio- nes o niples, éste fluirá hacia el piso y se acumu- lará... -
Page 16: Seguridad Con Propano O Gas Lp
• Consulte las Especificaciones en la página 2, la placa de datos del mismo o comuníquese con DESA Heating, LLC para determinar los requisitos de ventilación de aire para combustión del calentador. -
Page 17: Desempaque
deseMpaque Al ensamblar por primera vez, asegúrese de retirar todo el embalaje de los componentes antes de comenzar a ensamblarlos. ensaMble 1. Instale los tubos roscados en la base triangular como se muestra en la figura 1. Compruebe que los tubos roscados se asienten totalmente en el interior de la base. - Page 18 ensaMble Continuación 5. Instale las correas para tanque en la base (consulte la figura 5). 6. Instale la correa de seguridad en el tanque y ajuste las correas en las patas según se muestra en la figura 6. 7. Instale la cubierta del tanque (consulte la figura 7).
- Page 19 ensaMble Continuación 10. Inspeccione la manguera de gas en la parte inferior del ensamble del quemador en busca de grietas, cortaduras, orificios o desgaste excesivo. Si la manguera está dañada, no use el calentador. 11. Deslice la manguera hacia el tubo superior, instale el ensamble de quemador y reflec- tor en la base (consulte la figura 10).
-
Page 20: Funcionamiento
funcionaMiento ADVERTENCIA: si percibe olor a gas: • Cierre el suministro de gas al aparato. • Apague todas las llamas al descubierto. • Si el olor persiste, llame inmedia- tamente al distribuidor de gas. Consulte las advertencias y precauciones de seguridad que comienzan en la primera página de este manual para obtener más información. -
Page 21: Reparaciones
• los números de modelo y de serie de su calentador, • el número de la pieza de repuesto. servicio técnico la mano los números de modelo y serie de su calentador. También puede visitar el sitio web de DESA Heating, LLC en www.desatech.com. www.desatech.com... -
Page 22: Piezas
MODELO TD120A pieZas www.desatech.com 120948-01A... - Page 23 Esta lista contiene las piezas reemplazables utilizadas en el calentador. Al hacer un pedido de piezas, siga las instrucciones listadas en Piezas de repuesto en la página 9 de este manual. MODELO TD120A N° N° DE PARTE DESCRIPCIÓN 121014-01 121015-01...
-
Page 24: Garantía
Se debe presentar la prueba de compra junto con el calentador. El calentador será inspeccionado. Un defecto podría ser ocasionado por materiales o mano de obra defectuosos. Si es así, DESA Heating, LLC reparará o reemplazará el calentador sin ningún cargo.