Sony UP-DR200 Operating Instructions Manual
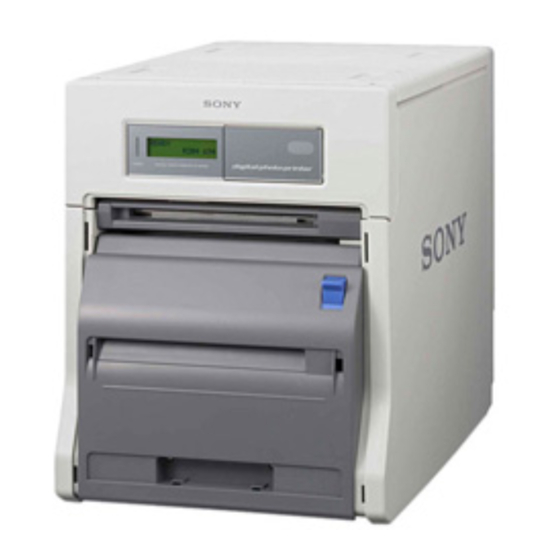
Digital photo printer
Hide thumbs
Also See for UP-DR200:
- Brochure & specs (16 pages) ,
- Specifications (2 pages) ,
- Service manual (102 pages)

Related Manuals for Sony UP-DR200


Summary of Contents for Sony UP-DR200
- Page 1 3-297-459-11(2) Digital Photo Printer Operating Instructions UP-DR200 © 2008 Sony Corporation...
- Page 2 This symbol is intended to alert the user to For the customers in Europe the presence of important operating and The manufacturer of this product is Sony Corporation, maintenance (servicing) instructions in 1-7-1 Konan, Minato-ku, Tokyo, Japan. The Authorized the literature accompanying the Representative for EMC and product safety is Sony appliance.
-
Page 3: Table Of Contents
Table of Contents Introduction Features ..............4 Basic Application Example ........ 4 Location and Function of Parts and Controls ..4 Preparation Supplied Accessories ..........7 Connections ............8 USB Port Connection ......... 8 Installing the Printer Driver ........ 8 Operation Loading the Paper Roll and Ink Ribbon ..... -
Page 4: Introduction
Introduction Location and Function of Parts and Controls For more details, see the reference page numbers Features enclosed in parentheses. The UP-DR200 Digital Photo Printer is a dye sublimation thermal transfer printer providing high Front quality, high resolution (330 dpi), and high speed printing of computer image data on four sizes of paper in full color (256 gradations process and 16.7 million colors). - Page 5 C Operation button door (page 19) F Output tray adapter (page 14) Buttons to be used for menu operation are located Attach this to the output tray to prevent printouts under this door. from falling out. G Output slot (page 18) Key panel section Printouts are ejected from here.
- Page 6 K Scrap receptacle (page 13) Margins of empty space are crated between each printout. These margins are cut off during printing and dropped into this receptacle. Rear L Filter cover (page 26) The filter for the printer’s cooling fan is attached to this cover.
-
Page 7: Preparation
Preparation Supplied Accessories Make certain you have received the following accessories: Output tray (1) Output tray adapter (1) Scrap receptacle (1) Cleaning ribbon (1) Ribbon tray Paper core Paper adapter (blue) Paper adapter (pink) CD-ROM (1) USB cable (1) Before Using This Printer (1) Software License Agreement (1) Warranty Card (1) Service and Customer Support... -
Page 8: Connections
Securing the USB cable and power cord Connections To prevent disconnection of the USB cable and power cord from accidental pulling, be sure to secure the cables After connecting a USB connecting cable (supplied) to with the cable clamps when connecting them to the the printer and the computer, connect the power cord. -
Page 9: Operation
• Hold the paper roll with both hands so that you do not Operation drop it, because it is heavy. Dropping may result in an injury. Loading the Paper Roll and Ink Ribbon This section describes how to load the paper roll and ink ribbon in the preparation to start printing, after connecting the printer as described on page 8. - Page 10 Insert the paper core into the paper roll. Note The two sides of the paper core are the same shape. If you use the 2UPC-R204 series or 2UPC-R206 series You can insert either side. Printing Pack with the 152-mm (6-inch) paper width after using the 2UPC-R203 series or 2UPC-R205 series Printing Pack with the 127-mm (5-inch) paper width, white stripes may appear on either side of printouts.
- Page 11 (When the factory is shipped, the paper adapter is Load the paper roll into the printer. attached.) Be sure to load the paper roll with the arrow on the seal pointing inside the printer. blue pink Notes • To prevent the paper roll from sliding off, hold Press the portions indicated by the arrows until the tabs both sides of the paper core when loading it into at the top lock into place.
- Page 12 Close the paper door, and press the center of the Note door until it clicks into place. After removing the ribbon tray, do not insert your hand into the opening in the printer. Touching the protrusions or movable parts inside the printer may result in bodily injury or malfunction of the printer.
-
Page 13: Attaching The Scrap Receptacle
Hold the center of the ribbon tray, and load it into Attaching the Scrap Receptacle the printer. When printing, a margin of empty space is left between each printout. These excess portions are cut off and dropped into the scrap receptacle. Remove scraps from the receptacle as soon as possible. - Page 14 Attaching the Output Tray Adapter When using the 2UPC-R205 series printing pack The output tray adapter prevents printouts from sticking Set the output stopper to the third position from the top. out of the output tray. If there is a large amount of curling in the printouts, set Use the adapter when printouts curl as shown.
-
Page 15: If The Ink Ribbon Breaks During Use
To remove the output tray Note Hold the output tray on both sides, and 1 raise the tray Be sure to wind the taped portion completely onto while 2 pulling it toward you. the black spool so that the tape is not exposed. Hold the center of the ribbon tray, and load it into the printer. -
Page 16: Removing The Ink Ribbon And Paper
Press and lower the paper door lever, hold the paper Removing the Ink Ribbon and door at the center portion, and pull the door forward Paper until it locks into the open position. When the following message appears on the LCD, the paper or ink ribbon corresponding to the designated number of sheets has been used up. - Page 17 Pull the ribbon door toward you to open it. If you have to replace a partially used printing pack We recommend replacing ink ribbons and paper rolls with new printing packs only when the predetermined number of sheets is used up. If you have to replace a partially used ink ribbon and paper roll, proceed as follows to replace the partially used ink ribbon and paper with new ones.
-
Page 18: Printing From The Computer
Identification of the printing pack currently Printing from the being used on the LCD Computer Display on the LCD Printing pack R203 2UPC-R203 series Before starting to print R204 2UPC-R204 series • Confirm that the printer and computer are connected R205 2UPC-R205 series (page 8). -
Page 19: Menu Operations
Notes Menu Operations • About 20 printout sheets can be stored in the output tray in most cases. However, this number can vary You can adjust or confirm the following items using the greatly depending on the amount of curling in menu. - Page 20 Press the F and f buttons to select GRAY ADJUST Note [A]. The gray balance of images cannot be adjusted during The printer enters the gray balance adjustment printing. mode. Press to display GRAY ADJUST [A]. 2,7,8,9,10 1,6,11 Press the G and g buttons to display the pattern number determined in step 4.
-
Page 21: Displaying The Quantity Of Pages Printed
Press the MENU button after confirming. Displaying the Quantity of Pages The printer returns to the on-line mode. Printed The total number of printings done since turning on the Displaying the Firmware Version of printer can be displayed. If no printings have been done the Printer since the printer was turned on, “0”... -
Page 22: Adjusting The Position Of The Printout Image
The printer returns to the on-line mode. Access the following site to get the latest information on the printer. http://www.sony.net/Products/DP-driver/ Press the MENU button. The printer is switched to the off-line mode. Press the F and f buttons to display PRINT OFFSET. -
Page 23: Miscellaneous
• If the unit malfunctions or if a foreign body falls into full performance. the cabinet, disconnect the power immediately and consult your Sony service facility or your Sony dealer. On Transporting the Printer On condensation Do not transport the printer with the supplied •... -
Page 24: Cleaning The Interior
Remove the output tray and scrap receptacle. Cleaning the Interior If defects such as white stripes and speckled scratches Check the remaining amount of print paper. begin to appear in printouts, you may need to clean the thermal head and rollers. To prevent such occurrences, Open the ribbon door, and remove the ribbon tray. - Page 25 When using the 2UPC-R204/R206 series printing pack Affix the cleaning sheet horizontally. Remove the paper from the back side of the cleaning sheet (the side without illustrations). About 5 cm Be careful not to remove the paper from the wrong side of the sheet.
- Page 26 Open the ribbon door, and remove the cleaning When the following symptoms appear ribbon. When the message “HEAD COOLING PLEASE WAIT” begins to appear on the information display frequently: Ventilation holes are located on the rear and side panels of the printer. Clean the filter on the rear panel of the printer.
-
Page 27: Ink Ribbon And Paper
Ink Ribbon and Paper Specifications Each printing pack contains two sets of the ink ribbon Power requirements and paper roll combination. 100 to 240 V AC, 50/60 Hz Be sure to use the ink ribbon and the paper roll in the Input current 5 to 2.5 A max. -
Page 28: List Of Messages
Messages and error messages causing Paper adapter (pink) (1) the ALARM indicator to turn on USB cable (1-790-081-71(Sony)) (1) When the ALARM indicator on the front panel lights in CD-ROM (1) red, a message or an error message appears on the LCD. -
Page 29: Troubleshooting
The ink ribbon cannot be properly the following. If the unit still does not operate properly, RELOAD RIBBON recognized. contact your supplier or the nearest Sony Service Center. tRemove the ribbon tray, make sure that the ink ribbon is loaded correctly, and reinsert the ribbon... -
Page 30: Index
Index Paper and ink ribbon loading 9 removing 16 Part Names and Functions Accessories supplied Front 4 confirmation 7 Operation button door 5 Adjusting the gray balance 19 Rear 6 Precautions condensation 23 Installation 23 Basic Application Example 4 on transportation 23 Safety 23 Preparation 7 Printer driver installing 8... - Page 31 Sony Corporation...