
Related Manuals for Audiovox 1286808A


Summary of Contents for Audiovox 1286808A
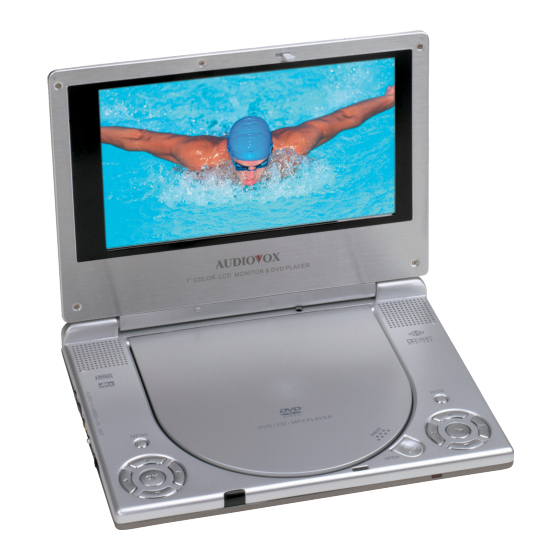
- Page 1 D1705 PORTABLE 7" LCD MONITOR AND DVD PLAYER For Customer Service Visit Our Website At .audiovox.com Product Information, Photos, FAQ’s Owner’s Manuals 128-6808A...
- Page 2 Notice: This Product incorporates copyright protection technology that is pro- tected by method claims of certain patents and other intellectual prop- erty rights owned by Macrovision Corporation and other rights owners. Use of this copyright protection technology must be authorized by Macrovision Corporation, and is intended for home and other limited view- ing uses only unless authorized by Macrovision Corporation.
-
Page 3: Installation
A. Introduction Thank you for selecting the D1705 portable DVD player. The main features include a 7" Wide Screen (16:9 Aspect Ratio) Liquid Crystal Display (LCD) monitor and a DVD player. The unit applies the latest state of the art electronics and is designed for use in hotels, offices or your home. - Page 4 Cleaning Unit When cleaning, make sure the system is unplugged from the power source. Do not use liquid cleaners or aerosol cleaners. Use a cloth lightly dampened with water for cleaning the exterior of the system only. Disc Do not use irregularly shaped discs such as heart or star-shaped discs as they may cause the unit to malfunction.
-
Page 5: Controls, Indicators, And Connectors
AUDIO V I D E O BRIGHT. DC 9V Figure 1 E. Controls, Indicators, and Connectors 1. Unit View (Refer to Figure 2) 7 8 9 10 Figure 2... - Page 6 1) Menu 2) Up button 3) Left Button 4) OK Button 5) Down Button 6) Right Button 7) Close disc cover point 8) Open Button 9) Previous Button 10) Stop Button 11) Next Button 12) Play Button 13) Pause Button 14) Screen Mode ( wide) Button 15) Remote Control Sensor 16) Power LED...
- Page 7 2. Remote Control View (Refer to Figure 3) 1) Display Button 2) Angle Button 3) Subtitle Button 4) Audio Button 5) Zoom Button 6) Up/Down/Left/Right/Enter Buttons 7) Return Button 8) A-B Button 9) Forward Button 10) Reverse Button 11) Slow Button 12) Stop Button 13) Number Buttons 14) Setup Button...
- Page 8 G. SETUP Press ‘SETUP’ to display the Main screen of the SETUP Menu on the screen. Press ‘SETUP’ again to exit the SETUP Menu. .. General Setup Page .. SPDIF Output TV Display Angle Mark Screen Saver Last Memory Go To General Setup Page Figure 4.
- Page 9 and a wide picture is shown on the screen with a black strip at both the top and bottom of the screen. * WIDE: When the player is connected to a wide screen TV, a wide picture is shown on the full screen. ..
- Page 10 *ON: screen saver on. *OFF: screen saver off. *NOTE The DVD player will enter the Screen Saver mode after 5 minutes if the image on the screen remains the same for more than 5 minutes. e). Select “ Last Memory’ by Up/Down button ..
- Page 11 .. Video Quality Setup .. Brightness Contrast Saturation Brightness Figure 11. BRIGHTNESS Screen Display Select “Contrast” using the Up/Down buttons, then press “Enter”. You can adjust the Contrast using the left/right but- tons. .. Video Quality Setup .. Brightness Contrast Saturation Contrast Figure 12.
- Page 12 .. Video Quality Setup .. Brightness Contrast Saturation Saturation Figure 14. SATURATION Screen Display When complete, press “Enter”again to return to the “Video Quality” setup page. e) Press Setup button to exit “Video Quality” setup page. 3). With no disc in the player, select “password” using the left/ right buttons;...
- Page 13 NOTE: The Default Password is 3308. This password is always effective even after you have selected your own password and changed it. To avoid the possibility of others using the default password to set the parental level and change the password, you can record this default password in another area and delete it from this manual.
- Page 14 c. Select ‘DISC MENU’ using UP/DOWN, then press ‘RIGHT’ to enter the submenu. Select the Disc Menu Language you desire using UP/DOWN, then press ‘ENTER’ to confirm the setting. Press ‘LEFT’ to return. .. Preference Page .. Audio E N G Subtitle E N G Disc Menu...
- Page 15 NOTE: Level 8 (Adult) is the default. e. Select ‘DEFAULTS’ using UP/DOWN, then press RIGHT to enter the submenu. Press ENTER to make the setting return to the factory-set mode. NOTE: The parental setting is not affected by the default function.
- Page 16 1. Basic Operation Turn the unit on/off POWER Remove/load the disc OPEN Start Play/Execute item or setting PLAY Play at 1/2, 1/4, 1/8 or 1/16 times speed SLOW Still Picture PAUSE (1 time) Stop at the present playing point / STOP (2 times) Stop playing Go to the next chapter, track or scene dur-...
- Page 17 2. MENU A DVD is divided into sections called titles and chapters. When you play a DVD, a root menu of the disc will appear on the screen of your TV or Monitor. The contents of the menu vary from disc to disc.
- Page 18 c. Press ‘DISPLAY’ the 3rd time to display the Elapsed Time for the chapter. The heading will disappear automatically in about 3 seconds. Figure 25. Chapter Elapsed Time Screen Display d. Press ‘DISPLAY’ the 4th time to display the Remaining Time for the chapter.
- Page 19 Figure 27. Angle Screen Display 3) SUBTITLE During disc playback press ‘SUBTITLE’ to select the subtitle lan- guage you desire*, with the current Subtitle Language Number (1) and the total Number of Subtitle Languages (2) displayed. If there are multiple languages press ‘SUBTITLE’ again to select another subtitle language.
- Page 20 4) AUDIO During playback press ‘AUDIO’ to select the audio language you desire*, with the current Audio Channel Number (1) and the total number of Audio Channels (2) displayed. Press AUDIO again to select another audio language. The audio display will disappear automatically if the ‘AUDIO’...
- Page 21 6) A-B REPEAT a. During playback press ‘A-B’ to set the Starting Point A. Figure 31. A-B Repeat Starting Point Screen Display b. Press ‘A-B’ a second time to set the Ending Point B and the player will repeatedly play the part between Point A and Point B Figure 32.
- Page 22 7) REPEAT a. During playback press ‘REPEAT’ once to repeatedly play the current chapter. Figure 34. Chapter Repeat ON Screen Display b. During playback press ‘REPEAT’ a second time to repeatedly play the current title. Figure 35. Title Repeat ON Screen Display c.
-
Page 23: Playing Audio Cds
d. Press “REPEAT” a fourth time to resume normal playback. Figure 37. Repeat Off Screen Display 4. PLAYING AUDIO CDS When playing an audio CD. Press the DISPLAY button on the remote to display the DISPLAY Banner. The options below show you what happens when you press the DISPLAY button. -
Page 24: Using The Repeat Feature
c. Press ‘DISPLAY’ a third time and TOTAL ELAPSED appears along with the current track playing and the total time that the CD has been playing. Figure 40. TOTAL ELAPSED Screen Display d. Press ‘DISPLAY’a fourth time and TOTAL REMAIN appears along with the current track playing and the amount of time remaining on the CD. -
Page 25: Playing Mp3 Discs
5. PLAYING MP3 DISCS MP3 is a format for storing digital audio. An audio CD-quality song is compressed into the MP3 format with very little loss of audio quality while taking up much less disc space. CD-R /RW discs that have been encoded in MP3 format are compatible with this system. -
Page 26: Skipping Songs
SKIPPING SONGS Use the ( NEXT ) button to move to the next song. Press the (PREVIOUS) button to move to the beginning of the previous song. USING THE REPEAT FEATURE The default mode for the Repeat feature is OFF. Pressing REPEAT consecutively changes the repeat options: •... - Page 27 NOTICE The upper left column is a list showing the name of folder. The upper right column is a list showing the name of song and the sub-folder. “ “ sign in front of a file name indicates that this is a folder, not an MP3 file.
- Page 28 refresh from right bottom 6.8) DIAGONAL WIPE RIGHT BOTTOM refresh from center 6.9) EXTEND FROM CEVTER H horizontally to both sides refresh from center 6.10) EXTEND FROM CEVTER V vertically to both sides refresh compress from 6.11) COMPRESS TO CEVTER H center horizontally refresh compress from 6.12) COMPRESS TO CEVTER V...
- Page 29 control and the brightness control on the monitor for individual preference. Figure 43 8. Connecting to a TV or another monitor ( Refer to Figure 38) You can also connect the DVD player to a TV to enjoy high quality stereo sound or another monitor.
- Page 30 10. Specifications Disc format: DVD/CD/MP3 Color system: NTSC Screen size: 7.0’’ DVD video format: Horizontal 720 pixel, vertical 480 pixel (NTSC) Frequency response: DVD (PCM 96 kHz/24 bits ): 20 Hz to 44 kHz DVD (PCM 48 kHz): 20 Hz to 22 kHz CD: 20 Hz to 20 kHz Video output: 1.0 Vp-p/75 Ohm, unbalanced Video S/N: Better than 35 dB...
- Page 31 NOTE: When the DVD player is used with the battery as a power source, ensure that the battery has been charged for at least eight hours prior to connecting it to the DVD player. If you plan to not use the battery for an extended period of time (say, one week or longer), we recommend that you first fully charge the battery and store it away properly.
-
Page 32: Installing The Battery Pack
left attached to the player for an extended period, please recharge the battery at least once every two weeks. 4. Avoid unnecessarily recharging fully charged batteries. Installing the Battery Pack: 1. First, make sure the player is in “Stop” mode and that the AC power supply has been disconnected. -
Page 33: 90-Day Limited Warranty
90 DAY LIMITED WARRANTY Applies to Audiovox Video Products AUDIOVOX ELECTRONICS CORP. (the Company) warrants to the original retail pur- chaser of this product that should this product or any part thereof, under normal use and conditions, be proven defective in material or workmanship within 90 days from the date of original purchase, such defect(s) will be repaired or replaced with reconditioned product (at the Company's option) without charge for parts and repair labor.