Dell PowerEdge R300 Hardware Owner's Manual
Dell server hardware owner's manual
Hide thumbs
Also See for PowerEdge R300:
- Getting started with (139 pages) ,
- Getting started manual (63 pages) ,
- Microsoft windows server 2008 installation notes (18 pages)

Related Manuals for Dell PowerEdge R300


Summary of Contents for Dell PowerEdge R300
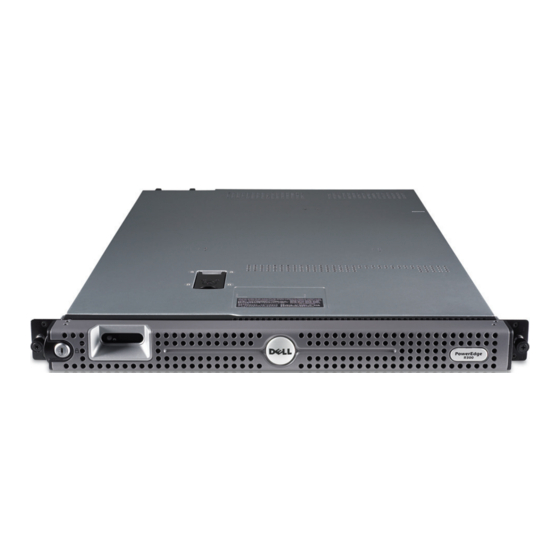
- Page 1 Dell™ PowerEdge™ R300 Systems Hardware Owner’s Manual w w w . d e l l . c o m | s u p p o r t . d e l l . c o m...
- Page 2 Other trademarks and trade names may be used in this document to refer to either the entities claiming the marks and names or their products. Dell Inc. disclaims any proprietary interest in trademarks and trade names other than its own.
-
Page 3: Table Of Contents
Contents About Your System Other Information You May Need Accessing System Features During Startup Front-Panel Features and Indicators Hard-Drive Indicator Codes Back-Panel Features and Indicators Connecting External Devices Power Indicator Codes NIC Indicator Codes LCD Status Messages Solving Problems Described by LCD Status Messages 33 Removing LCD Status Messages System Messages Warning Messages... - Page 4 Using the System Setup Program System Setup Options Main Screen Memory Information Screen CPU Information Screen SATA Configuration Screen Integrated Devices Screen Serial Communication Screen System Security Screen Exit Screen System and Setup Password Features Using the System Password Using the Setup Password Disabling a Forgotten Password Baseboard Management Controller Configuration Entering the BMC Setup Module...
- Page 5 System Board Shroud ....Removing the System Board Shroud Installing the System Board Shroud Hard Drives ..... . . Removing a Drive Blank Installing a Hard-Drive Blank Removing a Hot-Plug Hard Drive...
- Page 6 Removing the RAC Card Installing a RAC Card Expansion Cards Installing an Expansion Card Removing an Expansion Card Riser Cards Removing the Riser Card Installing the Riser Card Backplane Board Removing the Backplane Board Installing the Backplane Board System Memory Memory Module Installation Guidelines Installing Memory Modules Removing Memory Modules...
- Page 7 Removing the System Board Assembly Installing the System Board Assembly Troubleshooting Your System Safety First—For You and Your System Start-Up Routine Checking the Equipment Troubleshooting External Connections Troubleshooting the Video Subsystem Troubleshooting the Keyboard Troubleshooting the Mouse Troubleshooting Serial I/O Problems Troubleshooting a Serial I/O Device Troubleshooting a USB Device Troubleshooting a NIC...
- Page 8 Troubleshooting a Hot-plug Hard Drive Troubleshooting a SAS or SAS RAID Controller Troubleshooting Expansion Cards Troubleshooting the Microprocessors Running the System Diagnostics Using Dell PowerEdge Diagnostics System Diagnostics Features When to Use the System Diagnostics Running the System Diagnostics System Diagnostics Testing Options...
- Page 9 Disabling a Forgotten Password Getting Help ..... Contacting Dell Glossary 169 Index ......
- Page 10 Contents...
-
Page 11: About Your System
About Your System This section describes the physical, firmware, and software interface features that provide and ensure the essential functioning of your system. The physical connectors on your system’s front and back panels provide convenient connectivity and system expansion capability. The system firmware, applications, and operating systems monitor the system and component status and alert you when a problem arises. -
Page 12: Accessing System Features During Startup
<Ctrl+E> Enters the Baseboard Management Controller (BMC) Management Utility, which allows access to the system event log (SEL) and configuration of the remote access controller (RAC) card. See the Dell OpenManage™ Baseboard Management Controller User’s Guide for more information on setup and use of BMC. -
Page 13: Front-Panel Features And Indicators
Table 1-1. Keystrokes for Accessing System Features (continued) Keystroke Description <Ctrl+R> If you have the optional battery-cached SAS RAID controller, this keystroke enters the RAID configuration utility. For more information, see the documentation for your SAS controller card. <Ctrl+S> If you have PXE support enabled through the System Setup Program (see "Integrated Devices Screen"... - Page 14 Table 1-2. Front-Panel Components Item Component Power-on indicator, power button About Your System Icon Description The power button turns system power off and on. NOTICE: using the power button and the system is running an ACPI-compliant operating system, the system can perform an orderly shutdown before power is turned off.
- Page 15 Table 1-2. Front-Panel Components (continued) Item Component NMI button Hard-drive activity indicator System identification button LCD panel USB connectors (2) Icon Description Used to troubleshoot software and device driver errors when using certain operating systems. This button can be pressed using the end of a paper clip.
- Page 16 Table 1-2. Front-Panel Components (continued) Item Component Video connector Optical drive (optional) Hard-drive activity indicator Hard drive 0 Hard drive 1 About Your System Icon Description Connects a monitor to the system. One optional slim-line SATA DVD-ROM drive or DVD-RW drive, or combination CD-RW/DVD drive (when available).
-
Page 17: Hard-Drive Indicator Codes
Hard-Drive Indicator Codes The hard-drive carriers have two indicators—the drive-activity indicator and the drive-status indicator. See Figure 1-2. In RAID configurations, the drive- status indicator lights to indicate the status of the drive. In non-RAID configurations, only the drive-activity indicator lights; the drive-status indicator is off. - Page 18 Table 1-3 lists the drive indicator patterns for RAID hard drives. Different patterns are displayed as drive events occur in the system. For example, if a hard drive fails, the "drive failed" pattern appears. After the drive is selected for removal, the "drive being prepared for removal" pattern appears, followed by the "drive ready for insertion or removal"...
-
Page 19: Back-Panel Features And Indicators
Back-Panel Features and Indicators Figure 1-3 shows the controls, indicators, and connectors located on the system's back panel. Figure 1-3. Back-Panel Features and Indicators PCIe slot 1- riser card power supply bay 1 (PS1) redundant power supply indicators system status indicator NIC2 connector (Gb) 2.0-compliant USB connectors (2) serial connector... -
Page 20: Power Indicator Codes
• Always attach an external device while your system and the device are turned off. Next, turn on any external devices before turning on the system (unless the documentation for the device specifies otherwise). See "Using the System Setup Program" on page 48 for information about enabling, disabling, and configuring I/O ports and connectors. -
Page 21: Nic Indicator Codes
Figure 1-4. Redundant Power Supply Indicators power supply status (DC out is operational) AC line status (AC in is operational) NIC Indicator Codes Each NIC on the back panel has an indicator that provides information on network activity and link status. See Figure 1-5. Table 1-5 lists the NIC indicator codes. -
Page 22: Lcd Status Messages
Damage due to servicing that is not authorized by Dell is not covered by your warranty. Read and follow the safety instructions that came with the product. - Page 23 Table 1-6. LCD Status Messages Code Text SYSTEM NAME E1000 FAILSAFE, Call Support E1114 Temp Ambient Ambient system E1115 Temp Planar E1118 CPU Temp Interface E1210 CMOS Batt Causes A 62-character string that can be defined by the user in the System Setup program.
- Page 24 Table 1-6. LCD Status Messages (continued) Code Text E1211 ROMB Batt E1214 ## PwrGd E1215 ## PwrGd E1226 PCI Rsr 1.5V PwrGd E1229 CPU # VCORE E122A CPU VTT PwrGd Processor # VTT voltage has E1310 RPM Fan ## E1311 FAN MOD ## E1313 Fan Redundancy About Your System...
- Page 25 Corrective Actions See your system’s "Information Update Tech Sheet" located on support.dell.com for the most current system information. If the problem persists, see "Getting Help" on page 167. See "Troubleshooting System Cooling Problems"...
- Page 26 E1610 PS # Missing No power is available from E1614 PS # Status E1618 PS # Predictive About Your System Causes configuration unsupported by Dell. reported a processor protocol error. reported a processor bus parity error. The system BIOS has reported a processor initialization error.
- Page 27 Table 1-6. LCD Status Messages (continued) Code Text E161C PS # Input Lost E1624 PS Redundancy The power supply subsystem E1710 I/O Channel E1711 PCI PERR B## D## F## PCI PERR Slot Causes Power source for specified power supply is unavailable, or out of acceptable range.
- Page 28 Table 1-6. LCD Status Messages (continued) Code Text E1712 PCI SERR B## D## F## PCI SERR Slot E1714 Unknown Err E171F PCIE Fatal Err B## D## PCIE Fatal Err Slot # E1810 HDD ## Fault The SAS subsystem has About Your System Causes The system BIOS has reported a PCI system error...
- Page 29 Table 1-6. LCD Status Messages (continued) Code Text E1811 HDD ## Rbld Abrt E1812 HDD ## Removed E1913 CPU & Firmware Mismatch E1A12 PCI Rsr Config E1A12 PCI Rsr Missing E1A14 SAS Cable A E1A15 SAS Cable B Causes The specified hard drive has experienced a rebuild abort.
- Page 30 Table 1-6. LCD Status Messages (continued) Code Text E1A15 SAS Cable C E1A18 PDB Ctrl Cable E2010 No Memory E2011 Mem Config E2012 Unusable Memory E2013 Shadow BIOS Fail E2014 CMOS Fail E2015 DMA Controller E2016 Int Controller E2017 Timer Fail About Your System Causes SAS cable C is missing or...
- Page 31 Programmable interval timer error. SIO failure. Keyboard controller failure. See "Getting Help" on System management interrupt (SMI) initialization failure. failure. Dell remote access controller (DRAC) configuration failure. CPU configuration failure. Incorrect memory configuration. Memory population order incorrect. General failure after video.
- Page 32 Table 1-6. LCD Status Messages (continued) Code Text E2110 MBE DIMM # & E2111 SBE Log Disable DIMM E2112 Mem Spare DIMM # I1910 Intrusion I1911 >3 ERRs Chk I1912 SEL Full I1915 Video Off (LCD lights with a blue or amber background.) About Your System Causes...
-
Page 33: Solving Problems Described By Lcd Status Messages
Table 1-6. LCD Status Messages (continued) Code Text I1916 Video Off in (LCD lights with a blue or amber background.) W1228 ROMB Batt < 24hr NOTE: For the full name of an abbreviation or acronym used in this table, see the "Glossary"... -
Page 34: System Messages
Damage due to servicing that is not authorized by Dell is not covered by your warranty. Read and follow the safety instructions that came with the product. - Page 35 Table 1-7. System Messages Message Alert! DIMM1_A and DIMM1_B must be populated with a matched set of DIMMs if more than one DIMM is present. following memory DIMMs have been disabled: Alert! Unsupported memory, incomplete sets, or unmatched sets. The following memory is disabled: Attempting to update Remote...
- Page 36 Table 1-7. System Messages (continued) Message Diskette drive 0 seek failure. Diskette read failure. Diskette subsystem reset failed. Drive not ready. Error: Remote Access Controller initialization failure Error 8602 - Auxiliary Device Failure Verify that mouse and keyboard are securely attached to correct connectors.
- Page 37 Table 1-7. System Messages (continued) Message Fatal Error caused a system reset: Please check the system event log for details Gate A20 failure General failure Keyboard Controller failure Keyboard data line failure Keyboard stuck key failure Keyboard fuse has failed Manufacturing mode detected Causes...
- Page 38 Table 1-7. System Messages (continued) Message Memory address line failure at address , read value expecting value Memory double word logic failure at address , read value expecting value Memory odd/even logic failure at address, read value expecting value Memory write/read failure at address , read value expecting value...
- Page 39 Table 1-7. System Messages (continued) Message No boot sector on hard drive No timer tick interrupt Not a boot diskette No operating system on PCI BIOS failed to install PCIe Fatal Error caused a system reset: Slot X Embedded Bus#XX/Dev#XX/Func Please check the system event log for details...
- Page 40 Table 1-7. System Messages (continued) Message Plug & Play Configuration Error Read fault Requested sector not found Remote configuration update attempt failed ROM bad checksum = address SATA PORT x drive not found About Your System Causes Error encountered in initializing PCIe device;...
- Page 41 Table 1-7. System Messages (continued) Message Sector not found Seek error Seek operation failed Shutdown failure The amount of system memory has changed Time-of-day clock stopped Time-of-day not set - please run SETUP program Timer chip counter 2 failed TPM configuration operation honored Causes Faulty hard drive, USB...
- Page 42 Table 1-7. System Messages (continued) Message TPM failure TPM operation is pending. Press I to Ignore or M to Modify to allow this change and reset the system. WARNING: Modifying could prevent security. Unexpected interrupt in protected mode Unsupported DIMM detected in the RAID DIMM slot! Unsupported RAID...
- Page 43 Table 1-7. System Messages (continued) Message Warning! No micro code update loaded for processor n Warning! Detected missing RAID hardware for the embedded RAID subsystem. Warning! Detected mode change from SCSI to RAID on channel x of the embedded RAID subsystem.
-
Page 44: Warning Messages
Write fault Write fault on selected drive NOTE: For the full name of an abbreviation or acronym used in this table, see the "Glossary" on page 169. -
Page 45: Alert Messages
Alert Messages Systems management software generates alert messages for your system. Alert messages include information, status, warning, and failure messages for drive, temperature, fan, and power conditions. For more information, see the systems management software documentation. About Your System... - Page 46 About Your System...
-
Page 47: Using The System Setup Program
Using the System Setup Program After you set up your system, run the System Setup program to familiarize yourself with your system configuration and optional settings. Record the information for future reference. You can use the System Setup program to: •... -
Page 48: Using The System Setup Program
Using the System Setup Program Table 2-1 lists the keys that you use to view or change information on the System Setup program screens and to exit the program. Table 2-1. System Setup Program Navigation Keys Keys Up arrow or <Shift><Tab> Down arrow or <Tab>... - Page 49 Figure 2-1. Main System Setup Program Screen Table 2-2 lists the options and descriptions for the information fields that appear on the main System Setup program screen. NOTE: The options for the System Setup program change based on the system configuration.
- Page 50 CD-ROM may be present. NOTE: System boot is not supported from an external device attached to a SAS or SCSI adapter. See support.dell.com for the latest support information about booting from external devices Determines the order in which the system searches the hard drives during system startup.
-
Page 51: Memory Information Screen
Table 2-2. System Setup Program Options (continued) Option Serial Communication Embedded Server Management System Security Keyboard NumLock (On default) Report Keyboard Errors (Report default) Memory Information Screen Table 2-3 lists the descriptions for the information fields that appear on the Memory Information screen. -
Page 52: Cpu Information Screen
CPU Information Screen Table 2-4 lists the options and descriptions for the information fields that appear on the CPU Information screen. Table 2-4. CPU Information Screen Option 64-bit Core Speed Bus Speed Virtualization Technology (Disabled default) Adjacent Cache Line Prefetch (Enabled default) Hardware Prefetcher (Enabled default) -
Page 53: Sata Configuration Screen
SATA Configuration Screen Table 2-5 lists the options and descriptions for the information fields that appear on the SATA Configuration screen. NOTE: When a SAS Card is installed in the system, the SATA Configuration screen changes. The SATA controller field displays ATA Mode and will be unchoosable. Port A, Port B, Port C, and Port D display off and are also unchoosable. -
Page 54: Serial Communication Screen
Table 2-6. Integrated Devices Screen Options (continued) Option MAC Address OS Watchdog Timer (Disabled default) I/OAT DMA Engine (Disabled default) System Interrupt Assignment (Standard) Serial Communication Screen Table 2-7 lists the options and descriptions for the information fields that appear on the Serial Communication screen. Table 2-7. -
Page 55: System Security Screen
Table 2-7. Serial Communication Screen Options (continued) Option Failsafe Baud Rate (115200 default) Remote Terminal Type (VT 100/VT 220 default) Redirection After Boot (Enabled default) System Security Screen Table 2-8 lists the options and descriptions for the information fields that appear on the System Security screen. - Page 56 System Password option. Sets the reporting of the Trusted Platform Module (TPM) in the system. NOTE: See support.dell.com for additional documentation on TPM technology. When set to Off (default), the presence of the TPM is not reported to the operating system.
- Page 57 Table 2-8. System Security Screen Options (continued) Option TPM Activation TPM Clear (No default) Power Button (Enabled default) NMI Button (Disabled default) Description Changes the operational state of the TPM. When set to Activate, the TPM is enabled and activated at default settings.
-
Page 58: Exit Screen
Table 2-8. System Security Screen Options (continued) Option AC Power Recovery (Last default) Exit Screen After you press <Esc> to exit the System Setup program, the Exit screen displays the following options: • Save Changes and Exit • Discard Changes and Exit •... -
Page 59: Using The System Password
Using the System Password After a system password is assigned, only those who know the password have full use of the system. When the System Password option is set to Enabled, the system prompts you for the system password after the system starts. Assigning a System Password Before you assign a system password, enter the System Setup program and check the System Password option. - Page 60 5 To confirm your password, type it a second time and press <Enter>. The setting shown for the System Password changes to Enabled. Exit the System Setup program and begin using your system. 6 Either reboot your system now for your password protection to take effect or continue working and reboot your system at a later time.
-
Page 61: Using The Setup Password
NOTE: You can use the Password Status option in conjunction with the System Password and Setup Password options to further protect your system from unauthorized changes. Deleting or Changing an Existing System Password 1 When prompted, press <Ctrl><Enter> to disable the existing system password. -
Page 62: Disabling A Forgotten Password
The password assignment is not case-sensitive. However, certain key combinations are not valid. If you enter one of these combinations, the system beeps. To erase a character when entering your password, press <Backspace> or the left-arrow key. After you verify the password, the Setup Password setting changes to Enabled. -
Page 63: Baseboard Management Controller Configuration
Baseboard Management Controller Configuration The Baseboard Management Controller (BMC) enables configuring, monitoring, and recovery of systems remotely. BMC provides the following features: • Uses the system’s integrated NIC • Enables fault logging and SNMP alerting • Provides access to system event log and sensor status •... - Page 64 Using the System Setup Program...
-
Page 65: Installing System Components
Installing System Components This section describes how to install the following system components: • Front bezel • System board shroud • Hard drives • Optical drive • Cooling fan modules • Power supplies • Internal USB Memory Connector • RAC Card •... -
Page 66: Inside The System
Damage due to servicing that is not authorized by Dell is not covered by your warranty. Read and follow the safety instructions that came with the product. - Page 67 Figure 3-1. Inside the System cover latch system cover Installing System Components...
- Page 68 system board shroud left riser SAS RAID external controller daughter card battery and memory module SAS internal RAID controller daughter card RAC card CPU/heatsink SAS/SATA backplane cable connector hot plug hard drive bays 0 and 1 LCD control panel control panel assembly power distribution board NOTE: In the preceding figure, the 12C cable is shown connecting over the control...
-
Page 69: Front Bezel
Front Bezel A lock on the bezel restricts access to the power button, optical drive, and hard drive(s). A control panel LCD located on the front panel and accessible through the front bezel displays the system’s status. See Figure 3-2. Figure 3-2. -
Page 70: Replacing The Front Bezel
Damage due to servicing that is not authorized by Dell is not covered by your warranty. Read and follow the safety instructions that came with the product. -
Page 71: Opening The System
Opening the System To upgrade or troubleshoot the system, remove the system cover to gain access to internal components. 1 Unless you are installing a hot-plug component such as a power supply, turn off the system and attached peripherals, and disconnect the system from the electrical outlet and peripherals. -
Page 72: System Board Shroud
Figure 3-4. Installing and Removing the System Cover latch alignment J hooks System Board Shroud The system board shroud covers the processor, heatsink, memory modules, and system battery and provides air flow to these components. Airflow is facilitated by the cooling fan modules, which are positions directly behind the system board shroud. - Page 73 Damage due to servicing that is not authorized by Dell is not covered by your warranty. Read and follow the safety instructions that came with the product. 1 Open the system. See "Opening and Closing the System" on page 70.
-
Page 74: Installing The System Board Shroud
NOTE: In the preceding figure, the 12C cable is shown connecting over the control panel cabling. This cable should be routed under the control panel cable and the internal USB key connector. The 12C cable seats in a cable guide clip that is directly beneath the control panel connector. -
Page 75: Removing A Drive Blank
1 Remove the front bezel, if attached. See "Removing the Front Bezel" on page 69. 2 Locate the hard-drive blank that ships with your system. (Dell part number H7511) 3 Insert the hard-drive blank into the drive bay until the blank is fully seated. -
Page 76: Installing A Hot-Plug Hard Drive
2 From the RAID management software, prepare the drive for removal and wait until the hard-drive indicators on the drive carrier signal that the drive can be removed safely. See your SAS controller documentation for information about hot-plug drive removal. If the drive has been online, the green activity/fault indicator will flash as the drive is powered down. - Page 77 Figure 3-6. Installing a Hot-Plug Hard Drive hard drive drive carrier release handle 3 Install the hot-plug hard drive. Open the handle on the hard-drive carrier. Insert the hard-drive carrier into the drive bay until the carrier contacts the backplane. Close the handle to lock the drive in place.
-
Page 78: Replacing A Hard-Drive Carrier
Replacing a Hard-Drive Carrier Two versions of hard-drive carriers are used with your system. The version for SATA hard drives has a single set of (four) mounting holes on the side rails. The second version, called a SAS/SATAu hard-drive carrier, has an extra four mounting holes to enable either a "SAS"... - Page 79 As you seat the hard drive into the hard-drive bay, ensure the carrier latch contacts the carrier bracket and ensure that all latches are fully engaged. Figure 3-7. Installing a SAS Hard Drive Into a SAS/SATAu Drive Carrier screws (4) hard drive drive carrier Installing System Components...
-
Page 80: Optical Drive
Damage due to servicing that is not authorized by Dell is not covered by your warranty. Read and follow the safety instructions that came with the product. -
Page 81: Installing The Optical Drive
Installing the Optical Drive 1 Align the optical-drive tray with its opening in the front panel. See Figure 3-8. 2 Slide in the drive tray until the tray snaps into place. 3 Connect the optical-drive cable to the back of the drive tray. 4 If not already done, connect the power and interface cables from the optical drive to the system board connectors. -
Page 82: Installing The Optical Drive In The Optical Drive Tray
Figure 3-8. Removing and Installing the Optional Optical Drive optical drive power cable optical-drive tray NOTE: In the preceding figure, the 12C cable is shown connecting over the control panel cabling. This cable should be routed under the control panel cable and the internal USB key connector. -
Page 83: Removing The Optical Drive From The Optical Drive Tray
Damage due to servicing that is not authorized by Dell is not covered by your warranty. Read and follow the safety instructions that came with the product. 1 Align the optical drive's mounting holes with the retaining pins on the optical-drive tray. -
Page 84: Cooling Fan Modules
Cooling Fan Modules The fan assembly contains four dual-motor fans and provides cooling for the processor and memory modules and two dual-motor fans for the redundant power supplies. Installing System Components... -
Page 85: Removing The Fan Assembly
Damage due to servicing that is not authorized by Dell is not covered by your warranty. Read and follow the safety instructions that came with the product. - Page 86 Figure 3-10. Installing and Removing the Fan Assembly power supply fan bay assembly release levers (2) system fan bay assembly NOTE: In the preceding figure, the 12C cable is shown connecting over the control panel cabling. This cable should be routed under the control panel cable and the internal USB key connector.
-
Page 87: Installing The Fan Assembly
Damage due to servicing that is not authorized by Dell is not covered by your warranty. Read and follow the safety instructions that came with the product. - Page 88 Figure 3-11. Installing and Removing the Power Supply Fan Assembly power supply fan assembly FAN_MOD connector on power distribution board NOTE: In the preceding figure, the 12C cable is shown connecting over the control panel cabling. This cable should be routed under the control panel cable and the internal USB key connector.
-
Page 89: Installing The Power Supply Fan Assembly
Installing the Power Supply Fan Assembly 1 Connect the fan’s power cable to the FAN_MOD connector on the power distribution board. See Figure 3-11 for the location of the connector. 2 Route the fan cable through the slot on the shroud partition. 3 Close the power distribution board cover by rotating it downward until it seats directly over the board. -
Page 90: Replacing A Power Supply
NOTE: For nonredundant power supplies, remove the power cord retention bracket that secures the system cables. See the Getting Started Guide that ships with your system for more information. 4 Release the locking tab on the left side of the power supply by pressing in toward the right.. -
Page 91: Internal Usb Memory Key
Damage due to servicing that is not authorized by Dell is not covered by your warranty. Read and follow the safety instructions that came with the product. - Page 92 2 Open the system. See "Opening and Closing the System" on page 70. 3 Locate the USB connector on the front control board (see Figure 6-3). 4 Insert the USB memory key into the USB connector onto the board. See Figure 3-13.
-
Page 93: Rac Card
Damage due to servicing that is not authorized by Dell is not covered by your warranty. Read and follow the safety instructions that came with the product. - Page 94 Figure 3-14. Removing and Installing a RAC Card RAC-card system board connector RAC-card connector RAC card bay standoff holes (5) 6 Pull back slightly on one of the blue retention standoff tabs and gently work the edge of RAC card off of the standoff. Repeat for the other retention standoff.
-
Page 95: Installing A Rac Card
Damage due to servicing that is not authorized by Dell is not covered by your warranty. Read and follow the safety instructions that came with the product. -
Page 96: Expansion Cards
Damage due to servicing that is not authorized by Dell is not covered by your warranty. Read and follow the safety instructions that came with the product. -
Page 97: Removing An Expansion Card
Damage due to servicing that is not authorized by Dell is not covered by your warranty. Read and follow the safety instructions that came with the product. -
Page 98: Riser Cards
Figure 3-15. Installing and Removing Expansion Cards expansion-card connector (left riser card) expansion card back retainer NOTE: In the preceding figure, the 12C cable is shown connecting over the control panel cabling. This cable should be routed under the control panel cable and the internal USB key connector. -
Page 99: Removing The Riser Card
Damage due to servicing that is not authorized by Dell is not covered by your warranty. Read and follow the safety instructions that came with the product. -
Page 100: Installing The Riser Card
Damage due to servicing that is not authorized by Dell is not covered by your warranty. Read and follow the safety instructions that came with the product. -
Page 101: Backplane Board
Damage due to servicing that is not authorized by Dell is not covered by your warranty. Read and follow the safety instructions that came with the product. - Page 102 Figure 3-17. Removing and Installing the Backplane backplane securing slot backplane center release latch SAS interface cable NOTE: In the preceding figure, the 12C cable is shown connecting over the control panel cabling. This cable should be routed under the control panel cable and the internal USB key connector.
-
Page 103: Installing The Backplane Board
Damage due to servicing that is not authorized by Dell is not covered by your warranty. Read and follow the safety instructions that came with the product. - Page 104 Rank 1, 2: DIMM1_A and DIMM1_B Rank 3, 4: DIMM2_A and DIMM2_B Rank 5, 6: DIMM3_A and DIMM3_B The memory modules must be installed in identical pairs in configurations that have more than one memory module. For example, if socket DIMM1_A contains a 512-MB memory module, then the second memory module to be installed must be a 512-MB memory module in socket DIMM1_B.
-
Page 105: Installing Memory Modules
Damage due to servicing that is not authorized by Dell is not covered by your warranty. Read and follow the safety instructions that came with the product. - Page 106 8 Repeat step 2 through step 7 of this procedure to install the remaining memory modules. See Table 3-1 for valid memory configurations. 9 Close the system. See "Opening and Closing the System" on page 70. 10 (Optional) Press <F2> to enter the System Setup program, and check the System Memory setting on the main System Setup screen.
-
Page 107: Removing Memory Modules
Damage due to servicing that is not authorized by Dell is not covered by your warranty. Read and follow the safety instructions that came with the product. - Page 108 2 Turn off the system, including any attached peripherals, and disconnect the system from the electrical outlet. 3 Open the system. See "Opening the System" on page 71. 4 If applicable, disconnect the SAS cable connector on the expansion card. 5 Remove the system board shroud.
- Page 109 Figure 3-19. Installing and Removing the Heat Sink release levers (2) 8 Release the socket-release lever before opening the processor shield. 9 Rotate the processor shield upward and out of the way. 10 Lift the processor out of the socket and leave the release lever up so that the socket is ready for the new processor.
-
Page 110: Installing A Processor
Figure 3-20. Installing and Removing the Processor notch in processor (2) socket-release lever processor shield Installing a Processor 1 Unpack the new processor. 2 Align the processor with the socket keys on the ZIF socket. See Figure 3-20. 3 Install the processor in the socket. NOTICE: Positioning the processor incorrectly can permanently damage the system board or the processor when you turn it on. - Page 111 NOTICE: Do not use force to seat the processor. When the processor is positioned correctly, it engages easily into the socket. Close the processor shield. See Figure 3-20. When the processor is fully seated in the socket, rotate the socket release lever back down until it snaps into place, securing the processor.
-
Page 112: System Battery
Damage due to servicing that is not authorized by Dell is not covered by your warranty. Read and follow the safety instructions that came with the product. - Page 113 4 Locate the battery socket. See "System Board Connectors" on page 157. NOTICE: If you pry the battery out of its socket with a blunt object, be careful not to touch the system board with the object. Ensure that the object is inserted between the battery and the socket before you attempt to pry out the battery.
-
Page 114: Control Panel Assembly
Damage due to servicing that is not authorized by Dell is not covered by your warranty. Read and follow the safety instructions that came with the product. - Page 115 Figure 3-22. Installing and Removing the Control Panel Assembly display-module label display module control-panel cable control-panel circuit board NOTE: In the preceding figure, the 12C cable is shown connecting over the control panel cabling. This cable should be routed under the control panel cable and the internal USB key connector.
-
Page 116: Installing The Control Panel Assembly
6 Disconnect the display module cable from the control panel board. See Figure 3-22. 7 Remove the three screws that secure the control panel board to the system chassis and remove the board. See Figure 3-22. 8 Remove the display module: Insert the end of paper clip into the hole on the right side of the display module and gently pry off the label. -
Page 117: Power Distribution Board
Damage due to servicing that is not authorized by Dell is not covered by your warranty. Read and follow the safety instructions that came with the product. - Page 118 Figure 3-23. Power Distribution Board power-distribution board fan module connector power-distribution board system bay shroud captive screws (4) power supply connectors (2) NOTE: In the preceding figure, the 12C cable is shown connecting over the control panel cabling. This cable should be routed under the control panel cable and the internal USB key connector.
-
Page 119: Replacing The Power Distribution Board
Damage due to servicing that is not authorized by Dell is not covered by your warranty. Read and follow the safety instructions that came with the product. -
Page 120: Removing The System Board Assembly
Damage due to servicing that is not authorized by Dell is not covered by your warranty. Read and follow the safety instructions that came with the product. - Page 121 12 Disconnect the two power cables from the 12V and PWR_CONN connectors on the system board. See Figure 6-1. CAUTION: Before removing the system board tray from the chassis, ensure that all system board cables are disconnected from their respective cable connectors. 13 Pull up on the plunger that secures the system board tray to the chassis floor.
-
Page 122: Installing The System Board Assembly
Figure 3-24. Installing and Removing the System Board plunger system board tray NOTE: In the preceding figure, the 12C cable is shown connecting over the control panel cabling. This cable should be routed under the control panel cable and the internal USB key connector. - Page 123 Damage due to servicing that is not authorized by Dell is not covered by your warranty. Read and follow the safety instructions that came with the product. 1 Unpack the new system board assembly. 2 While sliding the system board tray into place, tilt the board at an angle to ensure that the cables from the power distribution board are above the system board assembly.
- Page 124 15 Connect the control-panel interface cable to the CTRL_PNL connector on the system board. See Figure 6-1 for the location of the CTRL_PNL connector. 16 If applicable, connect the optical drive interface cable to the SATA_C connector on the system card. See Figure 6-1 for the location of the SATA connector.
-
Page 125: Troubleshooting Your System
Damage due to servicing that is not authorized by Dell is not covered by your warranty. Read and follow the safety instructions that came with the product. -
Page 126: Checking The Equipment
Table 4-1. Start-Up Routine Indications (continued) Look/listen for: The USB diskette drive activity indicator. The USB CD drive activity indicator. The hard-drive activity indicator. An unfamiliar constant scraping or grinding sound when you access a drive. Checking the Equipment This section provides troubleshooting procedures for external devices attached to the system, such as the monitor, keyboard, or mouse. -
Page 127: Troubleshooting The Keyboard
1 minute, then connect the monitor to the other video connector and turn the system on again. 3 Run the appropriate online diagnostic test. See "Using Dell PowerEdge Diagnostics" on page 153. If the tests run successfully, the problem is not related to video hardware. -
Page 128: Troubleshooting The Mouse
• Mouse is not functioning properly. Action 1 Run the appropriate online diagnostic test. See "Using Dell PowerEdge Diagnostics" on page 153. If the test fails, continue to the next step. 2 Examine the mouse and its cable for signs of damage. -
Page 129: Troubleshooting A Serial I/O Device
3 Run the appropriate online diagnostic test. See "Running the System Diagnostics" on page 153. If the tests run successfully but the problem persists, see "Troubleshooting a USB Device" on page 129. Troubleshooting a Serial I/O Device Problem • Device connected to the serial port is not operating properly. Action 1 Turn off the system and any peripheral devices connected to the serial port. - Page 130 Damage due to servicing that is not authorized by Dell is not covered by your warranty. Read and follow the safety instructions that came with the product.
-
Page 131: Troubleshooting A Nic
Open the system. See "Opening the System" on page 71. Locate the NVRAM_CLR jumper on your system board (see "System Board Jumpers" on page 157) and set the jumper to the enabled position. Close the system. See "Closing the System" on page 71. Reconnect the system and peripherals to power and restart. -
Page 132: Troubleshooting A Wet System
Damage due to servicing that is not authorized by Dell is not covered by your warranty. Read and follow the safety instructions that came with the product. -
Page 133: Troubleshooting A Damaged System
Damage due to servicing that is not authorized by Dell is not covered by your warranty. Read and follow the safety instructions that came with the product. -
Page 134: Troubleshooting The System Battery
3 Ensure that all cables are properly connected. 4 Close the system. See "Opening and Closing the System" on page 70. 5 Run the system board tests in the system diagnostics. See "Using Dell PowerEdge Diagnostics" on page 153. If the tests fail, see "Getting Help" on page 167. -
Page 135: Troubleshooting Power Supplies
Damage due to servicing that is not authorized by Dell is not covered by your warranty. Read and follow the safety instructions that came with the product. -
Page 136: Troubleshooting System Cooling Problems
6 If the problem is resolved, close the system. See "Opening and Closing the System" on page 70. If the problem persists, remove the faulty power supply. See "Removing a Power Supply" on page 89. 7 Install a new power supply. See "Replacing a Power Supply" on page 90. If the problem persists, see "Getting Help"... -
Page 137: Troubleshooting System Memory
Damage due to servicing that is not authorized by Dell is not covered by your warranty. Read and follow the safety instructions that came with the product. 1 Run the appropriate diagnostic test. See "Using Dell PowerEdge Diagnostics" on page 153. - Page 138 Damage due to servicing that is not authorized by Dell is not covered by your warranty. Read and follow the safety instructions that came with the product. 1 If the system is operational, run the appropriate online diagnostic test. See "Using Dell PowerEdge Diagnostics"...
-
Page 139: Troubleshooting An Internal Usb Key
Damage due to servicing that is not authorized by Dell is not covered by your warranty. Read and follow the safety instructions that came with the product. -
Page 140: Troubleshooting A Diskette Drive
Damage due to servicing that is not authorized by Dell is not covered by your warranty. Read and follow the safety instructions that came with the product. - Page 141 3 Turn off the system and attached peripherals, and disconnect the system from the electrical outlet. 4 Open the system. See "Opening and Closing the System" on page 70. 5 Ensure that the diskette drive interface cable is securely connected to the diskette drive and the system board.
-
Page 142: Troubleshooting An Optical Drive
Damage due to servicing that is not authorized by Dell is not covered by your warranty. Read and follow the safety instructions that came with the product. -
Page 143: Troubleshooting A Scsi Tape Drive
Damage due to servicing that is not authorized by Dell is not covered by your warranty. Read and follow the safety instructions that came with the product. -
Page 144: Troubleshooting A Hard Drive
Damage due to servicing that is not authorized by Dell is not covered by your warranty. Read and follow the safety instructions that came with the product. -
Page 145: Troubleshooting A Hot-Plug Hard Drive
See the documentation supplied with the host adapter for information about the configuration utility. Ensure that the hard drive has been configured correctly for the RAID. Exit the configuration utility and allow the system to boot to the operating system. 4 Ensure that the required device drivers for your SAS controller card or SAS RAID controller are installed and are configured correctly. - Page 146 Damage due to servicing that is not authorized by Dell is not covered by your warranty. Read and follow the safety instructions that came with the product.
-
Page 147: Troubleshooting A Sas Or Sas Raid Controller
8 If you have a non-RAID SAS controller, remove the hard drive and swap its drive bay location with another hard drive that is functioning properly. If the problem is resolved, reinstall the hard drive in the original bay. See "Installing a Hot-Plug Hard Drive"... - Page 148 Damage due to servicing that is not authorized by Dell is not covered by your warranty. Read and follow the safety instructions that came with the product.
-
Page 149: Troubleshooting Expansion Cards
Damage due to servicing that is not authorized by Dell is not covered by your warranty. Read and follow the safety instructions that came with the product. - Page 150 5 Close the system. See "Opening and Closing the System" on page 70. 6 Reconnect the system to the electrical outlet, and turn on the system and attached peripherals. If the problem persists, go to the next step. 7 Turn off the system and attached peripherals, and disconnect the system from the electrical outlet.
-
Page 151: Troubleshooting The Microprocessors
Damage due to servicing that is not authorized by Dell is not covered by your warranty. Read and follow the safety instructions that came with the product. - Page 152 10 Remove processor 2. See "Replacing the Processor" on page 107. To locate processor 2, see Figure 6-1. If only one processor is installed, replace the processor. See "Getting Help" on page 167. 11 Close the system. See "Opening and Closing the System" on page 70. 12 Reconnect the system to the electrical outlet, and turn on the system and attached peripherals.
-
Page 153: Running The System Diagnostics
The files required to run PowerEdge Diagnostics for systems running ® supported Microsoft Windows at support.dell.com and on the CDs that came with your system. For information about using diagnostics, see the Dell PowerEdge Diagnostics User's Guide. System Diagnostics Features The system diagnostics provides a series of menus and options for particular device groups or devices. -
Page 154: When To Use The System Diagnostics
• View status messages that inform you if tests are completed successfully. • View error messages that inform you of problems encountered during testing. When to Use the System Diagnostics If a major component or device in the system does not operate properly, component failure may be indicated. -
Page 155: Using Custom Test Options
Table 5-1. System Diagnostics Testing Options Testing Option Function Express Test Performs a quick check of the system. This option runs device tests that do not require user interaction. Use this option to quickly identify the source of your problem. Extended Test Performs a more thorough check of the system. -
Page 156: Viewing Information And Results
• Test Iterations — Selects the number of times the test is run. • Log output file pathname — When checked, enables you to specify the diskette drive or USB memory key where the test log file is saved. You cannot save the file to a hard drive. -
Page 157: Jumpers And Connectors
Jumpers and Connectors This section provides specific information about the system jumpers and describes the connectors on the various boards in the system. System Board Jumpers Figure 6-1 shows the location of the configuration jumpers on the system board. Table 6-1 lists the jumper settings. Table 6-1. - Page 158 Figure 6-1. System Board Connectors Table 6-2. System Board Connectors Item Connector SYSTEM ID NIC2 NIC1 USB2 USB1 Jumpers and Connectors Description System ID LED indicator NIC 2 connector NIC 1 connector USB connector USB connector...
- Page 159 Table 6-2. System Board Connectors (continued) Item Connector PWRD_EN NVRAM_CLR RISER1 RAC_CONN HD_ACT_CARD DIMM3_B DIMM3_A DIMM2_B DIMM2_A DIMM1_B DIMM1_A FAN_MOD2 FAN_MOD1 USB_CONN PWR_CONN SATA_A PDB_12C SATA_B SATA_C CTRL_PNL RISER2 BATTERY Description Password and configuration jumper Video connector Center riser expansion card interface connector Serial connector Remote Access Control (RAC) card connector Hard drive activity connector (expansion controller)
-
Page 160: Riser Card Connectors
Riser Card Connectors The system is available with either a PCIe riser card or a PCI-X/PCIe riser card (not shown). See Figure 6-1 and Figure 6-2 for the location and description of the expansion-card slots on the two riser cards. Figure 6-2. -
Page 161: Control Panel Assembly Connectors
Control Panel Assembly Connectors Figure 6-3 shows the configuration of the I/O control panel assembly connectors. Figure 6-3. Input/Output Control Panel Board backplane connector (BP_12C) internal USB key cable connector (USB_CONN) control-panel system board connector (J_Planar) internal USB connector (USB3) LCD panel connector (FRONT PANEL) Jumpers and Connectors... -
Page 162: Sas/Sata Backplane Board Connectors
SAS/SATA Backplane Board Connectors Figure 6-4 shows the location of the hard-drive connectors on the SAS/SATA backplane board. Figure 6-4. SAS/SATA Backplane Board Components power +12C connector SAS controller daughter card connector Expansion Card Connectors for SAS Controller Daughter Cards Figure , Figure , and Figure 6-7 show the locations of the connectors on each expansion card. - Page 163 Figure 6-5. Expansion Card Connector for SAS RAID Controller Daughter Card external port connectors Figure 6-6. Expansion Card Connector for the RAC Card TOE key connector (44 pin) NIC port connector SAS 5e Card memory module slot DRAC Card DRAC5 cable connector (50 pin) Jumpers and Connectors...
-
Page 164: Disabling A Forgotten Password
Damage due to servicing that is not authorized by Dell is not covered by your warranty. Read and follow the safety instructions that came with the product. - Page 165 4 Close the system. See "Opening and Closing the System" on page 70. 5 Reconnect the system to the electrical outlet, and turn on the system. The existing passwords are not disabled (erased) until the system boots with the password jumper plug removed. However, before you assign a new system and/or setup password, you must install the jumper plug.
- Page 166 Jumpers and Connectors...
-
Page 167: Getting Help
NOTE: If you do not have an active Internet connection, you can find contact information on your purchase invoice, packing slip, bill, or Dell product catalog. Dell provides several online and telephone-based support and service options. Availability varies by country and product, and some services may not be available in your area. - Page 168 Getting Help...
-
Page 169: Glossary
Glossary This section defines or identifies technical terms, abbreviations, and acronyms used in your system documents. A — Ampere(s). AC — Alternating current. ACPI — Advanced Configuration and Power Interface. A standard interface for enabling the operating system to direct configuration and power management. ambient temperature —... - Page 170 BMC — Baseboard management controller. boot routine — A program that clears all memory, initializes devices, and loads the operating system when you start your system. Unless the operating system fails to respond, you can reboot (also called warm boot) your system by pressing <Ctrl><Alt><Del>.
- Page 171 DNS — Domain Name System. A method of translating Internet domain names, such as www.dell.com, into IP addresses, such as 143.166.83.200. DRAC — Dell Remote Access Controller.. DRAM — Dynamic random-access memory. A system’s RAM is usually made up entirely of DRAM chips.
- Page 172 ESD — Electrostatic discharge. ESM — Embedded server management. expansion bus — Your system contains an expansion bus that allows the processor to communicate with controllers for peripherals, such as NICs. expansion card — An add-in card, such as a NIC or SCSI adapter, that plugs into an expansion-card connector on the system board.
- Page 173 h — Hexadecimal. A base-16 numbering system, often used in programming to identify addresses in the system’s RAM and I/O memory addresses for devices. In text, hexadecimal numbers are often followed by h. headless system — A system or device that functions without having a keyboard, mouse, or monitor attached.
- Page 174 key combination — A command requiring you to press multiple keys at the same time (for example, <Ctrl><Alt><Del>). kg — Kilogram(s); 1000 grams. kHz — Kilohertz. KMM — Keyboard/monitor/mouse. KVM — Keyboard/video/mouse. KVM refers to a switch that allows selection of the system from which the video is displayed and for which the keyboard and mouse are used.
- Page 175 memory address — A specific location, usually expressed as a hexadecimal number, in the system’s RAM. memory module — A small circuit board containing DRAM chips that connects to the system board. memory — An area in your system that stores basic system data. A system can contain several different forms of memory, such as integrated memory (ROM and RAM) and add-in memory modules (DIMMs).
- Page 176 peripheral — An internal or external device, such as a diskette drive or keyboard, connected to a system. PGA — Pin grid array. A type of processor socket that allows you to remove the processor chip. pixel — A single point on a video display. Pixels are arranged in rows and columns to create an image.
- Page 177 — An I/O port used most often to connect a modem to your system. You can usually identify a serial port on your system by its 9-pin connector. service tag — A bar code label on the system used to identify it when you call Dell for technical support.
- Page 178 system board — As the main circuit board, the system board usually contains most of your system’s integral components, such as the processor, RAM, controllers for peripherals, and various ROM chips. system configuration information — Data stored in memory that tells a system what hardware is installed and how the system should be configured for operation.
- Page 179 VAC — Volt(s) alternating current. VDC — Volt(s) direct current. VGA — Video graphics array. VGA and SVGA are video standards for video adapters with greater resolution and color display capabilities than previous standards. video adapter — The logical circuitry that provides (in combination with the monitor) your system’s video capabilities.
- Page 180 XML — Extensible Markup Language. XML is a way to create common information formats and to share both the format and the data on the World Wide Web, intranets, and elsewhere. ZIF — Zero insertion force. Glossary...
-
Page 181: Index
126 closing the system, 70 connecting external devices, 19 connectors riser card, 160-161 SAS/SATA backplane board, 162 system board, 157 contacting Dell, 167 control panel assembly installing, 116 removing, 114 cooling fans troubleshooting, 136 cooling shroud installing, 74... - Page 182 diagnostics testing options, 154 when to use, 154 diskette drive troubleshooting, 140 drive blank installing, 75 removing, 75 drive carrier hard drive, 78 drives CD, 80 optical, 80 error messages, 47 expansion cards installing, 96 removing, 97 troubleshooting, 149 external devices connecting, 19 fan assembly (power supply) installing, 89...
- Page 183 processor fan assembly, 87 RAC card, 95 riser card, 100 system board, 122 USB memory key, 91 jumpers system board, 157 keyboard troubleshooting, 127 memory installation guidelines, 103 installing, 105 removing, 107 troubleshooting, 137 memory key connector (USB), 91 messages alert, 45 error messages, 47 hard-drive indicator codes, 17...
- Page 184 SAS controller card. See expansion cards. SAS/SATA backplane board connectors, 162 SD card troubleshooting, 139 securing your system, 55, 60 setup password, 61 startup accessing system features, 12 support contacting Dell, 167 system battery replacing, 112 system board connectors, 157...
- Page 185 installing, 122 jumpers, 157 removing, 120 system board view, 67 system cooling troubleshooting, 136 system features accessing, 12 system messages, 34 system password, 59 system setup program CPU options, 52 entering, 47 integrated devices options, 53 keystroke, 47 memory options, 51 serial communications options, 54 system security options, 55...
- Page 186 warning messages, 44 warranty, 11 wet system troubleshooting, 132 Index...