Table of Contents
Advertisement
Advertisement
Table of Contents

Related Manuals for BenQ W1000


Summary of Contents for BenQ W1000
- Page 1 W1000 Digital Projector User Manual Welcome...
-
Page 2: Table Of Contents
Timing chart ........61 size ............. 15 Warranty and Copyright Connections ....18 information .....65 Connecting a computer or monitor ..18 Regulation statements..66 Connecting Video source devices ..19 Connecting HDMI source devices ..20 Operation ......24 Starting up the projector..... 24 Using the menus......... -
Page 3: Important Safety Instructions
Important safety instructions Your projector is designed and tested to meet the latest standards for safety of information technology equipment. However, to ensure safe use of this product, it is important that you follow the instructions mentioned in this manual and marked on the product. - Page 4 Safety Instructions (Continued) The lamp becomes extremely hot Do not place this product on an during operation. Allow the unstable cart, stand, or table. The projector to cool for approximately product may fall, sustaining serious 45 minutes prior to removing the damage.
- Page 5 Always place the projector on a level, horizontal surface during operation. - Do not use if tilted at an angle of more than 10 degrees left to right, nor at angle of more than 15 degrees front to back.
- Page 6 Safety Instructions (Continued) Do not step on the projector or place Ceiling mounting the projector any objects upon it. Besides probable We want you to have a pleasant physical damage to the projector, experience using your BenQ projector, doing so may result in accidents and so we need to bring this safety matter possible injury.
-
Page 7: Introduction
The apparent brightness of the projected image will vary depending on the ambient lighting conditions, selected input signal contrast/brightness settings, and is directly proportional to projection distance. • The lamp brightness will decline over time and may vary within the lamp manufacturers specifications. This is normal and expected behavior. Introduction... -
Page 8: Shipping Contents
Shipping contents Carefully unpack and verify that you have all of the items shown below. If any of these items are missing, please contact your place of purchase. Standard accessories The supplied accessories will be suitable for your region, and may differ from those illustrated. -
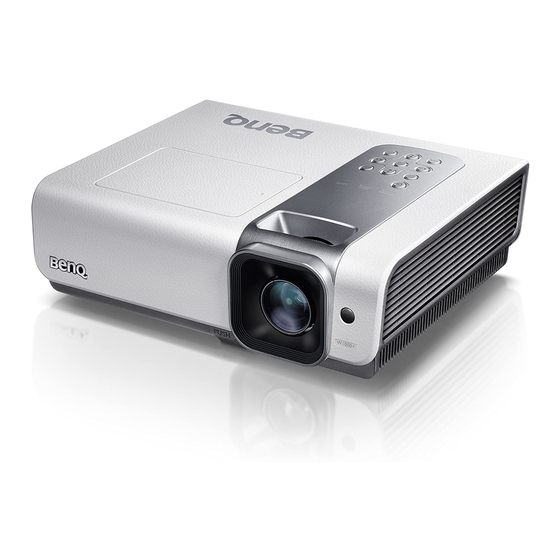
Page 9: Projector Exterior View
Quick-release button Projection lens External control panel (See "Projector" on page 10 details.) Vent (cool air intake) Focus ring and Zoom ring Front IR remote sensor AC power cord inlet USB input jack Rear/lower side COMPONENT input jacks S-VIDEO input jack... -
Page 10: Controls And Functions
Used to adjust the projected image appearance. See "Fine-tuning the image LAMP indicator light size and clarity" on page 29 for details. Indicates the status of the lamp. Lights up Keystone/Arrow keys or flashes when the lamp has developed a / Up, Down) problem. See "Indicators"... -
Page 11: Remote Control
Displays the VIDEO source selection. See LIGHT "Switching input signal" on page 28 for details. COMP Turns on or off the remote control backlight for about 10 seconds. Pressing any other Displays the COMPONENT source key while the backlight is on keeps the selection. See "Switching input signal"... -
Page 12: Remote Control Effective Range
Remote control effective range Infra-Red (IR) remote control sensor is located on the front and the rear of the projector. The remote control must be held at an angle within 30 degrees perpendicular to the projector's IR remote control sensor to function correctly. -
Page 13: Replacing The Remote Control Battery
Never throw a battery into a fire. There may be danger of an explosion. • If the battery is dead or if you will not be using the remote control for a long time, remove the battery to prevent damage to the remote control from possible battery leakage. -
Page 14: Positioning Your Projector
Your room layout or personal preference will dictate which installation location you select. Take into consideration the size and position of your screen, the location of a suitable power outlet, as well as the location and distance between the projector and the rest of your equipment. -
Page 15: Obtaining A Preferred Projected Image Size
This is so that they can be readily placed on a table and will project forward and upwards onto a screen positioned so that the bottom edge of the screen is above the level of the table (and everyone in the room can see the screen). - Page 16 How to determine the position of the projector for a given screen size Select your screen size. Refer to the table and find the closest match to your screen size in the left columns labelled "16:9 screen". Using this value, look across this row to the right to find the corresponding average distance from screen value in the column labelled "Average".
-
Page 17: Dimensions
There is 5% tolerance among these numbers due to optical component variations. BenQ recommends that if you intend to permanently install the projector, you should physically test the projection size and distance using the actual projector before you permanently install it, so as to make allowance for this projector's optical characteristics. -
Page 18: Connections
If you wish to make use of the projector (mixed mono) speakers in your presentations, take a suitable audio cable and connect one end of the cable to the audio output jack of the computer, and the other end to the AUDIO jack of the projector. Once connected, the audio can be controlled by the projector On-Screen Display (OSD) menus. -
Page 19: Connecting Video Source Devices
• Video (composite) You need only connect the projector to a Video source device using just one of the above connecting methods, however each provides a different level of video quality. The method you choose will most likely depend upon the availability of matching terminals on both the... -
Page 20: Connecting Hdmi Source Devices
Connecting HDMI source devices The projector provides a HDMI input jack that allows you to connect it to a HDMI source device like a DVD player, a DTV tuner or a display. HDMI (High-Definition Multimedia Interface) supports uncompressed video data transmission between compatible devices like DTV tuners, DVD players and displays over a single cable. -
Page 21: Connecting Component Video Source Devices
If so, you can continue with this procedure. • If not, you will need to reassess which method you can use to connect to the device. To connect the projector to a Component Video source device: Take a Component Video cable and connect the end with 3 RCA type connectors to the Component Video output jacks of the Video source device. - Page 22 If so, you can continue with this procedure. • If not, you will need to reassess which method you can use to connect to the device. To connect the projector to an S-Video source device: Take an S-Video cable and connect one end to the S-Video output socket of the Video source device.
-
Page 23: Connecting Composite Video Source Devices
If so, you can continue with this procedure. • If not, you will need to reassess which method you can use to connect to the device. To connect the projector to a composite Video source device: Take a Video cable and connect one end to the composite Video output socket of the Video source device. -
Page 24: Operation
"Turning off the Power on/off Ring Tone" on page 41 details. If the projector is still hot from previous activity, it will run the cooling fan for approximately 90 seconds before energizing the lamp. To use the OSD menus, please set them to your familiar Please select language language first. -
Page 25: Using The Menus
Securing the projector Using a security cable lock The projector has to be installed in a safe place to prevent theft. Otherwise, purchase a lock, such as a Kensington lock, to secure the projector. You can locate a Kensington lock slot on the left side of the projector. -
Page 26: Utilizing The Password Function
On. The digits being input will display as asterisks on-screen. Write your selected password down here in this manual in advance or right after the password is entered so that it is available to you should you ever forget it. -
Page 27: Entering The Password Recall Procedure
Enter a new password. The digits being input will display as asterisks on-screen. Write your selected password down here in this manual in advance or right after the password is entered so that it is available to you should you ever forget it. -
Page 28: Switching Input Signal
The projector can be connected to multiple devices at the same time. However, it can only display one full screen at a time. Be sure the Quick Auto Search function in the SOURCE menu is On (which is the default of this projector) if you want the projector to automatically search for the signals. -
Page 29: Adjusting The Projected Image
"Correcting keystone" on page 30 for details. • Do not look into the lens while the lamp is on. The strong light from the lamp may cause damage to your eyes. • Be careful when you press the adjuster button as it is close to the exhaust vent where hot air comes from. -
Page 30: Correcting Keystone
Correcting keystone Keystoning refers to the situation where the projected image is noticeably wider at either the top or bottom. It occurs when the projector is not perpendicular to the screen. To correct this, besides adjusting the height of the projector, and use Auto Keystone or Keystone to manually correct it following one of these steps. -
Page 31: Magnifying And Searching For Details
Selecting the aspect ratio The 'aspect ratio' is the ratio of the image width to the image height. For W1000, the default aspect ration is 16:9. Most analog TV and computers are in 4:3 ratio, and digital TV and DVDs are usually in 16:9 ratio. - Page 32 16:9: Scales an image so that it is displayed in the center of the screen with a 16:9 16:9 picture aspect ratio. This is most suitable for images which are already in a 16:9 aspect, like high definition TV, as it displays them without aspect alteration.
-
Page 33: Optimizing The Image
Setting the User 1/User 2/User 3 mode There are three user-definable modes if the current available picture modes are not suitable for your need. You can use one of the picture modes (except the User 1/User 2/User 3) as a starting point and customize the settings. -
Page 34: Adjusting Brightness
Fine-tuning the image quality in user modes According to the detected signal type, there are some user-definable functions available when User 1, User 2 or User 3 mode is selected. You can make adjustments to these functions based on your needs. -
Page 35: Selecting A Color Temperature
“color temperature”. A white color with a low color temperature appears to be reddish white. A white color with a high color temperature appears to have more blue in it. - Page 36 The range is from 1 to 3. If you prefer a stronger enhanced image, adjust toward the maximum setting. For a smoother, more natural image, adjust toward the minimum setting.
- Page 37 Saturation is the amount of that color in a video picture. Lower settings produce less saturated colors; a setting of “0” removes that color from the image entirely. If the saturation is too high, that color will be overpowering and unrealistic.
-
Page 38: Hiding The Image
ENTER on the remote control, or ENTER on the projector to restore the picture. Do not block the projection lens from projecting as this could cause the blocking object to become heated and deformed or even cause a fire. -
Page 39: Locking Control Keys
To release panel key lock, press and hold for 3 seconds on the projector. You can also use the remote control to enter the SYSTEM SETUP: Basic > Panel Key Lock and press to select Off. • Keys on the remote control are still in use when panel key lock is enabled. -
Page 40: Operating In A High Altitude Environment
1500 m –3000 m above sea level, and temperature is between 5°C–23°C. Do not use the High Altitude Mode if your altitude is between 0 m and 1500 m and temperature is between 5°C and 28°C. The projector will be over cooled, if you turn the mode on under such a condition. -
Page 41: Muting The Sound
Power on/off ring tone and press to select Off. The only way to change Power on/off ring tone is setting On or Off here. Setting the sound mute or changing the sound level will not affect the Power on/off ring tone. -
Page 42: Personalizing The Projector Menu Display
Press POWER again to start the projector after the fans stop and the POWER indicator light turns orange. -
Page 43: Menu Operation
Menu operation Menu system Please note that the on-screen display (OSD) menus vary according to the signal type selected. Main menu Sub-menu Options Picture Mode Cinema/Dynamic/Standard/User 1/User 2/User 3 Reference Mode Cinema/Dynamic/Standard Brightness Contrast Color PICTURE: Tint Basic Sharpness Flesh Tone... - Page 44 Language Front Table/Rear Table/ Projector Position Rear Ceiling/Front Ceiling Top-Left/Top-Right/Center/ Menu position Bottom-Left/Bottom-Right Menu Settings 5 sec/10 sec/15 sec/20 sec/25 sec/ Menu Display Time 30 sec SYSTEM Disable/5 min/10 min/15 min/20 Auto Power Off SETUP: min/25 min/30 min Basic...
- Page 45 • Equivalent Lamp Hour • Firmware Version Note that the menu items are available when the projector detects at least one valid signal. If there is no equipment connected to the projector or no signal detected, limited menu items are accessible.
-
Page 46: Description Of Each Menu
"Adjusting Flesh Tone" on page 34 for details. Save Settings Saves the settings made for User 1 or User 2 or User 3 mode. Reset Picture Resets the picture settings for User 1 or User 2 or User 3 mode. -
Page 47: Film Mode
This function is only available when Video or S-Video with NTSC Filter system is selected. There are five options to set the image's aspect ratio depending on your Aspect Ratio input signal source. See "Selecting the aspect ratio" on page 31 for details. - Page 48 Sets the language for the On-Screen Display (OSD) menus. Language "Using the menus" on page 25 for details. The projector can be installed on a ceiling or behind a screen, or with Projector one or more mirrors. Position "Choosing a location" on page 14 for details.
- Page 49 "Operating in a high altitude environment" on page 40 for details. Mode Change password You will be asked to enter the current password before changing to a Security new one. See "Utilizing the password function" on page 26 for details.
-
Page 50: Lamp Hour
Shows input system format, NTSC, PAL, SECAM, or RGB. Equivalent Displays the number of hours the lamp has been used. Lamp Hour Firmware Displays the firmware version of the projector. Version The INFORMATION menu shows you the current operating status of the projector. Operation... -
Page 51: Maintenance
Maintenance Care of the projector Your projector needs little maintenance. The only thing you need to do on a regular basis is to keep the lens clean. Never remove any parts of the projector except the lamp. Contact your dealer if other parts need replacing. -
Page 52: Lamp Information
Extending lamp life The projection lamp is a consumable item that normally can last up to 3500-4000 hours with proper usage. To keep the lamp life as long as possible, you can do the following settings via the OSD menu. -
Page 53: Timing Of Replacing The Lamp
The Lamp indicator light and Temperature warning light will light up if the lamp becomes too hot. Turn the power off and let the projector cool for 45 minutes. If the Lamp or Temp indicator still lights up after turning the power back on, please contact your dealer. See "Indicators"... -
Page 54: Replacing The Lamp
To reduce the risk of electrical shock, always turn the projector off and disconnect the power cord before changing the lamp. • To reduce the risk of severe burns, allow the projector to cool for at least 45 minutes before replacing the lamp. •... - Page 55 Loosen the screws that secure the lamp. • Do not turn the power on with the lamp cover removed. • Do not insert your fingers between the lamp and the projector. The sharp edges inside the projector may cause injuries.
- Page 56 Highlight Reset and press MODE/ENTER. The lamp time will be reset to '0'. Do not reset if the lamp is not new or replaced as this could cause damage. Maintenance...
-
Page 57: Indicators
Stand-by mode Green Powering up Flashing Green Normal operation Orange The projector needs to cool for 90 seconds after the power is turned off. Flashing Lamp events Orange The lamp ignition retries if the lamp fails during startup. Flashing The projector needs 90 seconds to cool down. Or Please contact your dealer for assistance. -
Page 58: Troubleshooting
Troubleshooting The projector does not turn on. Cause Remedy Plug the power cord into the AC inlet on the There is no power from the power projector, and plug the power cord into the cable. power outlet. If the power outlet has a switch, make sure that it is switched on. -
Page 59: Specifications
Electrical Power supply AC100–240V, 50/60 Hz (Automatic) 265W (Max)/ Power consumption <1W (Standby) Mechanical 325 mm (W) x 95 mm (H) x 254 mm (D) Dimensions Weight 7.5 lbs (3.4 Kg) Input terminal Computer input RGB input D-Sub 15-pin (female) x 1 Video signal input Screw type x 2 (V1.3) -
Page 60: Dimensions
Dimensions 325 mm (W) x 95 mm (H) x 254 mm (D) 58.6 80.53 Ceiling Mount Installation Ceiling Mount Screws: M4 (Max. L=12, Min. L=10) Unit: mm 35.7 51.5 51.5 80.8 44.0 71.0 90.5 259.5 Tripod Mount 14.0 14.0 24.5 14.0... -
Page 61: Timing Chart
Timing chart Supported timing for PC input Resolution Horizontal Vertical Pixel Mode Frequency Frequency Frequency (kHz) (Hz) (MHz) 31.469 59.940 25.175 VGA_60 37.861 72.809 31.500 VGA_72 640 x 480 37.500 75.000 31.500 VGA_75 43.269 85.008 36.000 VGA_85 720 x 400 37.927... - Page 62 576p(625p)@50Hz 31.25 50.00 720p(750p)@60Hz 45.00 60.00 720p(750p)@50Hz 37.50 50.00 1080i(1125i)@60Hz 33.75 60.00 1080i(1125i)@50Hz 28.13 50.00 1080P@60Hz 67.5 60.00 1080P@50Hz 56.26 50.00 1080P@24Hz 1080P@25Hz 28.12 1080P@30Hz 33.75 • Displaying a 1080i(1125i)@60Hz or 1080i(1125i)@50Hz signal may result in slight image vibration. Specifications...
- Page 63 Supported timing for Video and S-Video inputs Video mode Horizontal Vertical Color sub-carrier Frequency Frequency Frequency (kHz) (Hz) (MHz) NTSC 15.73 3.58 15.63 4.43 SECAM 15.63 4.25 or 4.41 PAL-M 15.73 3.58 PAL-N 15.63 3.58 PAL-60 15.73 4.43 NTSC4.43 15.73 4.43...
- Page 64 45.00 74.25 720p_60 VIDEO 28.13 74.25 1080i_50 33.75 74.25 1080i_60 67.5 148.5 1080p 56.26 148.5 1080p 1080P@24Hz 74.25 1080P@24Hz 1080P@25Hz 28.12 74.25 1080P@25Hz 1080P@30Hz 33.75 74.25 1080P@30Hz Displaying a 1080i_50 or 1080i_60 signal may result in slight image vibration. Specifications...
-
Page 65: Warranty And Copyright Information
BenQ warrants this product against any defects in material and workmanship, under normal usage and storage. Proof of purchase date will be required with any warranty claim. In the event this product is found to be defective within the warranty period, BenQ's only obligation and your exclusive remedy shall be replacement of any defective parts (labor included). -
Page 66: Regulation Statements
If this equipment does cause harmful interference to radio or television reception, which can be determined by turning the equipment off and on, the user is encouraged to try to correct the interference by one or more of the following measures: — Reorient or relocate the receiving antenna. - Page 67 BenQ's monitors have colored "Power" indicators. While the indicator shows green, it means that the monitor is using the full power. While the indicator shows yellow or amber, it means that the monitor is in suspend or sleep mode and is using less than 2 watts of electricity.