Sennheiser EK 300 IEM G3 Instruction Manual
Hide thumbs
Also See for EK 300 IEM G3:
- Instructions for use manual (160 pages) ,
- Instruction manual (30 pages) ,
- Product sheet (2 pages)
Table of Contents
Advertisement
Quick Links
Advertisement
Table of Contents

Related Manuals for Sennheiser EK 300 IEM G3


Summary of Contents for Sennheiser EK 300 IEM G3
- Page 1 EK 300 IEM Instruction manual...
-
Page 2: Table Of Contents
The frequency bank system ................3 Delivery includes ....................4 Product overview ....................5 Overview of the EK 300 IEM G3 diversity receiver ........5 Overview of the displays ................6 Putting the diversity receiver into operation ..........7 Inserting the batteries/accupack ..............7 Charging the accupack .................. -
Page 3: Important Safety Instructions
The following are sure signs that you have been subjected to excessive noise for too long a time: – You can hear ringing or whistling sounds in your ears. – You have the impression (even for a short time only) that you can no longer hear high notes. Replacement parts... -
Page 4: The Ek 300 Iem G3 Diversity Receiver
The EK 300 IEM G3 diversity receiver The EK 300 IEM G3 diversity receiver This diversity receiver is part of the evolution wireless series generation 3 (ew G3). With this series, Sennheiser offers high-quality state-of-the-art RF transmission systems with a high level of operational reliability and ease of use. -
Page 5: Delivery Includes
For an overview of the frequency presets, please refer to the supplied frequency information sheet. Updated versions of the frequency informa- tion sheet can be downloaded from the EK 300 IEM G3 product page on our website at www.sennheiser.com. The frequency banks “U1” to “U6” allow you to freely select and store receiving frequencies. -
Page 6: Product Overview
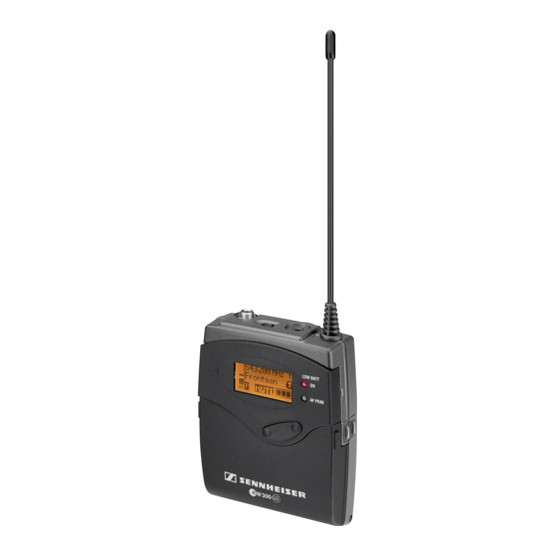
Product overview Product overview Overview of the EK 300 IEM G3 diversity receiver » On/off/volume control 3.5 mm stereo jack socket (PHONES), lockable (the ground contact is used by antenna II) Antenna I Operation and battery status indicator, red LED... -
Page 7: Overview Of The Displays
Product overview Overview of the displays After switch-on, the diversity receiver displays the “Frequency/Name” standard display. For further illustrations and examples of the different standard displays, refer to page 10. The display backlighting is automatically reduced after approx. 20 seconds. -
Page 8: Putting The Diversity Receiver Into Operation
Putting the diversity receiver into operation Inserting the batteries/accupack For powering the diversity receiver, you can either use two 1.5 V AA size batteries or the rechargeable Sennheiser BA 2015 accupack (see “Accesso- ries” on page 24). Open the battery compartment by pushing the two catches... -
Page 9: Attaching The Diversity Receiver To Clothing
To detach the belt clip: Lift one side of the belt clip as shown. Press down the belt clip at one fixing point and pull it out of the receiver housing. Repeat for the other side. -
Page 10: Using The Diversity Receiver
The transmission link is established and the receiver’s RF level display “RF” reacts. It is vital to observe the notes on frequency selection on page 20. If you cannot establish a transmission link between transmitter and receiver, read the chapter “Synchronizing an SR 300 IEM G3 transmitter with the diversity receiver”... -
Page 11: Deactivating The Lock Mode Temporarily
You can activate or deactivate the automatic lock mode via the “Auto Lock” menu item (see page 16). If the lock mode is activated, you have to temporarily deactivate it in order to be able to operate the receiver: Press the button. -
Page 12: Using The Operating Menu
Using the operating menu Using the operating menu A special feature of the Sennheiser ew G3 series is the consistent, intuitive menu structure of transmitters and receivers. As a result, adjustments to the settings can be made quickly – even in stressful situations, for example on stage or during a live show or presentation. -
Page 13: Working With The Operating Menu
Working with the operating menu If the lock mode is activated, you have to deactivate it In order to be able to work with the operating menu (see page 10). By way of example of the “Frequency... - Page 14 Canceling an entry Press the button to cancel the entry. The current standard display appears on the display panel. To subsequently return to the last edited menu item: Press the button repeatedly until the last edited menu item appears.
-
Page 15: Adjusting Settings Via The Operating Menu
Store the setting desired setting “Stored” Adjustment range: 5 to 25 dBμV, adjustable in 2-dB steps, can be switched The squelch eliminates annoying noise when the transmitter is switched off or when there is no longer sufficient transmitter power received by the receiver. - Page 16 “Stored” Via the “Name” menu item, you can enter a freely selectable name (e.g. the name of the performer) for the receiver. The name is displayed on the “Frequency/Name” standard display (see page 10). The name can consist of up to 8 characters such as: •...
- Page 17 “Stored” You can adjust the balance in 31 steps. In Focus mode (see next section) and when one of the standard displays is shown, you can also use the rocker button to adjust the balance. The mode of operation of the balance setting depends on the selected audio mode (see next section).
-
Page 18: The Extended Menu "Advanced Menu
Upon delivery, the channels of the frequency banks “U1” to “U6” are not assigned a receiving frequency. Via the “Tune” menu item, you can set a receiving frequency to be stored in the current channel you can select a different channel in one of the frequency banks “U1”... - Page 19 Set the limiter to a low level before putting the earphones on. continuously expose yourself to high volumes. You can adjust the limiter in 6-dB steps from –18 dB to –6 dB or switch it off (OFF).
- Page 20 “Stored” When resetting the settings made in the operating menu, only the selected settings for the pilot tone and for the frequency banks “U1” to “U6” remain unchanged. For an overview of the factory-preset default settings, refer to the enclosed frequency information sheet.
-
Page 21: Synchronizing An Sr 300 Iem G3 Transmitter With The Diversity Receiver
Synchronization allows you to quickly and easily transfer transmitter and receiver settings from one device to the other, especially if you want to set up a multi-channel system. There are two transfer directions: Easy Setup... -
Page 22: Synchronizing Transmitters With Diversity Receivers (Sync)
The diversity receiver transfers an unused channel from the selected frequency bank to the first transmitter and the next unused channel to the second transmitter and so on. As soon as a transfer is completed, the display panel of the transmitter displays the numbers of the trans- ferred frequency bank and channel. -
Page 23: Cleaning The Diversity Receiver
... for optimum reception • Transmission range depends to a large extent on location and can vary from about 10 m to about 150 m. There should be a “free line of sight” between transmitting and receiving antennas. • To avoid overloading the receiver, observe a minimum distance of 5 m between transmitting and receiving antennas. -
Page 24: If A Problem Occurs
(see page 15). this channel has not been switched off If a problem occurs that is not listed in the above table or if the problem cannot be solved with the proposed solutions, please contact your local Sennheiser partner for assistance. -
Page 25: Accessories
Accessories Accessories The following EK 300 IEM G3 accessories are available from your specialist dealer: Cat. No. Accessory 009950 BA 2015 accupack 009828 L 2015 charger 500432 IE 4 earphones Specifications RF characteristics Modulation wideband FM Frequency ranges 516–558, 566–608, 626–668, 734–776, 780–822, 823–865 MHz... -
Page 26: Manufacturer Declarations
Connector assignment 3.5 mm jack plug Manufacturer Declarations Warranty Sennheiser electronic GmbH & Co. KG gives a warranty of 24 months on this product. For the current warranty conditions, please visit our web site at www.sennheiser.com or contact your Sennheiser partner. - Page 27 This equipment has been tested and found to comply with the limits for a Class B digital device, pursuant to Part 15 of the FCC Rules. These limits are designed to provide reasonable protection against harmful interference in a residential installation.
-
Page 28: Index
Receiver Displays adjusting the volume adjusting the contrast of the dis- cleaning play panel (LCD Contrast) switching off AF (audio level) switching on LOW BATT Reset (resetting the settings made... - Page 29 Sennheiser electronic GmbH & Co. KG Printed in Germany Am Labor 1, 30900 Wedemark, Germany Publ. 01/09 www.sennheiser.com 529681/A01...