Table of Contents
Advertisement
1. INSTRUCTIONS FOR USE ................................................................................................... 28
2. SAFETY PRECAUTIONS ...................................................................................................... 30
3. ENVIRONMENTAL CARE ..................................................................................................... 32
3.1 Our environmental care ................................................................................................................................ 32
3.2 Your environmental care ............................................................................................................................... 32
4. GET TO KNOW YOUR APPLIANCE ..................................................................................... 33
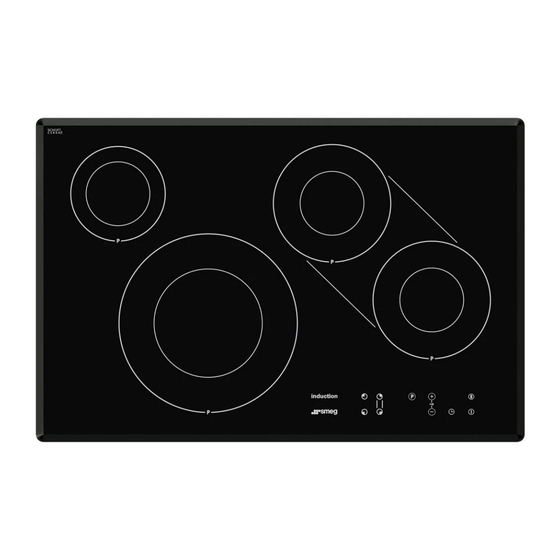
4.1 Layout of the cooking zones ......................................................................................................................... 33
4.2 Cookware recognition ................................................................................................................................... 33
4.3 Cookware suitable for use in induction cooking ............................................................................................ 34
4.4 Limiting the cooking duration ........................................................................................................................ 34
4.5 Protection from hob overheating ................................................................................................................... 34
4.6 Advice on energy-saving ............................................................................................................................... 35
4.7 Power levels .................................................................................................................................................. 35
5. USING THE COOKING HOB ................................................................................................. 36
5.1 General warnings and advice ....................................................................................................................... 36
5.2 Control panel ................................................................................................................................................. 36
5.3 Switching on and off the hob ......................................................................................................................... 37
5.4 Switching on the cooking zone ..................................................................................................................... 37
5.5 Switching off the cooking zone ..................................................................................................................... 37
5.6 Residual heat ................................................................................................................................................ 37
5.7 Power Function ............................................................................................................................................. 37
5.8 Pause function .............................................................................................................................................. 38
5.9 Timer ............................................................................................................................................................. 38
5.10 Cooking zone automatic switch-off timer .................................................................................................... 39
5.11 Heating accelerator function ....................................................................................................................... 40
5.12 Bridge function ............................................................................................................................................ 40
5.13 Control lock ................................................................................................................................................. 41
5.14 Power management .................................................................................................................................... 41
5.15 Cooking guidelines ...................................................................................................................................... 42
6. CLEANING AND MAINTENANCE ......................................................................................... 43
6.1 Cleaning the glass ceramic hob .................................................................................................................... 43
6.2 Weekly cleaning ............................................................................................................................................ 43
7. TROUBLESHOOTING .......................................................................................................... 44
8. INSTALLATION .................................................................................................................... 45
8.1 Safety instructions for installing in kitchen units ............................................................................................ 45
8.2 Section cut from the work surface ................................................................................................................. 45
8.3 Mounting ....................................................................................................................................................... 46
8.4 Ventilation ..................................................................................................................................................... 47
8.5 Hob seal ........................................................................................................................................................ 47
8.6 Positioning the fastening clips ....................................................................................................................... 48
8.7 Electrical connection .................................................................................................................................... 49
INSTRUCTIONS FOR THE USER: these contain user advice, the description of the controls and the
correct procedures for cleaning and maintenance of the appliance.
the appliance, set it functioning and carry out an inspection test.
@
Further information about the products can be found at www.smeg.com
Contents
27
Advertisement
Table of Contents

Related Manuals for Smeg SI3842B


Summary of Contents for Smeg SI3842B
-
Page 1: Table Of Contents
8.6 Positioning the fastening clips ........................48 8.7 Electrical connection ............................ 49 INSTRUCTIONS FOR THE USER: these contain user advice, the description of the controls and the correct procedures for cleaning and maintenance of the appliance. INSTRUCTIONS FOR THE INSTALLER: these are intended for the qualified technician who must install the appliance, set it functioning and carry out an inspection test. -
Page 2: Instructions For Use
General instructions 1. INSTRUCTIONS FOR USE THIS MANUAL IS AN INTEGRAL PART OF THE APPLIANCE. IT MUST BE KEPT IN ITS ENTIRETY AND IN AN ACCESSIBLE PLACE FOR THE WHOLE WORKING LIFE OF THE HOB. WE ADVISE YOU TO READ THIS MANUAL AND ALL THE INFORMATION IT CONTAINS CAREFULLY BEFORE USING THE HOB. - Page 3 DO NOT USE THE HOB IF PYROLYSIS IS TAKING PLACE INSIDE THE OVEN. The manufacturer declines all responsibility for damage to persons or things caused by non-observance of the above prescriptions or by tampering with any part of the appliance or by the use of non-original spare parts.
-
Page 4: Safety Precautions
THE INSTRUCTIONS BELOW. SHOULD THE APPLIANCE NOT FUNCTION, DISCONNECT IT FROM THE POWER SUPPLY AND CALL THE NEAREST TECHNICAL ASSISTANCE CENTRE. THE PLUG TO BE CONNECTED TO THE POWER SUPPLY CABLE AND ITS SOCKET MUST BE OF THE SAME TYPE AND CONFORM TO THE REGULATIONS IN FORCE. - Page 5 OCCUR INSIDE THE CONTAINERS DURING COOKING, CREATING A DANGER OF EXPLOSION. The manufacturer declines all responsibility for damage to persons or things caused by non-observance of the above prescriptions or by tampering with any part of the appliance or by the use of non-original spare parts.
-
Page 6: Environmental Care
Therefore, the user must consign the product that has reached the end of its working life to the appropriate selective collection centres for electrical and electronic refuse, or deliver it back to the retailer when purchasing an equivalent product, on a one for one basis. -
Page 7: Get To Know Your Appliance
4.2 Cookware recognition If there is no saucepan on a cooking zone or if the saucepan is too small, no energy will be transmitted. If there is a suitable saucepan on the cooking zone, the recognition system notices it and turns on the hob to the set power level. -
Page 8: Cookware Suitable For Use In Induction Cooking
1 ½ 4.5 Protection from hob overheating If the hob is used on full power for a long period, the electronics will have trouble cooling down if the room temperature is high. To avoid excessively high temperatures forming in the electronics, the power to the cooking zone is reduced automatically. -
Page 9: Advice On Energy-Saving
• The diameter of the base of the saucepan must correspond to the diameter of the cooking zone. • When buying a saucepan, check whether the diameter indicated is that of the base or the top of the container, as the top is almost always larger than the base. -
Page 10: Using The Cooking Hob
Power function key: activates the power function for the previously selected zone. At the sides of the display are located warning LEDs, their flashing can indicate a power value change or a timer change: Rear left cooking zone... -
Page 11: Switching On And Off The Hob
5 to speed up the selection. 5.5 Switching off the cooking zone After having selected the cooking zone you wish to switch off using the zone selection keys, return to 0 (zero) the power level value using key to switch it off. -
Page 12: Pause Function
The set timer stops to then resume the countdown as soon as the Pause function is deactivated. 5.9 Timer This function is used to set a timer, which will sound a buzzer at the end of the pre-set time (from 1 to 99 minutes). -
Page 13: Cooking Zone Automatic Switch-Off Timer
5.10.3End of set time At the end of the previously set time, the hob will deactivate the cooking zone and warn the user with a series of buzzers. Press any key to stop the buzzer. -
Page 14: Heating Accelerator Function
Using the bridge function you can use cookware such as fish kettles or rectangular cookware on the cooking zones connected by the two lines. The zones will be activated at the same time and will work as if a single zone is being controlled. 5.12.1Activating the bridge function After having switched on the hob, see “5.3 Switching on and off the hob”, press keys... -
Page 15: Control Lock
This function cannot be enabled if the cooking zones are active. 5.13.1Activating the control lock After having switched on the hob (see “5.3 Switching on and off the hob”), press keys the same time. After the buzzer has sounded press key The controls are now locked and will appear on the display. -
Page 16: Cooking Guidelines
Instructions for the user 5.15 Cooking guidelines The table below shows the power values which can be set, together with the corresponding type of food. Settings may vary depending on the amount of food and consumer taste. SETTING TYPE OF FOOD... -
Page 17: Cleaning And Maintenance
All marks stay on the membrane and can therefore be easily removed. After cleaning, dry the surface with a clean cloth. Make sure that there is no detergent left on the cooking surface as it will undergo an aggressive reaction when heated up and could modify the structure of the... -
Page 18: Troubleshooting
An E1 - E3 - E4 - E5 - E6 - E7 error There is a technical fault. Contact Technical Support. code is displayed The fuses or the magneto thermal... -
Page 19: Installation
The minimum distance between a ventilation hood and the cooking surface must be at least the distance indicated in the ventilation hood installation instructions. The minimum distances must also be respected for the edges of the hob on the back as indicated in the mounting illustrations. -
Page 20: Mounting
4 mm under the work surface across the full width of the appliance. In any event, if installed above an oven, a dishwasher or a fridge, a space of at least 5 cm must be left between the hob and the top of the appliance installed below. -
Page 21: Ventilation
Do not fix the hob using silicone as this would make it impossible to remove the hob, if necessary, without damaging it. -
Page 22: Positioning The Fastening Clips
The clips ensure that the hob will be fixed and centred as accurately as possible. To install the clips into the hob, all you have to do is insert them horizontally into the appropriate space by applying light pressure. -
Page 23: Electrical Connection
Instructions for the installer Electrical connection Make sure that the voltage and capacity of the power line conform to the data shown on the plate located under the casing. Do not remove this plate for any reason. THE HOB MUST BE CONNECTED TO THE POWER SUPPLY BY A QUALIFIED TECHNICIAN. -
Page 24: Instructions For The Installer
3 x 4 mm² H05V2V2-F Carefully read the wiring diagram plate underneath the appliance or around the power cable. Use H05V2V2-F cables withstanding a temperature of at least 90°C. The aforementioned power cables are sized taking into account the coincidence factor (in compliance...