Advertisement
Quick Links
1.
INSTRUCTIONS FOR SAFE AND PROPER USE ________________ 4
2.
INSTALLATION OF THE APPLIANCE _________________________ 6
3.
GAS CONNECTION _______________________________________ 7
4.
ADAPTATION TO DIFFERENT TYPES OF GAS ________________ 10
5.
FINAL OPERATIONS _____________________________________ 12
6.
DESCRIPTION OF CONTROLS _____________________________ 14
7.
USE OF THE HOB________________________________________ 21
8.
USE OF THE OVEN ______________________________________ 23
9.
AVAILABLE ACCESSORIES________________________________ 25
10.
COOKING HINTS ________________________________________ 26
11.
CLEANING AND MAINTENANCE____________________________ 32
12.
EXTRAORDINARY MAINTENANCE__________________________ 34
13.
PROBLEMS AND CAUSES_________________________________ 36
Thank you for choosing our product.
We advise you to read this manual carefully. It contains all necessary
instructions for maintaining unaltered the appearance and functional
qualities of the cooker.
INSTRUCTIONS FOR THE INSTALLER: these are for the ~ìíÜçêáëÉÇ=
éÉêëçåë=who must carry out a suitable check of the gas system, install
the appliance, set it functioning and carry out an inspection test.
INSTRUCTIONS FOR THE USER: these contain user advice,
description of the commands and the correct procedures for cleaning
and maintenance of the appliance.
Contents
3
Advertisement

Related Manuals for Smeg SA9010


Summary of Contents for Smeg SA9010
- Page 1 EXTRAORDINARY MAINTENANCE__________________________ 34 PROBLEMS AND CAUSES_________________________________ 36 Thank you for choosing our product. We advise you to read this manual carefully. It contains all necessary instructions for maintaining unaltered the appearance and functional qualities of the cooker. INSTRUCTIONS FOR THE INSTALLER: these are for the ~ìíÜçêáëÉÇ= éÉêëçåë=who must carry out a suitable check of the gas system, install...
- Page 2 NK fkpqor`qflkp=clo=p^cb=^ka=molmbo=rpb= THIS MANUAL IS AN INTEGRAL PART OF THE APPLIANCE AND THEREFORE MUST BE KEPT IN ITS ENTIRETY AND IN AN ACCESSIBLE PLACE FOR THE WHOLE WORKING LIFE OF THE COOKER. WE ADVISE READING THIS MANUAL AND ALL THE INSTRUCTIONS THERE IN BEFORE USING THE COOKER.
- Page 3 DO NOT USE CONTAINERS OR BROILERS THAT EXTEND BEYOND THE OUTER PERIMETER OF THE HOB. IF THE APPLIANCE IS TO BE POSITIONED ON A PLATFORM IT MUST BE INSTALLED IN SUCH A WAY AS TO PREVENT IT FROM SLIPPING OFF THE FORMER.
-
Page 4: Instructions For The Installer
This rating plate must never be removed. On the power line, install a two-pole cut-off device with contact cut-off distance greater than or equal to 3 mm, located in an easily accessible position near the unit. The wire section on the cable must not be less than 2.5 mm... - Page 5 2 large size burners are used. Ensure appliance is secured to wall when installation is completed. N.G. A regulator must be fitted to the ½ BSP thread at the rear of the appliance. An approved manual shut-off valve must be installed. The N.G.
- Page 6 Air must flow directly into the room through openings in its outside walls.
- Page 7 However, in no case shall the clearance between the highest part of the hob of the cooking appliance and a range hood be less than 600 mm or, for an overhead exhaust fan, 750 mm. Any other downward facing combustible surface less than 600 mm...
- Page 8 1.0kPa (SA 9066 – SA 9065) or LPG (liquid petroleum gas) at a pressure of 2.75 kPa (SA 9066 LPG – SA 9065 LPG). If used with other types of gas, you have to replace the nozzles, then adjust the minimum flame on the gas taps.
- Page 9 Instructions for the installer _ìêåÉê=~åÇ=åçòòäÉ=ÅÜ~ê~ÅíÉêáëíáÅë=í~ÄäÉ= Burner LPG (LIQUID PETROLEUM GAS) – 2.75 KPa Nominal gas Turn-down gas Injector consumption consumption (mm) (MJ/h) (MJ/h) Auxiliary 0,54 Semi rapid 0,68 Rapid 0,88 12.8 1,00 Fish pan 0,72 Burner NG – 1.0 KPa...
- Page 10 Instructions for the installer RK cfk^i=lmbo^qflkp= After replacing the nozzles, reposition the flame-spreader crowns, the burner caps and the grids. ^ÇàìëíãÉåí=çÑ=íÜÉ=ÜçÄ=ÄìêåÉê=ãáåáãìã=äÉîÉä=Ñçê=å~íìê~ä=Ö~ë= Light the burner and take it to the minimum Remove the gas tap knob and turn the adjustment screw inside of the tap shaft (depending on the model) until there is a regular minimum flame.
- Page 11 Loosen screws A located beneath the skirt. • Loosen nuts B. • Position the skirt above the top, taking care to align pins C with holes D. • Secure the skirt to the top by tightening screws E. t~ää=ÑáñáåÖ= •...
-
Page 12: Instructions For The User
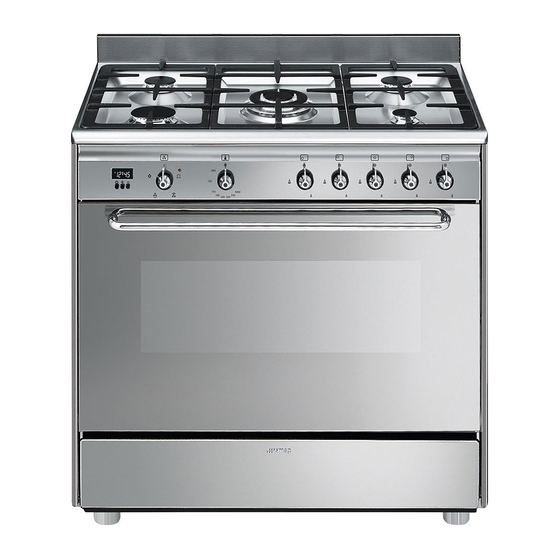
SK abp`ofmqflk=lc=`lkqolip= cêçåí=Åçåíêçä=é~åÉä= All the cooker controls and commands are on the front panel. If the cooker is equipped with an electronic programmer, before using the oven make sure that the symbol ; appears on the display. See paragraph “6.2.1 Clock adjustment”. - Page 13 Instructions for the user ELECTRIC OVEN CONTROL KNOB Each of the functions listed below can be used (except the oven light and the small grill) only together with the correct temperature thermostat regulation as described on page 14 of this manual.
-
Page 14: List Of Functions
END-OF-COOKING KEY DECREASE TIME KEY INCREASE TIME KEY 6.2.1 Clock adjustment When using the oven for the first time, or after a power failure, the display flashes regularly and indicates . Press the keys at the same time the keys : each single press changes the time by 1 minute either up or down. - Page 15 ; to see the end of cooking time press the key Set-up with incoherent values is logically prevented (e.g. the contrast between a cooking time and a longer period will not be accepted by the programmer). 6.2.4 End of cooking When cooking is over, the oven will automatically switch off and, at the same time, an intermittent alarm will sound.
- Page 16 After set-up, to see the remaining time, press the key Use as a minute counter does not interrupt functioning of the oven at the end of the programmed time. 6.2.8 Cancellation of set data...
- Page 17 DECREASE TIME KEY INCREASE TIME KEY 6.3.1 Setting the time When the oven is used for the first time, or after a power blackout, the display flashes on and off at regular intervals showing . Press the key and use the keys to set the current time.
- Page 18 ^å~äçÖìÉ=ÅäçÅâ=Eçåäó=çå=ÉèìáééÉÇ=ãçÇÉäëF= The mechanical timer is set by turning the knob clockwise. The timer can be set from 0 to 55 minutes. At the end of the cooking time, an alarm signal will be heard: to stop the alarm turn the...
- Page 19 This operation is not necessary for burners without thermocouples. For models with thermocouples, if the burner should accidentally go out, a safety device will be activated which stops the gas flow even if the tap is open.
- Page 20 To avoid burns or damage to the hob, all recipients or griddle plates must be placed within the perimeter of the hob. All containers have to have a flat and smooth bottom. When using fats or oils, be extremely careful that they don’t overheat and catch fire.
- Page 21 60 minutes. All cooking with the grill and grill + spit must be done with the door closed to prevent the knobs and the front panel of the equipment to overheat.
- Page 22 Food should be flavoured and basted with oil or melted butter before cooking. An oven dish should be used to contain the sauces. The food should be placed on the oven shelf which is positioned on one of the guides supplied...
- Page 23 Spit support (certain models only): to be inserted in the holes of the oven plate, on the second support from the bottom, after mounting the roasting spit. ^ÅÅÉëëçêáÉë=çå=oÉèìÉëí= You can order the lower base and self-cleaning oven panels through Authorised Assistance Centres.
-
Page 24: Function Switch
Place the food in the oven only after the thermostat indicator light has turned off. very fatty meats may be put in when the oven is still cold. Put frozen meat in immediately, without waiting for it to thaw. The only precaution you need to take is to set the temperature about 20°C lower and cooking time... - Page 25 THERMOSTAT SELECTOR SWITCH FROM 50° TO 260°C Permits rapid browning of foods. You are advised to place the pan in the highest guide. For short-term cooking of small quantities, place the grid in the third guide from the bottom. For long-term cooking and grills, put the grid in the lowest guide in accordance with the size of the pieces.
- Page 26 Ideal for pastries and cakes with wet covering and little sugar and damp desserts in moulds. Excellent results can also be achieved in completing cooking at the bottom and with dishes requiring heat in the lower area in particular. The plate is best inserted at bottom level.
- Page 27 50° TO 260°C Place the rotisserie frame “B” on the second set of runners up from the bottom and insert the rod “A” in the hole in the back of the oven, until the spit “C” starts to turn. Check that the right-hand end of the rod “C” is positioned as shown in the diagram.
-
Page 28: Traditional Cooking
Instructions for the user NMKU oÉÅçããÉåÇÉÇ=ÅççâáåÖ=í~ÄäÉ= Cooking times, especially meat, vary according to the thickness and quality of the food and to consumer taste. TRADITIONAL COOKING LEVEL TEMPERATURE TIME IN FROM BELOW (°C) MINUTES (*) cfopq=`lropbp= LASAGNE 2 - 3... -
Page 29: Hot-Air Cooking
Instructions for the user HOT-AIR COOKING LEVEL TEMPERATURE TIME FROM BELOW (°C) IN MINUTES cfopq=`lropbp= 190 - 210 20 - 25 LASAGNE 190 - 210 25 - 30 OVEN-BAKED PASTA 190 - 220 20 - 25 CREOLE RICE jb^q= 150 - 170... - Page 30 To clean and preserve the stainless steel surfaces, always use only specific products that do not contain abrasives or chlorine-based acids. How to use: pour the product on a damp cloth and wipe the surface, rinse thoroughly and dry with a soft cloth or deerskin.
- Page 31 Clean the oven grill with hot water and non-abrasive detergent. Rinse and dry. NNKQ aççê=Öä~ëë= The door glass should always be kept clean. Use absorbent kitchen paper to clean. In case of tough spots, clean with a damp sponge using regular detergent.
- Page 32 _ÉÑçêÉ= éÉêÑçêãáåÖ= ~åó= çéÉê~íáçåë= êÉèìáêáåÖ= ~ÅÅÉëë= íç= éçïÉêÉÇ= é~êíëI=ëïáíÅÜ=çÑÑ=íÜÉ=éçïÉê=ëìééäó=íç=íÜÉ=ã~ÅÜáåÉK NOKN iìÄêáÅ~íáçå=çÑ=Ö~ë=í~éë= With time it may happen that the gas taps get blocked and hard to turn. Clean them inside and re-grease them. This operation must be done by an authorised person.
- Page 33 Valves: if the gas valves get stuck or hard to turn, they need to be cleaned and re-greased; this operation must be carried out by an authorised person.
- Page 34 Instructions for the user NPK mol_ibjp=^ka=`^rpbp= Each of the following cases is caused by an abnormal operation of the appliance and should be dealt with by a authorised person: please contact your local dealer or Service Center in case you detect any of these malfunctioning.
- Page 36 914774596/ A...