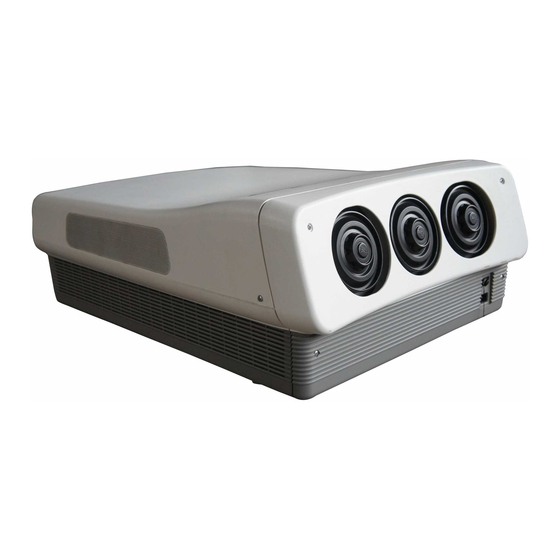
Zenith Presentation PRO900X Operating Manual
Presentation series hd projection display
Hide thumbs
Also See for Presentation PRO900X:
- Installation and setup manual (28 pages) ,
- Technical training manual (92 pages)

Related Manuals for Zenith Presentation PRO900X


Summary of Contents for Zenith Presentation PRO900X
- Page 1 Presentation Series HD Projection Display Operating Guide and Warranty for User Model PRO900X ® Presentation is a registered trademark of Zenith Electronics Corporation...
-
Page 2: Safety Warnings
Consult the dealer or an experienced radio/TV technician for help. • CAUTION: Do not attempt to modify this product in any way without written authorization from Zenith Electronics Corporation. Unauthorized modification could void the user’s authority to operate this product. P A G E 2... -
Page 3: Important Safety Instructions
IMPORTANT SAFETY INSTRUCTIONS Important safeguards for you and your new product Your product has been manufactured and tested with your safety in mind. However, improper use can result in potential electrical shock or fire hazards. To avoid defeating the safeguards that have been built into your new product, please read and observe the following safety points when installing and using your new product, and save them for future reference. - Page 4 IMPORTANT SAFETY INSTRUCTIONS (Continued from previous page) 14. Outdoor Antenna Grounding If an outside antenna or cable system is connected to the product, be sure the antenna or cable system is grounded so as to provide some protection against voltage surges and built-up static charges.
-
Page 5: Table Of Contents
......33 - 34 - 35 YOUR ZENITH WARRANTY ....Back Cover •... -
Page 6: Introduction
INSTALLER’S EXPERIENCE LEVEL Your new HD Projection Display is a sophisticat- ed entertainment appliance. In addition to mak- ing the necessary connections, installation will most likely require a series of adjustments to ensure the projected image is not distorted. If these adjustments are not accurate, the operation of the display could be adversely affected. -
Page 7: Standard Connections
CONNECTIONS CENTER You have a choice of these video source connections: Video In; S-Video In; and RGB with H/V Sync and V Sync. Use the COMM jack to connect a computer serial port. CONNECTIONS CENTER INPUT AND CONTROLS DESCRIPTION/FUNCTION 1. Remote Control Window — Receives the infrared signal sent by the remote. -
Page 8: Connecting Computer Video Sources
CONNECTING COMPUTER VIDEO SOURCES Connect a video source such as a computer: PC, Laptop, or Notebook type. To hook up a laptop or computer, use a cable with a 15-pin D type connector on one end and BNC connectors on the other end. CONNECTING VIDEO AND S-VIDEO SOURCES Connect video sources with a tuner, (VCR) or other video sources such as a DVD player or satellite receiver. -
Page 9: Users Quick Reference Guide
USERS QUICK REFERENCE GUIDE SETUP CHECKLIST Turn on all system components including the video source you intend to watch; video source is the video equipment connected to the HD Display connection center. Turn on the HD Display. Select a video source from one of the video inputs provided on the connection center: Video In, S-Video In, or RGB input jacks. -
Page 10: Using A Computer As A Video Source
USERS QUICK REFERENCE GUIDE USING A COMPUTER AS A VIDEO SOURCE Use the Trackball Remote to Access Menus and Make Changes Once the HD Display has been installed and set up, follow these simplified instructions for operation. Be sure to install batteries in the remote. -
Page 11: Communications Port Inter-Connection Wiring Reference
USERS QUICK REFERENCE GUIDE COMMUNICATIONS PORT INTER-CONNECTION WIRING REFERENCE P A G E 1 1 206-3275-A... -
Page 12: Using A Vcr Or Other Video Source
USERS QUICK REFERENCE GUIDE USING A VCR, OR OTHER VIDEO SOURCE Use the Trackball Remote to Access Menus and Make Changes Once the HD Display has been installed and set up, follow these simplified instructions for operation. Be sure to install batteries in the remote. -
Page 13: Using An S-Video Vcr Or Other S-Video Source
USERS QUICK REFERENCE GUIDE USING AN S-VIDEO VCR OR OTHER S-VIDEO SOURCE Use the Trackball Remote to Access Menus and Make Changes Once the HD Display has been installed and set up, follow these simplified instructions for operation. Be sure to install batteries in the remote. -
Page 14: Trk4000 Trackball Remote Control
• Remove the batteries if the remote will not be used for a month or more. Battery leakage can permanently damage the remote, for which Zenith is not responsible. PROGRAMMING YOUR REMOTE TO OPERATE OTHER IR (Infra-red) DEVICES 1. Select the device you want to operate, then refer to pages 16/17 to find the programming brand code appropriate for the type and brand of equipment. -
Page 15: Basic Operations
Remote Control Model Number(s) MBR TRAKBALL: TRK4000PT 124-236, or 124-236-03, or 124-219-05 POWER Turn your PRO900X or any other programmed equipment on or off, depending on mode. TRAKBALL Press and move the on-screen pointer. *FLSHBK Return immediately to the last channel viewed. -
Page 16: Other Brand Equipment Programming Codes
XR-1000 ..121 Yorx ..119 Zenith..101 142 149 Zenith StarSight . . 175 Symphonic ..154 XR-1OOO . - Page 17 Toshiba ..447 Yamaha ..448 Zenith..460 461 498 501 502 Toshiba ..521 Zenith.
-
Page 18: Remote Key Functions In Other Operating Modes
TRK4000PT TRACKBALL REMOTE CONTROL Remote key functions in other operating modes TV Mode KEY NAME Zenith Code 101 MODE LEFT/RIGHT Changes mode POWER TV Power On/Off SURF Surf On/Off FLSHBK TV Flashback, AM/PM MUTE TV Mute CHANNEL UP TV Channel Up... -
Page 19: Amplifier Volume Override
TRK4000PT TRACKBALL REMOTE CONTROL Control the volume on your sound amplifier while in other modes AMPLIFIER VOLUME OVERRIDE 1. Find the code that operates your amplifier. Test it to make sure it’s the correct one by following the procedure in “Programming Your Remote” on page 14. 2. -
Page 20: Auto Find: Automatic Brand Code Search
TRK4000PT TRACKBALL REMOTE CONTROL AutoFind: Automatically searches all possible brand programming codes 1. Turn on the device you want to operate. 2. Press and hold the MUTE and FLSHBK keys until the indicator light turns on. 3. Press MODE Left/Right until the indicator lights underneath the device you’re trying to program;... -
Page 21: On-Screen Menus And Displays
ON-SCREEN MENUS AND DISPLAYS AVAILABLE MENUS These are the Main Menus available: Source Menu, Setup Menu, and Video Menu. There is also a Trackball Menu, and a Source/Time Display, Source Menu - selects the picture source for the HD Display: Video, S-Video, or RGB. Setup Menu - sets up the HD Display features. -
Page 22: Trackball Menu
ON-SCREEN MENUS AND DISPLAYS Trackball Menu To access the Trackball menu, press TV. Press down on trackball to place cursor on HD Display screen. Rotate trackball to move cursor to left/center of HD Display screen to show the Trackball menu. Rotate trackball to move cursor to menu option;... -
Page 23: Source Menu
SOURCE MENU AVAILABLE MENU OPTIONS Use to select video source. There are three menu options avail- able: Video, S-Video, and RGB. Video Displays image from composite video equipment connected to the Video input jack. S-Video Displays image from S-Video equipment connected to the S-Video input jack. -
Page 24: Setup Menu
Use the Setup Menu to fine-tune the HD Display to your personal preferences and video sources’ particular requirements Setup Menu with Timer Setup Selected SETUP MENU OPTIONS Note: See the following pages for more detailed descrip- tions of the options listed below. Clock Set Sets the HD Display internal clock. -
Page 25: Clock Set
SETUP MENU Clock Set To set the clock, move the cursor to Clock Set and press down on the trackball to highlight the option. With the cursor placed over the right arrow of Clock Set, press and hold the trackball down to move time ahead. With the cursor placed over the left arrow, press and hold the trackball down to move time backward. -
Page 26: Language
Language Chooses English, Spanish, French, or German for the HD Display on-screen menus. Once you select a new language, Video Mode Selects broadcast signal standard. You can change the sig- nal standard manually or have it selected automatically. The following are signal standards for the U.S.A. and other countries. -
Page 27: Format Pref (Preference)
Format Pref (Preference) Switches between factory setups and customer-defined setups for those formats pre-aligned at the factory. Available Format Preferences Preset 10 Formats Preset factory-aligned settings formats. (Not adjustable.) Custom 10 Formats Customer-aligned settings of standard Preset factory-aligned formats. Customer 5 Formats Customer defined formats and customer aligned setup settings. -
Page 28: Static Setup (Red, Blue, Green Convergence)
SETUP MENU Blank Setup (Continued) Separate menus are available for adjusting the Top/Left and Bottom/Right of the projected image as well as the Phase. To adjust any option, simply place cursor over option and press down on the trackball, to highlight the option. (Blank Setup is normally adjusted by the installation technician;... -
Page 29: Video Menu
ADJUSTMENTS Fine-tunes settings for each video source. You can make changes to each option by moving the cursor to the desired option (Contrast, Brightness, Color, etc.) and press- ing down on the trackball. Once the option is highlighted, you can make changes directly on the Option Status Display bar at the bottom of the menu or by moving the cursor to the left or right arrow of the highlighted option and pressing or pressing and holding down the trackball to... -
Page 30: Rgb Source Special Adjustments
RGB Source Special Adjustments (Normally adjusted by the installation technician; usually no additional changes are needed.) For the RGB Source only, the Clamp Pulse is set at Auto Select by the factory. Auto Select determines the pulse of the RGB input video source and automatically chooses the appropriate setting. -
Page 31: Maintenance And Troubleshooting
MAINTENANCE AND TROUBLESHOOTING CARING FOR YOUR HD PROJECTION DISPLAY Your HD Projection Display will look better, have a longer life and perform better if you care for it properly. First check to see that the HD Display is off. For added safety, disconnect AC power to the HD Display. -
Page 32: Before Calling For Service
MAINTENANCE AND TROUBLESHOOTING BEFORE CALLING FOR SERVICE Use the following chart to identify operating problems. You may save a service call charge if the problem can be identified as a simple switch set improperly. Note: Problems not listed here may be installation related, see Installation Guide. Refer problem to Installer/Maintenance personnel PROBLEM IDENTIFICATION CHART Problem Possible Cause... - Page 33 NOTES P A G E 3 3 3275-A...
- Page 34 NOTES P A G E 3 4 3275-A...
- Page 35 NOTES P A G E 3 5 3275-A...
- Page 36 (see above) will be provided without charge. Other service is at the owner’s expense. If you have any problem in obtaining satisfactory warranty service, call or write the Zenith Response Center. You must provide the model number, serial number and date of purchase or date of original installa- tion.