Table of Contents
Advertisement
Quick Links
Advertisement
Table of Contents

Related Manuals for Zenith PRO895X


Summary of Contents for Zenith PRO895X
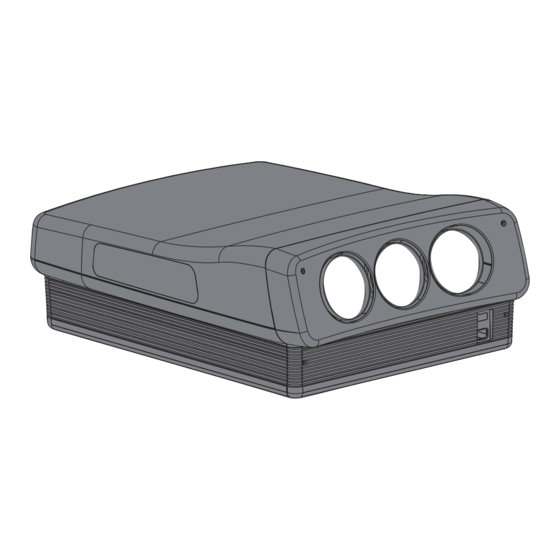
- Page 1 HD Projection Display Operating Guide and Warranty for User Model PRO895X ®...
-
Page 2: Safety Warnings
Consult the dealer or an experienced radio/TV technician for help. • CAUTION: Do not attempt to modify this product in any way without written authorization from Zenith Electronics Corporation. Unauthorized modification could void the user’s authority to operate this product. P A G E 2 ©... -
Page 3: Important Safety Instructions
Quick stops, excessive force, and uneven surfaces may convenience receptacles, and the point where they exit cause the product and cart combination to overturn. from the product. (Continued on next page) P A G E 3 PORTABLE CART WARNING 206-PRO895X... - Page 4 IMPORTANT SAFETY INSTRUCTIONS openings as they may touch dangerous voltage points or (Continued from previous page) short-out parts that could result in a fire or electric shock. 14. Outdoor Antenna Grounding Never spill liquid of any kind on the product. If an outside antenna or cable system is connected to the 19.
-
Page 5: Table Of Contents
Basic Menu Operation (Selecting and Adjusting Menu YOUR ZENITH WARRANTY ....Back Cover Features) ....... . 21 Note: All design and specifications are subject to change without prior notice. -
Page 6: Introduction
Do not defeat country. Acceptable agencies include the following: the safety purpose of the grounding-type plug. BSI (United Kingdom) Nemko (Norway) Power Source -- Your PRO895X is designed to operate on standard current, 120 volt 60 Hertz CEBEC (Belgium) OVE (Austria) AC or 230 volt 50/60 Hertz AC. -
Page 7: Standard Connections
4. MENU — Accesses on-screen menus. Note: Failure to set switch to proper position could 5. POWER — Turns PRO895X On and Off. result in a video overload or a washed out video. 6. Power On Indicator — Lights when power is On. -
Page 8: Connecting Computer Video Sources
To hook up a laptop or computer, use a cable with a Note: Any special adapters, cables, or connectors shown 15-pin D type connector on one end and BNC connectors are not provided with the PRO895X. See your computer on the other end. dealer for your special requirements. -
Page 9: User's Quick Reference Guide
Video In, S-Video In, or RGB input jacks. BASIC OPERATION: PROJECTING A PICTURE (Remote operates the PRO895X in TV mode) Once the PRO895X has been installed and set up, follow these simplified instructions for operation. Be sure to install batteries in the remote. -
Page 10: Using A Computer As A Video Source
Use the Universal Remote to Access On-screen Menus and Make Changes Once the PRO895X has been installed and set up, follow these simplified instructions for operation. Be sure to install batteries in the remote. See Remote control section for further instructions regarding remote operation. -
Page 11: Using A Vcr Or Other Video Source
Use the Universal Remote to Access On-screen Menus and Make Changes Once the PRO895X has been installed and set up, follow these simplified instructions for operation. Be sure to install batteries in the remote. See Remote control section for further instructions regarding remote operation. -
Page 12: Using An S-Video Vcr Or Other S-Video Source
Use the Universal Remote to Access On-screen Menus and Make Changes Once the PRO895X has been installed and set up, follow these simplified instructions for operation. Be sure to install batteries in the remote. See Remote control section for further instructions regarding remote operation. -
Page 13: Universal Multi-Brand Remote Control
Indicator Light • Remove the batteries if the remote will not be used for a month or more. Battery leakage can permanently damage the remote, for which Zenith is not responsible. PROGRAMMING YOUR REMOTE TO OPERATE OTHER IR POWER... -
Page 14: Amplifier Volume Override
UNIVERSAL MULTI-BRAND REMOTE CONTROL CONTROL THE VOLUME ON YOUR HOME AUDIO SYSTEM WITHOUT CHANGING MODES Indicator Light Amplifier Volume Override POWER 1. Find the code that operates your amplifier. Test it to CABLE make sure it’s the correct one by following the procedure in SURF FLASHBK MUTE... -
Page 15: Aux 1- 2 -3
Repeat the above steps for AUX+2, and AUX+3. Notes TV/VCR RECORD PAUSE TIMER • Programming your Zenith remote may allow you to use one SOURCE remote to work up to 7 different products or devices. PLAY REWIND FFWD • AUX Auxiliary equipment can be any equipment which does not STOP have a dedicated key on your remote like Cable or VCR. -
Page 16: Auto Find: Automatic Brand Code Search
UNIVERSAL MULTI-BRAND REMOTE CONTROL USE AUTOFIND TO AUTOMATICALLY SEARCH AND TRY ALL POSSIBLE BRAND CODES Indicator Light AutoFind 1. Turn on the device you want the remote to control. POWER 2. Press and hold PRG until the indicator light turns on, then CABLE release PRG. -
Page 17: Other Brand Equipment Programming Codes
Funai TV/VCR..154 Zenith TV/VCR . . . 150 152 153 154 172 Zenith ..101 121 149 Goldstar TV/VCR . . 153 172 Adventura TV/VCR . 154 Symphonic TV/VCR 154 Daewoo TV/VCR . - Page 18 Sears ..936 Nakamichi ..925 926 Zenith ..460 461 498 GE ... 932 Sharp .
-
Page 19: Remote Key Functions In Other Operating Modes
Key functions in TV, VCR, Cable, and AUX operating modes TV Mode VCR Mode Cable Mode AUX Mode KEY NAME Zenith Code 101 Zenith Code 201 Zenith Code 353 Zenith Code 960 Program Mode Codes Program Mode Codes Program Mode Codes Program Mode Codes... -
Page 20: Remote Key Functions For Analog Tv
REMOTE CONTROL KEY FUNCTIONS (FOR TYPICAL ANALOG TV) Note: Pressing TV puts remote into TV operating mode A list of the keys on your remote and what they do in TV mode, see previous page for remote key functions in the other operating modes POWER PRG (PROGRAM) Turns TV On or Off... -
Page 21: On-Screen Menus And Displays
Source/Time Display. Source/Time Display - checks Current Source, Signal Source Menu - selects the picture source for the PRO895X: Standard, and Time if the clock is set. Video, S-Video, or RGB. BASIC MENU OPERATION (Selecting and Adjusting Menu Features) Press TV on remote control. -
Page 22: Source Menu
Sync and V Sync input jacks. Current Source: Video Notes: • The PRO895X does not provide any sound (Audio) for equipment Press to Select Input connected to it. Connect equipment like a VCR or DVD Player to a Press ENTER to change. -
Page 23: Setup Menu
SETUP MENU Use the Setup Menu to fine-tune the PRO895X to your personal preferences and video sources’ particular requirements Setup Menu with Timer Setup Selected Submenu for Timer Setup Option SETUP MENU OPTIONS Aspect Ratio (Picture Proportion) Note: See the following pages for more detailed descrip- Changes shape into which image is projected. -
Page 24: Clock Set
Example Typical Timer Daily Commercial Usage Setup Program the PRO895X to turn itself On at the beginning of the work day, 9:00 am. When the staff goes to lunch at 12:00 pm, set it to turn Off until they return. -
Page 25: Language
Europe Automatic Modes Note: If you select one of the Automatic modes for your country, Americas’ standards — Auto: M-PAL/N-PAL/NTSC the PRO895X selects the broadcast standard from among those Europe’s standards — Auto: BG-PAL/NTSC shown. Aspect Ratio (Picture Proportion) Use to change the shape into which the source’s image is projected. -
Page 26: Format Pref (Preference)
Switches between factory setups and customer-defined setups for those formats pre-aligned at the factory. Available Format Preferences PRO895X will ask if you would like to save those settings as a new format. You can use one of the 5 Customer for-... -
Page 27: Blank Setup
SETUP MENU Blank Setup (Continued) Separate menus are available for adjusting the Top/Left and Bottom/Right of the projected image as well as the Phase. To adjust any option, see page 21 for basic menu opera- tion. (Blank Setup is normally adjusted by the installation technician;... -
Page 28: Video Menu
VIDEO MENU ADJUSTMENTS Fine-tune settings for each video source. You can make changes to each option by moving the highlight to the desired option (Contrast, Brightness, Color, etc.) to select it. Once the option is selected, you can make changes by pressing the Left or Right directional arrows to change the option settings. -
Page 29: Rgb Source Special Adjustments
VIDEO MENU RGB Source Special Adjustments image is “splotchy,” When the image is too green, or when (Normally adjusted by the installation technician; usually the image is too dark. no additional changes are needed.) For the RGB Source only, the Clamp Pulse is set at Auto The Clamp Pulse is initially set to Auto Select. -
Page 30: Maintenance And Troubleshooting
PRO895X. damp cloth. Then rinse the cloth in clean water and wipe Note: If you unplug your PRO895X, you will have to reset the surface again. Allow the PRO895X to air-dry before the clock to the current time. -
Page 31: Before Calling For Service
Remote does not work Using wrong remote control? Use only Universal remote. Remote in wrong mode? Batteries on screen menus. weak? Wrong battery polarity? Remote not pointed at PRO895X screen? Wrong source selected? Colors misaligned. Format wrong for current source selected? Static Setup needs adjustment? Image appears distorted. - Page 32 Whenever possible, warranty service will be provided where the PRO895X is installed in the U.S.A. or Canada. (Some repairs may require the PRO895X to be taken by the servicer to the repair facility and returned, at no additional charge. The HD Display must be taken down from the ceiling for on-site service.