Daewoo FLR00004 - Tornado Freedom Pro 22.2V 2 in 1 Vacuum Cleaner Manual
- User manual (12 pages)
Advertisement
- 1 Features
- 2 Description of Parts
- 3 Before the first time you use your device
- 4 Charging the internal Battery
- 5 Using the Unit in the Upright Position
- 6 Using the Device Hand Held
- 7 Emptying and Cleaning Your Product
- 8 Care and Use of your Product
- 9 Recommended filter cleaning intervals
- 10 Technical Data
- 11 Customer Support
- 12 Troubleshooting Guide
- 13 IMPORTANT SAFEGUARDS
- 14 Documents / Resources
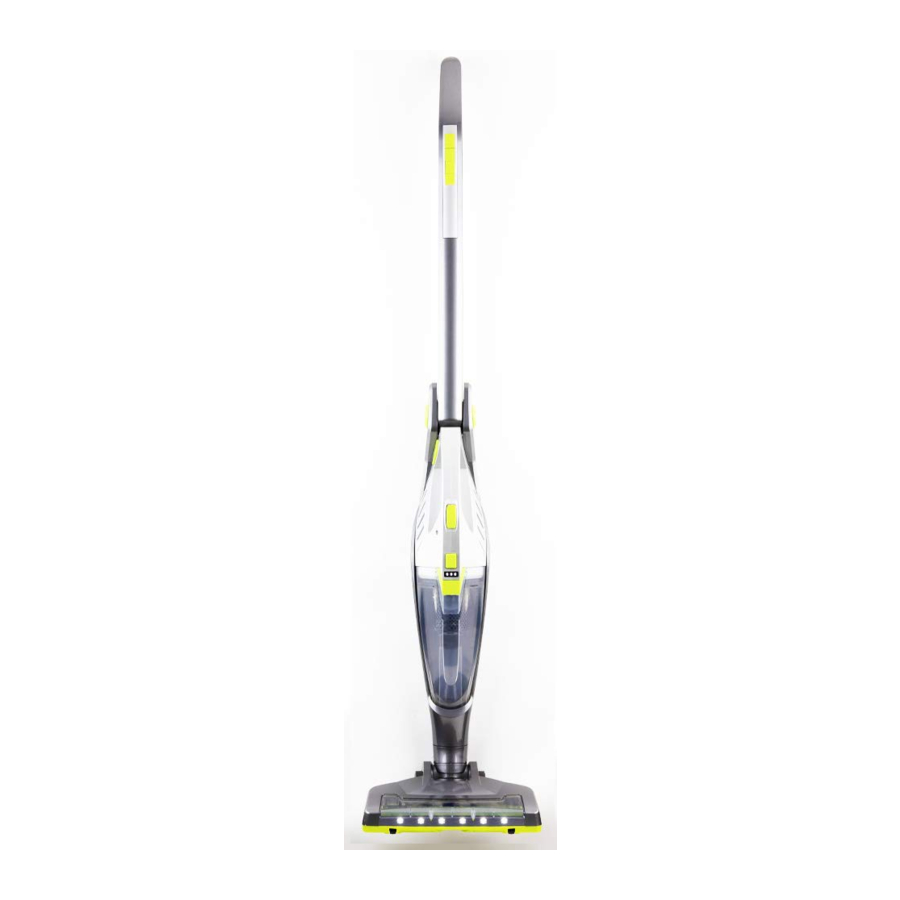
Features

Description of Parts


- Dust Compartment.
- Filter.
- Charging/Battery Indicators
- Dust Compartment Release Button.
- Handheld On/Off Button
- Cleaner Release Button (for handheld use)
- Charging Station.
- Charging Socket
- Handle Catch
- Control Buttons
- Handle Pivot
- Charging Contacts
- Floor Tool & Brush
- Upright On/Off Button
- Increase Speed/Suction Button
- Decrease Speed/Suction Button
- Floor Brush On/Off Button
- Crevice Tool (for carpet edges & hard to get at areas)
- Upholstery Tool
- Mains Charger
- Small Power Plug
Before the first time you use your device
Please read these operating instructions thoroughly and keep them in a safe place for future reference.
Remove all packing materials and discard responsibly.
Charging the internal Battery
Before use, please ensure that the internal rechargeable battery is fully charged as follows:
- Place the vacuum onto the Charging Station (7) ensuring that the Handheld Vacuum is mounted inside the upright section of the vacuum.
- Insert the Small Power Plug (21) of the Mains Charger (20) into the Charging Socket (8) on the right hand side of the Charging Station (7).
- Plug the Mains Charger (20) into the nearest mains socket.
- The Charging/Battery Indicators (3) will light in the sequence as in a, b, c below to show the internal battery is charging.

- Once the battery is fully charged (after approximately 5 hours), the Charging/Battery Indicators (3) will all light as in 'c' above showing that the internal battery is fully charged and the Mains Charger (20) can be removed.

NB the Charging/Battery Indicators will go out one at a time as the vacuum is being used, when none of the indicators are illuminated the internal battery will need recharging.
Using the Unit in the Upright Position
- Grasp the vacuum cleaner firmly by the Handle and press the Upright On/off Switch (14) to power up the cleaner.
![]()
- Place your foot gently on the Floor Tool & Brush (13) and pull the cleaner back by the Handle and start vacuum cleaning.
Press the Upright On/off Switch (14) again at the end of cleaning to switch the cleaner off.
![]()
- During use, press the Increase Speed/Suction Button (15) to increase suction power or press the Decrease Speed/Suction Button (16) to lower the suction power according to the floor surface being vacuumed.
![]()
- If Vacuuming hard floors such as Tiles, laminate, etc. press the Floor Brush On/Off Button (17) to switch off the floor brush to protect the hard surface being cleaned
![]()
- Pull the Handle Catch (9) upwards to allow the handle to bend. This is useful for cleaning under beds and hard to get at areas as shown below:
![]()


Using the Device Hand Held
- Press the Cleaner Release Button (6 – arrowed right) and lift out the cleaner from the upright section to use the cleaner handheld.
![]()
- Press the Handheld On/Off Button (5) to power up the cleaner, press the button again to switch the cleaner off.

- To aid cleaning, insert the Crevice or the Upholstery Tool (18 & 19) into to the inlet on the vacuum as shown below:


Emptying and Cleaning Your Product

Always disconnect the cleaner from the Charger before cleaning.

- Once the Dust Compartment (1) is full it will need emptying and the filter cleaned.
- To empty the cleaner, hold the Dust Compartment (1) and press the Dust Compartment Release Button (4) and remove the Dust Compartment (1). Lift out the Filter (2) and empty the dust out into a bin.
do not continue to use your vacuum cleaner once the Dust Compartment (6) is full otherwise permanent damage may occur to the appliance.
- Wash the Filter (2) in warm running water until the Filter (2) is clean. Allow the filter to thoroughly dry for 24 hours before reuse.


Care and Use of your Product
- Always disconnect the cleaner from the Mains Charger before cleaning.
- Clean outside of the cleaner with a clean damp cloth. Never clean with harsh or abrasive cleaners.
- Do not submerge the cleaner in water or any other liquids.
- Empty the Dust Compartment (1) as soon as it is full.*
- Wash the Filter regularly – see table below.
- Allow the filter to thoroughly dry out for 24 hours before reassembly and reuse.
do not continue to use your vacuum cleaner once the Dust Compartment (6) is full otherwise permanent damage may occur to the appliance.
Recommended filter cleaning intervals
| Filter Type | Recommended cleaning period |
| Cloth Filter (1) |
|
Ensure the filter is cleaned periodically according to the table above, failure to clean the filter regularly will severely impair the performance and permanent damage may occur to the appliance and may also invalidate your warranty.
NB Do not under any circumstances use the vacuum cleaner with the filter removed as damage to the appliance will occur.
Technical Data
| Model Number | FLR00004 |
| Mains Charger | Input: AC 100-240V ~ 50-60Hz Output: 27V 500mA DC |
| Rated Power | 120W |
| Battery | 22.2V 2200mAh Li-Ion (6x 3.7V Batteries) |
| Capacity | 0.6L |
| Unpacked Weight (approx.) | 2.7 Kgs |
| Dimensions (approx.) | 160mm (d) x 250mm (w) x 1150mm (h) |
| Vacuum (max) | >8kpa |
Customer Support
Should you require any product information, replacement parts or accessories, please contact out customer care team at help@daewooelectricals.com or call 0161 831 7879.
Troubleshooting Guide
| Problem | Possible Cause | Solution |
No Power | Battery Flat. | Place vacuum on charging station until all three indicator lights are lit. |
Low suction or poor pick-up | Dust Compartment is full. Filters are clogged. | Empty the Dust Compartment. Check and clean the filter. |
Low Operating Time | The airflow is restricted | Empty the Dust Compartment. Check and clean the filters. |
IMPORTANT SAFEGUARDS
When using electrical appliances, basic safety precautions should always be followed. These instructions should be saved for future reference:
- Read and familiarise yourself with all operating instructions before using this Vacuum Cleaner.
- This appliance can be used by persons with reduced physical, sensory or mental capabilities or lack of experience and knowledge if they have been given supervision or instruction concerning use of the appliance in a safe way and understand the hazards involved.
- Children shall not play with the appliance.
- Keep the appliance and its cord out of reach of children less than 8 years when it is energised or cooling down.
- Do not immerse the appliance or its cable in water or any other liquids.
- Do not leave the appliance unattended during use.
- Do not leave the appliance unattended whilst connected to the power supply.
- The Vacuum can be used outdoors but the power supply must remain indoors.
- It is imperative to unplug the power supply after the appliance has been used, before it is cleaned and whilst being repaired.
- Repairs to electrical appliances should only be performed by a qualified electrician. Improper repairs may place user at serious risk.
- Do not operate this appliance with a damaged power supply or cable, after a malfunction or after being dropped or damaged in any way.
- Regular, periodic checks should be carried out on the cable to ensure no damage is evident. Should there be any signs of damage the appliance should not be used.
- If the cable is damaged, it should only be replaced by the manufacturer or a suitable qualified after-sales-service in order to avoid a hazard
- Do not allow the power cable to hang over sharp edges or come in contact with hot surfaces.
- Do not run the cable under carpets, rugs, etc.
- The Vacuum Cleaner is not to be used if it has been dropped, if there are visible signs of damage.
- Allow the unit to cool before storage.
- Before cleaning, disconnect the appliance from the mains supply and allow to cool.
- This appliance is intended for household use only and should not be used for industrial purposes.
- Do not use any accessories or attachments with this appliance other than those supplied or recommended by supplier.
- Do not use this appliance for anything other than its intended use.
![shock hazard]() Do not push objects into any openings as damage to the appliance and/or electric shock may occur.
Do not push objects into any openings as damage to the appliance and/or electric shock may occur.- Unplug after each use. Grasp the power supply, not the cable.
- Do not pull or carry the Vacuum Cleaner by the cable.
- Never use the appliance without the filter in place.
- Do not use the Vacuum with no Dust Tank attached.
- Use only on vehicle interior surfaces.
- Do not tilt the Vacuum towards the main body when vacuuming liquids.
- Do not vacuum any large or broken objects such as glass.
- Do not vacuum anything that is burning or smoking such as cigarettes, matches or hot ashes.
- Do not vacuum reactive liquids (solvents, corrosives, detergents)
- Do not vacuum flammable or explosive substances such as alcohol, thinners etc.
 Do not push objects into any openings as damage to the appliance and/or electric shock may occur.
Manchester M3 1JS
www.esgltd.com

Documents / Resources
References

Download manual
Here you can download full pdf version of manual, it may contain additional safety instructions, warranty information, FCC rules, etc.
Download Daewoo FLR00004 - Tornado Freedom Pro 22.2V 2 in 1 Vacuum Cleaner Manual
Advertisement
Thank you! Your question has been received!


Need Assistance?
Do you have a question about the Tornado Freedom Pro FLR00004 that isn't answered in the manual? Leave your question here.