Table of Contents
Advertisement
Advertisement
Table of Contents

Related Manuals for X10 SUPERREMOTE UR19A


Summary of Contents for X10 SUPERREMOTE UR19A
- Page 1 UR19A UPER EMOTE ’ WNER ANUAL...
- Page 2 AFETY ONSIDERATIONS Remember to exercise good common sense when using the Home Automation features of your SuperRemote - especially when scheduling unattended devices. There can be some unexpected consequences if not used with care. For example, an empty coffee pot can be remotely turned on.
-
Page 3: Table Of Contents
ONTENTS ... 5 NTRODUCTION ... 6 ETTING TARTED ONTROLLERS AND ODULES OUSE ODES AND NSTALLING THE OMPONENTS RANSCEIVER ODULE ... 8 ODULE -1 S ... 9 UPER EMOTE ETTING P YOUR UPER UTTON ESCRIPTIONS TV, VCR, ETTING UP FOR ABLE OX AND ATELLITE SING... -
Page 4: Getting Started
ETTING Because we know that you are eager to get started, we’ve kept this introduction as short as possible, but it contains very valuable information, so you should read through it very carefully. ONTROLLERS AND The first thing you need to understand is that there are two different devices you need to control your house;... -
Page 5: Installing The Components
NSTALLING THE OMPONENTS RANSCEIVER ODULE The Transceiver Module (sold separately) receives radio frequency (RF) commands from the SuperRemote to operate a lamp or appliance plugged into it. The Transceiver Module also passes on commands over your house wiring to control other X-10 modules (also sold separately). -
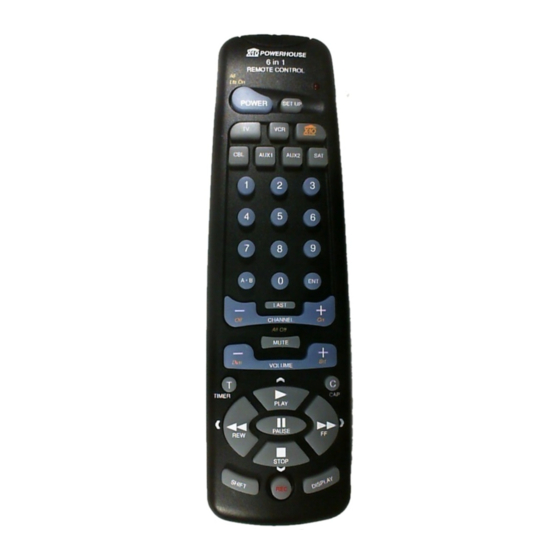
Page 6: Setting U Pyour Super Remote Button Descriptions
ETTING YOUR UPER UTTON ESCRIPTIONS INDICATOR LIGHT The indicator light flashes when the remote is operating. POWER Works in the same way as your original remote. SET UP Used for programming the remote. X-10 Lets you control X-10 modules to operate lamps and appliances around the home. -
Page 7: Tv Codes
5. Point the remote at the device and press the POWER button. Your device should turn off. 6. Turn your device on and press CHANNEL+. If the device responds, setup is complete. Notes: For CD players use the AUX buttons. If your TV/VCR/Cable Box/Satellite Receiver does not respond, try the other codes for your brand. - Page 8 MAGNAVOX ... 017,021,022,075,081,082 ... 087,088,089,090,101,102 ... 143,144,145,146,147,196,197 MAJESTIC ... 096 MARANTS ... 075 MARANTZ ... 017,022,075,091 MATSUI ... 075 MEI ... 189 MEMOREX ... 014,022,062,095,096 MGA ... 017,018,022,034,035 ... 059,064,092,093,095 MIDLAND ... 067,164,184,185,194 MINUTZ ... 065 MITSUBISHI ... 017,018,022,034,035,059 ... 064,092,093,094,095,102,138 MONTGOMERY WARD ...
- Page 9 COLT ... 074 CRAIG ... 026,027,036,074 CURTIS-MATHES ... 013,015,022,026 ... 029,031,034,035 CYBERNEX ... 026 DAEWOO ... 028,030,032,038,039 ... 040,041,123,143 DAYTRON ... 123 DBX ... 022,023 DIMENSIA ... 013 DYNATECH ... 015,039 ELECTROHOME ... 027,042 ELECTROPHONIC ... 027 EMERSON ... 015,019,025,027,028,034,037 ...
- Page 10 VIDEO CONCEPTS ... 022,023,028,029,126 VIDEOSONIC ... 026 WARDS ... 014,015,026,027,028,034 ... 036,039,042,068,069,074 ... 109,114,115,116,120,129 XR-1000 ... 034,039,074 YAMAHA ... 022,023,024,031,071,124 ZENITH ... 017,111,117,132,141 CABLE CODES ABC ... 014,015,016,017,018,019,020 ANTRONIX ... 021,022 ARCHER ... 021,022,023,024 CABLETENNA ... 021 CABLEVIEW ... 021 CENTURY ...
- Page 11 LASER DISC CODES PIONEER ... 093 PROSCAN ... 146 RCA ... 146 DSS CODES ECHOSPHERE ... 071 ECHOSTAR ... 071 DISH NETWORK ... 071 HUGHES SATELLITE ... 075 PANASONIC ... 069,072 PRIMESTAR ... 070 RCA ... 065 SONY ... 066 STAR SIGHT CABLE SERVICES ...
-
Page 12: To Control
SING TO CONTROL A TV, VCR, C ECOND ATELLITE ECEIVER The AUX button is normally used to control an audio component, but it can also be configured to control a second TV, VCR, cable box or satellite receiver. 1. Turn on the equipment you wish to control. -
Page 13: Identifying Codes Found Using The Search Procedure
*Note: You might have to press CHANNEL+ many times (50+). If the device does not have a Channel Up function, use the PLAY button (VCR only) or the POWER button. DENTIFYING ODES FOUND USING EARCH ROCEDURE 1. Press and hold the SETUP until the LED indicator lights steadily. -
Page 14: Controlling
ONTROLLING X-10 M ODULES If you have purchased and installed a Transceiver Module, you can control it and other X-10 modules as follows: 1. Press and release the X-10 button. 2. Use the number buttons to enter the Unit Code number of the chosen module. -
Page 15: Controlling An Ir Mini Controller
ActiveHome Replace your existing wall switches dimmer. On/Off and Bright/Dim functions. Other models available for 3-way and fluorescent lighting. XPANDING YOUR YSTEM HTTP://WWW.X10.COM The Dual Floodlight when it detects other modules, or macros. The Thermostat Setback Controller TH2807 mounts below... -
Page 16: Roubleshooting
Use a controller to trigger the Remote Chime Module SC546 to call Dad up for dinner, or warn people you’re about to turn on the sprinklers. Fit a Wireless Wall Switch RW724 anywhere you need an extra switch - with no wires. Sends commands to the Transceiver Module just like a remote. -
Page 17: Warranty
, NJ 07624-0420 , NJ 07624-0420 Closter Closter, NJ 07624-0420 Closter , NJ 07624-0420 , NJ 07624-0420 W eb Site: http://www eb Site: http://www eb Site: http://www eb Site: http://www.x10.com eb Site: http://www .x10.com .x10.com .x10.com .x10.com Printed in Hong Kong DRUR19A-1097...