Table of Contents
Advertisement
M M M M M
VK62A
VK62A
VK62A
VK62A
VK62A
ODEL
ODEL
ODEL
ODEL
ODEL
UR81A E
UR81A E
UR81A E
UR81A E
UR81A E
NTER
NTER
NTERT T T T T AINMENT
NTER
NTER
AINMENT
AINMENT
AINMENT
AINMENT
A A A A A
R R R R R
NYWHERE
NYWHERE
NYWHERE
NYWHERE
NYWHERE
EMOTE
EMOTE
EMOTE
EMOTE
EMOTE
WITH
WITH
WITH
WITH
WITH
MR26A RF R
MR26A RF R
MR26A RF R
MR26A RF R
MR26A RF R
ECEIVER
ECEIVER
ECEIVER
ECEIVER
ECEIVER
O O O O O
' ' ' ' '
M M M M M
WNER
WNER
WNER
WNER
WNER
S S S S S
ANUAL
ANUAL
ANUAL
ANUAL
ANUAL
Advertisement
Table of Contents

Related Manuals for X10 VK62A


Summary of Contents for X10 VK62A
- Page 1 M M M M M VK62A VK62A VK62A VK62A VK62A ODEL ODEL ODEL ODEL ODEL UR81A E UR81A E UR81A E UR81A E UR81A E NTER NTER NTER NTERT T T T T AINMENT NTER AINMENT AINMENT AINMENT AINMENT A A A A A...
- Page 2 It has been type tested and found to comply with the limits for remote control devices in accordance with the specifications in Sub-Parts B and C of Part 15 of FCC...
-
Page 3: Table Of Contents
CDs in your PC. Next, it shows you how to set up the remote to control your TV, cable box, etc. Next it shows you how to set up an X10 Transceiver Module and Lamp Module (sold separately) so you can use the UR81A Remote to control lights and appliances in your home. -
Page 4: Etting
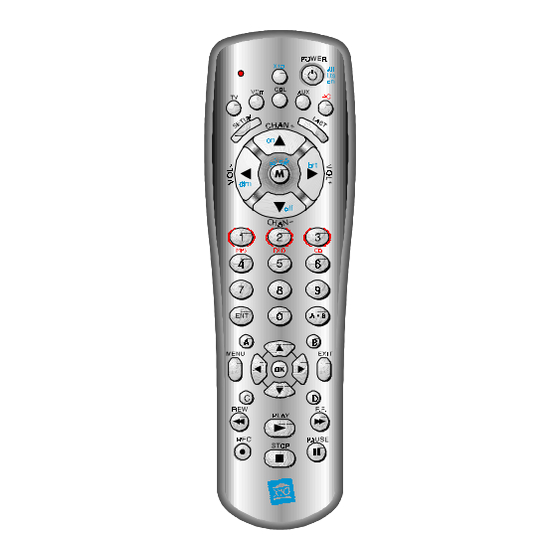
0 - 9 0 - 9 Used as with your original remote, and to enter X10 device codes. Also, after you first press PC, buttons 1, 2, and 3 perform as function buttons to select MP3, DVD and CD respectively when used with the MR26A wireless receiver and PC software. - Page 5 UP THE THE SOFTW SOFTWARE SOFTW SOFTW SOFTW NOTE: X10’s BOOM software lets you control an MP3 player application from the UR81A Remote. It works with WinAmp, RealJukeBox, MusicMatch, Windows Media Player, etc. which you must previously have installed. It also controls a DVD player and CD player in your PC.
- Page 6 Then press the Power button. The red LED on the receiver flickers and the application (MP3, DVD, or CD player) is launched. You can press Play, Stop, FF , Rew, Pause, Mute, Vol Up, Vol Down, etc., on the UR81A Remote and it operates your on-screen MP3 player, PC-DVD player, or PC-CD player, just as if you were clicking the buttons on your monitor...
-
Page 7: Earching Or Odes
Notes: 1. The TV mode key can only be used to store TV codes but you can store a code for ANY device under either the VCR, CBL, or AUX mode key. E.G., you can store a Cable code under the VCR key, or a Satellite code under the Cable key, etc. -
Page 8: O M E O N T R O
Please read the following as it will give you an understanding of how Home Control (Home Automation) works and will help you understand what X10 Modules you will need to purchase to control most everything in your home. C C C C C... -
Page 9: Transceiver
The Transceiver Module also passes on commands over your house wiring to control other X10 modules (also sold separately). Note that unlike the Lamp Module you cannot dim or brighten a lamp connected to the Transceiver Module. - Page 10 Transceiver Module, you can control it and other X10 modules as follows: 1 . 1 . 1 . 1 . 1 . Press and release the X10 button. 2 . 2 . 2 . 2 . 2 . Use the number buttons to enter the Unit Code number of the chosen module.
- Page 11 Release the SETUP button. 2 . 2 . 2 . 2 . 2 . Press and release the X10 button. 3 . 3 . 3 . 3 . 3 . Enter 998 to control an IR543, IR Mini Controller, or 999 for standard X10 control.
- Page 12 Y S T E M Y S T E M The modules illustrated below represent just a few of the wide range of X10 compatible modules you can choose from to expand your Home Automation system. They are available from electrical outlets, department stores and mail order catalogs.
-
Page 13: R O U B L E S H O O T I N
If the Remote won’t control your A/V equipment. • Use manual controls or the original remote control to confirm the equipment is working properly. • Be sure you pressed the device key for the device you want to control. -
Page 14: A R R A N T
• Try plugging the Module into a different outlet. Note: if you use an RF Transceiver (such as the RR501 or TM751) to control X10 Modules, you will be able to control up to 16 Modules. When using a Transceiver, when you press 1-6-ON you turn on Module number 16. - Page 15 X10.com, a division of X10 X10.com, a division of X10 X10.com, a division of X10 X10.com, a division of X10 X10.com, a division of X10 Wireless Technology, Inc. Wireless Technology, Inc. Wireless Technology, Inc. Wireless Technology, Inc. Wireless Technology, Inc.