
Related Manuals for Mitsubishi Electric PEA-M180LAA


Summary of Contents for Mitsubishi Electric PEA-M180LAA
- Page 1 <ORIGINAL> Packaged Air-Conditioners INDOOR UNIT PEA-M180,200,250LAA OPERATION MANUAL FOR USER For safe and correct use, please read this operation manual thoroughly before operating the air-conditioner unit.
-
Page 2: Table Of Contents
• Do not stand on, or place any items on the unit. - It may also be in violation of applicable laws. • Do not splash water over the unit and do not touch the unit with - MITSUBISHI ELECTRIC CORPORATION cannot be held wet hands. An electric shock may result. responsible for malfunctions or accidents resulting from the use of • Do not spray combustible gas close to the unit. Fire may result. -
Page 3: Parts Names
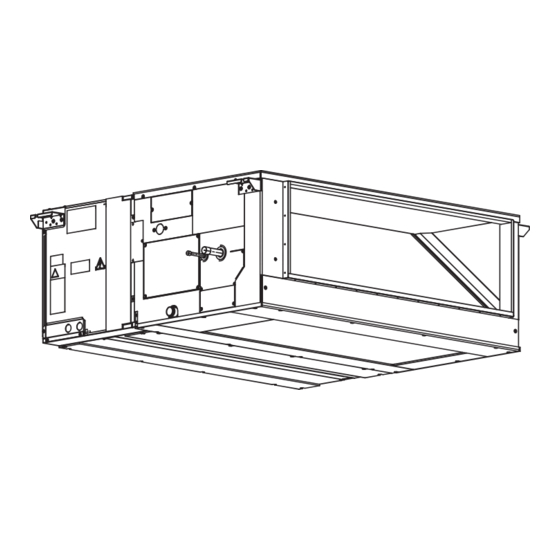
1. Safety Precautions Disposing of the unit Caution: • Do not use any sharp object to push the buttons, as this may When you need to dispose of the unit, consult your dealer. damage the remote controller. • Never block or cover the indoor or outdoor unit’s intakes or outlets. 2. Parts Names ■ Indoor Unit PEA-M·LAA Fan steps 4 steps Vane – Louver – Filter Optional parts Filter cleaning indication –... - Page 4 2. Parts Names ■ Wired Remote Controller Controller interface The functions of the function buttons change depending on the screen. Refer to the button function guide that appears at the bottom of the LCD for the functions they serve on a given screen. ⑤ When the system is centrally controlled, the button function guide that corresponds to the locked button will not appear. Main display Main menu ⑥ Cursor Page ⑦ ⑧ ⑨ ⑩ ⑦ ⑧ ⑨ ⑩ ④ ③ ② ① Menu screen Function guide Function buttons ⑦...
- Page 5 2. Parts Names Display The main display can be displayed in two different modes: “Full” and “Basic”. The factory setting is “Full”. To switch to the “Basic” mode, change the setting on the Main display setting. (Refer to operation manual included with remote controller.) <Full mode> <Basic mode> * All icons are displayed for explanation. ㉔ ⑫ ⑬ ⑭ ⑮ ⑯ ⑰ ⑱ ㉔ ② ㉓...
- Page 6 2. Parts Names ■ Outdoor unit Power Refrigerant pipes Indoor-outdoor connection wire Earth...
-
Page 7: Operation
3. Operation ■ About the operation method, refer to the operation manual that comes with each remote controller. 3.1. Turning ON/OFF [ON] [OFF] Press the [ON/OFF] button. Press the [ON/OFF] button again. The ON/OFF lamp will light up in green, The ON/OFF lamp will come off, and and the operation will start. the operation will stop. ■ Operation status memory ■ Settable preset temperature range Remote controller setting Operation mode Preset temperature range Operation mode Operation mode before the power was turned off... - Page 8 3. Operation 3.5. Ventilation <Returning to the Operation menu> 3.5.1. Navigating through the Main menu Press the [RETURN] button to go back to the Operation menu. <Accessing the Main menu> Press the [MENU] button. The Main menu will appear. <Item selection> Press [F2] to move the cursor left. Press [F3] to move the cursor right. Cursor 3.5.2. Vane·Vent. (Lossnay) <Accessing the menu>...
-
Page 9: Timer
4. Timer ■ Timer functions are different by each remote controller. ■ For details on how to operate the remote controller, refer to the appropriate operation manual included with each remote controller. 5. Emergency Operation for Wireless Remote-controller (option) ① ON/OFF lamp (lit when unit is operating; unlit when unit is not operating) ON/OFF ② Emergency operation ① In cases where the remote control unit does not operate properly, use either the COOL or HEAT button on the wireless remote control signal receiver to toggle the unit on or off. On cooler only units, pushing the HEAT button toggles the fan on and off. -
Page 10: Trouble Shooting
7. Trouble Shooting Having trouble? Here is the solution. (Unit is operating normally.) Air conditioner does not heat or cool well. ■ Clean the filter. (Airflow is reduced when the filter is dirty or clogged.) ■ Check the temperature adjustment and adjust the set temperature. ■ Make sure that there is plenty of space around the outdoor unit. Is the indoor unit air intake or outlet blocked? ■... -
Page 11: Specifications
The wireless remote controller does not operate (the indoor unit beeps 4 ■ Switch the auto mode setting to the AUTO (single set point) mode or times). AUTO (dual set point) mode. For details, refer to the included Notice (A5 sheet) or the Installation Manual. 8. Specifications Item Model PEA-M180LAA PEA-M200LAA PEA-M250LAA Power source 220-240 V 50 Hz Dimension Height / Width / Depth 470/1370/1120... - Page 12 Software Information This product includes open source software (“OSS”) distributed under the terms of open source licenses. Apache License Version 2.0, January 2004 http://www.apache.org/licenses/ TERMS AND CONDITIONS FOR USE, REPRODUCTION, AND DISTRIBUTION 1. Definitions. “License” shall mean the terms and conditions for use, reproduction, and distribution as defined by Sections 1 through 9 of this document. “Licensor”...
- Page 13 APPENDIX: How to apply the Apache License to your work. To apply the Apache License to your work, attach the following boilerplate notice, with the fields enclosed by brackets “{}” replaced with your own identifying information. (Don’t include the brackets!) The text should be enclosed in the appropriate comment syntax for the file format. We also recommend that a file or class name and description of purpose be included on the same “printed page”...
- Page 14 ■ The serial number is indicated on the SPEC NAME PLATE. Sequential number for each unit: 00001–99999 Month of manufacture: A(1), B(2), C(3), D(4), E(5), F(6), G(7), H(8), J(9), K(10), L(11), M(12) Year of manufacture (western calender): 2014 → 4, 2015 → 5...
- Page 16 Please be sure to put the contact address/telephone number on this manual before handing it to the customer. HEAD OFFICE: TOKYO BLDG., 2-7-3, MARUNOUCHI, CHIYODA-KU, TOKYO 100-8310, JAPAN VG79F102H01...