Table of Contents
Advertisement
Quick Links
Installation, Operation and Maintenance
RTXC-XE series Air-Cooled Screw
Chiller Heat Pump
Only qualified personnel should install and service the equipment. The installation, starting up, and servicing of heating,
ventilating, and air-conditioning equipment can be hazardous and requires specific knowledge and training. Improperly
installed, adjusted, or altered equipment by an unqualified person could result in death or serious injury. When working on the
equipment, observe all precautions in the literature and on the tags, stickers, and labels that are attached to the equipment.
July 2023
SAFETY WARNING
RTXC-SVX003D-EN
Confidential and proprietary Trane information
572568050001
Advertisement
Chapters
Table of Contents
Troubleshooting

Related Manuals for Trane RTXC-XE Series


Summary of Contents for Trane RTXC-XE Series
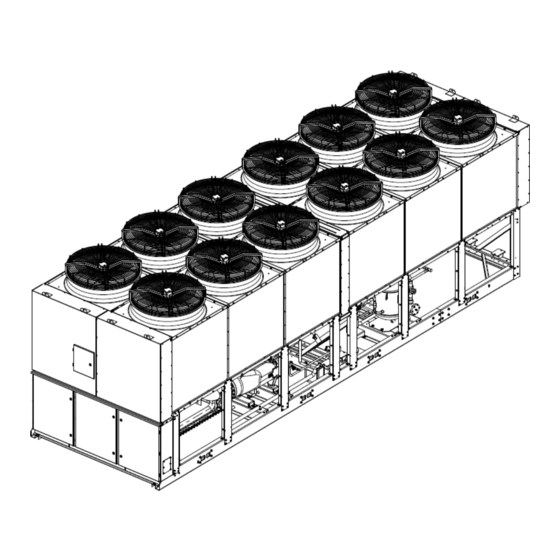
- Page 1 Installation, Operation and Maintenance RTXC-XE series Air-Cooled Screw Chiller Heat Pump 572568050001 SAFETY WARNING Only qualified personnel should install and service the equipment. The installation, starting up, and servicing of heating, ventilating, and air-conditioning equipment can be hazardous and requires specific knowledge and training. Improperly installed, adjusted, or altered equipment by an unqualified person could result in death or serious injury.
-
Page 2: Warnings, Cautions, And Notices
Important Responsible Refrigerant Practices Trane believes that responsible refrigerant practices are important to the environment, our customers, and the air conditioning industry. All technicians who handle refrigerants must be certified. Know and follow the applicable laws for handling, reclaiming, recovering, and recycling of certain refrigerants and the equipment used in these service procedures. - Page 3 Installation Completion and Request for Trane Service Important: A copy of this completed form must be submitted to the Trane Service Agency that will be responsible for the start-up of the equipment. Start-up will NOT proceed unless applicable items listed in this form have been satisfactorily completed.
- Page 4 Note: Minimum of two-week advance notification is required to allow for scheduling of unit start-up. ADDITIONAL COMMENTS/INSTRUCTIONS Note: A copy of this completed form must be submitted to the Trane Service Agency that will be responsible for start-up of equipment.
-
Page 5: Table Of Contents
Contents Warnings, Cautions, and Notices ................... 2 Important ..........................2 Model Number Descriptions ....................8 General Information......................... 9 Warranty ............................ 9 Unit Description ........................9 Reception ..........................9 Storage ............................ 10 Nameplate ..........................10 General Data ........................... 11 General Data – XE with AC Fan – R134a ................11 General Data –... - Page 6 Symbio800 Overview ......................38 Tracer TU ..........................39 Operating Principles ......................40 General ............................ 40 Refrigerant ..........................40 Compressor ..........................40 Oil Filter ........................... 41 Air Side Heat Exchanger ......................41 Water Side Heat Exchanger ....................41 Economizer (Only for RTXC110/180/220XE, 110/180/220/250/280XE-HSE) ......41 Expansion Valve ........................
- Page 7 Operating Panel Introduction ....................67 Keys on LED Operating Panel ....................67 Function Indicators ......................... 68 Troubleshooting - Fault Display and Reset ................68 Troubleshooting - Faults and Diagnostics ................69 Symptoms and Diagnostics ....................73 Function Code ......................... 74 RTXC-SVX003D-EN...
-
Page 8: Model Number Descriptions
Model Number Descriptions Digit 1-4 Model: RTXC Air-cooled Screw Heat Pump Digit 17 Installation Accessories Digit 5-7 Nominal Tonnage N = None (Note: * indicate not available now) R = Neoprene Isolators 110 = 110 tons 280 = 280 tons Digit 18 Flow Switch 130 = 130 tons... -
Page 9: General Information
General Information Warranty Warranty is based on the general terms and conditions of Trane. The warranty is void if the equipment is repaired or modified without the written approval of the manufacturer if the operating limits are exceeded or if the control system or the electrical wiring is modified. Damage due to misuse, lack of maintenance or failure to comply with the manufacturer’s instructions or... -
Page 10: Storage
If optional isolators are ordered, they are shipped mounted on the base of the unit. Notify any apparent damage or material shortage to the carrier and Trane local offices. Storage Extended storage of the unit prior to installation requires the following precautions: Store the unit in a ventilated, dry, and secure area. -
Page 11: General Data
General Data General Data – XE with AC Fan – R134a Cooling Total Cooling Capacity Energy Efficiency Rating (EER) 3.39 3.51 3.38 3.38 3.34 Energy efficiency class (Eurovent) Space Cooling Efficiency η,s,c SEER 4.46 4.68 4.67 4.55 4.55 Sound Power – STD Noise dB(A) Sound Pressure –... -
Page 12: General Data - Xe With Ec Fan - R134A
General Data – XE with EC Fan – R134a Cooling Total Cooling Capacity Energy Efficiency Rating (EER) 3.49 3.57 3.44 3.44 3.40 Energy efficiency class (Eurovent) Space Cooling Efficiency η,s,c SEER 4.58 4.78 4.81 4.70 4.67 Sound Power – STD Noise dB(A) Sound Pressure –... -
Page 13: General Data - Xe With Ec Fan - R513A
General Data – XE with EC Fan – R513A Cooling Total Cooling Capacity Energy Efficiency Rating (EER) 3.12 3.18 3.23 3.17 3.09 Energy efficiency class (Eurovent) Space Cooling Efficiency η,s,c SEER 4.36 4.66 4.55 4.60 4.55 Sound Power – STD Noise dB(A) Sound Pressure –... -
Page 14: General Data - Xe-Hse With Ec Fan - R134A
General Data – XE-HSE with EC Fan – R134a Cooling Total Cooling Capacity Energy Efficiency Rating (EER) 3.20 3.06 2.86 3.29 3.24 3.24 3.19 3.04 2.87 Energy efficiency class (Eurovent) Space Cooling Efficiency η,s,c SEER 5.23 5.15 5.06 5.45 5.54 5.54 5.42 5.30... -
Page 15: General Data - Xe-Hse With Ec Fan - R513A
General Data – XE-HSE with EC Fan – R513A Cooling Total Cooling Capacity Energy Efficiency Rating (EER) 2.90 2.84 2.36 2.93 2.88 2.97 2.88 2.86 2.35 Energy efficiency class (Eurovent) Space Cooling Efficiency η,s,c SEER 4.72 4.62 4.47 4.95 5.04 5.21 4.90 4.78... -
Page 16: Installation Requirements
Refer to Table 2 for unit operating weights. Once in place, the unit must be level within 6 mm over its length and width. Trane is not responsible for equipment problems resulting from an improperly designed or constructed foundation. RTXC-SVX003D-EN... - Page 17 Figure 2. Foundation Diagram Model L (mm) RTXC110XE/XE-HSE 4090 RTXC130/140XE-HSE 4090 RTXC160/180XE/XE-HSE 7480 RTXC200/220XE/XE-HSE 8480 RTXC250/280XE-HSE 8480 RTXC310XE/XE-HSE 13280 RTXC330XE/XE-HSE 13280 RTXC360XE/XE-HSE 16670 RTXC400/440XE/XE-HSE 17670 RTXC500/560XE-HSE 17670 2170 NOTICE Foundation is necessary for the convenience of unit service and maintenance. Clearances Locate the unit so that the condenser airflow is unrestricted both above and on the sides of the unit.
-
Page 18: Rigging
Figure 3-3. Installation Clearance – 200/220XE, 200/220/250/280XE-HSE Figure 3-4. Installation Clearance – Multi-Unit Note: In case of the height of enclosure around the unit higher than 1.5m, contact Trane local office. NOTICE No obstructions to outdoor fan airflow exit, including ductwork. - Page 19 NOTICE Fin-tube coil damage! Use properly sized lifting beam crossbars to avoid crushing fin-tube coils of the unit with lifting chains. Each of the cables, chains or slings used to lift the unit must be capable of supporting the entire weight of the unit. See Table keep cables or chains clear of unit sides.
-
Page 20: Neoprene Isolator Installation
Figure 4-3. Rigging – RTXC200/220XE, 200/220/250/280XE-HSE Table 2. Unit lifting weights and center of gravity dimensions Ckt1 Ref. Ckt2 Ref. Shipping charge charge Operating Model Weight (kg) (kg) Weight (kg) (kg) (kg) (kg) (kg) (kg) (kg) (kg) (mm) (mm) (mm) (kg) R134a/ R134a/... - Page 21 NOTICE Guarantee Alignment and Spacing of Isolators! RTXC310/330XE/XE-HSE the isolator distance between master 200/220XE/XE-HSE (W7/W8) and slave unit 110XE/XE-HSE (W5/W6) is 3042mm. RTXC360XE/XE-HSE the isolator distance between master 200XE/XE-HSE (W7/W8) and slave unit 160XE/XE-HSE (W7/W8) is 3462mm. RTXC400/440XE, 400/440/500/560XE-HSE the isolator distance between master 200/220XE, 200/220/250/280XE-HSE (W7/W8) and slave unit 200/220XE, 200/220/250/280XE-HSE (W7/W8) is 3645mm.
- Page 22 Figure 5-4. Isolator Placement – RTXC160/180XE-HSE Figure 5-5. Isolator Placement – RTXC200/220XE Figure 5-6. Isolator Placement – RTXC200/220XE-HSE Table 3. Isolator Selection Maximum load Neoprene Isolator Unit Model Quantity weight per isolator Part Number (kg) RTXC 110XE, 110/130/140HSE X10140305630 1361 RTXC160XE/XE-HSE X10140305640 1814...
-
Page 23: Cover Plate Of Assembly Unit Installation
Figure 6. Neoprene Isolator Part Number Type Colour (mm) (mm) (mm) (mm) (mm) (mm) (mm) (mm) (mm) X10140305630 76.2 12.7 127.0 14.2 69.9 158.8 40.6±6.35 117.6 RDP4-WR Green-yellow X10140305640 76.2 12.7 127.0 14.2 69.9 158.8 40.6±6.35 117.6 RDP4-WR Dark-grey Cover Plate of Assembly Unit Installation Keep master and slaver units’... - Page 24 CAUTION Water Strainer! To prevent evaporator damage, pipe strainers must be installed in the water supplies to protect components from water born debris. Trane is not responsible for equipment - only - damage caused by water born debris. CAUTION Equipment Damage! Thoroughly flush all the water piping before making the final piping connections to the unit after external water piping installation and leakage test.
- Page 25 CAUTION Equipment Damage! All inlet and outlet shutoff valves shown in Figure 8 should be always open to enable water circulated by Symbio 800 controlled pump to avoid freezing when the units in operation or standby condition. Figure 8. Typical chilled water piping system design Entering Water Piping •...
- Page 26 10. Flow switch contacts are closed on proof of water flow. • Wire flow switches in series with the water pump interlocks as in Trane wiring diagrams. Note: Dual flow switch for assembly unit RTXC310/330/360/400/440XE, 310/330/360/400/440/500/560XE-HSE, install appropriate water flow switches at the water outlet of each unit, refer to Section of Master - slave unit.
- Page 27 It is recommended that the services of a qualified water treatment specialist be engaged to determine what water treatment, if any, is required. Trane assumes no responsibility for equipment failures which result from untreated or improperly treated water, or saline or brackish water.
- Page 28 option will NOT protect the evaporator in the event of power failure to the unit unless backup power is supplied to the necessary components. CAUTION Equipment Damage! All inlet and outlet shutoff valves shown in Figure 8 should be always open to enable water circulated by Symbio 800 controlled pump to avoid freezing when the units in operation or standby condition.
-
Page 29: Partial Heat Recovery Piping
It is recommended that the services of a qualified water treatment specialist be engaged to determine what water treatment, if any, is required. Trane assumes no responsibility for equipment failures which result from untreated or improperly treated water, or saline or brackish water. -
Page 30: Partial Heat Recovery Freeze Avoidance
A field-supplied water strainer with a minimum size of 16 mesh must be installed close to the BPHE inlet to prevent debris into the heat exchanger. Install shutoff valves on both the entering and leaving water lines so that the BPHE can be isolated for service. A field installed safety or relief valve on the water side is required for the partial heat recovery to prevent risks resulting from a failure of the thermostat. -
Page 31: Electrical Controls
Failure to disconnect power before servicing could result in death or serious injury. All wiring must comply with local codes. The installation (electrical) contractor must provide and install system interlock wiring and power wiring. Specific electrical wiring diagrams are in Trane wiring diagrams. -
Page 32: Starter Panel
Unit Size 400± 400± 400± 400± 400± 400± 400± 400± 400± Rated Voltage 10%/ 10%/ 10%/ 10%/ 10%/ 10%/ 10%/ 10%/ 10%/ (V/Hz/Ph) 50/3 50/3 50/3 50/3 50/3 50/3 50/3 50/3 50/3 Refrigeration Circuit Qty. RTXC- Compressor XE-HSE Qty. Condensing Fan Qty. -
Page 33: Power Supply Wiring
NOTICE Equipment Damage! Trane only allows the customer select either one of the offered schemes for chilled water pump control and evaporator antifreeze protection. Fail to do so may result in equipment damage and the loss of related guaranteed rights without the authorization or approval from Trane. -
Page 34: Partial Heat Recovery Heater Power Supply
Master-Slaver Unit Chilled Water Pump Control For Master-Slave unit, the Master section and Slave section Symbio 800 systems offer 2 relay contacts of chilled water pump control separately, total 3 control schemes are provided. Scheme 1, when the chilled water pump is corresponding with specific unit and controlled by this unit, the relay contact J2-4 and J2-6 of Master section module 1A20 controls the chilled water pump running and stop, when the unit receives the running command, this relay contact will close. -
Page 35: Alarm And Status Relay Outputs (Programmable Relays) - Optional
Alarm and Status Relay Outputs (Programmable Relays) – Optional The Symbio 800 system provides a programmable relay concept for enunciation of certain events or states of the unit. Total four relays are provided (generally with a Quad Relay Output LLID) as part of the Alarm Relay Output Option. -
Page 36: External Current Limit Setpoint - Optional
External Current Limit Setpoint – Optional The Symbio 800 provides inputs (J2-2 and J2-3 of module 1A22) that accept either 4-20 mA or 2- 10 VDC signals to set the External Current Limit Setpoint. The 4-20 mA or 2-10 VDC signals are corresponding with unit 60%~120%RLA range. -
Page 37: Master-Slave Unit Wiring Connection
BACnet Communications Interface (BCI-C) Symbio 800 provides an optional BACnet Communications Interface (BCI-C) between the unit and a Building Automation System (BAS). See Trane wiring diagrams for details. Master-Slave Unit Wiring Connection (RTXC 310/330/360/400/440XE, 310/330/360/400/440/500/560XE-HSE units) RTXC-XE/XE-HSE units have installed the modules of unit status. The Master-Slave unit operation is conducted by the wired connection among Unit Running/Stop Output module 1A26, External Auto/Stop module 1A14 and Heating/Cooling Mode Setting module 1A19. -
Page 38: Operator Interface Controls
Operator Interface Controls Symbio800 Overview This section covers information pertaining to the Symbio ™ 800 controller hardware. The Symbio™ 800 controller is a factory-installed, application specific and programmable controller designed to control chillers and large packaged HVAC equipment. A 7-inch user interface features a touch sensitive color screen that provides facility managers at-a-glance operating status, performance monitoring, scheduling changes, and operating adjustments. -
Page 39: Tracer Tu
Tracer TU serves as a common interface to all Trane chillers and will customize itself based on the properties of the chiller with which it is communicating. Thus, the service technician learns only one service interface. -
Page 40: Operating Principles
Operating Principles General The refrigeration cycle of RTXC-XE/XE-HSE is conceptually similar to that of other Trane air- cooled screw heat pumps, including single refrigerant circuit unit, dual refrigerant circuit unit, and assembly unit with master-slave control system. RTXC110XE/XE-HSE apply single refrigerant circuit with one compressor with economizer and one water loop. -
Page 41: Oil Filter
Economizers can be used with the compressor to increase cycle capacity and in some cases improve cycle efficiency, depending on the port machined into the rotor housing for economizer gas injection. The economizer should only be modulated once the compressor is running at 100% load and closed before the compressor shut down. -
Page 42: Fan
In cooling condition, all fans operate in high speed when ambient temperature is high, automatically adjust fan stage for AC fans or fan speed for EC fans when ambient temperature decreased. In heating condition, all fans run in high speed except warmup and defrost. The fans are propeller-type and not recommended for use with ductwork, filters, or other impediments to airflow in the fan air stream. -
Page 43: Rtxc-Xe/Xe-Hse Operating Map
RTXC-XE/XE-HSE Operating Map Cooling Mode: Water Side Heat Exchanger (Evaporator) Min Temperature (° C) Max Temperature (° C) Entering Water Temperature (Startup) Leaving Water Temperature (Running) Air Side Heat Exchanger (Condenser) Min Temperature (° C) Max Temperature (° C) Entering Air Temperature Heating Mode: Water Side Heat Exchanger (Condenser) Min Temperature (°... -
Page 44: Pre-Start Checkout
Pre-Start Checkout Prestart procedures WARNING Hazardous Voltage! Disconnect all electrical power, including remote disconnects before servicing. Follow proper lockout / tagout (LOTO) procedures to ensure the power cannot be inadvertently energized. Failure to disconnect power before servicing could result in death or serious injury. When installation is complete, but prior to putting the unit into service, the following prestart procedures must be reviewed and verified correct. - Page 45 It is recommended that the services of a qualified water treatment specialist be engaged to determine what water treatment, if any, is required. Trane assumes no responsibility for equipment failures which result from untreated or improperly treated water or saline or brackish water.
-
Page 46: Unit Voltage Power Supply
WARNING Hazardous Voltage! For variable frequency drives or other energy storing components provided by Trane or others, refer to the appropriate manufacturer’s literature for allowable waiting periods for discharge of capacitors. Verify with an appropriate voltmeter that all capacitors have discharged. Failure to disconnect power or failure to discharge capacitors before servicing could result in death or serious injury. -
Page 47: Unit Voltage Imbalance
CAUTION Equipment Damage! Inadequate voltage to the unit may cause control components to malfunction and shorten the life of relay contact, compressor motors and contactors. Unit Voltage Imbalance Excessive voltage imbalance between the phases of a three-phase system can cause motors to overheat and eventually fail for XE(fixed speed) unit. -
Page 48: Water System Flow Rates
Do not interchange any load leads that are from the unit contactors or the motor terminals. The terminal connection of the compressor after maintenance must be consistent with Trane wiring diagrams. Do not interchange any load leads that are from the unit contactors or the motor terminals to prevent compressor from damage in a reverse rotation. -
Page 49: Unit Start-Up And Shut-Down Procedures
Unit Start-up and Shut-down Procedures Important: Initial unit commissioning start-up must be performed by Trane, or an agent of Trane specifically authorized to perform start-up and warranty of Trane products. Contractor shall provide Trane (or an agent of Trane specifically authorized to perform start-up) with notice of the scheduled start-up at least two weeks prior to scheduled start-up. -
Page 50: Unit Shutdown
Leaving water temperature Saturated suction temperature NOTICE Equipment Damage! Use only refrigerants specified on the unit nameplate and Trane OIL00388. Failure to do so may cause compressor damage and improper unit operation. CAUTION Personal Injury! Avoid breathing refrigerant vapor and any contact with liquid or gas. -
Page 51: Seasonal Unit Start-Up
Open the electrical disconnect switches for the unit. Lock the switches in the “OPEN” position. Remove evaporator power before draining evaporator to avoid heater burnout. Open the electrical disconnect switches for the water pump. Lock the switches in the “OPEN” position. -
Page 52: Periodic Maintenance
7. If unit measurements vary significantly from values listed in the table, problems may exist with refrigerant charge levels. Contact your local Trane Service Agency. Observe and clean the air side fin-tube heat exchanger if blocked. Record the water pressure drop across the evaporator. Clean water strainer if necessary. - Page 53 Contact a qualified service organization to leak test the unit, to check operating and safety controls, and to inspect electrical components for deficiencies. Clean and repaint any areas that show signs of corrosion. Inspect all piping components for leakage and/or damage. Clean all water strainers. Inspect the air side heat exchanger.
- Page 54 Table 8. RTXC-XE/XE-HSE Pre-Start Check List RTXC-XE/XE-HSE Start Up Test Log Jobsite Name: Jobsite Location: Unit Model #: Unit Serial #: Start Date: Sales Order #: Ship Date: Jobsite Elevation (m. above sea level): Power Supply Unit Status (before Start-up) Voltage (V): Chiller Appearance at Arrival: Frequency (Hz):...
-
Page 55: Maintenance And Service
Close the service valve and remove the hose. NOTICE Insufficient Subcooling! Proper subcooling can be determined by operator log, service technician experience or consulting Trane local service. NOTICE Gas Refrigerant Adding! Add gas refrigerant only during operation to avoid compressor failure. -
Page 56: Refrigerant Filter Replacement Procedure
13. Remove vacuum hose from liquid line and attach charging hose. 14. Replace stored charge in liquid line. 15. Remove charging hose. 16. Open liquid line isolation valve. Compressor Oil CAUTION Compressor Damage! Use only Trane OIL00388. Failure to do so may cause compressor damage and improper unit operation. RTXC-SVX003D-EN... -
Page 57: Fin-Tube Coil Cleaning
It is recommended that the services of a qualified water treatment specialist be engaged to determine what water treatment, if any, is required. The Trane Company assumes no responsibility for equipment failures which result from untreated or improperly treated water, saline or brackish water. - Page 58 Mechanical Cleaning Procedure Mechanical tube cleaning method is used to remove sludge and loose material from smooth-bore tubes. Review mechanical space limitations and determine the safest method or methods of rigging and lifting the Waterboxes. Disconnect water pipes, if connected. Mind the temperature sensor and insulation. Select the proper lift connection device from Table 10.
- Page 59 Note: all data is the weight of single component. Chemical Cleaning Procedure Scale deposits are best removed by chemical means. Consult qualified water treatment specialist for a recommended cleaning solution. A standard chilled water circuit is composed solely of copper, cast iron and steel. Improper chemical cleaning can damage tube walls. All the materials used in the external circulation system, the quantity of the solution, the duration of the cleaning period, and any required safety precautions should be approved by the company furnishing the materials or performing the cleaning.
-
Page 60: Ac Drive (Only For Rtxc-Xe-Hse)
Follow proper lockout/ tagout procedures to ensure the power cannot be inadvertently energized. For variable frequency drives or other energy storing components provided by Trane or others, refer to the appropriate manufacturer’s literature for allowable waiting periods for discharge of capacitors. Verify with an appropriate voltmeter that all capacitors have discharged. - Page 61 Figure 24. AC Drive Components (132/160kW) Figure 25. AC Drive Components (200kW) RTXC-SVX003D-EN...
-
Page 62: Product Appearance And Dimensions
Product Appearance and Dimensions Figure 26. Appearance and Dimensions of CA300 Drive (132/160kW) Figure 27. Appearance and Dimensions of CA300 Drive (200kW) Table 12. Dimensions of CA300 Drive (132/160/200kW) Mounting Hole Dimensions Mounting Weight (mm) (mm) Model Diameter d (kg) (mm) CA300-4T132 Φ10... -
Page 63: Technical Specifications
Technical Specifications Table 13. Product Models and Electrical Parameters Power Capacity Input Current Output Current Motor Model (kVA) (kW) Three-phase power supply: 380 V to 480 V (-15% to 10%) 50 Hz/60 Hz. CA300-4T132 CA300-4T160 CA300-4T200 Table 14. Parameter Table Item Description Output frequency... -
Page 64: Standard Wiring
Four DO terminals Three relay output terminals, one of which has NO and Output terminals NC contacts and the other two have NO terminals Three AO terminals that support 0 mA to 20 mA current output or 0 V to 10 V voltage output Communication terminal One RS485 communication terminal Install the AC drive inside the cabinet where it is protected... -
Page 65: Main Circuit Terminals
Main Circuit Terminals Figure 29. AC Drive Terminal Arrangement Table 15. AC Drive Terminal Arrangement Type Mark Name Function R, S, and T Three-phase power input Connected to the mains supply U, V, and W AC drive output Connected to the motor Main Circuit (+1) and (+2) AC reactor connection... - Page 66 Table 16. Layout of STO Board Terminals Port Signal Function Remarks STO1+ Positive input of the first security signal Vin1: Voltage difference between STO1+ and STO1- STO1- Negative input of the first security signal STO1+ Positive input of the second security signal Vin2: Voltage difference between STO2+ and STO2- STO2-...
-
Page 67: Operating Panel Introduction
Operating Panel Introduction Using the operating panel, you can set and modify function codes, monitor working status, and perform running control (start/stop) of the AC drive. You can also equip an external panel using the option LED operating panel (MD32NKE1). Figure 32. -
Page 68: Function Indicators
The following table lists faults and solutions for reference. Perform troubleshooting according to the descriptions and do not repair or modify the AC drive randomly. If the fault cannot be rectified, contact the agent or Trane. RTXC-SVX003D-EN... -
Page 69: Troubleshooting - Faults And Diagnostics
E01.01 abnormal in current Check whether the hall sensor or current sampling. sampling circuit is damaged. If yes, Hardware contact the agent or Trane. fault E01.02 The contactor is faulty. Check the contactor. Check that the braking resistor is The braking resistor is E01.03... - Page 70 Fault Code Fault Name Cause Possible Solution A ground fault or short circuit exists in the Check whether short circuit occurs on output circuit of the AC the motor, motor cable, or contactor. drive. The control mode is Set motor parameters according to the SVC, but motor auto- motor nameplate and perform motor tuning is not performed.
- Page 71 Adjust the voltage to normal range. permissible range. E09.00 Undervoltage The bus voltage is Contact the agent or Trane. abnormal. The rectifier bridge, the inverter drive board, or Contact the agent or Trane. the inverter control board is abnormal.
- Page 72 EEPROM read and write mapping E21.03 and write fault is abnormal. If the EEPROM chip is damaged, require the agent or Trane to replace the main E21.04 control board. Stator resistance is not Check whether rated motor voltage and E22.00...
-
Page 73: Symptoms And Diagnostics
The switching power supply on the drive Check bus voltage. There is no display at board of the AC drive is faulty. power-on. The control board or operating panel is faulty. Contact the agent or Trane. The rectifier module is damaged. RTXC-SVX003D-EN... -
Page 74: Function Code
Related components on the control board are damaged. The motor or motor cable is "HC" is displayed at short circuited to ground. Contact the agent or Trane. power-on. The hall sensor is damaged. The mains voltage is too low. The motor or motor output Use a megger to measure the insulation "E23.00"... -
Page 75: Main Frequency Reference Setting Channel Selection
Para. No. Para. Name Setting Range Default Property Group F0: Standard Parameters 0: Digital setting F0-08 (pressing UP or DOWN can revise F0-08 easily, but the revised value would be cleared after power off) 1: Digital setting F0-08 (pressing UP or DOWN can change F0-08 easily, and the revised value won't be cleared Main frequency reference... -
Page 76: Rated Motor Power 121.3
Para. No. Para. Name Setting Range Default Property Group F0: Standard Parameters Frequency reference 1: 0.1 Hz ★ F0-22 resolution 2: 0.01 Hz Retentive of digital setting 0: Non-retentive ☆ F0-23 frequency upon stop 1: Retentive Acceleration/ 0: Maximum frequency (F0-10) ★... -
Page 77: Di2 Function Selection
Para. No. Para. Name Setting Range Default Property Group F1: Motor 1 Parameters 0: No auto-tuning 1: Asynchronous motor static auto-tuning 2: Asynchronous motor no- load auto-tuning 3: Asynchronous motor static complete auto-tuning F1-37 Auto-tuning selection ★ 11: Synchronous motor no- load partial auto-tuning (back EMF is not auto-tuned) 12: Synchronous motor... - Page 78 39: Switchover between main frequency source X and preset frequency 40: Switchover between auxiliary frequency source Y and preset ★ F4-05 DI6 function selection frequency 41: Reserved 42: Position lock selection 43: PID parameter switchover 44: User-defined fault 1 45: User-defined fault 2 46: Speed control/Torque control switchover...
-
Page 79: Relay 1 Function Selection
Para. No. Para. Name Setting Range Default Property Group F4: Input Terminals 0: High level active 1: Low level active Ones position: DI1 active mode Tens position: DI2 active mode ★ F4-38 DI active mode selection 1 Hundreds position: DI3 active mode Thousands position: DI4 active mode... -
Page 80: Modbus Baud Rate
output at fault or alarm) 39: Motor overheat warning 40: Current running time reached 41: Fault output 2 (having output after ☆ F5-05 DO2 function selection AC drive stops at occurrence of coast to stop fault and decelerate to stop fault; no output at undervoltage) 43: Position lock successful (offset pulses of Position lock... - Page 81 Para. No. Para. Name Setting Range Default Property Group A4: Screw Machine Parameters Power calculation method 0: AC ☆ A4-00 selection 1: DC DC bus current correction ☆ A4-01 0% to 500.0% 100.00% coefficient Current delay 0: Disabled ☆ A4-02 compensation selection 1: Enabled Over-modulation function...
- Page 82 Other technical documentation ,e.g., quality assurance measures for design and production Name and address of the person (established in the Community) complied the technical files: SOCIETE Trane 1 rue des Amériques F 88190 GOLBEY Responsible for making this declaration is the: Manufacturer ■...
- Page 83 For more information, please visit trane.com or tranetechnologies.com. Trane has a policy of continuous product and product data improvement and reserves the right to change design and specifications without notice. We are committed to using environmentally conscious print practices.