
Related Manuals for Daikin Altherma 3 WS EWSAH06UD Series


Summary of Contents for Daikin Altherma 3 WS EWSAH06UD Series
- Page 1 Installation manual Daikin Altherma 3 WS EWSAH06UD▲9W▼ EWSAX06UD▲9W▼ Installation manual English ▲= 1, 2, 3, …, 9, A, B, C, …, Z Daikin Altherma 3 WS ▼= , , 1, 2, 3, …, 9...
-
Page 2: Table Of Contents
About the LAN adapter ..........25 This document is part of a documentation set. The complete set 6.16.2 Overview of electrical connections......26 consists of: 6.16.3 Router ................. 26 6.16.4 Electricity meter ............26 Installation manual EWSAH/X06UD Daikin Altherma 3 WS 4P675760-1C – 2023.02... -
Page 3: Specific Installer Safety Instructions
ONLY by authorised persons. Daikin website (publicly accessible). Opening and closing the unit (see "4.2 Opening and closing the ▪ The full set of latest technical data is available on the Daikin unit" [ 4 6]) Business Portal (authentication required). DANGER: RISK OF ELECTROCUTION... -
Page 4: About The Box
▪ Prepare in advance the path along which you want to bring the unit to its final installation position. CAUTION Do NOT push or place redundant cable length into the unit. Installation manual EWSAH/X06UD Daikin Altherma 3 WS 4P675760-1C – 2023.02... -
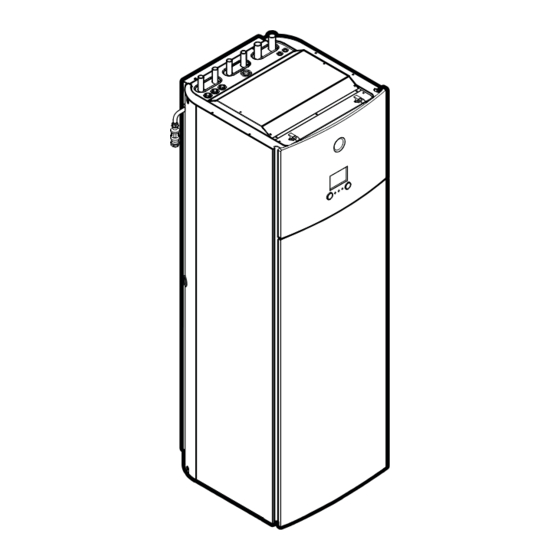
Page 5: Indoor Unit
(EKUHWG3DS) – 3/4" Male BSP staircases. See "4.2.2 To remove the hydro module from the unit" [ 4 7]. ▪ It is recommended to use lifting straps to carry the unit up or down staircases. EWSAH/X06UD Installation manual Daikin Altherma 3 WS 4P675760-1C – 2023.02... -
Page 6: Unit Installation
(example: open flames, an operating gas appliance or an operating electric heater). WARNING Make sure installation, servicing, maintenance and repair comply with instructions from Daikin and with applicable legislation and are executed ONLY by authorised persons. Installation manual EWSAH/X06UD Daikin Altherma 3 WS 4P675760-1C –... -
Page 7: To Remove The Hydro Module From The Unit
4 6]): 1 User interface panel 2 Front panel 5 Open the installer switch box as follows: 2 Remove the insulation from the shut-off valves by cutting the cable ties. EWSAH/X06UD Installation manual Daikin Altherma 3 WS 4P675760-1C – 2023.02... - Page 8 6 Unlink the connectors that run from the hydro module to the main switch box or other locations. Route the wires through the grommets of the upper hydro module cover. Installation manual EWSAH/X06UD Daikin Altherma 3 WS 4P675760-1C – 2023.02...
-
Page 9: To Close The Indoor Unit
1° 1° 0° NOTICE To avoid structural damage on unit, ONLY move the unit Water drain valve when levelling feet are at their lowest position. Central water loop drain valve EWSAH/X06UD Installation manual Daikin Altherma 3 WS 4P675760-1C – 2023.02... -
Page 10: To Connect The Drain Hose To The Drain
▪ Fluid temperature. All installed piping and piping accessories (valve, connections,…) MUST withstand following temperatures: INFORMATION The following figure is an example and may NOT completely match your system layout Installation manual EWSAH/X06UD Daikin Altherma 3 WS 4P675760-1C – 2023.02... -
Page 11: Connecting The Central Water Loop Piping
Central water loop circuit IN unit. Central water loop circuit OUT Manometer 1 Install the shut off-valve with integrated filter (delivered as Air purge valve accessory) at the space heating/cooling water inlet. Filter EWSAH/X06UD Installation manual Daikin Altherma 3 WS 4P675760-1C – 2023.02... - Page 12 A pressure relief valve (field supply) with an opening pressure of maximum 10 bar (=1 MPa) must be installed on the domestic cold water inlet connection in accordance with the applicable legislation. Installation manual EWSAH/X06UD Daikin Altherma 3 WS 4P675760-1C – 2023.02...
-
Page 13: To Connect The Water Piping For Domestic Hot Water
Fixed grating Trapped gully Metal discharge pipe from safety device to tundish Discharge pipe from tundish, with continuous fall. See Building Regulation G3 section 3.56, Table 03 and worked example. EWSAH/X06UD Installation manual Daikin Altherma 3 WS 4P675760-1C – 2023.02... -
Page 14: To Connect The Recirculation Piping
The piping in the complete water circuit MUST be insulated to prevent reduction of the heating capacity. Consider that the space heating piping can condensate during cooling operation. Foresee adequate insulation for these pipes. Installation manual EWSAH/X06UD Daikin Altherma 3 WS 4P675760-1C – 2023.02... -
Page 15: Electrical Installation
The power supply must be protected with the required safety devices, i.e. a main switch, a slow blow fuse on each phase and an earth leakage protector in accordance with the applicable legislation. EWSAH/X06UD Installation manual Daikin Altherma 3 WS 4P675760-1C – 2023.02... -
Page 16: To Connect The Main Power Supply
C5: Power supply for the rest of the unit current sensors. (1N~) Wires: 3×2. Use part of the cable (40 m) delivered as accessory. [9.9.1]=3 (Power consumption control = Current sensor) [9.9.E] Current sensor offset Installation manual EWSAH/X06UD Daikin Altherma 3 WS 4P675760-1C – 2023.02... - Page 17 Connect the factory-mounted power supply cable to a 1N~ or 3N~ — power supply. Preferential kWh rate power supply with separate normal kWh rate power supply NOT ALLOWED EWSAH/X06UD Installation manual Daikin Altherma 3 WS 4P675760-1C – 2023.02...
- Page 18 Connect the preferential kWh rate power supply contact (S1S) as 1× follows. Detail C4: Connection of X11Y Factory-mounted cables. 2× Disconnect X11Y from X11YA, and connect it to X11YB. X2M/5+6 1× X11YB X11Y X11YA 1× Installation manual EWSAH/X06UD Daikin Altherma 3 WS 4P675760-1C – 2023.02...
-
Page 19: To Connect The Remote Outdoor Sensor
2 Connect the valve control cable to the appropriate terminals as shown in the illustration below. NOTICE Wiring is different for a NC (normally closed) valve and a Factory-mounted cable Splicing connectors (field supply) NO (normally open) valve. EWSAH/X06UD Installation manual Daikin Altherma 3 WS 4P675760-1C – 2023.02... -
Page 20: To Connect The Electricity Meters
1 Top panel 2 User interface panel 3 Installer switch box cover 2 Connect the electricity meters cable to the appropriate terminals as shown in the illustration below. Installation manual EWSAH/X06UD Daikin Altherma 3 WS 4P675760-1C – 2023.02... -
Page 21: To Connect The Alarm Output
To connect the space cooling/ Cable sleeve (field supply) heating ON/OFF output Wires: (2+1)×0.75 mm² Maximum load: 3.5 A, 250 V AC — unit" [ 4 6]): 1 Open the following (see "4.2.1 To open the indoor EWSAH/X06UD Installation manual Daikin Altherma 3 WS 4P675760-1C – 2023.02... -
Page 22: To Connect The Changeover To External Heat Source
2 User interface panel 3 Front panel 4 Main switch box cover 2 Connect the changeover to external heat source cable to the appropriate terminals as shown in the illustration below. Installation manual EWSAH/X06UD Daikin Altherma 3 WS 4P675760-1C – 2023.02... -
Page 23: To Connect The Power Consumption Digital Inputs
2 Connect the safety thermostat (normally closed) cable to the appropriate terminals as shown in the illustration below. 2 Connect the power consumption digital inputs cable to the appropriate terminals as shown in the illustration below. EWSAH/X06UD Installation manual Daikin Altherma 3 WS 4P675760-1C – 2023.02... -
Page 24: To Connect The Brine Low Pressure Switch
Before disconnecting. If you want to remove or disconnect the brine low pressure switch, first set [C‑0B]=0 — (brine low pressure switch not installed). If not, this causes an error. Installation manual EWSAH/X06UD Daikin Altherma 3 WS 4P675760-1C – 2023.02... -
Page 25: Lan Adapter
▪ [9.9.1]=1 (Power consumption control = Continuous) ▪ [9.9.2]=1 (Type = kW) INFORMATION For instructions on how to perform a software update, see the installer reference guide. X1A~X4A Connectors EWSAH/X06UD Installation manual Daikin Altherma 3 WS 4P675760-1C – 2023.02... -
Page 26: Overview Of Electrical Connections
Item Specification Type Pulse meter (5 V DC pulse Use one of the following ways (A, B or C) to connect the router: detection) Possible number of pulses ▪ 100 pulse/kWh ▪ 1000 pulse/kWh Installation manual EWSAH/X06UD Daikin Altherma 3 WS 4P675760-1C – 2023.02... -
Page 27: Solar Inverter/Energy Management System
The rest of the wiring to X1A differs depending on the digital outputs available on the solar inverter/energy management system and/or on the Smart Grid operation modes that you want the system to run in. EWSAH/X06UD Installation manual Daikin Altherma 3 WS 4P675760-1C – 2023.02... -
Page 28: Configuration
Installer settings > solar inverter/energy management system to LAN adapter Configuration wizard. To access Installer settings, see digital inputs X1A/1+2 LAN. "7.1.1 To access the most used commands" [ 4 29]. Installation manual EWSAH/X06UD Daikin Altherma 3 WS 4P675760-1C – 2023.02... -
Page 29: To Access The Most Used Commands
Use this wizard to set the most important initial settings for the unit to run properly. If required, you can afterwards configure more settings. You can change all these settings via the menu structure. EWSAH/X06UD Installation manual Daikin Altherma 3 WS 4P675760-1C – 2023.02... -
Page 30: Configuration Wizard: Language
To manually recover it via the user interface, go to the Malfunctioning main menu screen and confirm whether the backup heater can take over the heat load or not. Installation manual EWSAH/X06UD Daikin Altherma 3 WS 4P675760-1C – 2023.02... -
Page 31: Configuration Wizard: Backup Heater
Define how the operation of the unit is controlled. European electricity grids. The type of backup heater can be viewed but not changed. Code Description [9.3.1] [E‑03] ▪ 4: 9W EWSAH/X06UD Installation manual Daikin Altherma 3 WS 4P675760-1C – 2023.02... -
Page 32: Configuration Wizard: Additional Zone
For more info about this functionality, see "7.2.5 Configuration zone" [ 4 31]. wizard: Main To set the heat pump ON hysteresis: Code Description [5.9] [6-00] Heat pump ON hysteresis ▪ 2°C~40°C Installation manual EWSAH/X06UD Daikin Altherma 3 WS 4P675760-1C – 2023.02... -
Page 33: Weather-Dependent Curve
Because it reacts more quickly, it prevents high rises and drops of the indoor temperature and water temperature at tap points. EWSAH/X06UD Installation manual Daikin Altherma 3 WS 4P675760-1C – 2023.02... -
Page 34: Slope-Offset Curve
Main zone – Heating [2.4] Main zone > Setpoint WD heating, fixed cooling mode OR Weather dependent Main zone – Cooling [2.4] Main zone > Setpoint Weather dependent mode Additional zone – Heating Installation manual EWSAH/X06UD Daikin Altherma 3 WS 4P675760-1C – 2023.02... -
Page 35: Settings Menu
To fine-tune the weather-dependent curve: 2-points curve Code Description The following table describes how to fine-tune the weather- [8.3] Number that users can call in case of dependent curve of a zone or tank: problems. EWSAH/X06UD Installation manual Daikin Altherma 3 WS 4P675760-1C – 2023.02... -
Page 36: Central Water Loop Freezing Temperature
▪ 5: –12°C ▪ 0: Off ▪ 6: –15°C ▪ 1: Every day ▪ 7: –18°C ▪ 2: Every Week [3‑0B] Water loop valve opening, Duration: ▪ 30~120 minutes, step 30 minutes Installation manual EWSAH/X06UD Daikin Altherma 3 WS 4P675760-1C – 2023.02... -
Page 37: Menu Structure: Overview Installer Settings
Ext. amb. sensor offset Averaging time [9.C] Bivalent Bivalent Boiler efficiency Temperature Hysteresis Only applicable in Swedish language. INFORMATION Depending on the selected installer settings and unit type, settings will be visible/invisible. EWSAH/X06UD Installation manual Daikin Altherma 3 WS 4P675760-1C – 2023.02... -
Page 38: Commissioning
Operation and turn off Space heating/cooling and Tank operation. ▪ Between the indoor unit and the valves (if applicable) ▪ Between the indoor unit and the room thermostat (if applicable) Installation manual EWSAH/X06UD Daikin Altherma 3 WS 4P675760-1C – 2023.02... -
Page 39: To Perform An Air Purge On The Central Water Loop Circuit
1 Set the user permission level to Installer. See "To — level" [ 4 29]. change the user permission 2 Go to [A.2]: Commissioning > Actuator test run. 3 Select a test from the list. Example: Pump. EWSAH/X06UD Installation manual Daikin Altherma 3 WS 4P675760-1C – 2023.02... -
Page 40: Hand-Over To The User
CO equivalent. Formula to calculate the quantity in CO equivalent tonnes: GWP value of the refrigerant × total refrigerant charge [in kg] / 1000 Installation manual EWSAH/X06UD Daikin Altherma 3 WS 4P675760-1C – 2023.02... - Page 41 See "4.3.2 To connect the drain hose to drain" [ 4 10]. Fluid pressure Check whether the fluid pressure is above 1 bar. If it is lower, add fluid. EWSAH/X06UD Installation manual Daikin Altherma 3 WS 4P675760-1C – 2023.02...
-
Page 42: To Drain The Domestic Hot Water Tank
Prerequisite: Open all the hot water tapping points to allow air to enter the system. Prerequisite: Remove the top panel. See "4.2.1 To open the indoor unit" [ 4 6]. 1 Remove the clip that fixes the domestic hot water OUT pipe. Installation manual EWSAH/X06UD Daikin Altherma 3 WS 4P675760-1C – 2023.02... -
Page 43: 11 Technical Data
11 Technical data Technical data A subset of the latest technical data is available on the regional Daikin website (publicly accessible). The full set of latest technical data is available on the Daikin Business Portal (authentication required). 11.1 Piping diagram: Indoor unit... -
Page 44: Wiring Diagram: Indoor Unit
Heat pump convector Heat pump convector A7P, A16P) Add LWT Additional leaving water Thermal protector backup heater relay temperature Reactor On/OFF thermostat (wired) On/OFF thermostat (wired) # Domestic hot water pump Installation manual EWSAH/X06UD Daikin Altherma 3 WS 4P675760-1C – 2023.02... - Page 45 Only for combined 3F BUH/ Only for combined 3F backup Additional LWT zone Additional leaving water compressor power supply (6/9 heater/compressor power supply temperature zone (6/9 kW) EWSAH/X06UD Installation manual Daikin Altherma 3 WS 4P675760-1C – 2023.02...
- Page 46 Without pressure loss detection (11) Ext. outdoor ambient (11) External outdoor ambient thermistor thermistor Switch box (12) LAN adapter connection (12) LAN adapter connection Ethernet Ethernet LAN adapter LAN adapter Switch box Installation manual EWSAH/X06UD Daikin Altherma 3 WS 4P675760-1C – 2023.02...
- Page 47 Power limitation demand input 3 FIELD SUPPLY A8P: X801M: 3-5 signal 2 core Power limitation demand input 4 Router for LAN adapter A8P: X801M: 4-5 A15P: X4A signal ethernet 4D137622 EWSAH/X06UD Installation manual Daikin Altherma 3 WS 4P675760-1C – 2023.02...
-
Page 48: Technical Specifications: Domestic Hot Water Tank
WARNING TO INSTALLER ■ This installation is subject to building regulation approval, notify Local Authority of intention to install. ■ Use only manufacturer's recommended spare parts. Contact your local Daikin dealer. ■ Installed by name address tel. No. - Page 52 4P675760-1 C 00000003 4P675760-1C 2023.02 Verantwortung für Energie und Umwelt...