Table of Contents
Advertisement
Owner's Manual
II:RRFrSMRN I
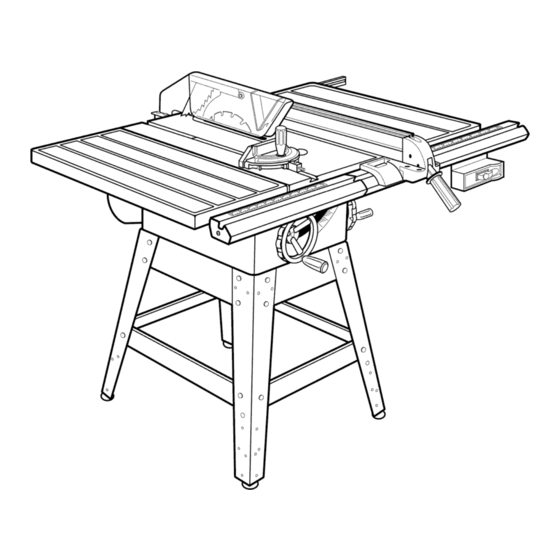
10 in. Stationary
TABLE SAW
Model No.
315.228390
Save this manual for
future reference
_, CAUTION:
Read and follow all Safety
Rules and Operating
Instructions
before first
use of this product.
Customer
Help Line: 1-800-932-3188
Sears,
Roebuck
and Co., Hoffman
Estates,
IL 60179
USA
Visit the Craftsman
web page: www.sears.com/craftsman
972000-780
10-02
• Safety
• Features
• Assembly
• Operation
• Maintenance
• Parts List
Advertisement
Table of Contents

Related Manuals for Craftsman 315.22839


Summary of Contents for Craftsman 315.22839
- Page 1 Read and follow all Safety Rules and Operating Instructions use of this product. Customer Help Line: 1-800-932-3188 Sears, Roebuck and Co., Hoffman Visit the Craftsman web page: www.sears.com/craftsman 972000-780 10-02 before first Estates, IL 60179 • Safety • Features • Assembly •...
-
Page 2: Table Of Contents
Carefully read through this entire owner's manual before using your new saw. Pay close attention to the Rules For Safe Operation, and all Safety Alert Symbols, including Danger, Warning and Caution. If you use your saw properly and only for what it is intended, you will enjoy years of safe, reliable service. -
Page 3: Table Of Contents
Maintenance ... • Lubrication ... • Troubleshooting • Exploded View and Repair Parts List ... • Parts Ordering / Service ... CR R FTSM R N _ TABLE SAW 315.228390 30-34 31-32 32-33 35-42 37-38 38-39 44-46 48-65 back page... - Page 4 Always use original factory replacement parts when servicing. READ ALL INSTRUCTIONS • KNOW YOUR POWER TOOL. Read the owner's manual carefully. Learn the saw's applications and limitations as well as the specific potential hazards related to this tool. • DO NOT USE IN DANGEROUS MENT.
-
Page 5: Rules For Safe Operation
• ALWAYS SUPPORT LARGE WORK PIECES while cutting to minimize risk of blade pinching and kickback. Saw may slip, walk or slide while cutting large or heavy boards. • GUARD AGAINST occur when the blade stalls, driving the work... - Page 6 RULES FOR SAFE OPERATION • USE A SUPPORT FOR THE SIDES AND BACK OF THE SAW TABLE when sawing wide or long workpieces. Use a sturdy "outrigger" support if a table extension is more than 24 inches long and is attached to the saw, to prevent tipping.
-
Page 7: Electrical
ELECTRICAL CONNECTION Your Sears Craftsman Table Saw is powered by a precision built electric motor. It should be connected to a power supply that is 120 volts, 60 Hz, AC only (normal household current). - Page 8 Also, the workpiece area which will be or has been cut by the blade. The distance that the tip of the saw blade tooth is bent (or set) outward from the face of the blade.
-
Page 9: Loose Parts List
Your new table saw has been designed to give you many years of high quality performance. this goal, proper care and treatment is important. Careful treatment begins with removing all parts from the carton and checking them against the list of loose parts. - Page 10 The following items are included Table Saw Base ... B. Belt ... C. Belt Guard ... D. Blade Guard Assembly (Hardware Shown Separately) ... E. Wrench ... Handwheel (Hardware Shown Separately) ... 2 G. Leg Brace, lower (short) ... H. Leg Brace, lower (long) ...
- Page 11 Hardware for Leveling Feet ... leveling foot ... flat washer (5/16 in.) ... hex nut (5/16-18) ... Hardware for Mounting Saw Base ... hex bolt (5/16-18 x 3/4 in.) ... flat washer (5/16 in.) ... hex nut (5/16-18) ... tRRFTSMRN _TABLESAW315.228390...
- Page 12 (1/4-20 x 3/8 in.) ... screw (#10-24 x 3/8 in.) ... cord clip ... Note: Cord clip and screw mount to the either side of saw cabinet and are used to secure motor cord, depending upon operator preference of switch assembly. Fig. 2 c...
- Page 13 The following tools are needed for assembly and alignment. Note: The five hex keys listed below have been provided with your saw. The remaining tools are typical shop tools and are not included with your saw. 8MALL / MEDIUM PHILLIPSSCREWDRIVER...
-
Page 14: Labels
The following labels are found on your saw in the locations shown. Read all warnings and this owner's manual before using saw. 10 inch Table Saw 3600 R.P.M. 120 VOLTS 60 Hz AC ONLY 13 A , WARNING I WHEN SERVICING,... - Page 15 When Mounting an Auxiliary [<_ Keep Fasteners Away From Blade. I Do Not Lift Saw With Rails or Extension Tables. WARNING • Attach Blade Guard Assembly Before Operating this Saw • Read Owners II:RRFTSMRN Fence Face, Position Mounting Hardware Beyond...
- Page 16 KNOW YOUR TABLE ANTI-KICKBACKPAWLS BLADEGUARD MITER GAGEGROOVE TABLE EXTENSION MITER GAGE BELTCOVER rRRFTSMRN _TABLE SAW 315.228390 REAR RAIL RIVINGKNIFE ALIGN-A-CUT OR SPREADER BLADE MOTOR RIP FENCE TABLE INSERT EXTENSION SCALE FRONT RAIL SWITCH BEVEL WITH KEY HANDWHEEL BEVEL RIP FENCE...
-
Page 17: Features
BEVEL SCALE - The easy-to-read scale on the front of the workstand shows the exact blade angle, BLADE -This saw is provided with a Craftsman 64 tooth, 10 in. steel blade. The blade is adjusted with bevel and height handwheels on the cabinet, Bevel... -
Page 18: Assembly
Assembly is best done in the area where the saw will be used. When you remove the table saw base, loose parts, and hardware from the packing materials, check all items with the loose parts list and drawing. If you are unsure about the description of any part, refer to the drawing. - Page 19 • Place the leg stand on the table saw base. Align the holes in the table with the holes in the end braces. Make sure the Craftsman label faces the front of the saw (same side as height handwheel). •...
- Page 20 See Figure 11. A good alignment allows the rails to slide on easily. • Stand at the front of the saw and line up the front edges of the saw table and extensions. • Pull the extensions out slightly, put a block of wood where the extension meets the table, and tap the block of wood with a hammer.
- Page 21 • At the back of the table, put the square head bolts in the holes in the edge of the saw table and the outer holes in each extension table so the bolt heads extend outward 1/2 in.
- Page 22 • Align the right rail from left to right - Match the 7-1/8 in. mark on the right scale to the right edge of the table saw base (main table). See Figure 16. • Snug right rail against table. Finger-tighten each nut on the table and extensions.
- Page 23 ALIGNING THE RIP FENCE AND FRONT See Figures 17 and 18. The rip fence scale indicator is installed on the right side of the rip fence but can be removed and rein- stalled on the left side if needed, tf a cutting operation requires placing the rip fence on the left side of the blade, and you find relocating the scale indicator necessary, simply unscrew and re-attach it.
-
Page 24: Crrftsmrn_Tablesaw315.228390
(#10-24). • Lower the blade by turning the height handwheel. • Slip the belt on the saw pulley (inside cabinet). Lift the motor forward and place the belt on the motor pulley. • Check that the belt is straight and both pulleys are aligned. - Page 25 INSTALLING THE BLADE GUARD See Figures 23- 25. WARNING: If the blade is not fully lowered, turn the height handwheel to lower the blade to prevent injury • Get the blade guard, the blade guard bracket, and the following hardware: 2 hex bolts (5/16-18 x 1/2 in.) 2 lock washers (5/16 in.) 3 socket head screws (1/4-20 x 3/8 in.)
- Page 26 BLADE See Figures 26 - 28. WARNING: Make sure the switch is off, the switch key is removed, and your saw is unplugged. Failure to do so could result in accidental starting, causing serious personal injury. The riving knife must be aligned with and centered over the blade.
-
Page 27: Adjustments
WARNING: Make sure the switch is off, the switch key is removed, and your saw is un- plugged. Failure to do so could result in acciden- tal starting, resulting in serious personal injury. WARNING:... - Page 28 Secure it to the side of the cabinet with the cord clip and screw provided. Use care with the cord around sharp edges. Your saw is now set up to provide years of high quality perfor- mance.
- Page 29 Place a square on the saw table, with the short end up and check. The long end of the square should extend across one of the extension tables. If the...
- Page 30 • To install a standard blade, place the new blade on the arbor shaft, with teeth pointing down toward the front of the saw. Wedge a piece of scrap wood at the back of the blade. See Figure 37. CAUTION: The teeth must point down toward the front of the saw to work properly.
- Page 31 WARNING: Make sure the switch is off, the switch key is removed, and your saw is un- plugged. Failure to do so could result in acciden- tal starting, resulting in serious personal injury. WARNING: The sawblade must be parallel to the miter gage groove so the wood does not bind, resulting in kickback.
- Page 32 If the blade is not parallel, adjust the front table bracket. Tilt the blade to 45 ° with the blade lock handle and bevel handwheel. • From the back of the saw, loosen the bolts holding the front table bracket, as well as the rear table bracket. •...
- Page 33 Place the square against the blade (be sure the square is not against one of the saw teeth). If the blade is not at 45 °, unscrew the 45 ° stop screw (right of blade), turn the handwheel until the blade is correct, and tighten the screw.
- Page 34 To remove the throat plate, first loosen the screw in the throat plate with a phillips screwdriver and lift the front end. Pull it out toward the front of the saw. • To re-install the throat plate, place it in the opening.
-
Page 35: Causes Of Kickback
Refer to the Electrical page of this manual. Note: This table saw is designed to cut wood and wood composition products only. CAUSES... -
Page 36: Types Of Cuts
TYPES OF CUTS See Figure 46. There are six basic cuts: 1) the cross cut, 2) the rip cut, 3) the miter cut, 4) the bevel cross cut, 5) the bevel rip cut, and 6) the compound (bevel) miter cut. All other cuts are combinations of these basic six. -
Page 37: Making A Cross Cut
See Figures 47 and 48. It is recommended that you make test cuts on scrap wood. Stand at the front of the saw and push the wood to the blade with the miter gage. WARNING: Make sure the blade guard is lowered over blade and is working properly to prevent possible injury. -
Page 38: Making A Miter Cut
A MITER CUT See Figure 50. Make a test cut on scrap wood. From the front of the saw, push the wood to the blade with the miter gage. WARNING: Make sure the blade guard is lowered over blade and is working properly to prevent possible injury. -
Page 39: Making A Bevel Rip Cut
• Make sure the wood is clear of the blade before turning on the saw. Insert the key and lift the switch to the ON position. Let the blade build up to full speed before feeding the wood into the blade with the miter gage. - Page 40 MAKING A COMPOUND (BEVEL) See Figure 54. Practice on scrap wood. From the front of the saw, push the wood to the blade with the miter gage. Do not use the rip fence. WARNING: Make sure the blade guard is lowered over blade and is working properly to prevent possible injury.
- Page 41 LARGEPANELCUT SUPPORTS • Make sure the wood does not touch the blade before you turn on the saw. Let the blade build up to full speed before feeding the wood into the blade. • When the work is completed, press the switch off and remove the key.
-
Page 42: Making A Dado Cut
Always use pushsticks with dado cuts. • When the work is completed, press the switch off and remove the key. Unplug the saw, remove the dado insert and dado blade. Reinstall the blade, riving knife, blade guard and throat plate. -
Page 43: Maintenance
GENERAL MAINTENANCE WARNING: When servicing, use only identical Craftsman replacement parts. Use of any other part may create a hazard or cause product damage. WARNING: To prevent accidental starting that could cause possible serious personal injury, turn off the saw, remove the switch key, and unplug the saw before working on the table saw. - Page 44 1. Motor is overloaded. 2. Dull blade. 3. Sawdust inside saw is blocking air flow. 1. Starter switch is defective. 2. Voltage from source is low. 3. Dull blade. 4. Fuses or circuit breakers are wrong size or defective.
- Page 45 Miter gage does not move smoothly. Cut binds, burns or stalls motor when ripping. Saw blade does not cut true at 90 ° or 45 ° positions. CAUSE 1. Motor is overloaded. 2. Fuses or circuit breakers are wrong size or defective.
- Page 46 PROBLEM Rip fence does not move smoothly. Wood edges away from rip fence when ripping. rRRFTIMRN TABLESAW315.228390 CAUSE 1. Rip fence is not mounted cor- rectly. 2. Rails are dirty or sticky. 1. Rip fence is misaligned. SOLUTION 1. Remove and reposition the rip fence.
- Page 47 £RRFTSMRN TABLE SAW 315.228390...
- Page 48 The model number will be found on a plate attached to the cabinet. Always mention the model FIGURE A rRRFTSMRN °TABLE SAW 315.228390 TABLE SAW - MODEL NO. 315.228390 regarding your TABLE SAW or when ordering repair parts. ] /1 •...
- Page 49 CRAFTSMAN number in all correspondence regarding your TABLE SAW or when ordering repair parts. The model number will be found on a plate attached to the cabinet. Always mention the model PARTS LIST FOR FIGURE A PART NUMBER 982072-001 ** STD551031 * Washer (5/16 in.) ...
- Page 50 SAW or when ordering repair parts. he model number will be found on a plate attached to the cabinet. Always mention the model number in all correspondence _> €,o FIGUREB CRAFTSMAN TABLE SAW- MODEL ® NO. 315.228390 regarding your TABLE...
- Page 51 SAW or when ordering repair parts. he model number will be found on a plate attached to the cabinet. Always mention the model number in all correspondence PART NUMBER 979999-001 ** STD541031 ** STD551031 979995-002 ** STD533107 979993-002 979997-002 ** STD523107...
- Page 52 CRAFTSMAN TABLE SAW - MODEL NO. 315.228390 • SAW or when ordering repair parts. he model number will be found on a plate attached to the cabinet. Always mention the model number in all correspondence regarding your TABLE 13"1 _>...
- Page 53 SAW or when ordering repair parts. he model number will be found on a plate attached to the cabinet. Always mention the model number in all correspondence PART NUMBER DESCRIPTION 979973-001 Fence End Cap ... 979945-001 * Screw (#8-32 x 1/2 in.) ... 4 ** STD541425 * Lock Nut (1/4-20) ...
- Page 54 SAW or when ordering repair parts. he model number will be found on a plate attached to the cabinet. Always mention the model number in all correspondence FIGURED CRAFTSMAN TABLE SAW- MODEL NO. 315.228390 regarding your TABLE •...
- Page 55 SAW or when ordering repair parts. he model number will be found on a plate attached to the cabinet. Always mention the model number in all correspondence PART NUMBER 979935-001 979940-001 979944-001 ** STD551025 979942-001 979941-001 979937-001 979939-001 979938-001 979934-001...
- Page 56 CRAFTSMAN TABLE SAW- MODEL NO. 315.228390 • SAW or when ordering repair parts. he model number will be found on a plate attached to the cabinet. Always mention the model number in all correspondence regarding your TABLE I"I"1 FIGUREE...
- Page 57 SAW or when ordering repair parts. he model number will be found on a plate attached to the cabinet. Always mention the model number in all correspondence PART NUMBER 979945-001 * Screw (#8-32 x 1/2 in.) ... ** STD512503 * Screw (1/4-20 x 3/8 in.) ...
- Page 58 CRAFTSMAN TABLE SAW- MODEL NO. 315.228390 • SAW or when ordering repair parts. he model number will be found on a plate attached to the cabinet. Always mention the model number in all correspondence regarding your TABLE I"I"1 FIGUREF...
- Page 59 SAW or when ordering repair parts. he model number will be found on a plate attached to the cabinet. Always mention the model number in all correspondence PART NUMBER STD541010 * Hex Nut (#10) ... STD551010 * Flat Washer (#10) ...
- Page 60 CRAFTSMAN TABLE SAW- MODEL NO. 315.228390 • SAW or when ordering repair parts. he model number will be found on a plate attached to the cabinet. Always mention the model number in all correspondence regarding your TABLE I"I"1 =£ FIGUREG...
- Page 61 SAW or when ordering repair parts. he model number will be found on a plate attached to the cabinet. Always mention the model number in all correspondence PART NUMBER 979992-002 ** STD523105 980588-001 979918-002 977229-002 977491-001 977481-001 980602-001 ** STD551010...
- Page 62 CRAFTSMAN TABLE SAW- MODEL NO. 315.228390 • SAW or when ordering repair parts. he model number will be found on a plate attached to the cabinet. Always mention the model number in all correspondence regarding your TABLE I"I"1 FIGUREH...
- Page 63 SAW or when ordering repair parts. he model number will be found on a plate attached to the cabinet. Always mention the model number in all correspondence PART NUMBER 979879-001 * Bolt (5/16-18x3/4in. 979945-001 * Screw (#8-32 x 1/2 in.) ...
- Page 64 SAW or when ordering repair parts. he model number will be found on a plate attached to the cabinet. Always mention the model number in all correspondence Ir'-- I1"1 )i> FIGUREI CRAFTSMAN TABLE SAW- MODEL 39 38 NO. 315.228390 regarding your TABLE...
- Page 65 SAW or when ordering repair parts. he model number will be found on a plate attached to the cabinet. Always mention the model number in all correspondence PART NUMBER DESCRIPTION ** STD551131 * Lock Washer (5/16 in.) ... 6 ** STD523105 * Bolt (5/16-18 x 1/2 in.
- Page 66 Parapedirserviciode reparaciCn a domicilio, Au Canadapourserviceen fran_;ais: y paraordenarpiezascon entregaa domicilio: 1-877-LE-FOYER 1-888-SU-HOGAR (1-877-533-6937) (1-888-784-6427) ® Registered Trademark / TMTrademark of Sears, Roebuck and Co. ® Sears, Roebuck and Co ® Marca Registrada / 7M Marca de Fabrica de Sears, Roebuck and Co...