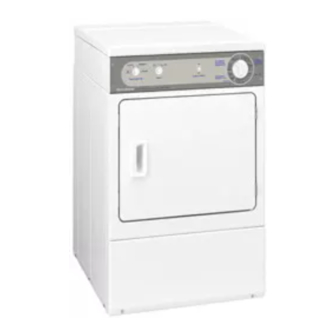
Speed Queen CES68AWF Installation Instructions Manual
Speed queen ces68awf: installation instruction
Hide thumbs
Also See for CES68AWF:
- Supplementary manual (23 pages) ,
- User manual (18 pages) ,
- Installation manual (17 pages)
Table of Contents
Advertisement
Quick Links
Installation Instructions
for Front Control Dryers
Inside......................................
Dimensions........................................................................
Before You Start................................................................
Installing the Dryer............................................................
Installer Checklist..............................................................
Para bajar una copia de estas instrucciones en español, visite www.speedqueen.com.
Keep these instructions for future reference.
(If this machine changes ownership, this manual must accompany machine.)
Date Purchased ________________
Model Number ________________
Serial Number _________________
www.speedqueen.com
3
4
5
Back Cover
Part No. 512100R3
June 2007
Advertisement
Table of Contents

Summary of Contents for Speed Queen CES68AWF
-
Page 1: Installation Instructions
Front Control Dryers Inside... Dimensions... Before You Start... Installing the Dryer... Installer Checklist... Para bajar una copia de estas instrucciones en español, visite www.speedqueen.com. Keep these instructions for future reference. (If this machine changes ownership, this manual must accompany machine.) -
Page 2: For Your Safety
IMPORTANT: Purchaser must consult the local gas supplier for suggested instructions to be followed if the dryer user smells gas. The gas utility instructions plus the SAFETY and WARNING note directly above must be posted in a prominent location near the dryer for customer use. -
Page 3: Electric Dryers
Dimensions 8.0 in. (20.3 cm) 23.5 in. 28 in. (59.7 cm) (71.1 cm) * With leveling legs turned into base. 8.0 in. (20.3 cm) 23.5 in. 28 in. (59.7 cm) (71.1 cm) *With leveling legs turned into base. 3/8 in. NPT Gas Connection ©... -
Page 4: Parts Included
© Copyright, Alliance Laundry Systems LLC – DO NOT COPY or TRANSMIT Parts Included An accessories bag has been shipped inside your dryer. It includes: • Installation Instructions • User’s Guide •... -
Page 5: Installing The Dryer
No other fuel burning appliance should be installed in the same closet with the dryer. The dryer must not be installed or stored in an area where it will be exposed to water and/or weather. The dryers needs sufficient clearance and an adequate air supply for proper operation and ventilation, and for easier installation and servicing. -
Page 6: Step 2: Connect Dryer Exhaust System
Place the dryer in position, and adjust the legs until the dryer is level from side to side and front to back. The dryer must not rock. Dryer Base Level Leveling Leg Figure 3 IMPORTANT: In mobile home installations, gas dryers MUST be permanently attached to the floor at the time of installation. -
Page 7: Exhaust Direction
© Copyright, Alliance Laundry Systems LLC – DO NOT COPY or TRANSMIT 512100 Exhaust Direction The dryer can be exhausted to the outdoors through the back, left, right or bottom of the dryer. EXCEPTION: Gas dryers cannot be vented out the left side because of the burner housing. -
Page 8: Step 3: (Gas Dryer Only) Connect Gas Supply Pipe
NOTE: When connecting to a gas line, an equipment shut-off valve must be installed within 6 feet (1.8 m) of the dryer. An 1/8 in. NPT pipe plug must be installed as shown for checking inlet pressure. Refer to Figure 5. -
Page 9: Step 4: (Electric Dryer Only) Connect Electrical Plug
208 Volt. Part No. • If branch circuit to dryer is 15 feet (4.57 m) or 1.32 58755 less in length, No. 10 AWG wire (copper wire 1.18... - Page 10 NOTE: The power cord is NOT supplied with the electric dryer. Type of power cord and gauge of wire must conform to local codes and instructions. The method of wiring the dryer is optional and subject to local code requirements.
- Page 11 NOTE: Four-wire cord is required for mobile homes or where codes do not permit grounding through neutral. D286I 1. Disconnect power to dryer. 2. Remove access cover from rear of dryer. 240 ± 12 V.A.C. V.A.C. DRY2016N Typical Four-Wire Receptacle Power Cord –...
- Page 12 8. Secure the strain relief to the power cord, or wires, where they enter the dryer cabinet. 9. Check the continuity of the ground connection before plugging the cord into an outlet. Use an...
-
Page 13: Step 5: Reverse Door, If Desired
Step 5: Reverse Door, if Desired The door on this dryer is completely reversible. To reverse door proceed as follows: 1. Remove four hinge attaching screws. 2. Remove all nine screws. 3. Pull bottom of door liner out, then pull down, removing door liner from door panel. - Page 14 When plugging in the dryer: • Do not overload circuits. • Do not use an adapter. • Do not use an extension cord. • Do not operate both a washer and gas dryer on the same circuit. Use separetely fused 15 amp circuits. DRY2049N...
-
Page 15: Step 8: Recheck Steps
Do not modify the plug provided with the dryer – if it will not fit the outlet, have a proper outlet installed by a qualified electrician. - Page 16 To view the burner flame, remove the lower front panel of the dryer. Close the loading door, start the dryer in a heat setting (refer to the Operating Instructions supplied with the dryer); the dryer will start, the igniter will glow red and the main burner will ignite.
- Page 18 CHECK ELECTRIC ONLY • Connect Electrical Cord. CHECK • Reverse Door, if Desired. CHECK Installer Checklist Fast Track for Installing the Dryer • Wipe Out Inside of D256I D259I • Plug In the Dryer. DRY688N DRY688N • Recheck Steps 1-7.


