Table of Contents
Advertisement
Quick Links
Advertisement
Table of Contents

Related Manuals for IBM Aptiva 2190


Summary of Contents for IBM Aptiva 2190
- Page 1 Hardware Maintenance Service for Service Level A Aptiva Type 2190 2190...
- Page 3 IMPLIED WARRANTIES OF MERCHANTABILITY OR FITNESS FOR A PARTICULAR PURPOSE. References to IBM products, programs, or services do not imply that IBM intends to make them available outside the United States. This publication could include technical inaccuracies or typographical errors. Changes are periodically made to the information herein;...
-
Page 5: Table Of Contents
Index of Symptoms, Messages, Error Codes, or Beeps ......2-8 Troubleshooting ..................2-23 Factory-Installed Storage Devices ............2-24 Factory-Installed Modem Card ............2-26 Audio (Not Supported by Diagnostics Program) ........2-28 CD-ROM Drive ..................2-30 Memory.....................2-31 Keyboard...................2-32 Mouse ....................2-33 Power Supply ..................2-35 ©Copyright IBM Corp. 1999... - Page 6 Monitor....................2-38 Undetermined Problems ..............2-40 Diagnostic Aids..................3-1 Introduction....................3-2 Power-On Self Test...................3-2 Diagnostics Tools..................3-3 Using Diagnostics Program from Recovery CD........3-3 Diagnostics Program Features .............3-4 Repairing Information ................4-1 Removals and Replacements ..............4-2 Identifying the Parts of the System Unit..........4-3 Top Cover....................4-5 Adapter Cards ..................4-6 Diskette Drive ..................4-8 CD-ROM Drive..................4-9 Hard Disk Drive..................4-10...
- Page 7 Safety Inspection Guide................6-1 General Guidelines ...................6-2 Parts Catalog...................7-1 Assembly 1 : Aptiva Type 2190 System Unit ..........7-2 Assembly 2 : Aptiva Type 2190 Diskette Drive, Hard Disk Drive....7-5 Assembly 3 : Aptiva Type 2190 CD-ROM, Modem Card ......7-6 Assembly 4 : Aptiva Type 2190 Keyboard and Mouse ........7-7 Appendix A.
-
Page 8: Notices
Notices References in this publication to IBM products, programs, or services do not imply that IBM intends to make these available in all countries in which IBM operates. Any reference to an IBM product, program, or service is not intended to state or imply that only IBM’s product, program, or service may be used. -
Page 9: Safety Information
Safety Information DANGER To avoid a shock hazard, do not connect or disconnect any cables or perform installation, maintenance, or reconfiguration of this product during an electrical storm. To avoid shock hazard: The power cord must be connected to a properly wired and earthed receptacle. - Page 10 To Connect To Disconnect Turn Everything OFF. 1. Turn Everything OFF. First, attach all cables to devices. 2. First, remove power cord(s) from outlet Attach signal cables to receptacles. 3. Remove signal cables from receptacles. Attach power cord(s) to outlet. 4.
- Page 11 Caution: When replacing the battery, use only IBM Part Number 36L9077 or an equivalent type battery recommended by the manufacturer. If your system has a module containing a lithium battery, replace it only with the same module type made by the same manufacturer. The battery contains lithium and can explode if not properly used, handled, or disposed of.
- Page 12 DANGER Some CD-ROM drives contain an embedded Class 3A or Class 3B laser diode. Note the following. Laser radiation when open. Do not stare into the beam, do not view directly with optical instruments, and avoid direct exposure to the beam. ≥...
- Page 13 PERIGO Para evitar choques elétricos, não conecte ou desconecte nenhum cabo, nem efetue instalação, manutenção ou reconfiguração deste produto durante uma tempestade com raios. Para evitar choques elétricos: O cabo de alimentação deve ser conectado a um receptáculo corretamente instalado e aterrado. Todos os equipamentos aos quais este produto será...
- Page 14 Para Conectar Para Desconectar DESLIGUE tudo. DESLIGUE tudo. Conecte primeiro todos os cabos nos dispositivos. Remova primeiro o(s) cabo(s) de alimentação das tomadas. Conecte os cabos de sinal nos receptáculos. Remova os cabos de sinal dos receptáculos. Conecte o(s) cabo(s) de alimentação nas tomadas.
- Page 15 Ao substituir a bateria, utilize apenas o Número de Peça IBM 33F8354 ou um tipo de bateria equivalente recomendado pelo fabricante. Se seu sistema possuir um módulo com uma bateria de lítio, substitua-o apenas pelo mesmo tipo de módulo, produzido pelo mesmo fabricante.
- Page 16 PERIGO Algumas unidades de CD-ROM contém um diodo de laser da Classe 3A ou da Classe 3B. Observe o seguinte. Radiação de laser quando aberto. Não olhe diretamente para o feixe de laser, não olhe diretamente com instrumentos óticos, e evite exposição direta ao raio.
- Page 17 XIII...
- Page 21 XVII...
- Page 22 PERIGO Pour éviter tout risque de choc électrique, ne manipulez aucun câble et n'effectuez aucune opération d'installation, d'entretien ou de reconfiguration de ce produit au cours d'un orage. Pour éviter tout risque de choc électrique : Les cordons d'alimentation du présent produit et de tous les appareils qui lui sont connectés doivent être branchés sur des socles de prise de courant correctement câblés et mis à...
- Page 23 Remplacez la pile usagée par une pile de référence identique exclusivement - voir la référence IBM - ou par une pile équivalente recommandée par le fabricant. Si votre système est doté d'un module contenant une pile au lithium, vous devez le remplacer uniquement par un module identique, produit par le même fabricant.
- Page 24 PERIGO Certaines unités de CD-ROM contiennent une diode laser de classe 3A ou 3B. Prenez connaissance des informations suivantes : Rayonnement laser lorsque le carter est ouvert. Évitez de regarder fixement le faisceau ou de l'observer à l'aide d'instruments optiques. Évitez une exposition directe au rayon.
- Page 25 attention: Ce produit pèse un poids considérable. Faites-vous aider pour le soulever. attention: Le courant électrique circulant dans les câbles de communication et les cordons téléphoniques et d'alimentation peut être dangereux. Pour votre sécurité et celle de l'équipement, avant de retirer les carters, mettez celui-ci hors tension et déconnectez ses cordons d'alimentation, ainsi que les câbles qui le relient aux réseaux, aux systèmes de télécommunication et aux modems (sauf instruction contraire...
- Page 26 Netzstecker an Steckdose anschließen. Gerät einschalten. achtung: Eine verbrauchte Batterie nur durch eine Batterie mit der IBM Teilenummer 33F8354 oder durch eine vom Hersteller empfohlene Batterie ersetzen. Wenn Ihr System ein Modul mit einer Lithium-Batterie enthält, ersetzen Sie es immer mit dem selben Modultyp vom selben Hersteller.
- Page 27 achtung: Wenn ein CD-ROM-Laufwerk installiert ist, beachten Sie folgendes. Steuer- und Einstellelemente sowie Verfahren nur entsprechend den Anweisungen im vorliegenden Handbuch einsetzen. Andernfalls kann gefährliche Laserstrahlung auftreten. Das Entfernen der Abdeckungen des CD-ROM-Laufwerks kann zu gefährlicher Laserstrahlung führen. Es befinden sich keine Teile innerhalb des CD-ROM-Laufwerks, die vom Benutzer gewartet werden müssen.
- Page 28 VORSICHT Manche CD-ROM-Laufwerke enthalten eine eingebaute Laserdiode der Klasse 3A oder 3B. Die nachfolgend aufgeführten Punkte beachten. Laserstrahlung bei geöffneter Tür. Niemals direkt in den Laserstrahl sehen, nicht direkt mit optischen Instrumenten betrachten und den Strahlungsbereich meiden. ≥ ≥ 32 Kg ≥...
- Page 29 PERICOLO Per evitare il pericolo di scosse elettriche durante i temporali, non collegare o scollegare cavi, non effettuare l'installazione, la manutenzione o la riconfigurazione di questo prodotto. Per evitare il pericolo di scosse elettriche: collegare il cavo di alimentazione ad una presa elettrica correttamente cablata e munita di terra di sicurezza;...
- Page 30 ATTENZIONE: Quando si sostituisce la batteria, utilizzare solo una batteria IBM o batterie dello stesso tipo o di tipo equivalente consigliate dal produttore. Se il sistema di cui si dispone è provvisto di un modulo contenente una batteria al litio, sostituire tale batteria solo con un tipo di modulo uguale a quello fornito dal produttore.
- Page 31 PERICOLO Alcune unità CD-ROM contengono all'interno un diodo laser di Classe 3A o Classe 3B. Prestare attenzione a quanto segue: Aprendo l'unità vengono emesse radiazioni laser. Non fissare il fascio, non guardarlo direttamente con strumenti ottici ed evitare l'esposizione diretta al fascio. ≥...
- Page 32 XXVIII...
- Page 33 XXIX...
- Page 35 PELIGRO Para evitar una posible descarga eléctrica, no conecte ni desconecte los cables ni lleve a cabo ninguna operación de instalación, de mantenimiento o de reconfiguración de este producto durante una Para evitar una posible descarga: El cable de alimentación debe conectarse a un receptáculo con una instalación eléctrica correcta y con toma de tierra.
- Page 36 Al cambiar la batería, utilice únicamente la batería IBM Número de pieza 33F8354 o un tipo de batería equivalente recomendado por el fabricante. Si el sistema tiene un módulo que contiene una batería de litio, sustitúyalo únicamente por el mismo tipo de módulo del mismo fabricante.
- Page 37 PELIGRO Algunas unidades de CD-ROM tienen incorporado un diodo de láser de Clase 3A o de Clase 3B Tenga en cuenta la siguiente información. Cuando la unidad está abierta se generan emisiones de rayos láser. No dirija la mirada al haz, no lo observe directamente con instrumentos ópticos y evite la exposición directa.
-
Page 38: Laser Compliance Statement
Laser Compliance Statement The CD/DVD-ROM drive in the computer is a laser product. The CD/DVD- ROM drive's classification label (sample shown below) is located on the drive. CLASS 1 LASER PRODUCT APPAREIL A LASER CLASSE 1 LASER KLASSE 1 LUOKAN 1 LASERLAITE PRODUIT LASER CATEGORIE 1 The CD/DVD-ROM drive is certified in the U.S. -
Page 39: Trademarks
Trademarks The following are trademarks of the IBM Corporation in the United States or other countries or both: Aptiva OS/2 Personal System/2 HelpCenter PS/1 PS/2 Operating System/2 Intel, Pentium, MMX, EtherExpress, and LANDesk are trademarks or registered trademarks of Intel Corporation. -
Page 40: Preface
Preface This manual contains service information for the 2190 Service Level A (SL- A) model of the IBM Aptiva Personal Computer, worldwide. This manual is intended to be used as a stand-alone document to service Aptiva type 2190 product. It is divided into the following chapters: Notices contains important safety information and notices required to service this computer. -
Page 41: General Information
Working with the Setup Menus ............1-11 Start Options ..................1-13 Advanced Setup ................1-16 Plug and Play control .................1-17 Power Management Setup..............1-19 ISA Legacy Resource ................1-20 PC Health Status ................1-20 Set Password ..................1-20 Specifications..................1-22 Operating Requirements .................1-23 Special Tools ..................1-24 ©Copyright IBM Corp. 1999... -
Page 42: Introduction
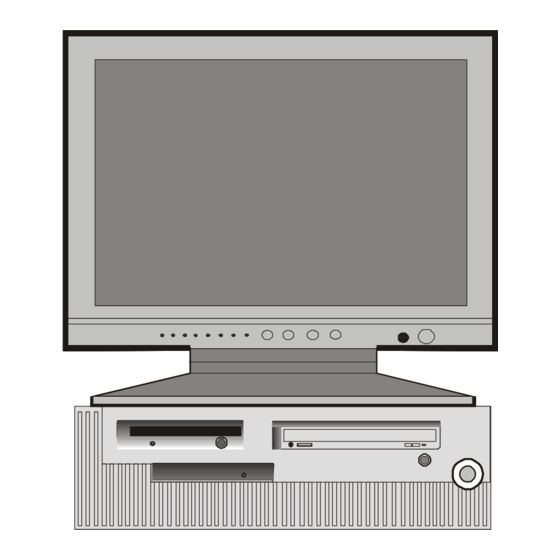
Introduction This chapter gives a general overview of the Aptiva Type 2190, describes the standard and optional features, and details functional and environmental specifications. Product Overview Aptiva Type 2190 contains three PCI slots, and the system board supports the AMD K6-2 processor. Listed below are 2190 system features: Processors (Aptiva Type 2190) •... - Page 43 External Ports • Video port (15-pin D-sub connector) • Parallel port (25-pin D-sub connector) • Serial port (9-pin D-sub connector) • Game/MIDI port (15-pin D-sub connector) • Keyboard port (6-pin PS/2 mini-din connector) • Mouse port (6-pin PS/2 mini-din connector) •...
- Page 44 Multimedia • One pair of internal speakers. Power Management • Compliant to ACPI and supports display power management signaling (DPMS) monitor. • Software shutdown by Windows 98. • System enters standby mode if any of following conditions are met: − Execute standby from the Windows 98 Start menu −...
- Page 45 • Auto-sensing power input for 100 V ac to 240 V ac. Keyboard • PS/2 104-key rubber dome IBM Keyboard with 1.8-m (5.8-ft) cable. Keyboard is Geography/Model dependent. Mouse • 2 button mouse connected to the mouse port with 1.8-m (5.8-ft) cable.
-
Page 46: Hardware Interfaces
Karaoke-CD, and Photo-CD (both single and multi- session) format. Diskette Drive AT diskette interface Video Physical interface is compatible with the IBM Personal System/2 (PS/2) VGA interface. SiS530 VGA on board. Modem One 56.6 Kbps PCI plug and play modem adapter card with data/fax features. - Page 47 Table 1-1 System Board Hardware Interfaces Item Interface Game port Game port interface for joystick. It also supports MIDI. Ethernet Port Some models have the 10/100 Mbps autosense Ethernet function built on board USB controller integrated in SiS530.
-
Page 48: Cmos Reset
CMOS Reset This system does not deny access to BIOS Setup Utility. Execute “Load BIOS Default Settings” in BIOS Setup to clear the corrupted CMOS data. See Loading the Default Settings” on page 1-12. -
Page 49: Flash (Bios) Update Procedure
Flash (BIOS) Update Procedure NOTE: The flash update procedure does not change the model number and serial number information in BIOS. 1. Prepare a bootable DOS diskette with AWDFLASH.EXE and VXXYYZZ.BIN files NOTE: The AWDFLASH.EXE is flash utility programs. The VXXYYZZ.BIN is a BIOS source code binary file. -
Page 50: Bios-Contained Model Number And Serial Number
BIOS-contained Model Number and Serial Number The model number and serial number information is stored in BIOS ROM and displayed in the “Model Information” of BIOS Setup main menu. If a repair is completed by replacing the system board or installing a new BIOS ROM, then you need to enter the original system’s model number and serial number in the new BIOS ROM. -
Page 51: Bios Setup Utility
Follow these steps to enter Setup when the computer is off: 1. Turn on your monitor. 2. Turn on the system unit. 3. When you see the IBM Aptiva logo, press F1 to enter Setup and display the Main Menu. Refer to the Setup Utility Main Menu below. - Page 52 The following table lists specific keys on the keyboard that will help you move through the Setup menus: Keys Function Down- or up- Use these arrow keys to highlight an option on arrow key the menu. (Press the Enter key to choose the option.) Left- or right- Use these arrow keys to make a selection and...
-
Page 53: Start Options
2. Type “Y” to select YES, then press Enter 3. Highlight the option Save & Exit Setup option, then press Enter. A dialog box appears saying "SAVE to CMOS and EXIT (Y/N)?" 4. Type “Y” to select Yes, then press Enter to save the changes in CMOS. You must load the Setup default settings in the following instances: −... - Page 54 Virus Warning Determines if the BIOS will monitor the boot sector and partition table of the hard disk drive for any attempt at modification. If any attempt is made, the BIOS will halt the system and an error message will appear.
- Page 55 Typematic Delay (Msec) When the typematic rate is enabled, you can select the delay between when the key was first depressed and when the acceleration begins. Security Option Determines the access limitation to the system and Setup, or just Setup. Diskette Drive Report No for Win 95...
-
Page 56: Advanced Setup
Advanced Setup You can set up some advanced hardware features in this function. If they are configured incorrectly, the system might malfunction. Cache Control Determines the internal cache and external cache will be enabled or disabled. If enabled, the memory access will speed up. ROM Shadowing “Video BIOS Shadowing”... -
Page 57: Plug And Play Control
Plug and Play control PnP OS installed The BIOS has the capability to automatically configure all of the boot and Plug and Play compatible devices. However, this capability applies only when you are using a Plug and Play Operating system such as Windows 98. - Page 58 Diskette Drive A Determines the type of Diskette Drive A. Mouse Function Determines the mouse function is enabled or disabled. On Board LAN Determines the on board Lan function to be enabled or disabled. Serial Port Setup Determines the I/O port address and Interrupt Request Number of serial port.
-
Page 59: Power Management Setup
let the controller and the CPU perform the complete task by themselves. This is simpler and more efficient. Your system suports five modes, numbered from 0 to 4, which primarily differ in timing. When Auto(default) is selected, the BIOS will select the best available mode. -
Page 60: Isa Legacy Resource
There are three selections for Power Management, three of which have fixed mode settings. Min. Power Saving Minimum power management. Doze Mode = 1 hr., Standby Mode = 1hr., Suspend Mode = 1hr., and Hard Disk Drive Power Down = 15 min. Max. - Page 61 If you set up a password for entering setup, you must type this password each time you want to enter the Setup utility. If you do not type the correct password, you cannot enter Setup. If you set up a system password, you must type this password each time you power on your system.
-
Page 62: Specifications
Specifications Dimensions (width x depth x height): • System unit: − 350 mm (13.8 in.) x 417.5 mm (16.4 in.) x 105 mm (4.1 in.) Weight: • System unit: − 14 kg (30.8 lb) Environment: • Temperature for system unit: −... -
Page 63: Operating Requirements
Operating Requirements All machines require two power inputs: one on the system unit and one on the monitor display. The system unit comes with a voltage selector switch, allowing selection of either 115 V ac or 230 V ac. This switch must be in the 230 V ac position when the machine is plugged into a 230 V ac electrical outlet. -
Page 64: Special Tools
Special Tools The following special tool is required to service this system when running the diagnostics program (PC-Doctor): • Wrap plug, P/N 72X854 1-24... -
Page 65: Check Procedures
Index of Symptoms, Messages, Error Codes, or Beeps ......2-8 Troubleshooting ..................2-23 Factory-Installed Storage Devices ............2-24 Factory-Installed Modem Card ............2-26 Audio (Not Supported by Diagnostics Program) ........2-28 CD-ROM Drive ..................2-30 Memory.....................2-31 Keyboard...................2-32 Mouse ....................2-33 Power Supply ..................2-35 Monitor....................2-38 Undetermined Problems ..............2-40 ©Copyright IBM Corp. 1999... -
Page 66: Introduction
Introduction This chapter contains the check procedures used to diagnose the causes of product failures. The diagnostic information consists of: Start: This is the starting point for any diagnostic action. Based on high- level symptoms, the check procedure directs you to more detailed procedures to help resolve machine failures. -
Page 67: Start
POST error codes and error messages are displayed on the screen after the IBM logo. A beep will precede each error code or message. Please refer to “Index of Symptoms, Messages, Error Codes, or Beeps” on page 2-8 for additional help. - Page 68 Power off the system unit before moving it or when replacing FRUs. Remove all adapter cards, except for the factory-installed modem adapter card and any other IBM Aptiva factory-installed adapter cards. Disconnect any drives except: 3.5-in. diskette drive Hard disk drive IBM Aptiva factory-installed devices (such as a CD-ROM drive) Make sure that all power cords and cables are connected properly.
- Page 69 Note any symptoms, messages, error codes, or beeps. Make sure that there are no diskettes or CDs in the drives. 002 - DOES AN IBM LOGO SCREEN APPEAR? (YES, READ AHEAD. NO, GO TO STEP 004.) Insert the diagnostics diskette in the diskette drive.
- Page 70 005 - If the keyboard responds incorrectly, go to "Keyboard" on page 2-32. 006 - DOES THE SYSTEM CONFIGURATION REPORT CORRECTLY IDENTIFY THE DEVICES INSTALLED IN SYSTEM? (YES, READ AHEAD. NO, GO TO STEP 007.) Select Diagnostics from the diagnostics program menu. Select and execute All Tests.
- Page 71 008 - DOES THE DIAGNOSTICS FINISH WITHOUT ANY ERRORS? (YES, READ AHEAD. NO, GO TO STEP 009.) If the Diagnostics \ All Tests did not detect a failure but the system still indicates a failure: Check all adapter card jumper settings. Check all adapter card switch settings.
-
Page 72: Index Of Symptoms, Messages, Error Codes, Or Beeps
Index of Symptoms, Messages, Error Codes, or Beeps How to Use Error Messages: Use the messages, error codes, and beeps combinations that occur to diagnose failures. If more than one failure occurs, diagnose from the first failure that appears. The cause of the first failure can result in false messages, error codes, or beeps. - Page 73 NOTES: If an error message and incorrect audio response occur, diagnose the error message first. If you cannot run the diagnostics program tests but did receive a POST error code, diagnose the POST error message. If you did not receive any error message, look for a description of your error symptoms in “Error Symptoms List”...
- Page 74 Table 2-1 BIOS Error Codes, Messages, and Beeps List BIOS Error Codes, Action/FRU Messages, beeps NOTE: To diagnose a problem, first find the BIOS error messages, codes, or beeps in left column. If directed to a check procedure, replace the FRU indicated in the check procedure.
- Page 75 Table 2-1 BIOS Error Codes, Messages, and Beeps List BIOS Error Codes, Action/FRU Messages, beeps NOTE: To diagnose a problem, first find the BIOS error messages, codes, or beeps in left column. If directed to a check procedure, replace the FRU indicated in the check procedure.
- Page 76 Table 2-1 BIOS Error Codes, Messages, and Beeps List BIOS Error Codes, Action/FRU Messages, beeps NOTE: To diagnose a problem, first find the BIOS error messages, codes, or beeps in left column. If directed to a check procedure, replace the FRU indicated in the check procedure.
- Page 77 Table 2-1 BIOS Error Codes, Messages, and Beeps List BIOS Error Codes, Action/FRU Messages, beeps NOTE: To diagnose a problem, first find the BIOS error messages, codes, or beeps in left column. If directed to a check procedure, replace the FRU indicated in the check procedure.
- Page 78 Table 2-2 BIOS Error Codes, Messages, and Beeps List BIOS Error Codes, Messages, Action/FRU beeps NOTE: To diagnose a problem, first find the BIOS error messages, codes, or beeps in left column. If directed to a check procedure, replace the FRU indicated in the check procedure.
- Page 79 Table 2-3 Error Symptoms List Error Symptoms Action/FRU NOTE: To diagnose a problem, first find the error symptom in the left column. If directed to a check procedure, replace the FRU indicated in the check procedure. If no check procedure is indicated, the first Action/FRU listed in right column is the most likely cause.
- Page 80 Table 2-3 Error Symptoms List Error Symptoms Action/FRU NOTE: To diagnose a problem, first find the error symptom in the left column. If directed to a check procedure, replace the FRU indicated in the check procedure. If no check procedure is indicated, the first Action/FRU listed in right column is the most likely cause.
- Page 81 Table 2-3 Error Symptoms List Error Symptoms Action/FRU NOTE: To diagnose a problem, first find the error symptom in the left column. If directed to a check procedure, replace the FRU indicated in the check procedure. If no check procedure is indicated, the first Action/FRU listed in right column is the most likely cause.
- Page 82 Table 2-3 Error Symptoms List Error Symptoms Action/FRU NOTE: To diagnose a problem, first find the error symptom in the left column. If directed to a check procedure, replace the FRU indicated in the check procedure. If no check procedure is indicated, the first Action/FRU listed in right column is the most likely cause.
- Page 83 Table 2-3 Error Symptoms List Error Symptoms Action/FRU NOTE: To diagnose a problem, first find the error symptom in the left column. If directed to a check procedure, replace the FRU indicated in the check procedure. If no check procedure is indicated, the first Action/FRU listed in right column is the most likely cause.
- Page 84 Table 2-3 Error Symptoms List Error Symptoms Action/FRU NOTE: To diagnose a problem, first find the error symptom in the left column. If directed to a check procedure, replace the FRU indicated in the check procedure. If no check procedure is indicated, the first Action/FRU listed in right column is the most likely cause.
- Page 85 Table 2-3 Error Symptoms List Error Symptoms Action/FRU NOTE: To diagnose a problem, first find the error symptom in the left column. If directed to a check procedure, replace the FRU indicated in the check procedure. If no check procedure is indicated, the first Action/FRU listed in right column is the most likely cause.
- Page 86 Table 2-3 Error Symptoms List Error Symptoms Action/FRU NOTE: To diagnose a problem, first find the error symptom in the left column. If directed to a check procedure, replace the FRU indicated in the check procedure. If no check procedure is indicated, the first Action/FRU listed in right column is the most likely cause.
-
Page 87: Troubleshooting
Troubleshooting Failing Parts or Assemblies: The check procedures generally help you trace a problem to one part or assembly. The last step of the specific check procedure you are using indicates that a part or assembly is failing. You should inspect the part or assembly before you decide to replace it. It might be loose, dirty, or in need of a small repair. -
Page 88: Factory-Installed Storage Devices
Factory-Installed Storage Devices Use this check procedure to test any factory-installed drives. ATTENTION: The customer may have customized settings in the Setup Utility (other than default settings) on the computer you are servicing. Running the Setup Utility might alter those settings. Take note of the current settings and verify that the customer settings are in place when service is complete. - Page 89 IDE Primary Channel Master and Slave Drives in BIOS Setup should be connected to the system board connector J6.(see “Aptiva Type 2190 System Board Layout” on page 5-3.) IDE Secondary Channel Master and Slave Drives in BIOS Setup should be connected to the system board connector J7.(Aptiva Type 2190 System Board Layout”...
-
Page 90: Factory-Installed Modem Card
Factory-Installed Modem Card 001 - START Power off the system unit. In Windows 98 Device Manager, make sure that the modem is not configured with a conflicting COM port and IRQ setting. Make sure that the communication software is configured with the correct COM and IRQ settings (same as COM port and IRQ as the modem). - Page 91 004 - CAN THE MODEM DIAL OUT AND CONNECT TO ANY BBS SUCCESSFULLY? (YES, READ AHEAD. NO, GO TO STEP 005.) The modem adapter functions normally. End. 005 - Make sure that Windows 98 is properly installed, then power off the system unit.
-
Page 92: Audio (Not Supported By Diagnostics Program)
Audio (Not Supported by Diagnostics Program) NOTE: Audio tests for the sound card cannot be carried out in the PC Doctor DOS diagnostics program. It is, however, possible to carry out a dial tone test for the modem. While performing this check, you may need to enter and exit Microsoft Windows 98 several times. - Page 93 004 - Perform the following under Windows 98. NOTE: If an operating system other than Microsoft Windows 98 is installed, the program screens and icons may differ from these instructions. 1. Start Microsoft Windows 98. 2. Select the Start icon. 3.
-
Page 94: Cd-Rom Drive
CD-ROM Drive 001 - START Insert the diagnostics diskette into the diskette drive and make sure that there is no CD in the CD-ROM drive. Select Interactive Tests menu, then select and execute CD-ROM Test. 002 - DO YOU SEE A MESSAGE “NO CD-ROM DRIVE OR MSCDEX DEVICE DRIVER INSTALLED.”... -
Page 95: Memory
Memory 001 - START Power off the system unit. Insert the diagnostics diskette into the diskette drive. Make sure that all DIMMs are installed correctly. Power on the system unit. Take note of any messages, error codes, or symptoms. 002 - DO YOU RECEIVE POST MEMORY ERROR MESSAGE? (YES, READ AHEAD. -
Page 96: Keyboard
Keyboard 001 - START Power off the system unit and make sure that the keyboard plug is connected properly. 002 - Insert the diagnostics diskette into the diskette drive and power on the system unit. Select Interactive Tests menu, then execute Keyboard test. 003 - DOES THE KEYBOARD FUNCTION CORRECTLY? (YES, READ AHEAD. -
Page 97: Mouse
Mouse NOTE: A sticking key button can cause the mouse to operate incorrectly. If you suspect this, go to "Keyboard" on page 2-32. 001 - START Make sure that the mouse ball turns freely. Make sure that the mouse plug connects properly. 002 - Power off the system unit. - Page 98 008 - ARE THERE ANY BROKEN PINS IN THE MOUSE PLUG? (YES, GO TO STEP 010. NO, READ AHEAD.) Try with a known good mouse. 009 - DO THE ERROR SYMPTOMS STILL REMAIN? (YES, READ AHEAD. NO, GO TO STEP 010.) Replace the system board.
-
Page 99: Power Supply
Power Supply 001 - START Power off the system unit. Check the power cord for continuity. Replace if necessary. Check for the correct line voltage from the power outlet, and verify that the voltage selector switch is set to the correct voltage. Power on the system unit. - Page 100 Figure 2-1 Power Supply Connectors (Bottom View) Figure 2-2 Hard Drive or CD-ROM End of Power Cable Figure 2-3 3.5-In. Diskette Drive End of Power Cable 2-36...
- Page 101 006 - ARE THE VOLTAGES CORRECT AND DOES THE FAN RUN? (YES, READ AHEAD. NO, GO TO STEP 009) The power supply is working normally. If you suspect the on/off switch cable assembly, see Step 003. If the fan continues to run when all connectors are plugged back in, go to “Undetermined Problems”...
-
Page 102: Monitor
Monitor First, set the system to VGA mode. To do this in Windows 98, press the F8 function key during startup. Safe mode (VGA) will be set for Windows 98. Use the operating system's video setup to change the monitor resolution. If the monitor type is set to the power saving mode, the screen remains black and the LED lights or flashes in amber color. - Page 103 002 - IS THE SCREEN READABLE? (YES, READ AHEAD. NO, GO TO STEP 004) NOTE: If the screen shows a blinking cursor with no memory count running, answer this question "No". Select Interactive Tests from the Main Menu. Select and execute Video test from the menu. Follow the prompts and perform the video test.
-
Page 104: Undetermined Problems
Check all cables and connectors for proper installation. If the jumpers, switch, and voltage settings are correct, return here and continue: 3. Remove or disconnect the following, one at a time: Non-IBM devices External devices Any adapters Modem card, if installed... - Page 105 4. Power on the system unit. 5. Repeat steps 1 through 4 until you find the failed device or adapter. 6. If software related, reload software from Recovery CD. If the symptom changes, go to “Index of Symptoms, Messages, Error Codes, or Beeps”...
-
Page 107: Diagnostic Aids
Chapter 3 Diagnostic Aids Diagnostic Aids..................3-1 Introduction....................3-2 Power-On Self Test...................3-2 Diagnostics Tools..................3-3 Using Diagnostics Program from Recovery CD........3-3 Diagnostics Program Features .............3-4 ©Copyright IBM Corp. 1999... -
Page 108: Introduction
BIOS version and system memory tested. For Aptiva, the F9 key will only work after exiting BIOS Setup. 3. If an error is detected during POST, the IBM logo screen will automatically switch to the text-based screen and display the error message or code with a beep. -
Page 109: Diagnostics Tools
The diagnostics program comes on a CD (compact disk) along with this book. This version of PC-Doctor diagnostics program, developed by Watergate for IBM, is the primary method of testing the computer. You can use it to test the IBM components of the system and some external devices. The amount of time required to test components depends on the number of components installed and selected. -
Page 110: Diagnostics Program Features
Diagnostics Program Features Diagnostics program (PC-Doctor for DOS) includes the following features: Table 3-1 Diagnostics Program Main Menu Selections Main Menu Selections Submenu Selections • System Test Diagnostics • Memory Test • Hard Disk Test • Floppy Disk Test • All Tests •... - Page 111 Table 3-1 Diagnostics Program Main Menu Selections • System Configuration Hardware Info • Memory Contents • IRQ and DMA Use • Device Drivers • COM and LPT Ports • Physical Disk Drives • Logical Disk Drives • VGA Information • Software Interrupts •...
-
Page 113: Repairing Information
Repairing Information ................4-1 Removals and Replacements ..............4-2 Identifying the Parts of the System Unit..........4-3 Top Cover....................4-5 Adapter Cards ..................4-6 Diskette Drive ..................4-8 CD-ROM Drive..................4-9 Hard Disk Drive..................4-10 System Board ..................4-11 Power Supply ..................4-13 Memory (DIMM).................4-14 ©Copyright IBM Corp. 1999... -
Page 114: Removals And Replacements
Removals and Replacements BEFORE REMOVING ANY FRU, POWER-OFF THE COMPUTER UNPLUG ALL POWER CORDS FROM ELECTRICAL OUTLETS, THEN DISCONNECT ANY INTERCONNECTING CABLES. ATTENTION: The System board, processors, adapter cards, DIMMs, and upgrade processors can be damaged by electrostatic discharge. Use an electrostatic discharge(ESD) strap to establish personal grounding. -
Page 115: Identifying The Parts Of The System Unit
Identifying the Parts of the System Unit This computer system has 3 bays, each bay has an factory-installed drive in it. The devices are 3.5” Diskette, 40X CD-ROM drive and 4.0 GB hard disk (some models may have hard disk of 6 or 8 GB capacity). Diskette drives in this unit use the standard diskette advanced technology (AT) Interface. - Page 116 Power Supply This is a 95-watt switching power supply. IO slot The riser card has 3 PCI slots. Modem card This machine has a factory-installed Data/Fax card for data transmission System board CD-ROM Drive This machine has a factory-installed 40 X CDROM drive. Floppy Diskette Drive This machine has a factory-installed 3.5”...
-
Page 117: Top Cover
Top Cover To remove the top cover of this system unit: Remove the 2 screws at the top cover at the back of the system unit. Hold both sides of the system unit cover and push it forward about 25 Lift the top cover up to remove it completely. -
Page 118: Adapter Cards
Adapter Cards Installing Adapter Cards Remove the screw that secures the adapter card retainer bracket. Remove the adapter card retainer bracket, and PCI slot cover. Align and insert the adapter card into the adapter card connector. Secure the card using the adapter card retainer bracket and screw that you removed in the first step. - Page 119 Removing Adapter Cards Follow these steps to remove an adapter card: Position the system unit so that the card is accessible to you. If the adapter card has cables, disconnect them. Be sure to take note of where the Cable are connected. You will have to reconnect these cables when you reinstall the card.
-
Page 120: Diskette Drive
Diskette Drive To remove the diskette drive : Disconnect the power and signal cables from the diskette drive. Remove the screw that secure the diskette drive holder. Pull the diskette drive backward from the front of the unit and pick it up to remove it from the securing slide. -
Page 121: Cd-Rom Drive
CD-ROM Drive To remove CD-ROM Drive: See page 4-8. Remove the diskette drive along with the diskette drive holder from the system unit. Disconnect the power, sound and signal cables from the CD-ROM. Remove the two screws from each side of the CD-ROM drive holder. Slide the CD-ROM drive forward to remove it. -
Page 122: Hard Disk Drive
Hard Disk Drive To remove or replace the hard disk drive: Make sure to disconnect the power and signal cables from the CD-ROM drive and the diskette drive. Remove the four screws that secure the bay holder to the metal frame of the system unit. -
Page 123: System Board
System Board To remove the system board from the system: Remove the three screws that secure the system board I/O bracket. Remove the two screws that secure the system board to the system chassis. Push the I/O bracket outward from the case to remove it. To remove the system board and the tray, pull the lever so that it rotates toward you. - Page 124 (Front of Riser Card) (Back of Riser card) 1.DIMM 12.PCI SLOT 1 2.CPU 13.PCI SLOT 2 3.Level II Cache 14.PCI SLOT 3 4.CPU Fan Connector 15.CD-in Connector 5.Power Supply Connector 16.Daughter card connector 17.DFP signal connector 6.Primary IDE Connector(Hard Disk Drive) 7.Secondary IDE Connector(CD-ROM) 18.Speaker connectors...
-
Page 125: Power Supply
Power Supply This system has a 95-watt switching power supply. 1. To remove the power supply. You must remove the top cover first. 2. Disconnect the power cable from the riser board and all drives. 3. Remove the screws in the machine rear that secure the power supply. 4-13... -
Page 126: Memory (Dimm)
Memory (DIMM) Your System has 2 system memory module sockets, DIMM 0 and DIMM 1. These sockets hold dual in line memory modules (DIMM) that contains 3.3V signal or double-sided synchronous DRAM (SDRAM). The maximum memory size is 256 MB total. If there is no VGA DRAM daughter card installed, DIMM 0 must be fitted with DRAM module. -
Page 127: Parts/Test Point Locations
DIMM Configurations................5-14 System Board Connector Pin Signals ............5-14 Monitor Port Signals ................5-14 Serial Port Signals ................5-14 Parallel Port Signals ................5-15 Mouse Port Signals................5-15 Keyboard Port Signals ...............5-15 Diskette Drive Cable Connector Signals ..........5-16 IDE Cable Connector Signals.............5-17 ©Copyright IBM Corp. 1999... -
Page 128: Introduction
Introduction This chapter contains system board layouts and jumper settings. It is useful when you are asked to measure voltages. Use this information to help you locate parts such as electronic boards, connectors, pin numbers, and test points. This chapter also contains jumper settings for the hard disk drive, CD-ROM (compact disc-read-only memory) drive, and the connector information for modem adapter card. -
Page 129: Aptiva Type 2190 System Board Layout
Aptiva Type 2190 System Board Layout DIMM 0 J100 (Front of Riser Card) JP 2,JP5 J103 JP 8 J105 J 15 J110 J102 BT 1 J112 DIMM 1 J111 JP 7 J101 J109 J107,J108 J106 J104 JP6,JP3 JP 1 (Back of Riser card) J12 J13 J11 J14 J10 J9 J8 J7 NOTE: The blackened pin of a jumper represents pin 1. -
Page 130: 2190 System Board Jumper Settings
2190 System Board Jumper Settings Table 5-1 Aptiva Type 2190 System Board Jumper Settings Jumper/Settings Function Bus Frequency(MHz) JP 2 JP 5 CPUCLK PCICLK 3-5 4-2 1-3 4-6 CPU Core Clock Multiplier Jumper connected CPU Clock Frequency Ratio CPU Vi/o Vcore Voltage Jumper connected Voltage CMOS data clear-up... -
Page 131: 2190 Processor Type Jumper Settings
2190 Processor Type Jumper Settings WARNING: You must verify the exact processor type before setting the processor type jumpers. The wrong processor type jumper setting may damage the CPU. The system only supports dual-voltage CPU. Table 5-2 Aptiva Type 2190 Processor Type Jumper default Settings CPU Types AMD K6-2 AMD K6-2... -
Page 132: 2190 System Board Connectors And Functions
2190 System Board Connectors and Functions Table 5-3 System Board Connector Functions Connector Function CPU FAN connector VGA port COM 1 connector Printer Port COM1 port USB Connector PS/2 Mouse Connector PS/2 Keyboard port Stereo Line-out port Stereo Line-in port Microphone port DFP signal connector DFP cable connector... -
Page 133: Power Supply Cable Connector Specifications
Power Supply Cable Connector Specifications Refer to the following figures when checking for voltages on power supply cable connectors. When checking voltages, the power supply fan must be running. To power on the power supply without using the on/off switch, use a screwdriver or other tools to short the connector JP7 (with the switch cable disconnected from the connector on the system board) or use a connection (jumper) to short the black and green wires of the 20-pin connector on power supply. -
Page 134: Main Output Pin Assignment
Main Output Pin Assignment Table 5-4 Main Output Pin Assignment Function Color +3.3 V Orange 3.3 V Orange COMMON BLACK +5Vdc COMMON BLACK +5Vdc COMMON BLACK POWER GOOD GRAY +5Vs PURPLE +12Vdc YELLOW 3.3V Orange -12Vdc BLUE COMMON BLACK P.S-on GREEN COMMON BLACK... - Page 135 Figure 5-3 Hard Drive or CD-ROM Power Cable Connector Figure 5-4 3.5-In. Diskette Drive Power Cable Connector...
-
Page 136: Factory-Installed Modem Card Layout
Factory-Installed Modem Card Layout Figure 5-5 Factory-Installed Modem Card Layout Factory-Installed Modem Card Connector Functions Table 5-5 Factory-Installed Modem Card Connector Functions Item Function Connect to… Telephone line-out Telephone set Some modem adapters may come without this jack. Telephone line-in Telephone line NOTE: Care should be taken while connecting the voice-in/speaker-out connector. -
Page 137: In. Hard Disk Drive Jumper Locations & Settings
3.5-In. Hard Disk Drive Jumper Locations & Settings Options jumper block (J8)(Seagate) Master or single drive Drive is slave Master with a non-ATA- compatible slave Cable select 7 5 3 1 8 6 4 2 Figure 5-6 3.5-In. Hard Disk (Seagate) Jumper Settings Locations Back of Drive (Quantum) AT Interface connector Jumper Configurations... -
Page 138: Cd-Rom Drive
CD-ROM Drive Figure 5-8 CD-ROM Front Panel NOTE: Position of CD-ROM switches and LEDs may vary from illustration. Table 5-7 CD-ROM Front Panel Introduction Item Description Load / eject button Headphone jack Power-on / busy indicator, lights up in green color while disc is set in ready state;... -
Page 139: Cd-Rom Drive Rear Panel Connectors And Features
CD-ROM Drive Rear Panel Connectors and Features CABLE SELECT SLAVE MASTER DC INPUT NOT USED AUDIO IDE INTERFACE C S M R G G L S L A Figure 5-9 CD-ROM Rear Panel Table 5-8 CD-ROM Drive Rear Panel Connectors and Features Item Function Connect to…... -
Page 140: Dimm Configurations
DIMM Configurations The 2190 system board has two DIMM sockets. A maximum of 256KB memory may be installed. You can install 16MB, 32MB, 64MB, or 128MB DIMM in any sockets and with any combinations. System Board Connector Pin Signals Monitor Port Signals Signal Name Signal Name Red Video... -
Page 141: Parallel Port Signals
Parallel Port Signals Signal Name Signal Name Strobe Auto Feed Data Bit 0 Error Data Bit 1 Initialize Data Bit 2 Select (In) Data Bit 3 Ground Power Data Bit 4 Ground Power Data Bit 5 Ground Power Data Bit 6 Ground Power Data Bit 7... -
Page 142: Diskette Drive Cable Connector Signals
Diskette Drive Cable Connector Signals Signal Name Signal Name No Connection Direction SELECT Density Select Ground No Connection Step High Density Out Ground Ground Write Data No Connection Ground Ground Write GATE Index Ground Ground Track 0 No Connection Ground Ground Write Protect Drive Select 1... -
Page 143: Ide Cable Connector Signals
IDE Cable Connector Signals Signal Name Signal Name Host Reset DMA Request Ground Ground Power Host Data 7 Host IOW Host Data 8 Ground Power Host Data 6 Host IOR Host Data 9 Ground Power Host Data 5 I/O Channel Ready Host Data 10 No Connection... -
Page 145: Safety Inspection Guide
Chapter 6 Safety Inspection Guide Safety Inspection Guide................6-1 General Guidelines ...................6-2 ©Copyright IBM Corp. 1999... -
Page 146: General Guidelines
If any unsafe conditions are present, you must find out how serious the hazard is and if you can continue before you correct the hazard. All current IBM Aptiva service supplements outlining feature/model changes, along with the machine history, should be reviewed. -
Page 147: Parts Catalog
Assembly 1 : Aptiva Type 2190 System Unit ..........7-2 Assembly 2 : Aptiva Type 2190 Diskette Drive, Hard Disk Drive....7-5 Assembly 3 : Aptiva Type 2190 CD-ROM, Modem Card ......7-6 Assembly 4 : Aptiva Type 2190 Keyboard and Mouse ........7-7 ©Copyright IBM Corp. 1999... -
Page 148: Assembly 1 : Aptiva Type 2190 System Unit
Assembly 1 : Aptiva Type 2190 System Unit 1-15 1-14 1-11 1-18 1-12 1-10 1-13 1-20 1-16 1-19 1-17... - Page 149 Asm-Index FRU Number Description 00N4428 Pro862 System Board 00N4429 Pro862 w/LAN System Board 09N5373 Pro862B System Board 09N5374 Pro862B w/LAN System Board 09N5394 CPU, AMD K6-2-450 09N5358 CPU, AMD K6-2-400 09N5359 CPU, AMD K6-2-500 01N1840 Fansink K6-2-400 MHz 09N5360 Fansink, K6-2-450/500 MHz Processor 00N4430 Riser Card...
- Page 150 Asm-Index FRU Number Description 1-16 00N4416 Screws Pack 1-17 00N4447 Power switch/Led Cable Assembly 1-18 00N4427 Card Retainer 1-19 00N4444 Game Port Cable 1-20 36L9077 CMOS Backup Battery (CR2032) 3V...
-
Page 151: Assembly 2 : Aptiva Type 2190 Diskette Drive, Hard Disk Drive
Assembly 2 : Aptiva Type 2190 Diskette Drive, Hard Disk Drive Asm-Index FRU Number Description 00N4433 Hard Disk Drive 6 GB 00N4434 Hard Disk Drive 8 GB 36L9130 Diskette Drive 3.5" 00N4441 Hard Disk Drive Cable 00N4443 Diskette Drive Cable... -
Page 152: Assembly 3 : Aptiva Type 2190 Cd-Rom, Modem Card
Assembly 3 : Aptiva Type 2190 CD-ROM, Modem Card Asm-Index FRU Number Description 00N4431 40X CD-ROM Drive 00N4442 CD-ROM Cable 00N4446 CD-ROM Audio Cable 36L9133 Modem-56K Japan GVC F- 1156 IV/R3 Data/Fax 36L9016 Phone Cord, 7'... -
Page 153: Assembly 4 : Aptiva Type 2190 Keyboard And Mouse
Assembly 4 : Aptiva Type 2190 Keyboard and Mouse Asm-Index FRU Number Description 10L6145 Mouse 28L1858 Keyboard - Japanese 194 PC NEXT 37L2610 Rapid Access II, Japanese... -
Page 155: Appendix A. Fru Number Index
Appendix A. FRU Number Index for Aptiva Type 2190 Page FRU Number Asm Index 00N4416 1-16 00N4417 1-13 00N4418 1-14 00N4419 1-15 00N4420 00N4421 1-12 00N4422 1-12 00N4427 1-18 00N4428 00N4429 00N4430 00N4431 00N4433 00N4434 00N4436... - Page 156 Page FRU Number Asm Index 00N4437 00N4438 1-11 00N4439 00N4440 1-10 00N4441 00N4442 00N4443 00N4444 1-19 00N4446 00N4447 1-17 01N1840 09N5358 09N5359 09N5360 09N5373 09N5374 09N5394 10L6145 28L1858 36L9015 36L9016 36L9077 1-20...
- Page 157 FRU Number Asm Index Page 36L9130 36L9133 37L2610...
-
Page 159: Appendix B. Online Support Information
Prodigy Service, America Online, and through the IBM support forums on CompuServe. IBM online support areas on all of the services can assist with your technical questions. These areas offer message boards monitored by IBM technicians, databases of computer-related solutions, and file libraries. - Page 160 To reach the IBM Online HelpCenter on Prodigy, use the jumpword: IBM. For information about Prodigy, please call (800) 776-3449(U.S. and Canada only). You can reach the IBM Online HelpCenter on America Online using keyword: IBM Connection. For information about America Online, please call (800) 827-6364 (U.S.
-
Page 161: Index
Index Diagnostic Aids, 3-1 Diagnostic Diskette, 2-21 Diagnostic Program 2190 service level A(SL- Error symptoms, 2-21 A), XXXVI Diagnostic Program Using from Recovery CD, 3-3 Diagnostic Tools,3-3 Diskette Drive,1-3, 1-6, 4-8 Adapter Cards Connector Signals, 5-16 Installing, 4-6 Error Symptoms,2-16 Removing,4-7 Audio Check Procedure, 2-28... - Page 162 Parallel Port,1-6, 1-18 Error Symptoms, 2-20 Connector Signals, 5-17 Port Signals, 5-15 Parts Catalog, 7-1 Aptiva Type 2190 CD-ROM, Modem Card, 7-6 Aptiva Type 2190 Diskette Joystick, 1-7,3-4 Hard Disk Drive Drive , 7-5 Error Symptoms, 2-21 Aptiva Type 2190 Keyboard and Mouse, 7-7 Aptiva Type 2190 System Unit, Parts/Test Point Locations, 5-1...
- Page 163 Safety Inspection Guide, 6-1 Serial Number, 1-10 Serial Port, 1-3, 1-6, 1-18 Error Symptoms, 2-20 Port Signals, 5-14 Specifications, 1-22 Dimensions, 1-22 Electrical Input, 1-22 Environment, 1-22 Power Consumption, 1-22 Weight, 1-22 System Board 2190 Layout,5-3 2190 Processor Type Jumper Setting,5-5 2190 Connector and Functions, 5-6...
- Page 165 Printed in U.S.A. International Business Machines Corporation Old Orchard Road, Armonk, New York 10504 Part Number: 09N1086 Pub Number: S09N-1086-00 8/99...