Table of Contents
Advertisement
Available languages
Available languages
Quick Links
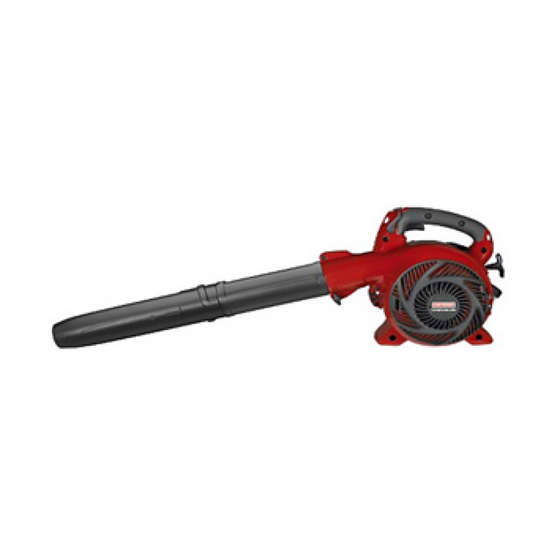
Operator's
Manual
I CRRFTSMRN°I
25cc/1.5
cu.in. 2-Cycle
210 MPH/450
CFM
GASOLINE
POWERED
BLOWERNAC
Model
No.
358.794760
•
Safety
•
Assembly
•
Operation
•
Maintenance
•
Parts List
•
Espar_ol,
p. 20
WARNING:
Read and follow all Safety Rules and Operating
Instructions before first use of this product.
For answers to your questions
about this product:
Call 7 am-7
pm, Mon.-Sat.,
or 10 am-7
pm, Sun.
1-800-235-5878
(Hours listed are Central Time)
Sears, Roebuck
and Co., Hoffman
Estates,
IL 60179 U.S.A.
545154696
Rev. 2
8/22/07
BRW
Advertisement
Table of Contents

Related Manuals for Craftsman 358.794760


Summary of Contents for Craftsman 358.794760
- Page 1 Operator's Manual I CRRFTSMRN°I 25cc/1.5 cu.in. 2-Cycle 210 MPH/450 GASOLINE POWERED BLOWERNAC Model 358.794760 • Safety • Assembly • Operation • Maintenance • Parts List • Espar_ol, p. 20 WARNING: Read and follow all Safety Rules and Operating Instructions before first use of this product.
- Page 2 When used and maintained according due to a defect in material or workmanship chase, return it to any Sears store, Sears Service Center, or other Craftsman in the United States for free repair (or replacement This warranty excludes spark plug and air cleaner, which are expendable can wear out from normal use in less than two years.
- Page 3 Use your unit as a blower for: • Sweeping debris or grass clippings from driveways, sidewalks, patios, etc. • Blowing grass clippings, straw, or leaves into piles, around joints, or be- tween bricks.
- Page 4 • Never run unit without the proper equipment attached. When using your unit as a blower, always install blower tubes. When using the op- tional vacuum kit, always install vac- uum tubes and vacuum bag assem- bly.
- Page 5 • Store in a dry area out of reach of children. CARTON CONTENTS Check carton contents against the fol- lowing list. Model 358.794760 • Blower • Upper blower tube • Lower blower tube • High velocity nozzle • Elbow tube •...
- Page 6 1. Align the rib on the upper blower tube with the groove in the blower outlet; slide the tube into place. NOTE: Knob must be loose enough allow blower tube to be inserted in blower outlet.
- Page 7 5= Push the upper vacuum tube into the vacuum inlet. Turn the tube counterclockwise until a click is felt to secure the tube to tile blower unit. 6. Align slanted end of lower vacuum tube as shown. Firmly push lower vacuum tube into upper vacuum tube.
- Page 8 THROTTLE POSITION LEVER The THRO]q-LE POSITION LEVER is de- signed to allow setting engine speed during blower use only. To avoid caus- ing damage to the unit, DO NOT at- tempt to use the throttle position lever during vacuum use.
- Page 9 2-cycle air-cooled engine oil. We recommend Craftsman brand syn- thetic oil. Mix gasoline and oil at a ratio of 40:1. A 40:1 ratio is obtained by mix- ing 3.2 ounces of oil with 1 gallon of un- leaded gasoline.
- Page 10 • Fuel engine. Move at least 10 feet (3 meters) away from the fueling site. • Hold the unit in the starting position as shown. Make sure the blower end is directed away from people, ani- mals, glass, and solid objects. STARTING...
- Page 11 The rotating blades can cause serious injury. Always disconnect the spark plug before performing maintenance...
- Page 12 CLEAN AIR FILTER A dirty air filter decreases engine per- formance and increases fuel consump- tion and harmful emissions. Always clean after every 5 hours of operation. Button _\ Air Filter \_" _-_'_J_ Air Filter Cover _'_ ,_'"----_._ Cleaning the air filter: 1.
- Page 13 Follow the mix instruc- tions found on stabilizer container. Run engine at least 3 minutes after adding stabilizer. Craftsman 40:1,2-cycle engine oil (air cooled) is already blended with fuel stabilizer.
- Page 14 TROUBLESHOOTING TABLE WARNING: Always stop unit and disconnect ing any of the recommended remedies quire operation of the unit. CAUSE TROUBLE Engh_e will not 1. Engine flooded. start. 2. Fuel tank empty. 3. Spark plug not firing. 4. Fuel not reaching carburetor.
- Page 15 YOUR WARRANTY RIGHTS AND OB- LIGATIONS: The U.S. Environmental Protection Agency/California Air Re- sources Board and Sears, Roebuck and Co., U.S.A., are pleased to explain the emissions control system warranty on your year 2007 and later small off-road engine. In California, all small off-road engines must be designed, built, and equipped to meet the State's stringent anti-smog...
- Page 16 WHERE TO GET WARRANTY SER- VICE: Warranty services or repairs shall be provided at all Sears Service Cen- ters. Call 1-800-469-4663. MAINTENANCE, REPLACEMENT AND REPAIR OF EMISSION RE- LATED PARTS: Any Sears approved replacement part used in the perfor- mance of any warranty maintenance repair on emission related parts will be provided without charge to the owner if the part is under warranty.
- Page 17 Montaje DOS ANOS COMPLETO DE GARANTiA PARA CORTADORA DE LiNEA A GASOLINA WEEDWACKER ® DE CRAFTSMAN ® Si este producto falla por un defecto en el material o de mano de obra dentro dos a_hos a partir de la fecha de compra y este se ha utilizado y mantenido...
- Page 18 SiL J m pret easP _gudee ImaaPnatrea_ ,_ADVERTENClA: Detenga el motor antes de abrir la compuerta de aire del aspirador. El motor deber& encontrarse impulsor no deber&n estar girando las cuchillas girantes. Suavemente, parte trasera del aparato para abrir la cerradura, cubierta de la entrada de aire de] aspirador Cuando est6 usando el accesorio...
- Page 19 • Soplar recortes de hierba, para u hojas en montones, o para remover escombros de esquinas, alrededor de uniones o entre ladrillos. Utilice su aparato como aspiradora para: • Recoger material seco como hojas, hierba, ramas peque_as y pedazos peque_ios de papel. •...
- Page 20 Centro de Servicio Sears. • Use exclusivamente los repuestos recomendados de la marca Craftsman; el uso de cualquier repuesto podrb, invalidar la garantia o daSar el aparato. • Vacia el tanque de combustible antes de almacenar el aparato.
- Page 21 DE LA CAJA Verifique que todos los articulos de la siguiente lista est_n incluidos: Modelo 358.794760 • Soplador • Tubo Superior del Soplador • Tubo Inferior del Soplador • Boquilla de Alta Velocidad • Tubo en Forma de Codo • Bolsa del Aspirador •...
- Page 22 6. Para remover los tubos, gire la perilla hacia la izquierda para aflojar el tubos del soplador; remueva el tubos. MONTAJE DE LA BOQUILLA ALTA VELOCIDAD Cuando se requiera una velocidad aire m&s alta, utilice la boquilla de alta velocidad. 1.
- Page 23 Cubierta -ntrada Aire Entrada de Aire del Aspirador 4= Alinee las leng0etas en el interior de la entrada de aire del aspirador con las ranuras en el tubo superior del aspirador. Leng0eta Ranura 5= Empuje el tubo superior del aspirador en la entrada de aire del aspirador.
- Page 24 MONTAJE DE LA BANDA DEL HOM- BRO (accesorio opcional #71-85783) 1. Pasando la banda del hombro sobre su cabeza, col6quela en su hombro izquierdo. 2. Cierre el gancho en el retenedor (vea la ilustraci6n siguiente). CONOZCA SU SOPLADOR LEA EL MANUAL DEL USUARIO Y SUS REGLAS DE SEGURIDAD ANTES DE COMEN- ZAR A USAR ESTE APARATO.
- Page 25 2 tiempoe enfriados a aire. Recomendamos el aceite de sint6tico de la marca Craftsman. Mezcle la gaeolina con el aceite en la proporci6n 40:1. Se obtiene una proporci6n de 40:1 mezclando 3,2 onzas de aceite con...
- Page 26 El aceite de la marcha Craftsman viene ya mezclado con estabilizador de combustible. la secci6n de ALMACENAJE para m&s informaci6n. PARA DETENER EL MOTOR •...
- Page 27 Mango de la Cuerda de Arranque Start Lever Bombeadol Este aparato cuenta con un sistema de arranque Sim-pul-". No tiene que tirar brusca ni en6rgicamente del mango de la cuerda de arran- que. Tire del mango de la cuerda de arranque 5 veces con un movimien- to controlado (no tire de la cuerda m_.s de 3 veces en temperatures...
- Page 28 ADVERTENClA: Evite hacer contacto con el silenciador a no ser que el motor y el silenciador se en- cuentre frio. El contacto con un silen- ciador caliente puede causar quema- duras de gran envergadura. ADVERTENClA: Detenga el motor y asegSrese de que las cuchillas del impulsor no se encuentren girando antes de abrir la compuerta de entrada de aire del aspirador o de intentar...
- Page 29 Tire del filtro que se encuentra en el tanque y retirelo de la linea de com- bustible. Instale un filtro nuevo en la linea de combustible; vuelva a instalar todas las piezas. Fi, odo Li°ne_dsetible VERIFIQUE LOS TORNILLOS MONTAJE DEL SILENCIADOR Para prevenir da_os, aseg_rese anu-...
- Page 30 Ponga el motor en marcha y d@jelo en marcha per Io menos 3 minutos des- pu@s de haberle puesto el estabilizador. El aceite de la marca Craftsman para motores a 2 tiempos (enfriados aire) ya viene mezclado con estabiliza- dor de combustible.
- Page 31 TABLA DIAGNOSTICA ADVERTENCIA: Siempre apague el aparato y desconecte de hacer cualquiera de las reparaciones no requieran que la unidad est6 en operaci6n. SlNTOMA CAUSA El motor no 1. El motor esta ahogado. arranoa. 2. El tanque de combustible est& vacio. 3.
- Page 32 SUS DERECHOS Y OBLIGAClONES DE GARANTIA: La Agencia de Protec- ci6n Ambiental de los Estados Unidos, la Junta de Recursos Ambientales California y Sears, Roebuck and Co., U.S.A., se complacen en explicar la ga- rantia con la que cuenta el eistema de control de emisi6n en su motor pe- queSo, modelo 2007 y m&s adelante, para uso fuera de carretera.
- Page 33 est6 programada para ser reemplazada como parte del mantenimiento requerido deber& estar garantizada por el periodo de tiempo que comienza en la fecha de compra inicial hasta la fecha del primer reemplazo programado para dicha pie- za. DIAGNOSTICO: No se deber& co- brat al dueSo ningOn tipo de cargos pot la labor de diagn6stico la cual determine...
- Page 37 ii!!ii I!iii!_ ! ii i ii_i !ii i ii_i !ii iii_i !ii iil _ !i!i i! i !!i !i i !i _iil !i i!i!!iil !i il!!i!i !i!i! _!!iii!_! !iii!_i !iii!_ ! iiiii_i !iii!_!i !i!i!!iil !i il!!i!i !i!i! _il !i il!!iil !i !I! _ i ! iii!_ !iiiii_i !i ii!_i ! iii!_ ! i i !f! _iil !i il!!iil !i!i!!iil _ii!!!i!!!!i!_i!!ii!!_i!!iiii_!!ii!ii_ i_iiii:_;_iiiiii_;_iiiii!_ For repair - in your home - of all major brand appliances,...