Table of Contents
Advertisement
Available languages
Available languages
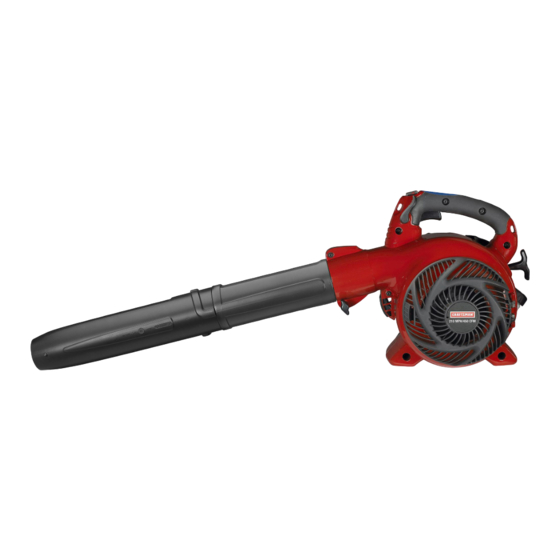
Operator's
Manual
I CRRFTSMRN°I
25cc/1.5 cu.in. 2-Cycle
210 MPH/450 CFM
GASOLINE
POWERED
BLOWERNAC
Model No.
358.794765
•
Safety
• Assembly
•
Operation
•
Maintenance
•
Parts
List
•
Espa_ol,
p. 21
WARNING:
Read and follow all Safety Rules and Operating
Instructions before first use of this product.
i_
For answers to your questions
about this product:
Call 7 am-7
pm, Mon.-Sat.,
or 10 am-7
pm, Sun.
1-800-235-5878
(Hours listed are Central Time)
Sears,
Roebuck
and Co., Hoffman
Estates,
IL 60179
U.S.A.
115264526
Rev. 2
2/2/10
BRW
Advertisement
Table of Contents

Related Manuals for Craftsman 358.794765


Summary of Contents for Craftsman 358.794765
- Page 1 Operator's Manual I CRRFTSMRN°I 25cc/1.5 cu.in. 2-Cycle 210 MPH/450 CFM GASOLINE POWERED BLOWERNAC Model No. 358.794765 • Safety • Assembly • Operation • Maintenance • Parts List • Espa_ol, p. 21 Read and follow all Safety Rules and Operating WARNING: Instructions before first use of this product.
- Page 2 CRAFTSMAN FU LL WARRANTY If this Craftsman product fails due to a defect in material or workmanship within two years from the date of purchase, return it to any Sears store, Parts & Repair Service Center, or other Craftsman outlet in the United States for free repair (or replacement if repair proves impossible).
- Page 3 Hazard zone f orthrown objects. Keep c hildren, bystanders, and animals away f rom work a rea a minimum of30feet ( 10 meters) when s tarting or operating unit. Do not p oint blower nozzle i nthe direction ofpeople orpets. Do not wear jewelry, loose clothing, or clothing with loosing hanging secure...
-
Page 4: Know Your Unit
• Do not o perate unit w hen y ou are _WARNING: F ailure tofollow all tired, ill,upset, orifyou areunder the Safety Rules and Precautions canre- influence ofalcohol, drugs, ormedi- sult i nserious injury. cation. • Keep c hildren, bystanders, and ani- KNOW YOUR U NIT mals a way f rom work a rea amini-... - Page 5 Sears Service Center. ning. Debris such asgravel, sand, • Use only recommended Craftsman dust, grass, etc. c ould b epicked upby replacement parts; use of any other the airintake and thrown out t hrough...
-
Page 6: Vacuum Assembly
CARTON C ONTENTS 3. Align the slots on the lower blower Check carton c ontents against the fol- tube with the tabs on the upper lowing list. blower tube. Model 358,794765 • Blower er BIow.,_ er TUbTe b • Upper blower tube •... -
Page 7: Vacuum Tube Assembly
Push the small end ofthe elbow release the latch while pulling up tube through the small opening on the vacuum inlet cover with your other hand. the bag. Hold the vacuum inlet cover open until upper vacuum tube is installed. Vacuum Inlet Cover... -
Page 8: Shoulder Strap
SHOULDER STRAP 2. Remove the vacuum t ubes b y turn- ATTACHMENT ing the tubes c lockwise. 1. Pass the shoulder strap over your 3. Close t he vacuum i nlet cover and head and onto your left shoulder. make s ure itislatched closed. 2. - Page 9 KNOW YOUR BLOWER READ THIS OPERATOR'S MANUAL AND SAFETY RULES BEFORE OPERATING YOUR UNIT. Compare the illustrations with your unit to familiarize yourself with the location of the various controls and adjustments. Save this manual for future reference. MULCHING BLADES Your blower is equipped with mulching blades as a standard feature.
-
Page 10: Fuel Requirements
2-cycle air-cooled engine oil. areas such as gutters, screens, patios, We recommend Craftsman brand syn- grills, porches, and gardens. thetic oil. Mix gasoline and oil at a ratio • Watch out for children, pets, open of 40:1. - Page 11 IMPORTANT STARTING A COLD ENGINE Use of alcohol blended fuels (called warm engine after running out of fuel) gasohol or using ethanol or methanol) Move the throttle position lever can cause major engine performance (cruise control) to the idle position. and durability problems.
- Page 12 STARTING A FLOODED ENGINE Pull starter rope handle with a con- Flooded engines can be started by mov- trolled and steady motion while squeezing throttle trigger until en- ing the start lever to the RUN position gine starts and runs. and fully squeezing the throttle trigger.
- Page 13 CHECK MUFFLER MOUNTING Button ._'_\ SCREWS Air Filter X_'_ Once each year, ensure muffler mounting screws are secure and tight- ened properly to prevent damage. Air Filter Cover "__ Cleaning the air filter: 1. Clean the cover and the area around it to keep debris from falling into the carburetor chamber...
-
Page 14: Seasonal Storage
Run lated area where fuel vapors cannot engine at least 3 minutes after adding reach sparks or open flames from stabilizer. water heaters, electric motors or Craftsman 40:1,2-cycle engine oil (air switches, furnaces, etc. cooled) is already blended with fuel •... -
Page 15: Troubleshooting
TROUBLESHOOTING TABLE WARNING: Always stop unit and disconnect spark plug before perform- ing any of the recommended remedies below other than remedies that re- quire operation of the unit. CAUSE REMEDY TROUBLE Engine will not i 1. See "Starting a Flooded Engine"... -
Page 16: Warranty
YOUR WARRANTY RIGHTS AND OB- ing your warranty rights and responsibili- LIGATIONS: The U.S. Environmental ties, you should contact your nearest Protection Agency/California Air Re- authorized service center, call Sears at sources Board and Sears, Roebuck and 1-800-469-4663, or send e-mail corre- Co., U.S.A., are pleased to explain the spondence to emission.warranty@... - Page 17 e-mail correspondence to emission. repair on emission related parts will be warranty@ HCOP- emission.com. provided without charge to the owner if WHERE TO GET WARRANTY SER- the part is under warranty. EMISSION CONTROL WARRANTY PARTS LIST: VICE: Warranty services or repairs shall be provided at all Sears Service Cen- Carburetor, air filter (covered up to main- ters.
- Page 18 (2) a_os a partir de la fecha de compra y este se ha utilizado y mantenido de acuerdo al manual del usuario, envielo a cualquier tienda Sears, Centro de Servicios Sears u otra tienda Craftsman en los Estados Unidos para su reparaci6n gratuita (o reem- plazo si no es posible repararlo).
- Page 19 Zona de peligro por objetos arrojados al aire. Mantenga a niSos, espectadores y animales una distancia minima de 10 metros (30 pies) al poner en marcha o al usar el aparato. seSale la boquilla en la direcci6n de la personas o de animales domesticos.
- Page 20 en la cara al ser propulsados por el ADVERTENClA: De no cumplir aparato. La protecci6n para los ojos con todas las Reglas y Precauciones debe ser marcada Z87. de Seguridad, correr& el riesgo de ac- • Use siempre protecci6n en los pies. cidentes muy graves.
- Page 21 Man- recomendados de la marca tenga el equilibrio, con los pies en una Craftsman; el uso de cualquier otro superficie estable en todo momento. repuesto podr& invalidar la garantia • Nunca coloque objetos dentro de los o dafiar el aparato.
- Page 22 • No almacene el aparato ni el combus- anti-vibraci6n no garantizan que se evi- tible en un recinto cerrado donde los tan tales problemas. Los usuarios que vapores el combustible puedan entrar hacen uso continuo y prolongado de las herramientas de fuerza deben fiscalizar en contacto con chispas o llamas abiertas procedentes de calentadores atnetamente su estado fisico y el estado...
- Page 23 Empuje la punta pequeSa el tubo Tubo Superior en forma de codo por abertura plador LengOeta queSa el la bolsa del aspirador. Tubo Inferior Tubo en forma Moldura de Codo Saliente .s_S°P lad°r 4. Empuje el tubo inferior del soplador sobre el tubo superior del soplador.
- Page 24 1. Introduzca un destornillador dentro del &rea del cerradura de la entrada de aire del aspirador. Area cerradura Salida 6. Alinee la parte final inclinada del tubo Area del inferior del aspirador como se cerradura muestra. Presione firmemente el Cubierta de tubo inferior del aspirador dentro del entrada de aire tubo superior del aspirador.
-
Page 25: Conozca Su Soplador
MONTAJE DE LA BANDA DEL HOM- BRO (accesorio opcional #71-85783) 1. Pasando la banda del hombro sobre su cabeza, col6quela en su hombro izquierdo. 2. Cierre el gancho en el retenedor (vea la ilustraci6n siguiente). USO DEL USO DEL SOPLADOR ASPIRADOR @ etene o CONOZCA... - Page 26 INTERRUPTOR STOP BOMBEADOR Se usa el interruptor STOP para detener El BOMBEADOR es usado para remover el motor. Para detener el motor, empuje aire de el carburador y de las lineas de y sostenga el interruptor en la posici6n combustible y las Ilena de mezcla de STOP hasta que el motor se haya dete- combustible.
- Page 27 2 tiempos enfriados a aire. PARA DETENER EL MOTOR Recomendamos el aceite de sintetico de la marca Craftsman. Mezcle la ° Suelte el gatillo acelerador. ° Empuje y sostenga el interruptor gasolina con el aceite en la proporci6n STOP en la posici6n STOP hasta que 40:1.
- Page 28 Mango de la Cuerda de Arranque POSICION DE ARRANQUE Soplador Start Lever Bombeador 4. Este aparato cuenta con un sistema ADVERTENClA: AI arrancar de arranque Sim-pul TM.NO tiene motor, sostenga el aparato como se que tirar brusca ni en@gicamente ilustra en la figura. Apoye el aparato del mango de la cuerda de arran- exclusivamente en una superficie...
- Page 29 10 minutos, set& necesario arrancar el Tirando de la cuerda repetidas veces aparato siguiendo los pasos abajo PARA mientras que presiona el gatillo acelera- ARRANCAR CON MOTOR FRIO o des- dor hasta el motor arranque y se ponga pues trate los pasos de las instruc- en marcha.
- Page 30 linea de combustible; vuelva a instalar todas las piezas. Filtro del Combustible Linea de Combustible Siempre limpie el filtro de aire despues ded cada 5 horas de uso. VERIFIQUE LOS TORNILLOS Limpieza del filtro del aire: MONTAJE DEL SILENClADOR 1. Limpie la cubierta y el &rea conti- Para prevenir daSos, asegt3rese anu- gua para evitar que caiga tierra en...
- Page 31 Tornillo de Ajuste de Para ajuste de la marcha lenta: la Marcha Lenta \/ Deje el motor en marcha lent& Ajuste las revoluciones hasta que el motor se mantenga en marcha sin calarse marcha lenta es demasiado lenta). • Gire el tornillo de marcha lenta hacia la derecha para aumentar las revolu- clones si el motor se ahoga o se para.
- Page 32 El aceite de la marca Craftsman 40:1 etc. para motores a 2 tiempos (enfriados a • Guarde el aparato con todos los pro- aire) ya viene mezclado...
- Page 33 TABLA DIAGNOSTICA ADVERTENCIA: Siempre apague el aparato y desconecte la bujia antes de hacer cualquiera de las reparaciones recomendadas a continuaci6n no requieran que la unidad este en operaci6n. SINTOMA CAUSA i SOLUOION El motor no 1. El motor est& ahogado. 1.
- Page 34 SUS DERECHOS Y OBLIGAClONES por el incumplimiento de su parte en DE GARANTIA: La Agencia de Pro- asegurarse que el mantenimiento pro- tecci6n Ambiental de los Estados Uni- gramado haya sido desempeSado. dos, la Junta de Recursos Ambien- Como dueSo de una m&quina de motor tales de California y Sears, Roebuck pequeSo para uso fuera de carretera,...
- Page 35 que este programada t3nicamente para garantia, usted deber& entrar en contac- to con su centro de servicio autorizado inspecci6n regular para efectos de "re- paraci6n o reemplazo si fuera necesa- m&s cercano, Ilamar a Sears al rio" deber_, garantizarse por un periodo 1-800-469-4663, o envie la correspon- de dos aSos.
- Page 36 La informaci6n en la etiqueta del producto indica las normas de certificaci6n de su motor. Ejemplo: (Aho) EPA y/o CALIFORNIA. Informacion Importante en relacion al motor. Este motor satisface regulaciones de emision para mo- tores peque_os operados fuera de la carretera. Familia # De Serie Horas de la durabilidad...