Advertisement
Available languages
Available languages
Quick Links
Operator's
Manual
I CRRFTSMRN°I
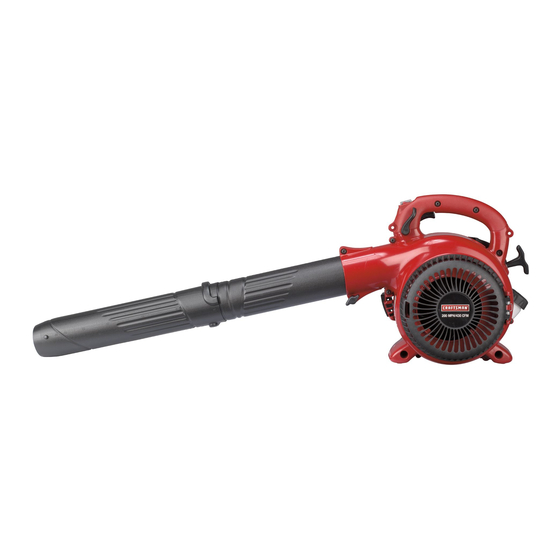
25cc/1.5 cu. in. 2-Cycle
200 MPH/430 CFM
GASOLINE
POWERED
BLOWERNAC
Model No.
358.794701
•
Safety
• Assembly
•
Operation
•
Maintenance
•
Parts
List
•
Espa_ol,
p. 21
WARNING:
Read and follow all Safety Rules and Operating
Instructions before first use of this product.
For answers to your questions
about this product:
Call 7 am-7
pm, Mon.-Sat.,
or 10 am-7
pm, Sun.
1-800-235-5878
(Hours listed are Central Time)
Sears Brands Management
Corporation,
Hoffman Estates, IL 60179 U.S.A.
115442526
Rev. 1 6/2/11
BRW
Advertisement

Related Manuals for Craftsman 358.794701


Summary of Contents for Craftsman 358.794701
- Page 1 Operator's Manual I CRRFTSMRN°I 25cc/1.5 cu. in. 2-Cycle 200 MPH/430 CFM GASOLINE POWERED BLOWERNAC Model No. 358.794701 • Safety • Assembly • Operation • Maintenance • Parts List • Espa_ol, p. 21 WARNING: Read and follow all Safety Rules and Operating Instructions before first use of this product.
- Page 2 Estates, IL 60179 Congratulations on making a smart purchase. Your new Craftsman product is designed and manufactured for years of dependable operation. But like all products, it may require repair from time to time. That's when having a Repair Protection Agreement can save you money and aggravation.
- Page 3 *Coverage inCanada varies o nsome items. For f ulldetails c all S ears Canada at 1-800-361-6665, Sears Installation Service For Sears professional installation of home appliances, garage door openers, water heaters, and other major home items, in the U.S.A. or Canada call 1-800-4-MY-HOME®.
- Page 4 WARNING: Stop the engine before opening the vacuum inlet door. The engine must be stopped and the impeller blades no longer turning to avoid serious injury from the rotating blades. Gently tilt the handle of the screwdriver toward the back of the unit to release the latch while pulling up on the vacuum inlet cover with your other hand.
- Page 5 from being b lown orricocheting into muffler side facing away from your eyes a nd face which can result in body and clothes. blindness and/or serious injury. Eye • Inspect unit before each use for protection should bemarked Z87. worn, loose, missing, or damaged •...
- Page 6 Users by a Sears Service Center. who operate power tools on a continual • Use only recommended Craftsman and regular basis must monitor closely replacement parts; use of any other their physical condition and the condition parts may void your warranty and of this tool.
- Page 7 BLOWER ASSEMBLY HIGH-SPEED NOZZLE ASSEMBLY When greater air speed is desired, use BLOWER TUBE ASSEMBLY the high-speed nozzle. If you have already assembled your 1. Align the slots on the nozzle with unit for use as a vacuum, remove the the tabs on the lower blower tube.
- Page 8 VACUUM TUBE ASSEMBLY _ILWARNING: Stop engine and be sure the impeller blades have stopped turning before opening the vacuum inlet door or attempting to insert or remove the vacuum or blower tubes. The rotat- ing blades can cause serious injury. 1.
- Page 9 SHOULDER STRAP ATTACHMENT (optional accessory #71-85936) 1. Pass the shoulder strap over your head and onto your left shoulder. 2. Snap the hooks onto the retainers (see following illustration). BLOWER I VACUUM RetainerI Retainer Retainer I Retainer KNOW YOUR BLOWER READ THIS OPERATOR'S MANUAL AND SAFETY RULES BEFORE OPERATING YOUR UNIT.
- Page 10 2-cycle air-cooled engine oil. Blow debris away safely. We recommend Craftsman brand syn- • Use the full blower nozzle extension thetic oil. so the air stream can work close to Mix gasoline and oil at a ratio of 40:1. A the ground.
- Page 11 Pour the entire contents of this container STARTING POSITION into 1 gallon of gasoline to achieve the proper fuel mixture. DO NOT USE auto- motive oil or boat oil. These oils will Blower cause engine damage. When mixing fuel, follow instructions printed on con- tainer.
- Page 12 6. Pull starter rope handle with a con- Starter Handle trolled and steady motion while squeezing throttle trigger until engine starts and runs. STARTING A WARM ENGINE 1. Squeeze and hold the throttle trig- Start ger. Lever 2. Pull starter rope handle with a con- trolled and steady motion while squeezing throttle trigger until en-...
- Page 13 CHECK FOR LOOSE REPLACE SPARK PLUG FASTENERS AND PARTS Replace spark plug each year to ensure • Muffler the engine starts easier and runs better. • Spark Plug Boot Set spark plug gap at 0.025 inch. Igni- • Air Filter tion timing is fixed, nonadjustable.
- Page 14 • Store unit and fuel in a well venti- engine at least 3 minutes after adding lated area where fuel vapors cannot stabilizer. reach sparks or open flames from Craftsman 40:1,2-cycle engine oil (air water heaters, electric motors or cooled) is already blended with fuel switches, furnaces, etc.
- Page 15 TROUBLESHOOTING TABLE WARNING: Always stop unit and disconnect spark plug before perform- ing any of the recommended remedies below other than remedies that re- quire operation of the unit. TROUBLE CAUSE REMEDY Engine will not i 1. See "Starting a Flooded Engine"...
- Page 16 YOUR WARRANTY RIGHTS AND OB- ing your warranty rights and responsibili- LIGATIONS: The U.S. Environmental ties, you should contact your nearest Protection Agency/California authorized service center, call Sears at Resources Board and Sears Brands 1-800-469-4663, or send e-mail corre- Management Corporation, U.S.A., are spondence to emission.warranty@...
- Page 17 nearest authorized service center, call mance of any warranty maintenance Sears at 1-800-469-4663, or send repair on emission related parts will be e-mail correspondence to emission. provided without charge to the owner if warranty@ HOOP- emission.com. the part is under warranty. EMISSION WHERE TO GET WARRANTY SER- CONTROL...
- Page 18 Para que los detalles de la garantia obtengan la reparacion o el reemplazo, site en nuestra pagina de red: www.craftsman.com Esta garantia cubre SOLAMENTE defectos en material y de mano de obra. La cobertura...
- Page 19 O un reembolso prorrateado en cualquier momento posterior al vencimiento periodo de garantia del producto.iCompre su Acuerdo de protecci6n para repara- ciones ya mismo! Aplioan algunas limitaciones y exclusiones. Para conocer los precios e in- formacion adicional en EE.UU, Ilame al 1-800-827-6655.*La cobertura Canada varia en algunos articulos.
- Page 20 bujia antes de dar mantenimiento. _LADVERTENCIA: Detenga el motor antes de abrir la compuerta de entrada de aire del aspirador. El motor deber& encontrarse detenido y las cuchillas de la impulsor no deber&n estar girando para evitar serios accidentes provocados las cuchillas girantes.
- Page 21 MANEJE EL COMBUSTIBLE Utilice su aparato como soplador aire para: EXTREMO CUlDADO, ES ALTA- • Barrer escombros o recortes de MENTE INFLAMABLE hierba de caminos de entrada, • Elimine todas las posibles fuentes de aceras, patios, etc. chispan o llamas (inclusive los cigar- •...
- Page 22 Man- tenga el equilibrio, con los pies en una Craftsman; el uso de cualquier otro superficie estable en todo momento. repuesto podr& invalidar la garantia • Nunca coloque objetos dentro de los o dafiar el aparato.
- Page 23 ras a aquellas personal propensas a los AVlSO ESPECIAL: Su aparato viene trastomos de la circulaci6n o alas hin- equipada con silenciador limitador de chazones anormales. El uso prolongado temperatura y con rejilla antichispa que en climas frios ha sido asociado con cumpla los requisitos de los C6digos de daSos a los vasos sanguineos a perso-...
- Page 24 5. Gire el tubo de soplador inferior embudo del tubo en forma de codo, y la moldura saliente del tobo en forma de hacia la derecha hasta que oiga un codo se encuentre al fondo. chasquido para bloquear el tubo de soplador inferior en el superior.
- Page 25 COMO CONVERTIR EL APARATO Sostenga la cubierta de entrada de DE USO DEASPIRADOR A USO DE aire del aspirador abierta hasta que SOPLADOR el tubo del aspirador quede instalado. _/L ADVERTENCIA: AI usar el Cubierta de aparato para soplar los escombros, Entrada de sujete el aparato con el lado del silen- Aire...
- Page 26 USO DEL USO DEL MONTAJE DE LA BANDA DEL HOM- SOPLADOR ASPIRADOR BRO (accesorio opcional #71-85936) 1. Pasando la banda del hombro Retenedor Retenedor Retenedor I Retenedor sobre su cabeza, col6quela en su ..hombro izquierdo. 2. Cierre el ganchos en el retene- dores (vea la ilustraci6n siguiente).
- Page 27 BOMBEADOR PALANCA DEL ARRANCADOR El BOMBEADOR es usado para remover La PALANCA DEL ARRANCADOR ayuda a aire de el carburador y de las lineas de suministrar combustible al motor para combustible y las Ilena de mezcla de facilitar el arranque. Active el sistema de combustible.
- Page 28 PARA DETENER EL MOTOR Recomendamos el aceite de sintetico • Suelte el gatillo acelerador. de la marca Craftsman. Mezcle la • Empuje y sostenga el interruptor gasolina con el aceite en la proporci6n STOP en la posici6n STOP hasta que 40:1.
- Page 29 pia y s61ida siempre que vaya a efec- m_.s de 3 veces en temperatures tura el arranque y siempre que tenga que exceden los gO°F). Si el motor que apoyar el aparato con el motor en arranque y se ponga en marcha marcha.
- Page 30 RESPONSABILIDAD DEL USUARIO ADVERTENCIA: Desconecte la bujia antes de realizar mantenimiento, servicio, o ajustes. TAREA DE CUIDADO Y MANTENIMIENTO CUANDO HACER Antes de cada uso Verificar que no haya fijadores flojos ni piezas sueltas Antes de cada uso Verificar que no haya piezas daSadas o gastadas Inspeccione y limpie el aparato y sus placas Despues...
- Page 31 VERIFIQUE LOS TORNILLOS 2. Abra la tapa del filtro de aire presio- MONTAJE DEL SILENClADOR nando el bot6n (vea la ilustraci6n). Remueva el filtro. Para prevenir da_os, asegt3rese anu- almente de que los tornillos de mon- AVlSO: No limpie el filtro de aire con taje del silenciador se encuentren gasolina...
- Page 32 Io menos 3 minutos des- • Guarde el aparato con todos los pro- pues de haberle puesto el estabilizador. tectores en su lugar y coloque El aceite de la marca Craftsman 40:1 aparato de modo que las piezas filo- para motores a 2 tiempos...
- Page 33 TABLA DIAGNOSTICA ADVERTENCIA: Siempre apague el aparato y desconecte la bujia antes de hacer cualquiera de las reparaciones recomendadas a continuaci6n no requieran que la unidad este en operaci6n. SINTOMA CAUSA i SOLUCION El motor no 1. Elmotorest&ahogado. 1. Vea "Arranque de Motor Ahogado"...
- Page 34 SUS DERECHOS Y OBLIGAClONES bos o por el incumplimiento de su parte DE GARANTIA: La Agencia de Pro- en asegurarse que el mantenimiento tecci6n Ambiental de los Estados programado haya sido desempeSado. Unidos, la Junta de Recursos Ambien- Como dueSo de una m&quina de motor tabs de California y Sears Brands pequeSo para uso fuera de carretera,...
- Page 35 PERIODO DE GARANTIA: Cualquier sus derechos y responsabilidades pieza garantizada que no este progra- garantia, usted deber& entrar en contac- to con su centro de servicio autorizado mada para ser reemplazada como parte del mantenimiento requerido, o que este m&s cercano, Ilamar a Sears al programada Qnicamente para inspec- 1-800-469-4663, o envie la correspon-...
- Page 36 La informaciGn en la etiqueta del producto indica las normas de certificaciGn de su motor. Ejemplo: (Aho) EPA y/o CALIFORNIA. Informacion Importante en relaciGn al motor. Este motor satisface ..regulaciones de emision para mo- ---._l" EMISSION CONTROL INFORMATION " IBIS ENGINE MEETS EXHANDEVPEMISSIONS REGULATION, tores pequehos operados fuerade...