Table of Contents
Advertisement
Quick Links
Advertisement
Table of Contents

Related Manuals for Optoma ZH450ST


Summary of Contents for Optoma ZH450ST
- Page 1 Projector ® User manual...
-
Page 2: Table Of Contents
TABLE OF CONTENTS SAFETY ....................4 Important Safety Instruction....................... 4 Laser Radiation Safety Information ................... 5 Copyright ........................... 7 Disclaimer ..........................7 Trademark Recognition ......................7 FCC ............................7 Declaration of Conformity for EU countries ................8 WEEE ............................8 Cleaning the Lens........................ - Page 3 Compatible resolutions ......................55 Image size and projection distance ..................59 Projector dimensions and ceiling mount installation ..............63 IR remote control codes ......................65 Troubleshooting ........................67 Warning indicators ........................69 Specifications ........................... 70 Optoma global offices ....................... 72 English...
-
Page 4: Safety
‡ Do not attempt to service the unit yourself. Opening or removing covers may expose you to dangerous voltages or other hazards. Please call Optoma before you send the unit for repair. ‡ See projector enclosure for safety related markings. -
Page 5: Laser Radiation Safety Information
‡ When switching the projector off, please ensure the cooling cycle has been completed before disconnecting power. Allow 90 seconds for the projector to cool down. ‡ Turn off and unplug the power plug from the AC outlet before cleaning the product. ‡... - Page 6 ‡ Do not open or disassemble the projector as this may cause damage by the exposure of laser radiation. ‡ Do not stare into beam when the projector is on. The bright light may result in permanent eye damage. Not following the control, adjustment or operation procedure may cause damage by the the exposure of laser radiation.
-
Page 7: Copyright
Copyright This publication, including all photographs, illustrations and software, is protected under international copyright laws, with all rights reserved. Neither this manual, nor any of the material contained herein, may be reproduced without written consent of the author. © Copyright 2022 Disclaimer The information in this document is subject to change without notice. -
Page 8: Declaration Of Conformity For Eu Countries
Operation Conditions This device complies with Part 15 of the FCC Rules. Operation is subject to the following two conditions: 1. This device may not cause harmful interference and 2. This device must accept any interference received, including interference that may cause undesired operation. Notice: Canadian users This Class B digital apparatus complies with Canadian ICES-003. -
Page 9: Introduction
INTRODUCTION Thank you for purchasing an Optoma laser projector. For full list of features please visit the product page on our website, where you will also find additional information and documentation such as FAQs. Package Overview Carefully unpack and verify that you have the items listed below under standard accessories. Some of the items under optional accessories may not be available depending on the model, specification and your region of purchase. -
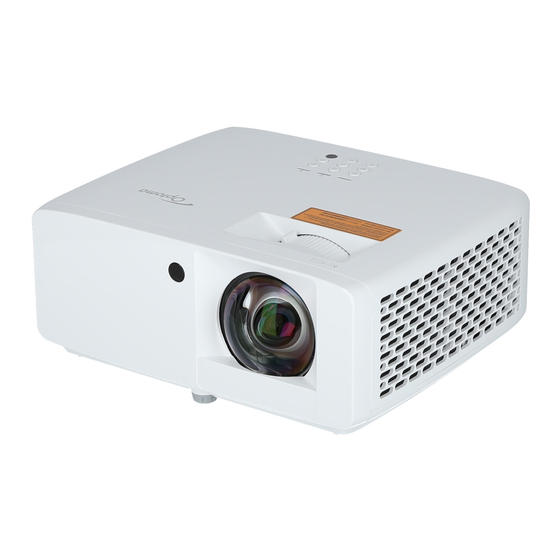
Page 10: Product Overview
INTRODUCTION Product Overview 1080p 1.3x/1080p 1.6x model XGA/WXGA/1080p Short Throw/1080p Short Throw w/o network model Note: ‡ Do not block projector intake and exhaust vents. ‡ When operating the projector in an enclosed space, allow at least 30 cm clearance around the intake and exhaust vents. -
Page 11: Connections
INTRODUCTION Connections 1080p 1.3x/1080p 1.6x model XGA/WXGA/1080p Short Throw/1080p Short Throw w/o network model Item Item HDMI 1 Connector Audio Out Connector HDMI 2 Connector DC Jack RS-232 Connector Kensington Lock Port USB Power Out (5V 1.5A) Connector RJ-45 Connector* Note: ‡... -
Page 12: Keypad
INTRODUCTION Keypad Item Item Power LED IR Receiver Lamp LED Enter Temp LED Keystone Correction Information 10. Menu Re-Sync 11. Source Four Directional Select Keys 12. Power English... -
Page 13: Remote Control
INTRODUCTION Remote control Item Item Aspect Ratio Freeze Power On / Off AV Mute Mode 11. Volume + Enter Menu Return 13. Four Directional Select Keys Mute 14. Settings/Setup Menu Volume - 15. Source Keystone Correction Note: ‡ Some keys may have no function for models that do not support these features. ‡... -
Page 14: Setup And Installation
SETUP AND INSTALLATION Installing the projector Your projector is designed to be installed in one of four possible positions. Your room layout or personal preference will dictate which installation location you select. Take into consideration the size and position of your screen, the location of a suitable power outlet, as well as the location and distance between the projector and the rest of your equipment. - Page 15 SETUP AND INSTALLATION Projector installation notice ‡ 360° free orientation operation ‡ Allow at least 30 cm clearance around the exhaust vent. Minimum 100mm Minimum 300mm Minimum 300mm (3.94 inches) (11.81 inches) (11.81 inches) Minimum 100mm (3.94 inches) Minimum 100mm Minimum 100mm (3.94 inches) (3.94 inches)
-
Page 16: Connecting Sources To The Projector
SETUP AND INSTALLATION Connecting sources to the projector Item Item HDMI Cable Power Adapter HDMI Dongle Power Cable USB Power Cable RS232 Cable Audio Out Cable RJ-45 Cable* Note: ‡ To ensure the best image quality and avoid connection errors, we recommend the use of High Speed or Premium Certified HDMI cables up to 5 meters. -
Page 17: Adjusting The Projector Image
SETUP AND INSTALLATION Adjusting the projector image Image height The projector is equipped with elevator feet for adjusting the image height. Locate the adjustable foot you wish to adjust on the underside of the projector. Rotate the adjustable foot clockwise or counterclockwise to raise or lower the projector. 1080p 1.3x/1080p 1.6x model: Tilt-Adjustment Feet Tilt-Adjustment Ring... - Page 18 SETUP AND INSTALLATION Zoom and focus ‡ To adjust the image size, turn the zoom lever clockwise or counterclockwise to increase or decrease the projected image size. ‡ To adjust the focus, turn the focus ring clockwise or counterclockwise until the image is sharp and legible.
-
Page 19: Remote Setup
SETUP AND INSTALLATION Remote setup Installing / replacing the batteries Press firmly and slide the battery cover off. Install new battery into the compartment. Remove the old battery and install new one (CR2025). Ensure that the side with a “+” is facing Put the cover back. - Page 20 SETUP AND INSTALLATION Effective range Infra-Red (IR) remote control sensor is located on the top and front sides of the projector. Ensure that the remote control is held at an angle 30 degrees perpendicular to the projector’s IR remote control sensor to ensure correct functionality.
-
Page 21: Using The Projector
USING THE PROJECTOR Powering on / off the projector Powering on Securely connect the power lead and signal/source cable. When connected, the Power LED will turn red. Turn on the projector by pressing the button on the projector keypad or the button on the remote control. -
Page 22: Selecting An Input Source
USING THE PROJECTOR Selecting an input source Turn on the connected source that you want to display on the screen, such as computer, notebook, video player, etc. The projector will automatically detect the source. If multiple sources are connected, press the button on the projector keypad or remote control to select the desired input. -
Page 23: Menu Navigation And Features
USING THE PROJECTOR Menu navigation and features The projector has multilingual on-screen display menus that allow you to make image adjustments and change a variety of settings. The projector will automatically detect the source. To open the OSD menu, press the button on the projector keypad or remote control. -
Page 24: Osd Menu Tree
USING THE PROJECTOR OSD Menu tree Note: The OSD menu tree items and features are subject to models and region. Optoma reserve the right to add or remove items to improve product performance without notice. Main Sub Menu Sub Menu 2... - Page 25 USING THE PROJECTOR Main Sub Menu Sub Menu 2 Sub Menu 3 Sub Menu 4 Values Menu Blackboard Light Yellow Wall Color Light Green Light Blue Pink Grey 3D Mode DLP-Link 3D Sync Type 3D Sync Image 3D-2D Conversion Auto Side by Side (SBS) 3D Format Top and Bottom...
- Page 26 USING THE PROJECTOR Main Sub Menu Sub Menu 2 Sub Menu 3 Sub Menu 4 Values Menu -15 ~ 15 H Keystone [-30 ~ 30, for 1080p model] Geometric Four Corner Correction Adjustment Reset -5 ~ 25 Digital Zoom Zoom Display -100 ~ 100 -100 ~ 100...
- Page 27 USING THE PROJECTOR Main Sub Menu Sub Menu 2 Sub Menu 3 Sub Menu 4 Values Menu Tiếng Việt Language Bahasa Indonesia Română Menu Timer Menu Settings Information Hide High Altitude Filter Usage (read only) Hours Optional Filter Installed 300hr Filter Settings Filter Reminder 500hr...
- Page 28 USING THE PROJECTOR Main Sub Menu Sub Menu 2 Sub Menu 3 Sub Menu 4 Values Menu None Blue Background Color Green Grey Setup Logo Reset OSD Device Reset Reset All Settings Auto Source Auto Input Switch HDMI Link Inclusive of TV Input HDMI CEC Mutual...
- Page 29 USING THE PROJECTOR Main Sub Menu Sub Menu 2 Sub Menu 3 Sub Menu 4 Values Menu Crestron (Port 41794) Extron (Port 2023) PJ Link (Port 4352) Control AMX Device Control Discovery (Port 9131) Telnet (Port 23) HTTP (Port 80) Reset Regulatory Serial Number...
-
Page 30: Image Picture Mode Menu
USING THE PROJECTOR Image menu Image picture mode menu There are several predefined display modes that you can choose from to suit your viewing preference. Each mode has been fine-tuned by our expert colour team to ensure superior colour performance for wide range of content. Vivid: In this mode, the color saturation and brightness are well-balanced. -
Page 31: Image Contrast Menu
USING THE PROJECTOR Image contrast menu The contrast controls the degree of difference between the lightest and darkest parts of the picture. Image sharpness menu Adjust the sharpness of the image. Image gamma menu Set up gamma curve type. After the initial setup and fine tuning is completed, utilize the Gamma Adjustment steps to optimize your image output. -
Page 32: Image 3D Menu
USING THE PROJECTOR Image 3D menu Note: ‡ This projector is a 3D ready projector with DLP-Link 3D solution. ‡ Please ensure that 3D glasses are in use for DLP-Link 3D content before enjoying your video. ‡ This projector supports frame sequential (page-flip) 3D via HDMI1/HDMI2 ports. ‡... -
Page 33: Display Projection Orientation Menu
USING THE PROJECTOR Display menu Display projection orientation menu Select the preferred projection between front, rear, ceiling-top, and rear-top. Display light source mode menu Select a light source mode depending on the installation requirements. Display dynamic black menu Use to automatically adjust the picture brightness in order to give optimum contrast performance. Display gaming mode menu Enable this feature to reduce response times (input latency) during gaming to 8.6ms (1080p@120Hz). -
Page 34: Display Aspect Ratio Menu
USING THE PROJECTOR Display aspect ratio menu Select the aspect ratio of the displayed image between the following options: 4:3: This format is for 4:3 input sources. ‡ 16:9: This format is for 16:9 input sources, like HDTV and DVD enhanced for Wide screen TV. ‡... - Page 35 USING THE PROJECTOR WXGA scaling table (screen type 16x10): 16 : 10 screen 480i/p 576i/p 1080i/p 720p Scale to 1066x800. 16x10 Scale to 1280x800. Scale to 1280x960, then get the central 1280x800 image to display. Native mode 1:1 mapping centered. 1:1 mapping 1280x720 1:1 mapping...
- Page 36 USING THE PROJECTOR WXGA auto mapping rule (screen type 16x9): Input resolution Auto/Scale Auto H-resolution V-resolution 1280 1024 1280 1024 1400 1050 1600 1200 1280 1280 Wide Laptop 1280 1200 1280 1152 1280 SDTV 1280 1280 1280 HDTV 1920 1080 1280 1080p scaling table: 16:9 screen...
-
Page 37: Display Geometric Correction Menu
USING THE PROJECTOR Display geometric correction menu V Keystone Adjust image distortion vertically and make a squarer image. Vertical keystone is used to correct a keystoned image shape in which the top and bottom are slanted to one of the sides. This is intended for use with vertically on-axis applications. -
Page 38: Setup Test Pattern Menu
USING THE PROJECTOR Setup menu Setup test pattern menu Select the test pattern from green grid, magenta grid, white grid, white, or disable this function (off). Setup language menu Select the multilingual OSD menu between English, German, French, Italian, Spanish, Portuguese, Polish, Dutch, Swedish, Norwegian, Danish, Finnish, Greek, Traditional Chinese, Simplified Chinese, Japanese, Korean, Russian, Hungarian, Czechoslovak, Arabic, Thai, Turkish, Farsi, Vietnamese, Indonesian, and Romanian. -
Page 39: Setup Power Settings Menu
USING THE PROJECTOR Setup power settings menu Direct Power On Choose “On” to activate Direct Power mode. The projector will automatically power on when AC power is supplied, without pressing the “Power” key on the projector keypad or on the remote control. Signal Power On Choose “On”... -
Page 40: Setup Startup Logo Menu
USING THE PROJECTOR Setup startup logo menu Logo Use this function to set the desired startup screen. If changes are made, they will take effect the next time the projector is powered on. ‡ Default: The default startup screen. Neutral: Logo is not displayed on startup screen. ‡... -
Page 41: Input Auto Source Menu
USING THE PROJECTOR Input menu Input auto source menu Choose this option to let the projector automatically find an available input source. Input auto input switch menu When HDMI input signal is detected, the projector will automatically switch the input source. Input HDMI CEC settings menu Note: When you connect HDMI CEC-compatible devices to the projector with HDMI cables, you can control them... -
Page 42: Audio Volume Menu
USING THE PROJECTOR Audio menu Audio volume menu Adjust the volume level. Audio mute menu Use this option to temporarily turn off the sound. ‡ On: Choose “On” to turn mute on. ‡ Off: Choose “Off” to turn mute off. Note: “Mute”... -
Page 43: Control Device Id Menu
USING THE PROJECTOR Control menu Control device ID menu ID definition can be set up by menu (range 0-99), and allow user control an individual projector by using RS232 command. Note: For a full list of RS232 commands, please refer to the RS232 user manual on our website. Control remote settings menu IR Function Set the IR function setting. - Page 44 USING THE PROJECTOR How to use web browser to control your projector How to use web browser to control your projector Turn “On” the DHCP option on projector to allow a DHCP server to automatically assign an IP address. Open the web browser in your PC and type in the projector’s IP address (“Control >...
-
Page 45: Control Control Menu
USING THE PROJECTOR Control control menu This projector can be controlled remotely by a computer or other external devices through the wired network connection. It allows the user to control one or more projectors from a remote control center, such as powering the projector on or off, and adjusting the image brightness or contrast. -
Page 46: Setup Network Control Settings Menu
USING THE PROJECTOR Setup network control settings menu LAN_RJ45 function For simplicity and ease of operation, the projector provides diverse networking and remote management features. The LAN / RJ45 function of the projector through a network, such as remotely manage: Power On / Off, brightness, and contrast settings. - Page 47 USING THE PROJECTOR LAN RJ45 Connect an RJ45 cable to RJ45 ports on the projector and the PC (laptop). On the PC (Laptop), select Start > Settings > Network & Internet. In the Ethernet section, select Properties. In the IP settings section, select Edit. English...
- Page 48 USING THE PROJECTOR Type in the IP address and Gateway, then select “Save”. Press the “Menu” button on the projector. Open on projector Control > LAN. Enter the following connection parameters: ± DHCP: Off ± IP Address: 192.168.0.100 ± Subnet Mask: 255.255.255.0 ±...
- Page 49 USING THE PROJECTOR The projector is setup for remote management. The LAN / RJ45 function displays as follows: Log in When you open the web page for the first time, you will see a screen like the one below. Please enter valid user password. When you open the web page after entering a valid password, you will see a screen like the one below.
- Page 50 USING THE PROJECTOR System Status The current status of the projector is displayed.You can check projector model name, firmware version, current LAN configuration, and change the interface language if needed. The version name displayed on the web page in the diagram may differ from the actual display. General Setup The projector name set here is also used in PJLink control.Only alphanumeric characters can be used as projector name.
- Page 51 USING THE PROJECTOR Projector Control You can control the projector with this item. The items for control are described in this section. Control button: When you click a button, the corresponding function will be performed. Network Setup Set the network of the projector. English...
- Page 52 USING THE PROJECTOR Alert Setup You can send email alerts when an error occurs. You can carry out settings for alert mail in this section. 1. Alert types: Check the type of error for which you want to send alert mail. 2.
-
Page 53: Control Reset Menu
Telnet connection should be ready for RS232 command control. Specification for “RS232 by TELNET”: Telnet: TCP. Telnet port: 23 (for further details, please contact the Optoma service team). Telnet utility: Windows “TELNET.exe” (console mode). To end the Telnet session, just close the Command Prompt app window. -
Page 54: Information Menu
USING THE PROJECTOR Information menu Information menu View the projector information as listed below: ‡ Regulatory ‡ Serial Number ‡ Source ‡ Color Info ‡ Light Source Hours ‡ Picture Mode ‡ Device ID ‡ Filter Usage Hours ‡ Light Source Mode ‡... -
Page 55: Additional Information
ADDITIONAL INFORMATION Compatible resolutions Input Signal for HDMI Signal Resolution Refresh Rate(Hz) Notes for Mac 640 x 480 Mac 60/72/85/ SVGA 800 x 600 60(*2)/72/85/120(*2) Mac 60/72/85 1024 x 768 48/50(*4)/60(*2)/70/75/85/120(*2) Mac 60/70/75/85 SDTV(480I) 720 x 480 SDTV(480P) 720 x 480 SDTV(576I) 720 x 576 SDTV(576P) - Page 56 ADDITIONAL INFORMATION True 3D Video Compatibility Input timing 1280 x 720P @ 50Hz Top-and-Bottom 1280 x 720P @ 60Hz Top-and-Bottom 1280 x 720P @ 50Hz Frame packing HDMI 1.4a 1280 x 720P @ 60Hz Frame packing 3D Input 1920 x 1080i @ 50Hz Side-by-Side(Half) 1920 x 1080i @ 60Hz Side-by-Side(Half)
- Page 57 ADDITIONAL INFORMATION EDID (Digital) XGA/WXGA B0 / B0 / B0 / B1 / B1 / Established Timing Standard Timing Detail Timing Video Mode Detail Timing 640 x 480 @ 60Hz 1600 x 1200 @ 60Hz Native timing: 640 x 480p @ 60Hz XGA: 640 x 480 @ 67Hz 1440 x 900 @ 60Hz...
- Page 58 ADDITIONAL INFORMATION 1080p B0 / B0 / B0 / B1 / B1 / Established Timing Standard Timing Detail Timing Video Mode Detail Timing 4096 x 2160p @ 60 Hz 256:135 720 x 480p @ 60 Hz 16:9 720(1440) x 480i @ 60 Hz 16:9 720 x 576p @ 50 Hz 16:9 2880 x 480i @ 60 Hz 16:9 1440 x 480p @ 60 Hz 16:9...
-
Page 59: Image Size And Projection Distance
ADDITIONAL INFORMATION Image size and projection distance XGA model Screen Size (W x H) Projection Distance (D) Offset (Hd) Diagonal Length Size of (inch) (feet) (4:3) Screen Width Height Width Height Wide Tele Wide Tele (inch) 25.4 0.52 0.39 20.32 15.24 0.32 0.32... - Page 60 ADDITIONAL INFORMATION 1080p Short Throw w/o network model Screen Size (W x H) Projection Distance (D) Offset (Hd) Diagonal Length Size of (inch) (feet) (16:9) Screen Width Height Width Height Wide Tele Wide Tele (inch) 24.5 0.54 0.31 21.35 12.01 0.27 0.35 0.89...
- Page 61 ADDITIONAL INFORMATION 1080p Short Throw model Screen Size (W x H) Projection Distance (D) Offset (Hd) Diagonal Length Size of (inch) (feet) (16:9) Screen Width Height Width Height Wide Tele Wide Tele (inch) 0.80 0.45 31.38 17.65 0.40 0.40 1.31 0.07 2.76 0.89...
- Page 62 ADDITIONAL INFORMATION Top View Screen Screen (W) Projection Distance (D) Width Screen (H) Screen Side View Offset (Hd) Projection Distance (D) Distance English...
-
Page 63: Projector Dimensions And Ceiling Mount Installation
ADDITIONAL INFORMATION Projector dimensions and ceiling mount installation To prevent damage to your projector, please use the Optoma ceiling mount. If you wish to use a third party ceiling mount kit, please ensure the screws used to attach a mount to the projector meet the following specifications: ‡... - Page 64 ADDITIONAL INFORMATION For ceiling mounting, you could purchase a cable tie whose length is over 250mm to fix the AC adapter if needed. Install the cable tie to the designated holes on the bottom of the projector. Then place the AC adapter onto its slot.
-
Page 65: Ir Remote Control Codes
ADDITIONAL INFORMATION IR remote control codes Customer Code Key Code Description format Byte 1 Byte 2 Byte 3 Byte 4 Power Format 1 Press to turn on / off the projector. Press to change the aspect ratio of a Aspect ratio Format 1 displayed image. - Page 66 ADDITIONAL INFORMATION Customer Code Key Code Description format Byte 1 Byte 2 Byte 3 Byte 4 Press to momentarily turn off / on the Mute Format 1 audio. Volume + Format 2 Press to increase the volume. Freeze Format 1 Press to freeze the projector image.
-
Page 67: Troubleshooting
ADDITIONAL INFORMATION Troubleshooting If you experience a problem with your projector, please refer to the following information. If a problem persists, please contact your local reseller or service center. Image problems No image appears on-screen ‡ Ensure all the cables and power connections are correctly and securely connected as described in the "Installation"... - Page 68 ADDITIONAL INFORMATION Other problems The projector stops responding to all controls ‡ If possible, turn off the projector, then unplug the power cord and wait at least 20 seconds before reconnecting power. Remote control problems If the remote control does not work ‡...
-
Page 69: Warning Indicators
ADDITIONAL INFORMATION Warning indicators When the warning indicators (see below) light up or flash, the projector will automatically shutdown: ‡ “Lamp” LED indicator is lit red and if “Power” indicator flashes red. ‡ “Temp” LED indicator is lit red and if “Power” indicator flashes red. This indicates the projector has overheated. -
Page 70: Specifications
ADDITIONAL INFORMATION Specifications Item Description ‡ XGA: Texas Instrument DMD, 0.55" S450 DMD Technology ‡ WXGA: Texas Instrument DMD, 0.65" S450 DMD ‡ 1080p: Texas Instrument DMD, 0.65" S600 ‡ XGA: 1024 x 768 Native Resolution ‡ WXGA: 1280 x 800 ‡... - Page 71 ADDITIONAL INFORMATION Item Description ‡ HDMI 1 (HDMI 1.4b [XGA/WXGA model] / HDMI 2.0 [1080p model]) ‡ HDMI 2 (HDCP 2.0 [XGA/WXGA model] / HDCP 2.2 [1080p model]) ‡ USB Type-A for firmware upgrade and power USB 5V/1.5A I/Os ‡ Audio Out 3.5mm ‡...
-
Page 72: Optoma Global Offices
ADDITIONAL INFORMATION Optoma global offices For service or support, please contact your local office. Japan Optoma Technology, Inc. 888-289-6786 https://www.optoma.com/jp/ 47697 Westinghouse Drive. 510-897-8601 Fremont, Ca 94539 services@optoma.com Taiwan https://www.optoma.com/tw/ Canada Optoma Technology, Inc. 888-289-6786 China 47697 Westinghouse Drive. 510-897-8601... - Page 73 www.optoma.com...