Oregon Scientific RM826 - Radio Controlled Clock With Backlight Manual
- User manual (2 pages)
Advertisement
Introduction
Congratulations on purchasing the RM826 Radio Controlled Travel Clock. The RM826 is a clock that automatically sets the time and date from signals broadcast by the U.S. Atomic Clock, one of the world's most accurate timekeepers.
This extraordinary timepiece, located outside Boulder, Colorado, is operated by the U.S. Department of Commerce's National Institute of Standards and Technology.
Your RM826 Clock automatically activates its receiver immediately upon battery insertion and then six times every 24 hours and makes any necessary adjustments in its time display. The clock not only sets itself to synchronize its digital time and date with the atomic clock's signals, but it also automatically adjusts for Daylight Saving Time.

Features
- Automatic setting of clock by radio signal from the U.S. Atomic Clock
- Time display with Hour, Minutes, Seconds and Date
- Day of the Week displayed in one of five languages (English, French, German, Italian or Spanish)
- Blue HiGloTM electroluminescent backlight
- Alarm with eight-minute snooze
- Crescendo Alarm increases in volume and intensity
- Signal Reception Strength indicator
- U.S. Map icon shows user selected time zone
- Automatic adjustment for Daylight Saving Time
- Low Battery indicator
Description of Function buttons

- Snooze/light (Figure A.1)
Pressing the Clock back on its stand activates the "lite-touch" feature of your RM826 Travel Clock. - D –
![]() button (Figure A.2)
button (Figure A.2)
This button is used for manually setting the time, alarm time or calendar functions. Please, refer to the section "MANUALLY SETTING: TIME, YEAR, MONTH, DATE & LANGUAGE", for further information."
NOTE: Pressing the![]() button once to advance the setting by increments of 1: holding the button down for more the three seconds will accelerate the setting to rapid advance mode.
button once to advance the setting by increments of 1: holding the button down for more the three seconds will accelerate the setting to rapid advance mode.
![]()
The![]() button also is used to reactivate the signal reception process should it become disabled. Please see the "TROUBLESHOOTING" section for further information.
button also is used to reactivate the signal reception process should it become disabled. Please see the "TROUBLESHOOTING" section for further information. - ZONE (Figure A.3)
The RM826 Travel Clock is designed to automatically adjust the time signal to the user-selectable North American time zone – Pacific, Mountain, Central or Eastern. Pressing the ZONE button once advances the time zone setting (see U.S. map figure A.9). Once the desired time zone block is highlighted on the map, the time will automatically adjust accordingly.
![]()
Do not press and hold the ZONE button for more than three seconds. Use the single press method to set the time zone. Holding the button will turn off the automatic time signal reception. Please see the "TROUBLESHOOTING" section for further information. ![]() ON/OFF (Figure A.4)
ON/OFF (Figure A.4)
This button turns the alarm function on and off. Touching the![]() ON/OFF button one time will either turn the alarm on or off. Please refer to the "SETTING THE ALARM" section for further information.
ON/OFF button one time will either turn the alarm on or off. Please refer to the "SETTING THE ALARM" section for further information.
NOTE: When setting the alarm time, the alarm is automatically turned on. If the bell icon [![]() ] is visible, the alarm is "on".
] is visible, the alarm is "on".
Touching the ON/OFF button one time will either turn the Alarm function on or off.
If you want to stop the daily alarm while leaving the pre-set time for the following day's wake-up, press the DATE / ALARM or![]() ON/OFF button. Pressing the
ON/OFF button. Pressing the ![]() ON/OFF button once more to stop the wake-up alarm will deactivate the alarm function.
ON/OFF button once more to stop the wake-up alarm will deactivate the alarm function.- MODE (Figure A.5)
Press the MODE button once to switch between the display of either the Day of the Week or Seconds on the clock. The RM826 Travel Clock will continue to display the selected function (Day or Seconds) until the MODE button is pressed again.
![]()
Holding the MODE for more than three seconds turns on the manual mode for setting the time, date, year and language (English/ French/ German/ Italian/ Spanish). Please refer to this section for specific setting instructions. - DATE/ALARM (Figure A.6)
Press the DATE/ALARM button once to show the alarm time.
The ((•)) icon is displayed in the lower left portion of the screen to alert you that the display is showing the alarm time. To return to the month and date display, press the DATE/ALARM button once. To set the alarms please refer to the "SETTING THE ALARM" section for more information.
 button (Figure A.2)
 ON/OFF (Figure A.4)
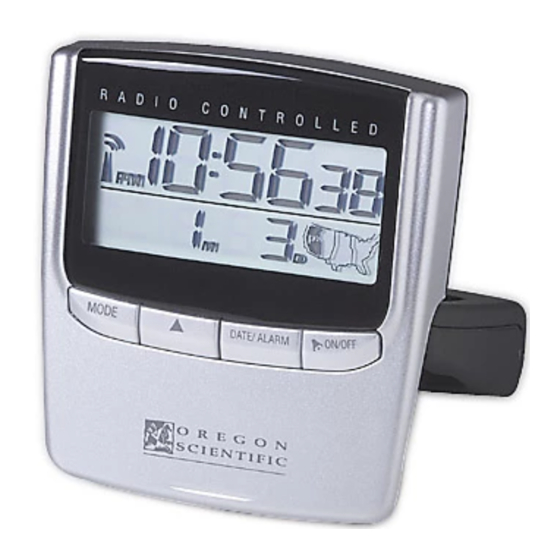
Description of LCD Display
Please refer to Figure A for a detailed description of RM826 Travel Clock LCD display and refer to the appropriate section(s) of the these instructions for more specific information.
- Signal Strength Indicator (Figure A.7)
| INDICATORS ON THE DISPLAY | MEANING |
 | Your last signal reception was excellent and time Synchronization with the U.S. Atomic Clock has taken place. |
 | Your last signal reception was insufficient and it is recommended that you reposition the clock. |
 | The displayed time has been manually set and is not synchronized by the RF signal. |
| No indicator | Your radio reception is disabled and no signal reception will be initiated unless it is enabled again. |
- Time Display (Figure A.8)
The top line of the display shows the hours, minutes and seconds (AM/ PM) of the clock. Pressing the MODE button once will switch the "Seconds" display to the Day of the Week. The RM826 Travel Clock will continue to display the selected function (Day or Seconds) until the MODE button is pressed again. - US MAP (Figure A.9)
This map represents the four optional time-zone settings. The darkened zone block indicates the user selected time zone.
NOTE: When the RM826 Travel Clock is receiving a signal from the U. S. Atomic Clock; the outline of this map will flash. - Month/Date (Figure A.10)
The second line of the display shows the Month and the Date. Pressing the ALARM button once will switch the "month and date" to show the "alarm time". The Alarm time is displayed in hours and minutes (AM/PM).
NOTE: The Time RM826 Travel Clock will continue to display the selected function (Month/Date or Alarm Time) Until the ALARM button is pressed again. - ((•)) Alarm Display indicator (Figure A.11)
This ((•)) icon indicates the second line of the display is showing Alarm Time. - [
![]() ] Alarm "ON" Indicator (Figure A.12)
] Alarm "ON" Indicator (Figure A.12)
This Bell [![]() ] icon indicates that the alarm function is activated.
] icon indicates that the alarm function is activated. - [BATT] Low Battery Indicator (Figure A.13)
This [![]() ] icon indicates that it is time to change batteries.
] icon indicates that it is time to change batteries. - Slide Lock Switch (Figure A.14)
When the slide lock switch is in the "lock position". The settings of the clock will be locked. You will be unable to make any changes to the settings. This is a useful feature especially when you are in transit. To unlock, slide the switch back to the "unlock position" (i.e., to the left).
 ] Alarm "ON" Indicator (Figure A.12)
 ] icon indicates that it is time to change batteries.
BATTERY INSTALLATION
Your RM826 Travel Clock is shipped with two AAA batteries. These batteries should last for approximately one year depending on how frequent the HiGloTM backlight is used.
Radio Controlled Clock
The RM826 will automatically synchronize current time and date with the signal broadcast by the U.S. Atomic Clock when the product is in reception range of the signal.
When the unit is new and just out of the box, synchronization with the U.S. Atomic Clock can take up to 72 hours. The unit will receive the most dependable and interference-free signal automatically between midnight and 4 AM.
When the unit is receiving a radio signal, the reception icon will start to blink. The reception icon will show either strong, weak or no signal depending on the strength of the radio signal. A complete reception generally takes about two to 10 minutes.
 | Strong |
 | Weak |
 | -No signal |
 | Receiving |
When the reception is completed the reception icon will stop blinking. The reception icon will show [  ] for no Reception or [
  ] for successful reception. For best signal reception, place the RM826 away from other equipment that emit Radio Frequency (RF) or microwave signals such as TV's, radios, PC's or microwave ovens. Other causes for signal interference include electrical power transmission towers, steel reinforced concrete construction, and/or metal siding.
You may need to reposition the clock for maximum reception.
RF appliances and radios, such as the Radio Controlled Alarm Clock, perform best when placed near a window.
After receiving the initial signal, updates are accomplished with greater ease. Even though there are areas that may have more difficulty in receiving a signal, the RM826 Alarm Clock contains very accurate quartz movement and will retain precise time even if a signal is missed on a rare occasion.
SETTING THE ALARM
- Press and hold the DATE/ALARM button for at least three seconds. The "Hour" Segment of the alarm time will begin Flashing.
- While the "Hour" segment is flashing press the [
![]() ] button to set the desired hour time (please note the AM/PM designation).
] button to set the desired hour time (please note the AM/PM designation). - When the desired hour time is reached, press the DATE/ALARM button again.
- The "Minutes" segment of the alarm time will begin flashing.
- While the "Minutes" segment is flashing press the [
![]() ] button to set the desired minute time.
] button to set the desired minute time. - When the desired minute time is reached press the DATE/ALARM button again to exit the alarm time set mode.
 ] button to set the desired hour time (please note the AM/PM designation).
NOTE: As soon as any change in the alarm time is made the alarm icon [  ] will automatically appear indicating that the alarm is activated.
TURNING THE ALARM ON or OFF
To turn the alarm on or off simply press the ON/OFF button in any mode.
When the crescendo alarm sounds, it may be turned off using one of the following methods.
- If the SNOOZE/LIGHT button is pressed within two minutes the Snooze is activated and the alarm will sound again in 8 minutes.
- If the DATE / ALARM or
![]() ON/OFF button is pressed, the alarm will not sound again until the next day.
ON/OFF button is pressed, the alarm will not sound again until the next day. - If the
![]() ON/OFF button is pressed again, the alarm is deactivated and will not sound again until it is activated.
ON/OFF button is pressed again, the alarm is deactivated and will not sound again until it is activated.
MANUALLY SETTING: TIME,YEAR, MONTH, DATE & LANGUAGE
NOTE: It is highly unlikely you should ever have the desire (or need) to manually set the clock time, year, month or date of the Radio Controlled Travel Clock. However, in the event this becomes necessary please review the following.
Setting the Time
- Press and hold the MODE button for at least three seconds. The "Hour" segment of the clock time will begin flashing.
- While the "hour" segment is flashing press the [
![]() ] button to set the desired hour time. (Please note the AM/PM designation)
] button to set the desired hour time. (Please note the AM/PM designation) - When the desired hour times reached press the MODE button again. The "Minutes" segment of the clock time will begin flashing.
- While the "Minutes" segment is flashing press the [
![]() ] button to set the desired minutes time.
] button to set the desired minutes time. - When the desired minutes time is reached. Briefly press the MODE button five more times to exit the clock time set mode.
 ] button to set the desired hour time. (Please note the AM/PM designation)
As soon as any manual change in the clock time is mode, there is a loss of the signal strength indicator from the display.
Setting the Year Month and Date
- Press and hold the MODE button for at least three seconds. The "Hour" segment of the clock time will begin flashing.
- Briefly press the MODE button and the "Minutes" segment will begin flashing.
- Briefly press the MODE button once more. The clock time will disappear and be replaced by a flashing year (Example 2005). This is the year set mode.
- While the "Year" segment is flashing press the [
![]() ] button to set the desired year.
] button to set the desired year. - When the desired year is reached briefly press the MODE button and the "Month" digit will start flashing.
- Press the [
![]() ] button until the desired month appears on the display.
] button until the desired month appears on the display. - Press the MODE button to confirm the "month" and the "date" digits will flash.
- Press the [
![]() ] until the desired date appears on the display.
] until the desired date appears on the display. - Press the MODE button to confirm the "Date" and the Language display will flash".
- Press the [
![]() ] button until the desired language indicator appears onthe display ("E" for English, "F" for French, "D" for German, "I" for Italian and "S" for Spanish).
] button until the desired language indicator appears onthe display ("E" for English, "F" for French, "D" for German, "I" for Italian and "S" for Spanish). - Press the MODE button one more time to exit the set mode and resume normal time keeping.
TROUBLESHOOTING
| PROBLEM | REMEDY |
| No Display |
|
| Did not receive A time signal |
|
| Loss of Signal |
|
SPECIFICATIONS
- Integrated radio receiver for reception of time signal 10kW transmitter WWVB: at 60kHz
- Operating temperature: 35°F to 120°F (2°F to 49°C)
- Typical operating time on one battery set is up to one year, subject to backlight usage
- Setting time with interference-free reception: 2-10 minutes
- Automatic signal-reception activation: six times every 24 hours
- HiGloTM backlighting source: Electroluminescence
- Battery type: 2 AAA (included)

Documents / ResourcesDownload manual
Here you can download full pdf version of manual, it may contain additional safety instructions, warranty information, FCC rules, etc.
Download Oregon Scientific RM826 - Radio Controlled Clock With Backlight Manual
Advertisement
Thank you! Your question has been received!


Need Assistance?
Do you have a question about the RM826 that isn't answered in the manual? Leave your question here.