Table of Contents

Related Manuals for Fisher & Paykel DCS RX215


Summary of Contents for Fisher & Paykel DCS RX215
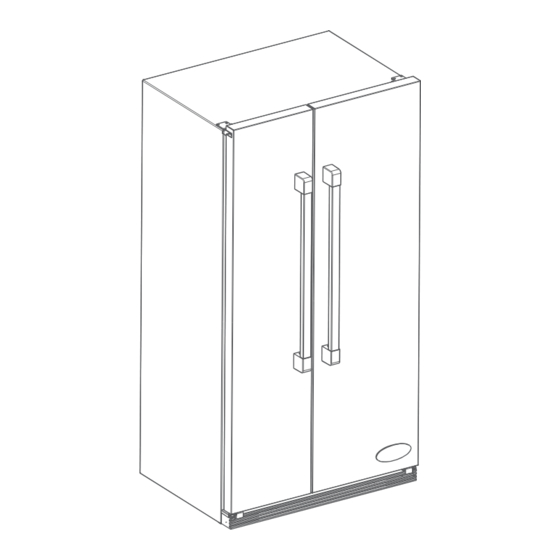
- Page 1 All manuals and user guides at all-guides.com Side by side refrigerator Installation instructions RX215 models User guide Réfrigérateur à Instructions d’installation compartiments juxtaposés Guide d’utilisation Modèles RX215 US CA...
- Page 2 All manuals and user guides at all-guides.com English Page 1 – 36 Français Page 37 – 72...
-
Page 3: Table Of Contents
All manuals and user guides at all-guides.com Contents Introduction Safety and warnings Installation instructions Before use Temperature controls (RX215) Fresh food features Freezer features Ice maker Water filter Food storage tips Care and cleaning Operating sounds Troubleshooting Warranty and service Filter specification data Important! SAVE THESE INSTRUCTIONS... -
Page 4: Introduction
All manuals and user guides at all-guides.com Introduction Thank you for buying a DCS side by side refrigerator with an internal ice maker. This refrigerator combines size and storage space with the latest features and functions. Many hours have been spent researching how you, our customer, use your refrigerator and what we can do to make life easier for you. -
Page 5: Safety And Warnings
All manuals and user guides at all-guides.com Safety and warnings WARNING! Electric Shock Hazard Read and follow the SAFETY AND WARNINGS outlined in this User Guide before operating this appliance. Failure to do so can result in death, electric shock, fire or injury to persons. Use this appliance only for its intended purpose as described in this User Guide. - Page 6 All manuals and user guides at all-guides.com Safety and warnings Repair or replace immediately all electric service cords that have become frayed or otherwise damaged. Do not use a cord that shows cracks or abrasion along its length or at either the plug or appliance end.
-
Page 7: Installation Instructions
All manuals and user guides at all-guides.com Installation instructions WARNING! Electric Shock Hazard Read and follow the SAFETY AND WARNINGS outlined in this User Guide before operating this appliance, pages 3 – 4. Failure to do so can result in death, electric shock, fire or injury to persons. Location Do not install refrigerator near an oven, radiator or other heat source. - Page 8 All manuals and user guides at all-guides.com Installation instructions Door and hinge removal Some installations require door removal to get the refrigerator to its final location. Tools needed: Phillips screwdriver 3⁄8” (9.5 mm) hex head driver WARNING! Electric Shock Hazard Disconnect power to refrigerator before removing doors.
- Page 9 All manuals and user guides at all-guides.com Installation instructions Leveling Caution! To protect personal property and refrigerator from damage, observe the following: Protect vinyl or other flooring with cardboard, rugs, or other protective material. Do not use power tools when performing leveling procedure. To enhance the appearance and maintain performance, the refrigerator should be level.
- Page 10 All manuals and user guides at all-guides.com Installation instructions Connecting the water supply Important! Read the instructions before connection, and do not attempt if instructions are not understood or are beyond personal skill level. It is recommended that an authorized plumber in your state or town is used to install the water connection, to ensure all local codes and ordinances are followed.
- Page 11 All manuals and user guides at all-guides.com Installation instructions Step 1 2’ (610 mm) Water connection diameter min Note: ensure refrigerator is not plugged into a power supply. Create service loop with copper tubing (minimum 2’ (610 mm) diameter). Avoid kinks in the copper tubing when bending the service loop. Do not use plastic tubing.
-
Page 12: Before Use
All manuals and user guides at all-guides.com Before use Before you start using your refrigerator Check refrigerator is switched on and has been allowed to cool for three to four hours before loading with food. Fit filter if desired (see page 18). Check the water is connected correctly. -
Page 13: Temperature Controls (Rx215)
All manuals and user guides at all-guides.com Temperature controls Fig.6 Internal temperature display There is one internal display on your refrigerator, inside at the top of the fresh food compartment. Temperature is controlled via this control panel. The temperatures are preset to setting 4 (recommended setting) in both the fresh food and freezer compartments. -
Page 14: Fresh Food Features
All manuals and user guides at all-guides.com Fresh food features The fresh food compartment is designed to keep your food as fresh, nutritious and flavorsome as possible. Fruit and vegetable storage Fruit and vegetables stored in the normal refrigerator environment will lose moisture very quickly to the cold, dry air. - Page 15 All manuals and user guides at all-guides.com Fresh food features There are a number of customizable storage options throughout the compartment. Shelves Caution! To avoid personal injury or property damage, observe the following: Never attempt to adjust a shelf that is loaded with food. Ensure shelf is secure before placing items on shelf.
- Page 16 All manuals and user guides at all-guides.com Fresh food features Dairy shelf The dairy shelf provides con venient door storage for spreadable items such as butter and margarine. On select models, this compartment can be moved to several different locations to accommodate storage needs.
-
Page 17: Freezer Features
All manuals and user guides at all-guides.com Freezer features Shelves Shelves can be removed to meet individual storage needs. To remove shelf: Snap right side of shelf up from cabinet railing or wall mounting clips and slide to the right. Fig.13 Freezer shelf To install shelf: Replace shelf in left side cabinet railing. -
Page 18: Ice Maker
All manuals and user guides at all-guides.com Ice maker Your refrigerator is equipped with an ice system that automatically makes cubed ice. Once your refrigerator has been plumbed in (see pages 8 and 9) and the ice maker turned on (see below) you can enjoy this great feature. - Page 19 All manuals and user guides at all-guides.com Ice maker Ice making information The first two batches of ice may contain small or irregular cubes, due to air in the supply line. After cubes are made, it is normal for a few cubes to be joined together. They can easily be broken apart.
-
Page 20: Water Filter
All manuals and user guides at all-guides.com Water fi lter Water filter removal and installation WARNING! Poisoning Hazard To avoid serious illness or death, do not use the refrigerator where water is unsafe or of unknown quality without adequate disinfection before or after use of filter. - Page 21 All manuals and user guides at all-guides.com Water fi lter Replacing water filter Important! Air trapped in system may cause water and cartridge to eject. Use caution when removing. Turn filter counterclockwise until it releases from filter head. Drain water from filter into sink, and dispose in normal household trash. Wipe up excess water in filter cover and continue with initial installation (page 18), steps 2 through 4.
-
Page 22: Food Storage Tips
All manuals and user guides at all-guides.com Food storage tips – refrigerator Red meat Place fresh red meat on a plate and loosely cover with waxed paper, plastic wrap or foil. Store cooked and raw meat on separate plates. This will prevent any juices lost from raw meat contaminating cooked meat. - Page 23 All manuals and user guides at all-guides.com Food storage tips – freezer Freezing food at 0˚F (-18˚C) reduces microbial activity, and chemical and physical reactions. This allows food to be kept for considerably longer than when stored in the refrigerator. Frozen food care For best results: Choose only good quality foods that freeze well.
- Page 24 All manuals and user guides at all-guides.com Food storage tips – freezer Meat, poultry and game Meat should be frozen quickly in order to maintain its texture. Do not stuff poultry before freezing. Always thaw poultry completely before cooking. Red meat can be cooked from frozen, or from partly or completely thawed states.
-
Page 25: Care And Cleaning
All manuals and user guides at all-guides.com Care and cleaning Refrigerator cleaning chart Important! When cleaning your refrigerator, please pay attention to the chart below. Improper cleaning can result in damage to your refrigerator. Do not place buckets, shelves, or accessories in the dishwasher. Part Do not use Cabinet Exterior... - Page 26 All manuals and user guides at all-guides.com Care and cleaning Removing odors from refrigerator WARNING! Electric Shock Hazard Disconnect power to refrigerator before cleaning. After cleaning, reconnect power. Failure to do so can result in death or injury to persons. Remove all food from the refrigerator and turn the refrigerator off.
- Page 27 All manuals and user guides at all-guides.com Care and cleaning Replacing light bulbs WARNING! Electric Shock Hazard Disconnect power to refrigerator before replacing light bulb. After replacing light bulb, reconnect power. Failure to do so can result in death or injury to persons. Caution! To avoid personal injury or property damage, observe the following: Before handling, allow light bulb to cool once refrigerator has been turned off.
- Page 28 All manuals and user guides at all-guides.com Care and cleaning Preparing for vacation Caution! If there is any possibility that the temperature where the refrigerator is located can drop below freezing, the entire water supply system must be drained by a qualified servicer if going on vacation.
- Page 29 All manuals and user guides at all-guides.com Care and cleaning Upon your return After a short vacation or absence: Reconnect the water supply and turn on supply valve (see pages 8 – 9). Monitor water connection for 24 hours and correct leaks if necessary. Restart the ice maker by lowering the ice maker arm.
-
Page 30: Operating Sounds
All manuals and user guides at all-guides.com Operating sounds Improvements in refrigeration design may mean your new refrigerator produces sounds that are different to other models. These improvements have created a refrigerator that is better at preserving food, more energy efficient, and quieter overall. Because new units are quieter, sounds may be detected that were masked by higher sound levels in older units. -
Page 31: Troubleshooting
All manuals and user guides at all-guides.com Troubleshooting If there is a problem with your appliance, please check the following points before contacting your local DCS Authorized Service Agency or DCS Customer Care Representative. Problem Possible causes What to do Freezer control and Refrigerator is in defrost Normal operation. - Page 32 All manuals and user guides at all-guides.com Troubleshooting Problem Possible causes What to do Food temperature Door is not closing Refrigerator is not level. See page 7 for details is too warm. properly. on how to level your refrigerator. Check gaskets for proper seal. Clean, if necessary, according to the chart on page 23.
- Page 33 All manuals and user guides at all-guides.com Troubleshooting Problem Possible causes What to do Refrigerator or Normal operation. See page 28. ice maker makes unfamiliar sounds or seems too loud. Temperature- Contents of drawer or Reposition food items and containers to avoid controlled drawer positioning of items in the interference with the drawers.
- Page 34 All manuals and user guides at all-guides.com Troubleshooting Ice maker Problem Possible causes What to do Ice maker is Ice maker has just been Wait 24 hours for ice production to begin or not producing installed or a large amount for ice maker to restock after emptied.
- Page 35 All manuals and user guides at all-guides.com Troubleshooting Ice maker Problem Possible causes What to do Ice maker is not Ice maker arm is up. Confirm ice maker arm is down. See producing ice. automatic ice maker, page 16. Household water supply is See connecting the water supply, not reaching water valve.
-
Page 36: Warranty And Service
All manuals and user guides at all-guides.com Limited warranty When you purchase any new Fisher & Paykel whiteware product for personal or consumer use you automatically receive a one year limited warranty covering parts and labor for servicing within the 48 mainland United States, Hawaii, Washington DC and Canada. In Alaska the limited warranty is the same except that you must pay to ship the product to the service shop or the service technician’s travel to your home. - Page 37 All manuals and user guides at all-guides.com Limited warranty This warranty does not cover: Service calls that are not related to any defect in the product. The cost of a service call will be charged if the problem is not found to be a defect of the product. For example: 1.
- Page 38 All manuals and user guides at all-guides.com Limited warranty Before you call for service or assistance ... Check the things you can do yourself. Refer to the installation instructions and your User Guide and check that: Your product is correctly installed. You are familiar with its normal operation.