
Related Manuals for Fisher & Paykel DCS RF24-D


Summary of Contents for Fisher & Paykel DCS RF24-D
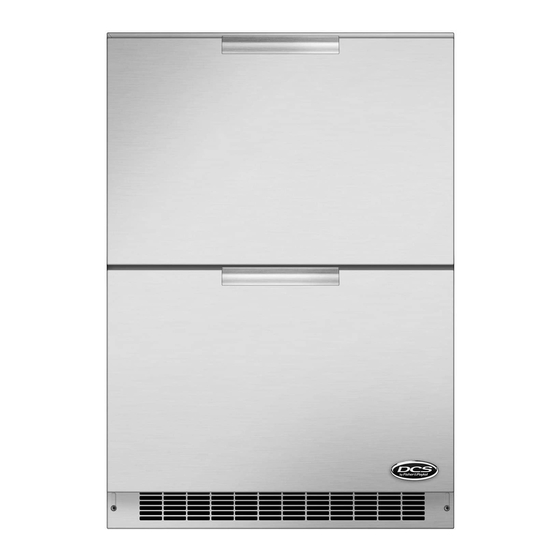
- Page 1 THE OUTDOOR REFRIGERATED DRAWER Use and Care and Installation Guide MODELS: RF24-D...
- Page 3 A MESSAGE TO OUR CUSTOMERS Thank you for selecting this DCS Outdoor Refrigerated Drawer. Because of these appliances’ unique features we have developed this Use and Care and Installation Guide. It contains valuable information on how to properly install, operate and maintain your new appliance for years of safe and enjoyable operation. To help serve you better, please fill out and submit your Product Registration by visiting our website at www.dcsappliances.com and selecting “Customer Care”...
-
Page 4: Table Of Contents
TABLE OF CONTENTS SAFETY PRACTICES AND PRECAUTIONS INSTALLATION - ESSENTIAL REQUIREMENTS INSTALLATION Electrical connection How to install your outdoor refrigerated drawer Anti-tip installation instructions USING THE REFRIGERATED DRAWER Startup Set temperature Set controls Adjust temperature control Interior light Warning alarm Door ajar alarm High and low temperature Power failure... -
Page 5: Safety Practices And Precautions
SAFETY PRACTICES & PRECAUTIONS To reduce the risk of fire, electric shock, or injury to persons read these SAFETY PRACTICES AND PRECAUTIONS before installing or operating this appliance. Use this appliance only for its intended purpose as described in this Use and Care and Installation Guide. -
Page 6: Installation - Essential Requirements
INSTALLATION – ESSENTIAL REQUIREMENTS POWER I The appliance must be installed so the power plug is accessible. I To ensure that the appliance is not accidentally switched off, connect your refrigerated drawer to its own power point. Do not plug in any other appliance at this power point or use extension cords, or double adapters, as the combined weight of both power cords can pull the double adapter from a wall outlet socket. -
Page 7: Installation
INSTALLATION HOW TO INSTALL YOUR OUTDOOR REFRIGERATED DRAWER ELECTRICAL CONNECTION: Check serial plate for correct power supply. Use only electrical power supply as specified on your appliance serial nameplate. Do not use an extension cord! WARNING! Do not splash or spray water from a hose onto the refrigerated drawer! Doing so may cause an electrical shock, which may result in severe injury or death. - Page 8 INSTALLATION HOW TO INSTALL YOUR OUTDOOR REFRIGERATED DRAWER SELECT LOCATION: The proper location will ensure peak performance of your appliance. Choose a location where the unit will be out of direct sunlight, away from heat sources and moisture. Units with fan cooled condensers can be built in. Unit should be operated in a properly ventilated area with ambient temperatures above 40 degrees and below 100 degrees Fahrenheit.
-
Page 9: Anti-Tip Installation Instructions
INSTALLATION ANTI-TIP INSTALLATION INSTRUCTIONS A free standing refrigerated drawer must have an anti-tip device installed as per these instructions. If the drawer is removed from its location for any reason, make sure that the device is properly engaged when you push the drawer back into the original location. - Page 10 INSTALLATION ANTI-TIP INSTALLATION INSTRUCTIONS WALL MOUNT 1. Remove the bracket from its original shipping position on the Drawer Refrigerator back of the unit (Fig. 08 and 09). 2. Reattach the bracket to the back of the unit using the existing screws from the unit’s back panel (Fig 10).
-
Page 11: Using The Refrigerated Drawer
USING THE REFRIGERATED DRAWER START YOUR APPLIANCE Your appliance will start upon initial plug-in. The LED will flash amber upon initial plug-in due to your unit being powered-on at the factory to verify performance and then powered-off. The Fault System has sensors to inform you that a power outage has occurred when you initially power-up your appliance. -
Page 12: Power Failure
USING THE REFRIGERATED DRAWER POWER FAILURE If your unit experiences a power failure, the LED will flash amber until the alarm is reset. RESET ALARMS Press the “ON/OFF” button for approximately one second. This will reset all audible and display alarms. HOLIDAY MODE Your refrigerated drawers are equipped with a Holiday Mode feature. -
Page 13: Moving Or Storing Your Refrigerated Drawer
MOVING OR STORING YOUR REFRIGERATED DRAWER If your refrigerated drawer is turned off for any reason, wait 10 minutes before turning it back on. This will allow the refrigeration system pressures to equalize before restarting. MOVING YOUR REFRIGERATED DRAWER I Turn off the appliance and unplug from the power point. Remove all food. I Retract the adjustable feet in as far as they will turn (see page 4, Stability). -
Page 14: Care And Maintenance
CARE AND MAINTENANCE LIGHT REPLACEMENT For light replacement, contact DCS Customer Care at (888) 936-7872. THINGS TO REMEMBER. . . 1. Allow 24 hours for your refrigerator to reach a new temperature setting. 2. The motor will start and stop often. It must do this to maintain the temperature you select. 3. -
Page 15: How To Clean And Maintain Your Unit
CARE AND MAINTENANCE HOW TO CLEAN AND MAINTAIN YOUR UNIT Condenser The condenser coil under the cabinet for forced air units does require frequent cleaning. Satisfactory cooling depends on adequate ventilation over the condenser coil. Be sure that nothing obstructs the air flow openings in the lower front of the cabinet. -
Page 16: Troubleshooting
TROUBLESHOOTING PROBLEM POSSIBLE CAUSE/SOLUTIONS Odor in cabinet Interior needs cleaning Cabinet not level Noisy operation Fan blade damaged/ call for service Cabinet not level Cabinet vibrates Fan blade damaged/ call for service Cabinet light not working Call for service Temperature control turned to “OFF” Line cord not plugged in Appliance will not run No power at electrical outlet... -
Page 17: Service
SERVICE HOW TO OBTAIN SERVICE: For warranty service, please contact your local service provider or DCS Customer Care at (888) 936-7872. Before you call, please have the following information ready: Model Number (the serial plate is located on the upper left side, inner wall). Serial Number (the serial plate is located on the upper left side, inner wall). -
Page 18: Warranty
WARRANTY LIMITED WARRANTY When you purchase any new DCS Refrigeration Product, you automatically receive a One Year Limited Warranty covering parts and labor for servicing within the 48 mainland United States, Hawaii, Washington, D.C. and Canada. In Alaska the Limited Warranty is the same except that you must pay to ship the Product to the service shop or for the service technician’s travel to your home. - Page 19 WARRANTY 7. Noise and vibration that is considered normal e.g. drain sounds, regeneration noises and user warning beeps. 8. Correcting damage caused by pests e.g. rats, cockroaches etc. 9. Used in commercial applications. B. Defects caused by factors other than: 1.
- Page 20 NOTES...
- Page 21 LE TIROIR FRIGORIFIQUE D'EXTÉRIEUR Manuel d'utilisation, d'entretien et d'installation MODÈLES : RF24-D...
- Page 22 À L'INTENTION DE NOS CLIENTS Merci d'avoir sélectionné ce Tiroir frigorifique d'extérieur DCS. Nous avons conçu ce Manuel d'utilisation et d'entretien pour expliquer les fonctions uniques de ces appareils. Ce manuel contient des informations extrêmement utiles sur la façon correcte de les installer, les faire fonctionner et en faire l'entretien. Vous pourrez ainsi en profiter pendant des années en toute sécurité.
- Page 23 TABLE DES MATIÈRES MESURES DE SÉCURITÉ ET DE PRÉCAUTION INSTALLATION - CONFIGURATION ESSENTIELLE INSTALLATION Connexion électrique Installation du tiroir frigorifique d'extérieur Instructions d'installation antibasculement UTILISATION DU TIROIR FRIGORIFIQUE Mise en marche de l'appareil Réglage du mode Température Réglage des commandes Commande de température réglable Éclairage intérieur Alarmes d'avertissement...
-
Page 24: Mesures De Sécurité Et De Précaution
MESURES DE SÉCURITÉ ET DE PRÉCAUTION Afin de réduire le risque d'incendie, de choc électrique ou de blessures, lisez les IMPORTANTES CONSIGNES DE SÉCURITÉ avant de faire fonctionner l'appareil. Employez cet appareil uniquement selon l'usage prévu tel que décrit dans ce Guide de l'utilisateur. -
Page 25: Installation - Configuration Essentielle
INSTALLATION – CONFIGURATION ESSENTIELLE ALIMENTATION I L'appareil doit être installé de manière à ce que la fiche secteur soit accessible. I Pour s'assurer de ne pas mettre l'appareil hors tension par inadvertance, connecter le tiroir frigorifique à son propre point d'alimentation. Ne pas brancher d'autre appareil à ce point d'alimentation ni utiliser de rallonges ou d'adap- tateurs doubles étant donné... -
Page 26: Installation
INSTALLATION INSTALLATION DU TIROIR FRIGORIFIQUE D'EXTÉRIEUR CONNEXION ÉLECTRIQUE : Voir la plaque signalétique pour le bon type d'alimentation. L'alimentation utilisée doit impérativement être conforme aux spécifications de la plaque signalétique de l'appareil. N'utilisez pas de rallonge! AVERTISSEMENT! Évitez d'asperger ou d'arroser le tiroir frigorifique avec de l'eau au moyen d'un tuyau! Cela pourrait causer un choc électrique qui pourrait entraîner des blessures graves ou la mort. - Page 27 INSTALLATION INSTALLATION DU TIROIR FRIGORIFIQUE D'EXTÉRIEUR SÉLECTIONNEZ L'EMPLACEMENT : Un bon emplacement assurera une performance optimale de l'appareil. Choisissez un endroit où l'appareil sera à l'abri de la lumière directe du soleil, de sources de chaleur et de l'humidité. Les appareils dotés de condensateurs ventilés peuvent être encastrés.
-
Page 28: Instructions D'installation Antibasculement
INSTALLATION INSTRUCTIONS D'INSTALLATION ANTIBASCULEMENT Un tiroir frigorifique autoportant doit être muni d'un dispositif antibasculement installé conformément à ces instructions. Si le tiroir est retiré de son emplacement pour une raison quelconque, s'assurer de bien enclencher le dispositif avant de repousser le tiroir dans son emplacement d'origine. Si le dispositif n'est pas correctement enclenché, le tiroir risque de basculer, provoquant ainsi des dégâts matériels ou des blessures corporelles lorsque quelqu'un monte, s'assied ou s'appuie sur le tiroir ouvert. - Page 29 INSTALLATION INSTRUCTIONS D'INSTALLATION ANTIBASCULEMENT FIXATION MURALE 1. Retirer le support de son emplacement d'expédition original sur le Vers le tiroir frigorifique dos de l'unité (Fig. 08 et 09). 2. Rattacher le support sur le dos de l'unité à l'aide des vis existantes provenant du panneau arrière de l'unité...
-
Page 30: Utilisation Du Tiroir Frigorifique
UTILISATION DU TIROIR FRIGORIFIQUE MISE EN MARCHE DE L'APPAREIL L'appareil se mettra en marche dès son branchement initial. Le voyant DEL clignotera (ambre) dès le branchement initial en raison de la mise sous tension de l'unité en usine afin de vérifier sa performance et de sa mise hors tension successive. -
Page 31: Réinitialisation Des Alarmes
UTILISATION DU TIROIR FRIGORIFIQUE RÉINITIALISATION DES ALARMES Appuyer sur le bouton « ON/OFF » pendant approximativement une seconde et ce, pour réinitialiser les alarmes sonores et visuelles. MODE VACANCES Les tiroirs frigorifiques sont munis d'une fonction Mode Vacances. En activant ce mode, l'ensemble des affichages, des alarmes sonores et des voyants est désactivé. -
Page 32: Déplacement Ou Remisage Du Tiroir Frigorifique
DÉPLACEMENT OU REMISAGE DU TIROIR FRIGORIFIQUE Si le tiroir frigorifique sont éteints pour une raison quelconque, patienter 10 minutes avant de les remettre en marche. Ceci permettra aux pressions du système de réfrigération de s'équilibrer avant de se remettre en marche. DÉPLACEMENT DU TIROIR FRIGORIFIQUE I Éteindre l'appareil et le débrancher du point d'alimentation. -
Page 33: Entretien Et Maintenance
ENTRETIEN ET MAINTENANCE REMPLACEMENT DES AMPOULES Pour remplacer les ampoules, contacter le Service à la clientèle DCS au (888) 936-7872 À NE PAS OUBLIER. . . 1. Prévoyez une période de 24 heures avant que le réfrigérateur n'atteigne la nouvelle température que vous avez réglée. 2. -
Page 34: Nettoyage Et Maintenance De L'appareil
ENTRETIEN ET MAINTENANCE NETTOYAGE ET MAINTENANCE DE L'APPAREIL Condensateur La bobine du condensateur sous l'armoire (appareils à air pulsé) n'a pas besoin d'être nettoyée fréquemment; toutefois, un bon refroidissement dépend d'une ventilation adéquate de la bobine du condensateur. Assurez-vous que les ouvertures d'air dans la partie avant inférieure de l'armoire ne sont pas obstruées par quoi que ce soit. -
Page 35: Dépannage
DÉPANNAGE PROBLÈME CAUSE POSSIBLE/SOLUTIONS Présence d'odeur dans l'armoire L'intérieur a besoin d'être nettoyé L'armoire n'est pas de niveau Fonctionnement bruyant Lame de ventilateur endommagée / appelez un technicien L'armoire n'est pas de niveau L'armoire vibre Lame de ventilateur endommagée / appelez un technicien La lumière de l'armoire ne fonctionne pas Appelez un technicien Bouton de contrôle de température éteint (OFF) -
Page 36: Service
POUR L'OBTENTION DE SERVICE POUR L'OBTENTION DU SERVICE DE GARANTIE : Pour le service sous garantie, contactez votre distributeur ou le Centre de service à la clientèle DCS au (888) 936-7872. Avant d'appeler, veuillez avoir les informations suivantes à portée de main : Numéro de modèle (la plaque du numéro de série se trouve sur la paroi interne supérieure gauche). -
Page 37: Garantie
GARANTIE GARANTIE LIMITÉE À l'achat d'un nouveau produit de réfrigération DCS, vous bénéficiez automatiquement d'une garantie limitée d'un an sur les pièces et la main-d'oeuvre valide dans les 48 états continentaux des États-Unis, l'état de Hawaï, la ville de Washington, DC, et au Canada. La garantie limitée est la même en Alaska sauf que vous devez payer les frais d'expédition du produit à... - Page 38 GARANTIE 8. Corriger des dommages causés par des animaux nuisibles, par exemple des rats, des coquerelles, etc. 9. Utilisé dans le cadre d'une application commerciale. B. Défauts causés par des facteurs autres que : 1. Utilisation domestique normale ou 2. Utilisation conformément aux indications du guide d'utilisation et d'entretien du produit. C.
- Page 40 Fisher & Paykel Appliances, Inc. 5900 Skylab Road, Huntington Beach, CA 92647 Customer Care: 888.936.7872 Fax: 714.372.7003 www.dcsappliances.com As product improvement is an ongoing process, we reserve the right to change specifications or design without notice. Nous améliorons constamment ses produits et se réserve le droit de modifier les spécifications ou la conception de ses produits sans aucun préavis.