
Related Manuals for Siemens Gigaset SL785


Summary of Contents for Siemens Gigaset SL785
- Page 1 Congratulations By purchasing a Gigaset, you have chosen a brand that is fully committed to sustainability. This product’s packaging is eco-friendly! To learn more, visit www.gigaset.com.
-
Page 3: Brief Overview
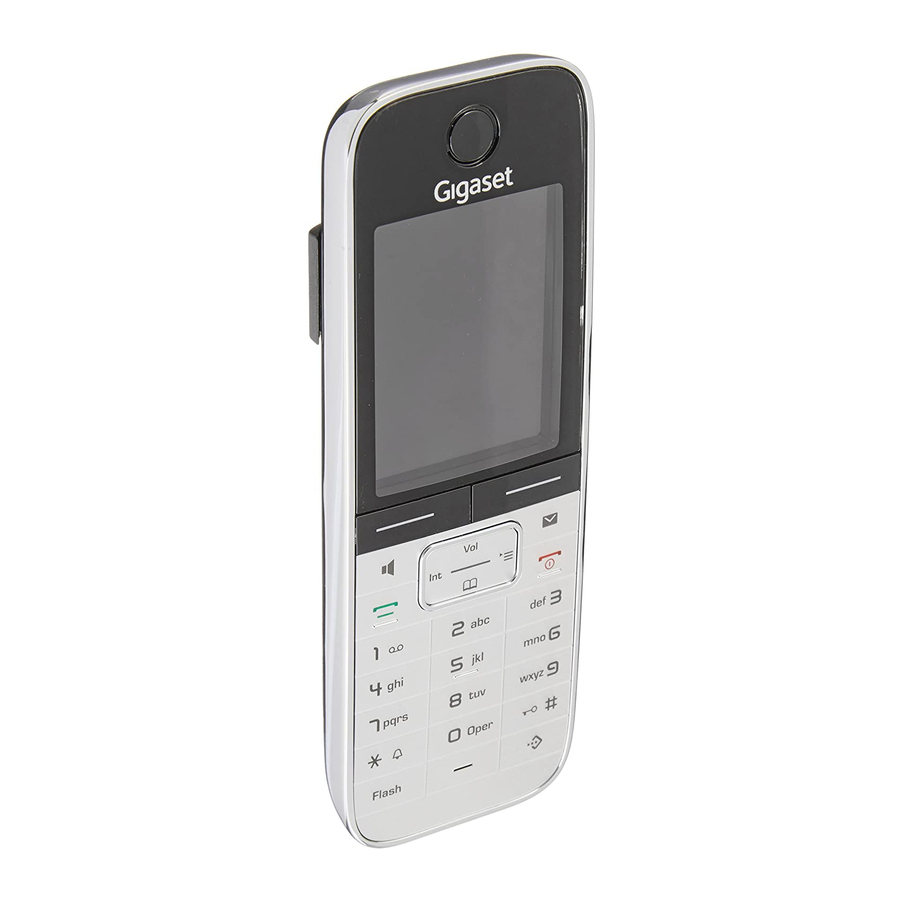
Brief overview i à INT 1 14, 2009 07:15am Redial Calendar Base station 1 Display in idle status 2 Battery charge status ( 3 Display keys ( 4 Message key ( Access to Calls and Message lists. Flashes: New message 5 End Call key, On/Off key End call, cancel function, go back one menu level (press briefly), back to idle status (press... -
Page 4: Display Symbols
Display symbols Display symbols The following symbols are displayed regardless of the settings and the operating status of your telephone: ò i Ã ó ˝ ™ à ¼ INT 1 07:00 11:28am 2009 Calls Calendar Signaling ¢ External call ( page 27) Ø... -
Page 5: Table Of Contents
Safety precautions ..........6 Gigaset SL785 – more than just a telephone ......7 First steps . - Page 6 Gigaset SL785 base station ........
- Page 7 Caring for your telephone ........
-
Page 8: Safety Precautions
Safety precautions Safety precautions Warning Be sure to read this user guide and the safety precautions before using your telephone. Explain their content and the potential hazards associated with using the telephone to your children. Use only the power adapter supplied, as indicated on the bottom of the base station. -
Page 9: Gigaset Sl785 - More Than Just A Telephone
Gigaset SL785 – more than just a telephone Your telephone sets new standards for the way you communicate at home. The configuration and user interface of the cordless phone are unique, providing you with first-class voice quality in handsfree mode, while the various ports (Blue- tooth, USB) offer you high flexibility. -
Page 10: First Steps
First steps First steps Checking the package contents One Gigaset SL785 base station One base station cover stand One power adapter for the base station One Gigaset SL78H handset One battery One battery cover One belt clip One charging cradle with power adapter... -
Page 11: Connecting The Base Station
Connecting the base station ¤ Connect the power adapter and phone jack station, and place the cables in the cable recesses. ¤ First connect the phone jack 4. ¤ Then connect the power adapter 3. Please note: The power adapter must always be connected, as the phone will not operate without connection to an electrical outlet. -
Page 12: Installing The Base Station And Charging Cradle
165 feet (50 m) inside buildings. The range is reduced when Eco mode ( Never expose the telephone to heat sources, direct sunlight, or other electri- cal devices. Protect your phone from moisture, dust, corrosive liquids, and fumes. -
Page 13: Setting Up The Handset For Use
Setting up the handset for use The display and keypad are protected by a protective plastic film. Please remove the protective film! Inserting the battery and closing the battery cover Warning Use only the rechargeable batteries ( Communications GmbH; using other batteries could result in significant health risks and property damage. - Page 14 First steps To connect the USB cable or change the battery open the battery cover: ¤ Remove the belt clip (if attached). ¤ Place a coin into the notch at the bottom of the casing and pull the battery cover upwards.
- Page 15 Placing the handset in the charging cradle ¤ Insert the power adapter of the charging cradle into the electrical outlet. ¤ Place the handset in the charging cradle, with its display facing forward. The handset is registered with the base station at the factory. You do not need to complete a registration.
-
Page 16: Setting The Date And Time
First steps Setting the date and time Set the date and time so that the alarm and the calendar can be used. Date/Time Date: 00/00/0000 Time: 00:00am Back ¤ Enter the hours and minutes as four-digit numbers using the keypad (e.g., QM 5 for 07:15 am). - Page 17 am/pm Save ‰ Saved Date/Time Date: 10/14/2009 Time: 07:15am am/pm Save ¤ §Save§ Press the key below play screen to confirm your entry. The display shows Saved. You will hear a confirmation tone. ¤ §Back§ Press the key below play screen to return to idle status. First steps on the dis- on the dis-...
-
Page 18: Battery Charge Status
First steps Display in idle status Once the phone is registered and the time set, the idle display is shown, as in this example. If the answering machine is activated, the answering machine icon will be displayed in the header. The following is displayed after successful registration: The strength of the reception signal between the base station and handset:... -
Page 19: Setting Up Area Codes
Setting up area codes Before you can return a call from the Calls list ( area code of the area in which your phone is being used. If your phone is in a mul- tiple area code area, you must also store the extra codes for that area. Local Area Code Ï... -
Page 20: What Would You Like To Do Next
Setting the handset volume Recording your own announcement for the answering machine Setting Eco mode Operating the telephone on a PABX Registering existing Gigaset handsets to a base station Transferring directory entries from existing Gigaset handsets to your new handset(s) -
Page 21: Using The Phone
Using the phone Using the Control key Below, the side of the Control key that you must press in a given operating situation is shown in black (top, bottom, right, left, center), for example, v for "press right on the Control key" or w for "press the center of the Control key."... -
Page 22: Using The Display Keys
Using the phone Using the Display keys The function of the Display keys changes depending on the particular operating sit- uation. Example: Back Some important Display keys: Options Open a menu for further functions. Confirm selection. Û Delete key: Backspace deletes character/word. Go back one menu level or cancel operation. -
Page 23: Using The Menus
Using the menus Your telephone's functions are accessed using a menu that has a number of levels. Main menu (first menu level) ¤ When the handset is in idle status, press the right v Control key to open the main menu. -
Page 24: Activating/Deactivating The Handset
Using the phone Activating/deactivating the handset With the phone in idle status, press and hold the End Call key to switch off the handset. A confirmation tone plays as the phone turns off. Press and hold the End Call key again to switch the handset on. Please note When the handset is switched on, an animation of a clock will be displayed for several seconds. -
Page 25: Using This Guide
Using this guide The operating steps are shown in abbreviated form. Example: The illustration: ¢ Settings means: Settings · Í á Back Settings Date/Time Audio Settings Display Language Registration Telephony Back ¢ ¢ Telephony Auto Answer (³ = on) ¤ Press right on the Control key v to open the main menu. - Page 26 Using the phone Telephony Auto Answer Area Codes Listening In Dialing Mode Back Telephony Auto Answer Area Codes Listening In Dialing Mode Back ´ The Auto Answer function has already been selected. Change ¤ Press the Display key activate/deactivate the function. Changes are effective immediately ³...
-
Page 27: Menu Tree
Menu tree With the telephone in idle status, press v (open main menu): · Alarm Clock ò Bluetooth Activation Search for Headset Search for DataDevice Known Devices Own Device É Additional Features Room Monitor Missed Alarms Í Calendar Ê Call Lists... - Page 28 Menu tree á Resource Directory Screensavers Caller Pictures Sounds Capacity Î Directory Ï Settings Date/Time Audio Settings Display Language Registration Telephony System Reset ¢ page 54 ¢ page 54 ¢ page 54 ¢ page 54 ¢ page 29 ¢ page 14 Call Volume Ringer Settings Advisory Tones...
-
Page 29: Making Calls
Making calls If the backlight is deactivated ( is switched on by pressing any key. In this case the pressed key has no other function. Making an external call External calls are calls using the public tele- phone network. ~ c Enter the number and press the Talk key. -
Page 30: Using Caller Id
Making calls Using Caller ID Caller ID (CID) and Caller Name ID (CNID) are optional subscription services provided by your telephone service provider. These fea- tures supply incoming caller identification information that will be displayed on your handset. Call display with Caller ID/ Name If the caller's number is saved in your direc- tory, the caller's name will be displayed. -
Page 31: Using The Directory And Lists
Using the directory and lists The options are: Directory Quick list Last Number Redial list Call lists List of missed appointments Answering Machine Message list You create the directory and Quick list for your own individual handset. You can also send lists/entries to other handsets ¢... - Page 32 Using the directory and lists Caller Melody (VIP): Mark a directory entry as a VIP (very important person) by assigning a specific ringer to it. VIP calls are recognized by the ringer. When scrolling through the directory, VIP entries are highlighted by the Æ symbol. Requirement: Caller ID service subscrip- ¢...
- Page 33 Editing entries ¢ s / C s (Select entry). §View§ §Edit§ Press the Display keys one after the other. ¤ Carry out changes and save. Using other functions ¢ s / C s (Select entry) ¢ §Options§ (Open menu) The following functions can be selected with Display Number Save or modify a saved number, and then dial with c or save as a new entry;...
- Page 34 Using the directory and lists Receiving a vCard with Bluetooth If a device from the "Known Devices" list ¢ page 49) sends a vCard to your handset, this takes place automatically. You are informed about it on the display. If the sending device does not appear in the list, you will be asked on the display to enter the device PIN for the sending device: Enter the PIN for the sending...
-
Page 35: Using The Last Number Redial List
Using the directory and lists Using Call lists Requirement: Caller ID service subscription (CID, page 28) Your telephone stores various types of calls: Answered calls Outgoing calls Missed calls Calls recorded by the answering machine You can view each type of call separately or see an overview of all calls. -
Page 36: In The Network Mailbox
Using the directory and lists Press the Talk key c to return the selected call. §View§ Select the Display key to access addi- tional information, including, for example, the number linked with the name §Options§ Select the Display key to choose the following options: Copy to Directory Copy a displayed number to the direc-... -
Page 37: Operating The Answering Machine On The Gigaset Sl785 Base Station
Operating the answering machine on the Gigaset SL785 base station Operating the answering machine on the Gigaset SL785 base station You can access the answering machine using the handset or by remote operation (from another telephone/mobile phone). You can record your own announcement or advisory message using the handset. -
Page 38: Play Announcement
Operating the answering machine on the Gigaset SL785 base station After recording, the announcement is played back for you to check. You can rerecord the announcement with Please note: Recording ends automatically if the max- imum recording time of 170 seconds is exceeded or there is a break in speech for more than 2 seconds. -
Page 39: Deleting Messages
Operating the answering machine on the Gigaset SL785 base station t or Go to the start of the current message. Press twice to go back to the previous message. s or 3 Skip to next message. Press twice to skip to the mes- sage after next. -
Page 40: Activating/Deactivating Call Screening
Operating the answering machine on the Gigaset SL785 base station Activating/deactivating two-way record You can record an external call with the answering machine. ¤ Inform the caller that the call is being recorded. §Options§ Open menu. Two-way Record Select and press... -
Page 41: Resetting Fast Access For The Answering Machine Using Key 1
Operating the answering machine on the Gigaset SL785 base station Changing the language for voice prompt and prerecorded announcement Open the main menu. *#Q5#2 Enter digits and press §OK§ To set English. §OK§ To set French. §OK§ To set Spanish. -
Page 42: Using The Network Mailbox
Using the network mailbox Using the network mailbox The network mailbox is your network pro- vider's voice mail within the network. You cannot use the network mailbox unless you have subscribed to the service from your network provider. Configuring Fast Access for the network mailbox With Fast Access, you can dial the network mailbox or the integrated answering... -
Page 43: Eco Dect
ECO DECT You are helping to protect the environment with your Gigaset. Reduced energy consumption Your telephone has a power-saving adapter plug and uses less power. Reducing radiation The radiation from your telephone is reduced automatically: The closer the handset is to the base, the lower the radiation. - Page 44 Setting an appointment (calendar) If appointments have already been entered, this will open the list of existing appointments on that day. ¢ §OK§ Select <New Entry> data input window. If no appointments have been entered, the data input window will open immedi- ately to add the new appointment.
-
Page 45: Displaying Missed Appointments, Anniversaries
Displaying missed appointments, anniversaries Missed appointments/anniversaries ¢ page 32) are displayed in the Missed Alarms list if: You do not accept an appointment/anni- versary. The appointment/anniversary was sig- naled during a phone call. The handset is deactivated at the time of the appointment/anniversary. -
Page 46: Using Several Handsets
Using several handsets Using several handsets Registering handsets You can register up to six handsets to your base station. A Gigaset SL78H handset can be registered on up to four base stations. Manually registering the Gigaset SL78H to the Gigaset SL785 You must activate manual registration of the handset on both the handset (1) and the... -
Page 47: Changing The Base Station
Changing the base station If your handset is registered to more than one base station, you can set it to a particular base station or to the base station that has the best reception (Best Base). Ï ¢ ¢ Registration Select one of the registered base stations or Best Base, and §Select§... -
Page 48: Listening In To An External Call
Using several handsets Accepting/rejecting call waiting If you receive an external call during an internal call, you will hear the call waiting tone (short tone). The caller's number will appear in the display if caller ID is enabled. Ending an internal call, accepting an external call §Accept§... -
Page 49: Using A Handset As A Room Monitor
Using a handset as a room monitor When the room monitor function is acti- vated and the handset detects a specific noise level, the handset automatically calls a destination phone number. That phone number can be either another handset or an external number. -
Page 50: Using Bluetooth Devices
Using Bluetooth devices i à INT 1 Á 07:15am 2009 Room Monitor active 9725551234 Options Changing the set destination number É ¢ ¢ Room Monitor ¤ Enter and save number as described in "Activating the room monitor and enter- ing the destination number" ¢... -
Page 51: Search For Headset
Registering Bluetooth devices The distance between the handset in Blue- tooth mode and the activated Bluetooth device (headset or data device) should be no more than 33 feet (10 m). Please note If you register a headset, any headset that is already registered will be over- written. -
Page 52: Handset Settings
Handset settings Changing the name of a Bluetooth device ¢ s (select entry) Open list §Options§ Press the Display key. Edit Name Select and press Change the name. §Save§ Press the Display key Rejecting/accepting an unregistered Bluetooth device If a Bluetooth device that is not registered in the list of known devices tries to connect to the handset, you will be prompted on the display to enter the PIN for the Bluetooth... -
Page 53: Changing The Display Language
Bluetooth Assign the Bluetooth menu to a key. Redial Displaying the Last Number Redial list. Call Lists Displaying the lists of incoming and out- going calls. ¢ Internal calls ( page 45). Starting the function, dialing the number Press and hold the Digit key while in handset idle status, or briefly press the Display key. -
Page 54: Activating/Deactivating Auto Answer
Handset settings ¤ You can enter data in the following fields: Activation: Select On (screensaver is displayed) or Off (no screensaver). Selection: Select screensaver or §View§ Press the Display key. The active screensaver is displayed. Select screensaver and §OK§ press §Save§... -
Page 55: Changing Ringers
Additionally for external calls: Once you have selected the melody, you can specify a time period when you do not want the telephone to ring (e.g., during the night). Time Control: Select On or Off. Suspend ringing from: In 4-digit format, enter the start of the period. -
Page 56: Using The Resource Directory
Handset settings Activating/deactivating the alert tone In place of the ringer, you can activate an alert tone. When you get a call, you will hear a short tone ("Beep") instead of the ringer. Press and hold the Asterisk key, and within 3 seconds: §Beep§... -
Page 57: Activating/Deactivating Advisory Tones
"1" ( i. e., 312 -555-1212 instead of 1-312-555-1212), please add the "1" in front of the telephone number before transferring the number to the phonebook of the SL78H handset via Bluetooth. -
Page 58: Restoring The Handset Default Settings
Base station settings Restoring the handset default settings You can reset individual settings and changes that you have made. The following settings are not affected by a reset Registration to the base station Date and time Entries in the calendar Entries in the directory, Quick list, Call lists as well as the content of the Resource Directory... -
Page 59: Activating/Deactivating Music On Hold
Returning to the default system If you have forgotten your system PIN, you can reset the base station to the original code 000. Disconnect the power cord from the base station. Hold down the Registration/Paging key on the base station while reconnecting the power cable to the base station. -
Page 60: Connecting The Base Station To The Pabx
Connecting the base station to the PABX Connecting the base station to the PABX The following settings are only necessary when your PABX requires them; see the PABX user guide. Dialing modes and setting Flash Duration The current setting is indicated by Changing the dialing mode The following dialing modes can be selected:... -
Page 61: Questions And Answers
Questions and answers If you have any questions about using your phone, visit us any time at www.gigaset.com/service. The table below contains a list of common problems and possible solutions. Registration or connection problems with a Bluetooth headset. ¥ Reset the Bluetooth headset (see the user ¥... -
Page 62: Protecting Our Environment
Protecting our environment Exclusion of liability Some displays may contain pixels (picture elements), which remain activated or deactivated. As a pixel is made up of three sub-pixels (red, green, blue), it is possible that pixel colors may vary. This is completely normal and does not indicate an error. -
Page 63: Appendix
Appendix Caring for your telephone Wipe the base, charging cradle and the handset with a damp cloth (do not use sol- vent or a microfiber cloth) or an antistatic cloth. Never use a dry cloth as this can cause static. -
Page 64: Writing And Editing Text
Environmental operat- +5°C to +45°C, 20% to ing conditions 75% relative humidity Dialing mode DTMF (touch-tone dial- ing)/DP (pulse dialing) Pin connections on the telephone jack 1 unused 2 unused 5 unused 6 unused Writing and editing text The following rules apply when writing text:... -
Page 65: Additional Functions In The Pc Interface
Additional functions in the PC interface To enable your handset to communicate with the PC the "Gigaset QuickSync" program must be installed on your PC (free to download at www.gigaset.com/gigasetsl780). Transferring data After installing "Gigaset QuickSync", con- nect the handset to your computer using ¢... -
Page 66: Industry Canada Certification
The REN is used to determine the number of devices that may be connected to a telephone line. Excessive RENs on a telephone line may result in the devices not ringing in response to an incoming call. In most but not all areas, the sum of RENs should not exceed five (5.0). -
Page 67: Safety Precautions
Customer (user). This telephone system may not be used on coin service provided by the telephone company. Con- nection to party line service is subject to state tar- iffs. -
Page 68: Battery Safety Precautions
There may be a remote risk of electrical shock from lightning. Therefore we suggest a surge arrestor. 14. Do not use the telephone to report a gas leak in the vicinity of the leak. 15. Emergency/911 numbers may not be dialed if the keypad is locked. -
Page 69: Service (Customer Care)
NAM-approved repair facility, or that have been improperly installed. – Cost of installation, removal or reinstallation. – Damage due to any telephone, electronic, hardware or software program, network, Inter- net or computer malfunctions, failures, or diffi- culties of any kind, including without limita- tion, server failure or incomplete, incorrect, garbled or delayed computer transmissions. - Page 70 Service (Customer Care) – Payments for labor or service to representa- tives or service centers not authorized to per- form product maintenance by Gigaset NAM. – Loss of data. – Testing and examination discloses that the alleged defect or malfunction in the Product does not exist.
-
Page 71: Governing Law
This limited warranty gives you specific legal rights, and you may also have other rights which vary from state to state/province to province. In no event shall Gigaset NAM's liability exceed the cost of repairing or replacing defective Products as provided herein, and any such liabilities will ter- minate upon expiration of the warranty period. -
Page 72: Accessories
Accessories Accessories Gigaset SL78H handset Illuminated graphical color display (256k colors) Illuminated keypad Handsfree talking Polyphonic ringers Directory for approximately 500 entries Picture CID PC interface (e.g., for managing directory entries, ringers, and screensavers) Bluetooth Room monitor www.gigaset.com/gigasetSL78H Gigaset S810H handset Illuminated graphic colour display (65k colours) Illuminated keypad Speaker mode... - Page 73 Gigaset C610H handset Illuminated graphic color display (65k colors) Illuminated keypad Speaker mode Polyphonic ringtones Directory for approx. 150 entries Room monitor www.gigaset.com/gigasets610h All accessories, with the exception of batteries, are available from your phone retailer. Use only original accessories. This prevents possible health risks and property dam- age and also ensures compliance with all relevant regulations.
-
Page 74: Mounting The Base Station To The Wall
Mounting the base station to the wall Mounting the base station to the wall 48 mm approx. 2.5 mm Please note Mounting screws are not included in the package. -
Page 75: Index
Index ..... Access protection ......Accessories Acknowledgment tones . - Page 76 ......internal Caring for your telephone ....
- Page 77 Display keys ........... assigning .
- Page 78 Index ....Key 1 (Fast Access) ......Keypad lock Keys .
- Page 79 ......Talk key Telephone jack, pin connections Touch-tone dialing .......