Table of Contents
Advertisement
Available languages
Available languages
INSTRUCTION MANUAL
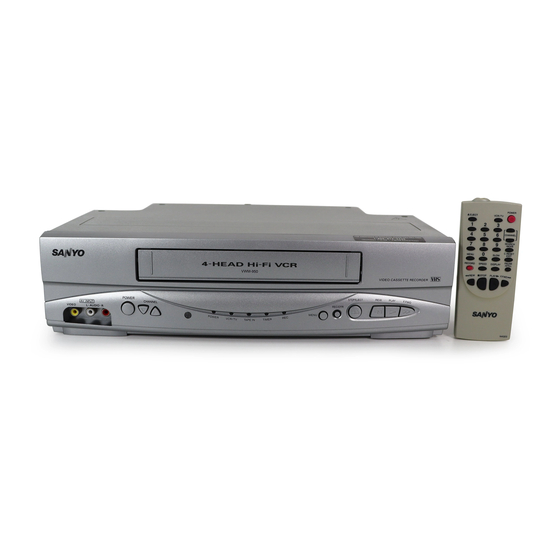
Video Cassette Recorder
1. Before Using Your VCR
Basic TV Connection
Antenna
Cable TV
Cable TV
Signal
Signal
or
(Back of TV)
Disconnect
4
Plug the AC power cords of the VCR and TV into the AC outlets.
Hints for Cable Box or Satellite Box
Connection A
(Back of VCR)
(Cable box or
ANT
Antenna
Satellite box)
IN
or
IN
OUT
OUT
RF cable
Cable TV
(supplied)
signal
Select this connection when you want to view or record a
scrambled channel. With this connection, channels cannot
be changed on the VCR. You can view or record ONLY the
channels you have selected on the cable box or the satellite
box.
• While you are recording, only the recorded channel can
be viewed.
To select channels of the cable box or satellite box
1) Turn on the unit by pressing [POWER], then press
[VCR/TV]. The "POWER" and the "VCR/TV" lights on
the front panel will appear, then press
[CHANNEL
] to select channel 3 or 4 (the
same channel as the output channel of the cable box
or satellite box).
• If you use the channel 4, you need to change the
unit's RF output to channel 4. Refer to "RF Output
Channel".
2) On the TV, select channel 3 or 4 (the same channel as
you have selected at step 1).
3) On the cable box or satellite box, select the channel
you want to view or record.
VWM-950
Antenna
(Back of VCR)
or
ANT
2
IN
3
Connect
OUT
Connect
RF Cable
(supplied)
Connection B
(Back of VCR)
ANT
IN
Antenna
or
OUT
E
Cable TV
signal
(Back of TV)
RF cable
(supplied)
Select this connection when you want to change channels
on the unit. With this connection, you may watch one
channel while recording another.
• You may not view or record a scrambled channel.
To select channels of the cable box
1) On the cable box, select channel 3 or 4 (the same
channel as the VCR's RF output channel.)
• Refer to "RF Output Channel".
2) On the TV, select the same channel as the output
channel (3 or 4) of the cable box.
3) Turn on the unit by pressing [POWER], then press
[VCR/TV]. The "POWER" and "VCR/TV" lights on the
front panel will appear, then select the channel you
want to view or record.
To play back a tape
Follow the steps 1) to 2) above, then play back a tape.
• Refer to "Playback" on page 4.
To view one channel while recording another
1)While you are recording on the unit, press [VCR/TV].
2)On the cable box, select the channel you want to view.
RF Output Channel
If channel 3 is already occupied for broadcasting,
1) Set your TV to channel 4.
2) Insert a pre-recorded tape into this unit.
3) Press [PLAY B B ] once to start playback.
4) After a few seconds, press [PLAY B B ] on the unit for 3 seconds.
• The RF output channel will change to channel 4 from channel 3 and
you will see a playback picture.
• When a picture does not appear on the TV screen, repeat step 4).
5) Press [C C STOP] to stop playback.
Stereo TV Connection
You can use the AUDIO OUT jacks and
VIDEO OUT jack on the back of the
(Back of TV)
unit if your TV has Audio/Video Input
jacks. In this case, you need to set the
TV to external Line Input Mode. Please
refer to your TV's owner's manual.
Front & Rear Terminals
AUDIO OUT jacks
Connect the audio cables here through to
the audio input jacks of a camcorder, another
VCR, a stereo amplifier or an audio system.
(Cable box)
E
IN
OUT
(Back of TV)
RF cable
VIDEO OUT jack
Connect the video cable here through the
video input jack of a camcorder, another
VCR or a TV.
POWER
AV INPUT
VIDEO
L–AUDIO–R
Supplied Accessory
• Remote control
(NA323) with
two AA batteries
- 1 -
VIDEO
AUDIO OUT
OUT
L
R
(Back of TV)
AUDIO
L
ANT
AUDIO
IN
OUT
IN
L
OUT
IN
R
R
VIDEO
OUT
VIDEO
OUT
IN
OUT
IN
CHANNEL
MENU
TAPE IN
• RF cable
• Instruction manual
• Quick setup guide
Quick Setup Guide
Printed in China
Hint
Hint
• The RF output channel may not
change when you adjust track-
ing during playback. In this
case, stop the playback, and
start the playback again. After
that, press [PLAY B B ] on the
VCR for 3 seconds again.
VIDEO
AUDIO IN
IN
L
R
ANT
AUDIO
IN
L
OUT
IN
R
OUT
VIDEO
AUDIO
Audio/Video Cables
OUT
IN
L
OUT
IN
(not supplied)
R
VIDEO
OUT
(Back of VCR)
AUDIO IN jacks
Connect the audio cables coming from the
audio output jacks of a camcorder, another
VCR or an audio source here.
ANT
ANT IN jack
IN
Connect your antenna or cable box
here.
OUT
ANT OUT jack
Connect the supplied RF cable to the
antenna input jack on your TV.
VIDEO IN jack
Connect the video cable coming from the
video output jack of a camcorder, another
VCR or an audio-visual source (laser disc
player, video disc player, etc.) here.
Installing the Batteries for
the Remote Control
Install two AA batteries
(supplied) matching the
polarity indicated on
the bottom of the
remote control.
81VMN20401--- / HJ420UD #####
ANT
IN
OUT
IN
Advertisement
Table of Contents

Related Manuals for Sanyo VWM-950


Summary of Contents for Sanyo VWM-950
-
Page 1: Rf Output Channel
Cable TV Signal Signal (Back of TV) Disconnect Connect Plug the AC power cords of the VCR and TV into the AC outlets. Hints for Cable Box or Satellite Box Connection A Connection B (Back of VCR) (Cable box or... -
Page 2: Important Safeguards
2. IMPORTANT SAFEGUARDS TO REDUCE THE RISK OF FIRE OR ELECTRIC SHOCK, WARNING: DO NOT EXPOSE THIS APPLIANCE TO RAIN OR MOISTURE. CAUTION: TO REDUCE THE RISK OF ELECTRIC CAUTION SHOCK, DO NOT REMOVE COVER (OR BACK). RISK OF ELECTRIC SHOCK NO USER SERVICEABLE PARTS INSIDE. -
Page 3: Preparation For Use
3. Preparation for Use Turn On the Unit for the First Time To Select a Channel Turn on the TV and You can select a channel by using set it to channel 3. the Number buttons on the remote • If channel 3 is already occu- control. -
Page 4: Recording & Otr (One Touch Recording)
Press [F.FWD g g ] or [h h REW]. mode. • Press it again and the VCR will now • If the noise bar appears on the TV search in super high speed. (in the screen, you can reduce it by pressing... -
Page 5: Recording Features
5) Press [REC/OTR] on the recording VCR. 6) Begin playback of the tape in the playing VCR. 7) To stop recording, press [STOP/EJECT C C / A A ] on the recording VCR, then stop playback of the tape in the playing VCR. -
Page 6: Special Features
• These functions are not available during recording. • Press [C C STOP] to stop the search. • If the end of the tape is reached during a Search, the VCR will cancel the search and rewind the tape. Auto Repeat... -
Page 7: Maintenance
11. Important Information Important Copyright Information Install Location Unauthorized recording or use of broad- For safety and optimum performance of cast television programming, video tape, this unit: film or other copyrighted material may • Install the unit in a horizontal and stable violate applicable copyright laws. -
Page 8: Troubleshooting Guide
SANYO product against defects in materials and workmanship for the periods of LABOR and PARTS specified above. SANYO will repair or replace (at its option) the product and any of its parts which fail to conform to this warranty with new or refurbished products or parts. - Page 9 [VCR/TV]. Se encienden “POWER” y después, presione [CHANNEL ] para “VCR/TV” en el panel frontal y seleccione el canal seleccionar el canal 3 ó 4 (el mismo canal que el que desea ver o grabar. canal de salida de la caja de cable o caja de Para reproducir una cinta satélite).
-
Page 10: Importante Información Sobre Seguridad
2. IMPORTANTE INFORMACIÓN SOBRE SEGURIDAD PARA REDUCIR EL RIESGO DE INCENDIO O DESCARGA ELÉCTRICA, ADVERTENCIA: NO EXPONGA ESTEAPARATO A LA LLUVIA NI A LA HUMEDAD. PRECAUCIÓN:PARA REDUCIR EL RIESGO DE QUE SE PRODUZCAUNA DESCARGA ELÉCTRICA, NO QUITE PRECAUCIÓN LA TAPA(NI EL PANEL POSTERIOR). EN EL INTERIOR RIESGO DE DESCARGA NOHAY PIEZAS QUE DEBA REPARAR EL USUARIO. -
Page 11: Ajuste Del Reloj
3. Preparación para utilizar Conecte la unidad por primera vez Conecte el TV y Para seleccionar un canal Puede seleccionar un canal cambie al canal 3. utilizando los botones numéricos • Si el canal ya está ocupado en el mando a distancia. por una emisora, vea la sección “Canal Notas para utilizar los botones numéricos: de salida RF”. -
Page 12: Otras Operaciones
AJUSTE DE RELOJ SELEC. IDIOMA EJECT Para decidir AJUSTE CANAL AJUSTE AUTO B AJUSTE MANUAL MENU RECORD Para salir del menú C.RESET MENU EXIT STOP/EJECT REC/OTR MENU TAPE IN POWER VCR/ TV CHANNEL SEARCH -MODE C.RESET SLOW EXIT PAUSE SPEED DISPLAY /STILL... -
Page 13: Grabación Con Temporizador
• Si conectó la unidad a una caja de cable o caja de satélite como en la Conexión A de Seleccione el día deseado. la página 9, seleccione el VCR al canal 3 ó 4 (el canal de salida RF del VCR). • Puede programar el Seleccione el canal deseado en la caja de año por adelantado. -
Page 14: Características Especiales
MTS grabada en estéreo de alta fidelidad • Cuando reciba una • Si se conecta un TV estéreo a transmision en el VCR, puede esta unidad, seleccione verificar el tipo de transmisión “ESTEREO”. • Si se conecta un TV presionando [DISPLAY]. -
Page 15: Mantenimiento
11. Importante Información Importante información de derechos de autor Lugar de Instalación La grabación no autorizada o utilización Para su seguridad y óptimas de programas transmitidos por la prestaciones de esta unidad: televisión, videocintas, películas u otro • Instale la unidad en posición horizontal y material protegido por los derechos de estable. -
Page 16: Guía De Localización De Averías
Lo anterior está en lugar de todas las demás garantías explícitas y SANYO no asume ni autoriza a ninguna parte a asumir autorizar en su lugar cualquier otra obligación o responsabilidad.
Need help?
Do you have a question about the VWM-950 and is the answer not in the manual?
Questions and answers