Table of Contents
Advertisement
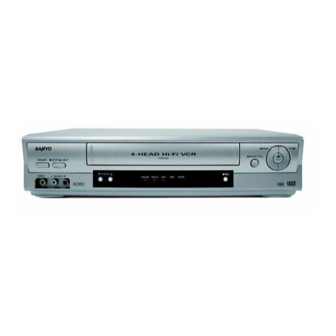
INSTRUCTION MANUAL
4-HEAD Hi-Fi STEREO VCR
Only cassettes marked
can be used with this video cassette recorder.
As an E
S
Partner,
®
NERGY
TAR
SANYO has determined that
this product or product model
meets the E
S
NERGY
TAR
guidelines for energy efficiency.
SANYO'S HELP-LINE
Call the toll-free number below if you have any difficulties operating this product.
1-800-813-3435 (Weekdays: 7:30 AM - 4:00 PM Central Time)
Please read this manual carefully before connecting your VCR and operating it for the first time.
Keep the manual in a safe place for future reference.
®
VWM-900
English
Advertisement
Table of Contents

Related Manuals for Sanyo VWM-900


Summary of Contents for Sanyo VWM-900
- Page 1 Call the toll-free number below if you have any difficulties operating this product. 1-800-813-3435 (Weekdays: 7:30 AM - 4:00 PM Central Time) Please read this manual carefully before connecting your VCR and operating it for the first time. Keep the manual in a safe place for future reference.
-
Page 2: Moisture Condensation
Under this condi- tion, connect the power cord to the AC line, press POWER on and allow at least two hours for the VCR to dry out. The serial number is found on the back of this unit. This number is unique to this unit and not available to others. -
Page 3: Important Safety Instructions
IMPORTANT SAFETY INSTRUCTIONS CAUTION: PLEASE READ AND OBSERVE ALL WARNINGS AND INSTRUCTIONS IN THIS OWNER’S MANUAL. AND THOSE MARKED ON THE PRODUCT. RETAIN THIS BOOKLET FOR FUTURE REFERENCE. This product has been designed and manufactured to assure personal safety. Improper use can result in electric shock or fire hazard. -
Page 4: Control Names And Locations
Aim the remote control unit at the sensor on the front panel of the VCR. For TV operation: This remote control will only work with Sanyo TVs. HOW TO INSTALL THE BATTERIES Detach the battery compartment cover in the direction of the arrow. -
Page 5: Vcr To Tv Connection
If your antenna lead wire is a flat type antenna cable, connect it to a Antenna Adaptor (300-ohm to 75-ohm) (not supplied) and slip the Adaptor onto the ANT.IN connector. The Adaptor does not screw on to the VCR, it just slips over the connector. AUDIO ANT.IN... -
Page 6: On-Screen Display (Osd)
Indicates the selected channel (or LINE1, LINE2). ❺ STEREO/SAP DISPLAY (MONO is not displayed.) Shows the type of audio signal received by the VCR tuner. ❻ DATE DISPLAY Shows the current date (Month/Day/Day of the week format). ❼ CLOCK/COUNT/REMAIN DISPLAY Shows the current time, the tape counter, and remaining time of the tape. -
Page 7: Setting The Setup Menu
VHF channels 2-13, UHF channels 14-69, and CATV channels 1-125. PREPARATION • Connect the VCR to the desired type of antenna or cable TV system, as shown in ANTENNA TO VCR CONNECTIONS . AUTO CHANNEL PROGRAMMING Press MENU and the MAIN menu will appear. -
Page 8: Setting The Clock
SETTING THE CLOCK The VCR gives you two ways to set the time and date: the Auto Clock Feature or manually. The Auto Clock Feature enables the VCR to set up the clock when the VCR is turned off. Things to know before starting •... - Page 9 SETTING THE TVG (TVGuardian ® TVGuardian Technology embedded into the VCR will ® filter foul language from pre-recorded movies which have CC (Closed Caption). TVGuardian reads the hidden sig- nals for closed captions, detects offensive language, momentarily mutes the sound, and displays alternate words and phrases.
-
Page 10: Normal Playback
• Turn on the TV. • Be sure the TV is set to the VCR Output Channel (CH 3 or 4). • If a direct VIDEO/AUDIO connection is made between the VCR and the TV, set the TV’s source selector to VIDEO. -
Page 11: Timer Recording
PLEASE SET THE CLOCK appears for a moment and then the CLOCK menu appears on the TV screen. Set the time and date before proceeding. • Make sure a tape is in the VCR and the safety tab is in place or the tape will be automatically ejected. PREPARATION •... -
Page 12: Program Priority
PREPARATION • Turn on the power of both the VCR and the TV. • Be sure the TV is set to the VCR Output Channel (CH 3 or 4). • If a direct VIDEO/AUDIO connection is made between the VCR and the TV, set the TV’s source selector to VIDEO. -
Page 13: Dubbing And Editing
Instant timer recording is canceled. • If the VCR is set to “0H00M”, the VCR goes to normal record- ing mode. DUBBING AND EDITING If you wish to edit or dub your camcorder (or another... -
Page 14: Editing A Recording
Be sure the VCR Channel Selector is on the correct channel you wish to record. The channel that is being recorded can always be checked by setting the television to the VCR chan- nel (3 or 4) and pressing the TV/VCR selector to turn the VCR indicator on. •... -
Page 15: Troubleshooting
No picture appears on the TV screen when PLAY is pressed. • Set the television to the VCR channel (3 or 4) upon the select- ed channel. • Try a different cassette tape. - Page 16 Acts of God, or normal wear and tear. The foregoing is in lieu of all other express warranties and SANYO does not assume or authorize any party to assume for it any other obli- gation or liability.