
Related Manuals for Technibel CAF258C5TAA


Summary of Contents for Technibel CAF258C5TAA
- Page 1 TECHNICAL DATA & SERVICE MANUAL INDOOR UNIT: CAF258C5TAA CAF368C5TAA CAF488C5TAA SPLIT SYSTEM AIR CONDITIONER Model No. Product Code No. CAF258C5TAA 387106012 CAF368C5TAA 387106013 CAF488C5TAA 387106014 0.8180.558.0 11/2008...
- Page 2 IMPORTANT! • Ground the unit following local electrical codes. • The Yellow/Green wire cannot be used for any connection Please read before installation different from the ground connection. • Connect all wiring tightly. Loose wiring may cause overheating This air conditioning system meets strict safety and operating at connection points and a possible fire hazard.
-
Page 3: Table Of Contents
Table of Contents Page 1. SPECIFICATIONS 1-1 Unit specifications 1-2 Major Component specifications 1-3 Other Component specifications 2. DIMENSIONAL DATA 3. ELECTRICAL DATA 3-1 Electric Wiring Diagram 3-2 Wiring System Diagrams 4. FUNCTION 4-1 Cool Mode Operation 4-2 Dry Mode Operation 4-3 Fan Mode Operation 4-4 Auto Fan Speed 4-5 Forced Mode... -
Page 4: Specifications
1. SPECIFICATIONS 1-1 Unit Specifications CAF258C5TAA 220 - 240V ~ 50Hz Power source 230 V - 50 Hz Voltage rating Cooling Performance See catalogue with the requested matching Capacity 1140/1020/840 Air circulation (High/Med./Low) m³/h Features Controls/Temperature controls Microprocessor/ I.C. thermostat... - Page 5 CAF368C5TAA CAF488C5TAA 220 - 240V ~ 50Hz Power source 230 V - 50 Hz Voltage rating Cooling Performance See catalogue with the requested matching Capacity Air circulation (High/Med./Low) m³/h 1920/1680/1320 Features Microprocessor/ I.C. thermostat Controls/Temperature controls Wireless remote control unit Control unit ON/OFF 24 hours Timer...
-
Page 6: Major Component Specifications
1-2 Major Component Specifications CAF258C5TAA Controller PCB SAC ON-OFF IDU Part No. Microprocessor Controls 250 V - 3,15 A Control circuit fuse 2,54mm-5pcs Jumper setting JP1..JP5 SAC W-REM Remote Control Unit Fan & Fan Motor Type Centrifugal fan 1…. Ø 443 Q'ty ……. - Page 7 CAF368C5TAA CAF488C5TAA Controller PCB SAC ON-OFF IDU Part No. Microprocessor Controls 250 V - 3,15 A Control circuit fuse 2,54mm-5pcs Jumper setting JP1..JP5 Fan & Fan Motor Type Centrifugal fan 1…. Ø 443 Q'ty ……. Diameter Fan motor model…Q'ty SFG6X-81A6P…1 6 …...
-
Page 8: Other Component Specifications
1-3 Other Component Specifications A040C5026AA Trasformer (TR) AC 230 V, 50 Hz Rating Primary 13 V - 5VA Secondary Thermal cut-off temp. (PTC) (on the board) C 883 - 120°C NTC-THERMISTOR Thermistor ( Coil sensor ) 10 at 25 °C Resistance kΩ... -
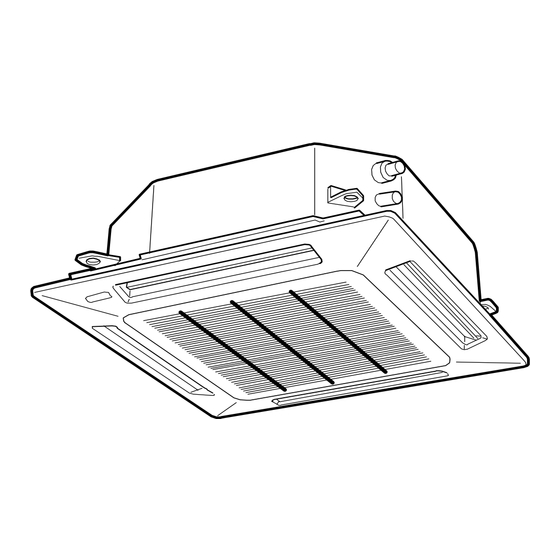
Page 9: Dimensional Data
2. DIMENSIONAL DATA CAF258C5TAA 820 (Ceiling opening) 757 (Suspention bolt pitch) Air intake grille Air outlet Refrigerant liquid line [D. 9.52 (In case of 25 type , 6.35 use the tube connector.)] Refrigerant gas line D.15.88 D.15.88 D. 12.7: 9, 12 type... - Page 10 CAF368C5TAA CAF488C5TAA 820 (Ceiling opening) 757 (Suspention bolt pitch) Air intake grille Air outlet Refrigerant liquid line (D.9.52) Refrigerant gas line (D.19.05) Drain connection Power supply entry For discharge duct For fresh air intake Suspension bolt mounting...
-
Page 11: Electrical Data
3. ELECTRICAL DATA 3-1 Electric Wiring Diagram 3-2 Wiring System Diagram Model Power Supply Power/Control line Delayed fuse 15 A AE71 15 A AE100 25 A AE125... -
Page 12: Function
4.FUNCTION 4-1 Cool Mode Operation In Cooling Mode, the operation of the compressor (CM), Outdoor Fan (FMO) and Indoor Fan (FMI) are determined by the difference between the room air temperature (RAT) and the set point temperature (SPT) as shown in the graph. NOTES 1. -
Page 13: Dry Mode Operation
4-2 Dry Mode Operation Dry operation remove moisture from indoor air running, in cooling mode, at a low level without reducing the ambient temperature. This is done cycling ON and OFF indoor and outdoor units according to below. ROOM DRY LEVEL TEMP Operation according to COOLING mode ≥... -
Page 14: Forced Mode
4-5 Forced Mode In this mode the system operates (COOLING mode – fixed settings) or is switched off by means of the MODE button of the indoor unit control board. The operation modes can be selected pressing the button in a cyclic way (OFF ð COOL ð OFF…). The settings are: SET POINT temperature = 25°C FAN SPEED = HIGH 4-6 Protection operations in Cool and Dry Mode... -
Page 15: I Feel Function
4-7 I FEEL Function As standard configuration the air conditioner operates detecting the room temperature through the sensor equipped in the wireless remote controller (icon I FEEL shown on the display). This feature provides a personalised environment since the temperature can be detected where the remote controller is located. It is possible to de-activate this option pressing the I FEEL button on the remote controller. -
Page 16: Diagnostic
4-10 Diagnostic With this feature is possible to have a visual signal that a trouble is occurring. This mode is always active and the signalling is made through the display board LEDS . In case of no troubles the LEDS status follows its normal function. NOTES The troubles are showed according a priority list that is in case of more than one trouble present, is always showed, at first, the one with the highest priority (1... -
Page 17: Contacts For Building Automation
4-12 Contacts for Building Automation 4-12.1 INPUT CONTACT (J4 - green) The status of this input affects system operation according to the following: Contact OPEN : system does not operate (always OFF) – inputs from wireless remote controller are not processed Contact CLOSED: system operates in the normal way according to the inputs coming from wireless remote controller 4-12.2 OUTPUT CONTACT (J12) -
Page 18: Maintenance
4-13 Maintenance Changing the Address of the Air Conditioner In case of more than one air conditioner operating in the same room, it may be necessary to assign an address to each unit in order to avoid operation conflicts. Address is set acting on the dip-switches located on the indoor PCB and on the remote controller. -
Page 19: Troubleshooting
5. TROUBLESHOOTING 5-1 Check Before and After Troubleshooting (A) Check power supply wiring. • Check the power supply wires are correctly connected. (B) Check power supply. • Check that voltage is in specified range (±10% of the rating). • Check that power is being supplied. •... -
Page 20: Unit And Compressor Do Not Run
2 • The unit does not run. 5-4 Unit and Compressor Do Not Run The unit does not run when air conditioner is in the follwing conditions: • When the room temperature is below the setting temperature. • During the protection modes. -
Page 21: Some Parts Of The Air Conditioner Do Not Operate
5-5 Some Parts of the Air Conditioner Do Not Operate... -
Page 22: Air Conditioner Operates, But Abnormalities Are Observed
5-6 Air Conditioner Operates, but Abnormalities are Observed... -
Page 24: Poor Cooling
5-7 Poor Cooling... -
Page 25: Excessive Cooling
5-8 Excessive Cooling 5-9 A Sensor Is Defective... -
Page 26: Checking Eletrical Components
6. CHECKING ELETRICAL COMPONENTS 6-1 Measurement of Insulation Resistance The insulation is in good condition if the resistance exceeds 1 MOhm a) Power Supply Wires Clamp the earthed wire of the power supply wires with the lead clip of the insulation resistance tester and measure the resistance by placing a probe on either of the power wires (fig.1). -
Page 27: Checking Continuity Of Fuse On Pcb Assy
6-2 Checking Continuity of fuse on PCB assy Remove PCB assy from electrical component box (fig.5) Then pull out the fuse from PCB assy Check continuity of fuse by the multimeter (fig.6) 6-3 Checking Motor Capacitor Remove the lead wires from the capacitor terminals, and then place a probe on the capacitor terminals as shown in fig.7. - Page 28 0.8180.557.00 06/2008 R.D. 28 Reyrieux BP 131 - 01601 Trévoux CEDEX France Tél. 04.74.00.92.92 - Fax 04.74.00.42.00 R.C.S. Bourg-en-Bresse B 759 200 728...