Table of Contents
Advertisement
Quick Links
OPERATING INSTRUCTIONS • NOTICE D'UTILISATION
BEDIENUNGSANLEITUNG • ISTRUZIONI D'USO
INSTRUCCIONES DE USO
CAF94MR5IAA
CAF124MR5IAA
CAF184MR5IAA
Split air conditioner system • Climatiseurs split
Split-klimagerät • Condizionatore d'aria split system
Acondicionador de aire de consola partida sistema split
37.4163.247.0
02/2006
Advertisement
Table of Contents

Related Manuals for Technibel CAF94MR5IAA


Summary of Contents for Technibel CAF94MR5IAA
- Page 1 OPERATING INSTRUCTIONS • NOTICE D’UTILISATION BEDIENUNGSANLEITUNG • ISTRUZIONI D’USO INSTRUCCIONES DE USO CAF94MR5IAA CAF124MR5IAA CAF184MR5IAA Split air conditioner system • Climatiseurs split Split-klimagerät • Condizionatore d’aria split system Acondicionador de aire de consola partida sistema split 37.4163.247.0 02/2006...
-
Page 2: Features
Features This air conditioner is equipped with cooling, heating, and drying functions. Details on these functions are provided below; refer to these descriptions when using the air conditioner. • Microprocessor Controlled Operation • Air Sweep Control The interior compartment of the remote control This function moves a flap up and down in the unit contains several features to facilitate air outlet, directing air in a sweeping motion... -
Page 3: Table Of Contents
Contents Page Features ......................2 Product Information ..................3 Alert Symbols ....................3 Installation Location ..................4 Electrical Requirements .................. 4 Safety Instructions ..................4 Names of Parts and operation selector ............5 Using the Remote Control Unit ..............10 Operation with the Remote Control Unit ............ -
Page 4: Installation Location
Installation Location • We recommend that this air conditioner be installed properly by qualified installation technicians in accordance with the Installation Instructions provided with the unit. • Before installation, check that the voltage of the electric supply in your home or office is the same as the voltage shown on the nameplate. •... -
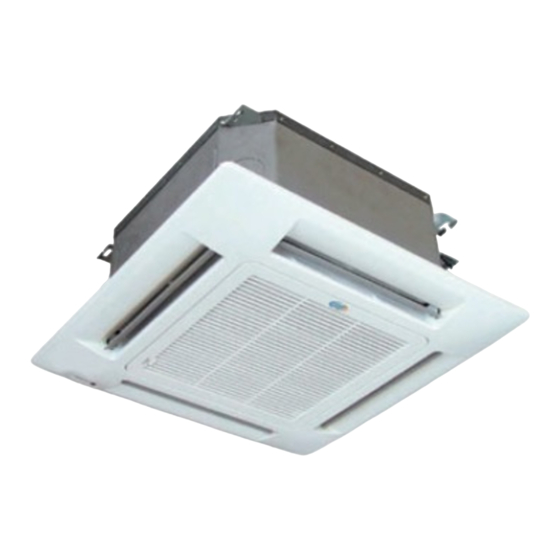
Page 5: Names Of Parts And Operation Selector
Names of parts and operation selector INDOOR UNIT 6. Air intake grille: Air from the room is drawn into this section and passes through air filter which removes dust. 7. Air filter. 8. Suspension brackets. 9. Refrigerant couplings. 10. Condensate drain connection. 11. - Page 6 Remote Control Unit (Display) Displayed when setting temperature in automatic operation Displayed when transmitting data Displayed when indoor unit sensor is in use Displayed when setting temperature Displayed when setting timer Symbols (1) Operation mode (5) ECONOMY ......AUTO ........(6) High power operation ...
- Page 7 Remote Control Unit Sensor Transmitter (Cover closed) Display ON/OFF operation button HIGH POWER button 1 HR. TIMER button Temperature setting buttons (TEMP .) ECONOMY button OFF TIME setting button ON TIME setting button MODE selector button Return button FAN SPEED selector button Advance button FLAP button SET button...
- Page 8 Remote Control Unit (continued) No display : The timer does not operate. ON TIME/OFF TIME setting buttons : The air conditioner stops at the set time. : The air conditioner starts at the set time. : The air conditioner stops and starts, or starts and stops, at the set times every day.
- Page 9 Remote Control Unit (continued) ADDRESS switch • Change the address switch to prevent mixing of signals from remote control units when two Sanyo air conditioners are installed next to each other. Normally, the address switch is set to A. When switching the adress, take the steps listed below.
-
Page 10: Using The Remote Control Unit
Using the Remote Control Unit How to Install Batteries 1. Slide the cover in the direction indicated by the arrow and remove it. 2. Install two AAA alkaline batteries. Make sure the batteries point in the direction marked in the battery compartment. -
Page 11: Operation With The Remote Control Unit
Operation with the Remote Control Unit 1. Automatic Operation STEP 2 STEP 3 STEP 1 STEP 1 Press the MODE selector button and select (AUTO). STEP 2 Press the ON/OFF button and switch the air conditioner ON. STEP 3 Press the temperature setting buttons (TEMP .). The air conditioner starts operating after automatically selecting the type of operation —whether heating, drying (dehumidifying) or cooling—that suits the conditions in the room, and automatically adjusting the temperature, fan speed and airflow direction. -
Page 12: Manual Operation
Operation with the Remote Control Unit (continued) As shown in the figure below, the automatic selection of the operating modes is determined by the indoor temperature and outside air temperature. Temperature setting Indoor temperature (standard) Approx. Approx. Approx. 27°C 15°C 22°C Cooling Approx. - Page 13 Operation with the Remote Control Unit (continued) STEP 1 Press the MODE selector button and select the desired mode. → For heating operation For dehumidifying operation → → For cooling operation STEP 2 To start the air conditioner, press the ON/OFF operation button.
-
Page 14: Adjusting The Fan Speed
Operation with the Remote Control Unit (continued) 3. Adjusting the Fan Speed A. Automatic Simply set the FAN SPEED selector button to the position. B. Manual If you want to adjust fan speed manually during operation, just set the FAN SPEED selector button as desired. [ , or 4. - Page 15 Operation with the Remote Control Unit (continued) A. In Cooling and DRY When the ECONOMY mode is selected, the air conditioner Mode: ( and ) automatically raises the temperature setting 1 °C when 60 minutes have passed after the selection was made. This enables you to save energy without sacrificing comfort.
-
Page 16: Special Remarks
Special Remarks Power failure • In the event of power failure, the unit will stop. Though the power is during operation resumed, the unit will not restart automatically. Press the ON/OFF operation button and restart the unit again. Clicking Sound •... -
Page 17: Setting The Timer
Setting the Timer 1. How to set the present (Example) To set to 10:30 pm. time Operation Indication 1. Press the CLOCK button three The time indication alone blinks. times. 2. Press the Advance, Return ( , ) The time can be set in 1-minute button until PM 10:30 is increments. - Page 18 Setting the Timer (continued) NOTE • The timer can be programmed while the unit is operating or while it is stopped. • A timer program is canceled after the timer has operated. So the timer should be set every time programming operation is to be performed.
- Page 19 Setting the Timer (continued) 4. How to set DAILY ON/ (Example) To start operation at 7:10 am. and stop the air conditioner at OFF REPEAT timer 11:00 am. 7:10 am. 11:00 am. Present time Operation Indication The present time 10:30 pm. and 1.
-
Page 20: Setting The 1-Hour Off Timer
Setting the 1-Hour OFF Timer 1. 1-Hour OFF Timer This function causes the unit to operate for one hour and then stop, regardless of whether the unit is on or off when this button is pressed. indicator in the display indicates that this function is operating. Setting the 1-Hour OFF Timer: Regardless of whether the unit is operating or stopped, press the 1 HR. -
Page 21: Tips For Energy Saving
Setting the HIGH POWER Operation (continued) NOTE Concerning HIGH POWER During a heating operation • The room is heated for 15 minutes by warm air which has a slightly operations higher temperature than usual. • When the HIGH POWER button is pressed during a defrosting operation, the unit enters the HIGH POWER operating mode upon completion of the defrosting operation. -
Page 22: Adjusting The Airflow Direction
Adjusting the Airflow Direction This air conditioner is equipped with auto flaps. You can set the airflow direction using the remote control unit. F L A P S SWEEP COOL SWEEP HEAT B. Setting the airflow manually A. Sweep function Referring to the above illustration, use the The flap starts moving up and down to FLAP button to set the airflow direction... -
Page 23: Operation Without The Remote Control Unit
Operation without the Remote Control Unit If you have lost the remote control unit or it has trouble, follow the steps below. 1. When the air conditioner is not running If you want to turn on the air conditioner, switch the operation selector to the OFF position, and then to the ON position. - Page 24 Care and Cleaning (continued) AIR FILTER ADDITIONAL MAINTENANCE The inspection or replacement of internal components involve The air filter should be cleaned at least once every six months or the removal of the condensate drain pan. more frequently; it depends on the real operation conditions. CAUTION Some metal edges and the vanes of heat exchanger are sharp and may cause injury if handled improperly;...
-
Page 25: Troubleshooting
Troubleshooting If your air conditioner does not work properly, first check the following points before requesting service. If it still does not work properly, contact your dealer or service center. Trouble Possible Cause Remedy Air conditioner does not run 1. Power failure. 1. - Page 26 INFORMATION FOR CORRECT DISPOSAL OF THE PRODUCT IN ACCORDANCE WITH THE EUROPEAN DIRECTIVE 2002/96/EC At the end of its working life this equipment must not be disposed of as an household waste. It must be taken to special local community waste collection centres or to a dealer providing this service. Disposing of an electrical and electronic equipment separately avoids possible negative effects on the environment and human health deriving from an inappropriate disposal and enables its components to be recovered and recycled to obtain significant savings in energy and resources.
- Page 27 In order to carry on a constant improvement, our products can be modified without prior notice. Per garantire un costante miglioramento dei nostri prodotti, ci riserviamo di modificarli senza preavviso. Par souci d’amélioration constante, nos produits peuvent être modifiés sans préavis. Unsere Produkte werden laufend verbessert und können Vorankündigung abgeändert Werden.