
Related Manuals for Raymarine Rotary Drive


Summary of Contents for Raymarine Rotary Drive
- Page 1 Distributed by Any reference to Raytheon or RTN in this manual should be interpreted as Raymarine. The names Raytheon and RTN are owned by the Raytheon Company.
-
Page 2: Rotary Drive
Rotary Drive Installation Guide Drives covered: M81135 Type 1 Rotary Drive 12 V M81136 Type 2 Rotary Drive 12 V M81137 Type 2 Rotary Drive 24 V Document number: 81174-3 March 2001... -
Page 3: Safety Notices
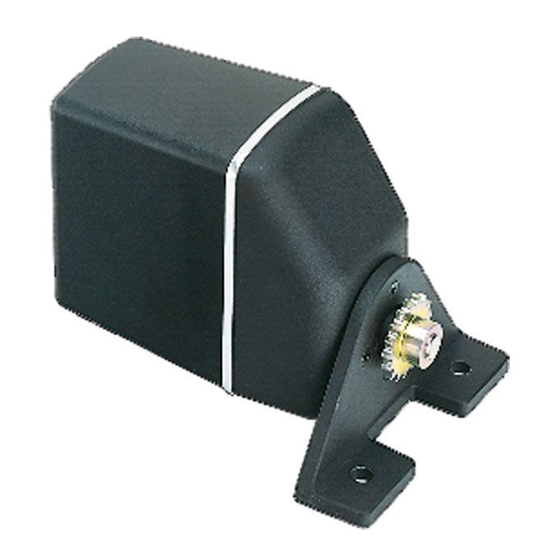
EMC conformance All Raymarine equipment and accessories are designed to the best industry standards for use in the recreational marine environment. The design and manufacture of Raymarine equipment and... - Page 4 Rotary Drive - Installation Guide Introduction Product description Welcome to the installation guide for the Raymarine rotary drive. This product is intended to operate the boat’s steering mechanism as part of a Raymarine autopilot system. It is designed for steering systems that can be driven from the helm position through a chain and sprocket (for example: cable and rod steering systems).
-
Page 5: Drive Dimensions
M81135 (12 V) 10,000 kg (22,000 lb) 20 Nm (180 lb.in) 33 rpm 10 sec 24-48 W Rotary Drive - Installation Guide D5087-1 Type 2 (T2) M81136 (12 V) M81137 (24 V) 20,000 kg (44,000 lb) 34 Nm (300 lb.in) -
Page 6: Installation Instructions
Rotary Drive - Installation Guide Table 1: Drive specifications (contd) Other information Installation instructions Parts required To install this drive you will need: • Parts supplied: • • • • Additional parts: • • • • • Note: Make sure you have obtained these additional parts before you start installation. -
Page 7: Installation Steps
WARNING: Electrical safety Make sure you have switched off the power supply before you start installing this product. Follow these steps to install your rotary drive unit: Consult the EMC installation guidelines. Mount the drive. Connect to the course computer. -
Page 8: Suppression Ferrites
Figure 3: Typical suppression ferrites Connections to other equipment If your Raymarine equipment is to be connected to other equipment using a cable not supplied by Raymarine, a suppression ferrite MUST always be attached to the cable near to the Raymarine unit. -
Page 9: Mounting The Drive
(see Figure 8). Refer to the EMC installation guidelines (page 6) Make sure the drive will be accessible for future servicing. Rotary Drive - Installation Guide... -
Page 10: Mounting Bolts
Connecting to the steering system The rotary drive is connected to the steering system by a chain drive between a sprocket on the drive and a sprocket on the boat’s steering shaft. - Page 11 • use Figure 4 to determine the sprocket sizes required at the steering gear shaft (steering sprocket) and at the rotary drive (drive sprocket) by: • • • for example, if the steering shaft turns twice when the rudder moves from hardover to hardover you will need (as indicated by the dotted lines on Figure 4): •...
- Page 12 Rotary Drive - Installation Guide Obtaining the steering sprocket Obtain the appropriate sized steering sprocket from the steering system manufacturer. Obtaining the drive sprocket Your Raymarine dealer can supply the following drive sprockets (suitable for a • 13 tooth: part number M81182 •...
- Page 13 (see Figure 7). • Drives mounted vertically: use the slots in the mounting foot to move the drive up or down (see Figure 7). Steering sprocket Drive sprocket Rotary Drive - Installation Guide Steering sprocket Drive sprocket End view D5085-1...
-
Page 14: Steering Check
3. Connecting to the course computer WARNING: Electrical safety Make sure the power supply is switched off before you make any electrical connections. The rotary drive has electrical connections for: • drive motor: two single-core cables: red and black •... - Page 15 Follow these steps to connect the rotary drive to the course computer: 1. Measure the total distance of cable run from the drive unit to the course computer: • • 2. Join these cables to the drive cables using appropriate electrical connectors or junction boxes at the correct power rating.
-
Page 16: Post Installation Checks
• check cables for signs of wear or damage Note: If this drive is used heavily, we recommend that it is serviced every two years by a Raymarine Authorized Service Representative. – – – –... -
Page 17: Emc Servicing And Safety Guidelines
Raymarine equipment should be serviced only by authorized Raymarine service technicians. They will ensure that service procedures/replacement parts used will not affect performance. There are no user serviceable parts in any Raymarine product. • Some products generate high voltages, so never handle cables or connectors when power is being supplied to the equipment.