Table of Contents
Advertisement
Quick Links
Advertisement
Table of Contents

Related Manuals for NEFF B12S32 3GB Series


Summary of Contents for NEFF B12S32 3GB Series
- Page 1 Built-in oven [en] Instruction manual B12S32.3GB...
-
Page 3: Table Of Contents
Produktinfo Your new appliance ..............6 Control panel ..................6 Additional information on products, accessories, replacement Operating modes ................6 parts and services can be found at www.neff- Your accessories ................6 international.com and in the online shop www.neff- eshop.com Accessories ..................6 Inserting accessories .................7 Shelf positions ..................7... -
Page 4: Important Safety Information
: Important safety information Read these instructions carefully. Only then Risk of fire! will you be able to operate your appliance Combustible items stored in the cooking ■ safely and correctly. Retain the instruction compartment may catch fire. Never store manual and installation instructions for combustible items in the cooking future use or for subsequent owners. -
Page 5: Causes Of Damage
Risk of injury! Causes of damage Scratched glass in the appliance door may Caution! develop into a crack. Do not use a glass Accessories, foil, greaseproof paper or ovenware on the ■ scraper, sharp or abrasive cleaning aids or cooking compartment floor: do not place accessories on the cooking compartment floor. -
Page 6: Your New Appliance
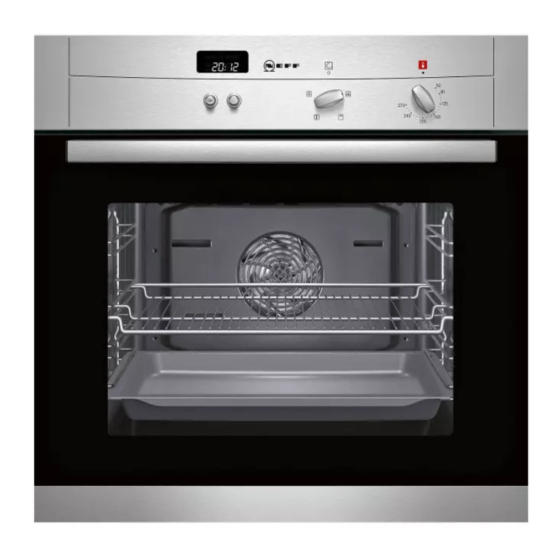
Your new appliance In this section, you will find information on the control panel ■ the operating modes ■ Control panel Control element Clock function button Selects the desired clock function (see section: Electronic clock) Rotary selector Makes settings within a clock function (see section: Electronic clock) Operating mode selector Selects the desired operating mode Temperature selector... -
Page 7: Inserting Accessories
Inserting accessories Shelf positions The accessories are equipped with a locking function. The locking function prevents the accessories from tilting when they are pulled out. The accessories must be inserted into the cooking compartment correctly for the tilt protection to work properly. -
Page 8: Operating The Appliance
Afterwards, wipe the cooled cooking compartment with hot, soapy water. Clean the outside of the appliance with a soft, damp cloth and soapy water. Operating the appliance In this section, you can read about how to switch your appliance on and off ■... -
Page 9: Timer
End of operation Switching the clock display on and off Press and hold the clock function button for 6 seconds. Automatic switch-off at a set time. The clock display switches off. If a clock function is active, Set the operating mode and temperature. the associated symbol remains lit. -
Page 10: Setting The Clock
Setting the clock Checking, correcting or deleting settings You can only change the clock when no other clock function is To check your settings, press the clock function button active. repeatedly until the corresponding symbol lights up. Press the clock function button repeatedly until If necessary, you can correct your setting using the rotary symbols light up. -
Page 11: Baking Table
Baking table Four baking tins on two levels When baking with four round baking tins, slide a wire rack in at The details given in the table are guidelines and apply to dark shelf position 1 and a wire rack in at shelf position 3. baking tins. -
Page 12: Tips And Tricks
Do not use frozen products that are heavily frosted We recommend that you set the lower of the specified ■ temperatures the first time. Lower temperatures will generally Follow the manufacturer's instructions. ■ allow more even browning. The details given in the table are guidelines and apply to the If you are baking on more than one level, only use the universal pan. -
Page 13: Roasting And Braising
Saving energy Only preheat the appliance when it is specified in the baking table that you should do Use dark baking tins as these absorb the heat better. Make use of the residual heat with longer baking times and switch the oven off 5 ... -
Page 14: Tips And Tricks
Meal Setting Level Temperature in °C Time in minutes (per 500 g) Lamb 170* 30 + 25 Shoulder (on the bone) 170* 25 + 20 Shoulder (boned and rolled) 170* 30 + 25 Rack of lamb 180* 25 + 25 Pork Roast joint 180*... -
Page 15: Grilling
Grilling In this section, you will find information on You can influence the grilling result by changing the position of the wire rack. the operating mode Full-surface grill ■ The grilling table Wire rack posi- Application ■ tion Caution! Place the wire insert in the universal pan with Material damage due to effect of heat: The temperature the lower area facing downwards: Suitable generated in the cooking compartment is very high. -
Page 16: Defrosting
Meal Setting Level Temperature in °C Time in minutes Chicken Drumsticks side: 15 - 17 side: 10 - 13 Breast (boneless) side: 12 - 15 side: 7 - 10 Fish Whole fish, e.g. trout side: 10 - 15 side: 10 - 15 Fillets side: 8 - 12 side: 7 - 10... -
Page 17: Cleaning And Care
Cleaning and care In this section, you will find information on Caution! cleaning and care of your appliance Surface damage due to incorrect cleaning: Do not use any ■ harsh or abrasive cleaning agents Cleaning agents and aids ■ ■ cleaning agents that contain alcohol ■... -
Page 18: Self-Cleaning Surface
Keeping the appliance clean Removing the appliance door To avoid getting the cooking compartment dirty, Open the appliance door fully. clean the cooking compartment after each use, as dirt will Open the locking levers on the left and right-hand side fully. ■... -
Page 19: Cleaning The Hook-In Racks
Removing the door panel Fitting the door panel Note: Before removing, make a note of which way round the Insert the door panel at an angle towards the back into both door panel is fitted, so that it is not refitted the wrong way brackets as far as it will go. -
Page 20: Faults And Repairs
Faults and repairs It is not always necessary to call the after-sales service. Risk of electric shock! Sometimes, you can find a remedy yourself. You will find some Work on the appliance electronics may only be performed by tips for troubleshooting in the following table. ■... -
Page 21: After-Sales Service
After-sales service Our after-sales service is there for you if your appliance needs After-sales service to be repaired. We will always find the right solution in order to avoid unnecessary visits from a service technician. E number and FD number Please note that there will be a fee for a visit by a service technician in the event of a malfunction, even during the When calling us, please give the product number (E no.) and... - Page 24 Constructa-Neff Vertriebs-GmbH Carl-Wery-Straße 34 D-81739 München GERMANY *9000849930* Register your product online 9000849930 950901 www.neff-international.com...