
Related Manuals for RCA 25425RE1


Summary of Contents for RCA 25425RE1
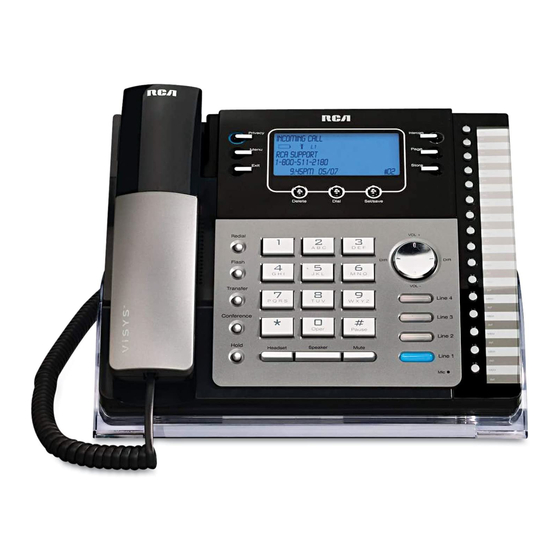
- Page 1 4-Line Intercom Speakerphone with Answering System and Caller ID User’s Guide Quick Guide on Pgs. 7-13 Please read this manual before operating product for the first time. Model 25425...
-
Page 2: Important Information
The REN is useful in determining the number of devices you may connect to your telephone line and still have all of these devices ring when your telephone number is called. In most (but not all) areas, the sum of the RENs of all devices connected to one line should not exceed 5. -
Page 3: Quipment Pproval Nformation Nterference Nformation
FCC Rules and Regulations. If these changes are expected to affect the use or performance of your telephone equipment, the telephone company must give you adequate notice, in writing, to allow you to maintain uninterrupted service. -
Page 4: Icensing
Use of other accessories may not ensure compliance with FCC RF exposure guidelines. Licensing Licensed under US Patent 6,427,009. Hearing Aid Compatibility This telephone system meets FCC standards for Hearing Aid Compatibility. THE LIGHTNING FLASH AND ARROW WARNING: TO HEAD WITHIN THE... -
Page 5: Table Of Contents
quipmEnt pprovAl nformAtion ... 3 ntErfErEncE nformAtion fcc rf r AdiAtion xposurE tAtEmEnt ... 4 icEnsing ... 4 EAring ompAtibility ... 7 ntroduction ... 8 Arts HEcklist ... 8 ElEpHonE EquirEmEnts mportAnt nstAllAtion nformAtion ... 9 Ayout mportAnt nstAllAtion uidElinEs ... - Page 6 Table of Contents rogrAmmed ocAL rogrAm id ...36 Aiting ALLer emory og And hone toring A umBer And Ame in eViewing hone emory eViewing the ntercom emory diting A Ame or umBer ...37 irectory emory diting A Ame or umBer ...37 emory toring the...
-
Page 7: Introduction
Your Four-Line Speakerphone is a full-featured phone ideally suited for home-office use. It is designed to receive calls on up to four incoming telephone lines and to serve up to 16 station users. Your phone features 16 memory locations, 94 phone book memories, hold, conference call, intercom, call transfer, Caller ID display, and speakerphone capabilities. -
Page 8: Arts C Hecklist
Important Installation Information • Never install telephone wiring during a lightning storm. • Never install telephone jacks in wet locations unless the jack is specifically designed for wet locations. • Never touch non-insulated telephone wires or terminals, unless the telephone line is disconnected from the network. -
Page 9: Mportant Nstallation Nformation Ase Ayout
Base Layout PRIVACY (button) MENU (button) EXIT (button) REDIAL/ FORMAT (button) FLASH (button) TRANSFER (button) CONFERENCE (button) HOLD (button) (button) HEADSET (button) ATTENDANT (button) ANSWERER (button) DIAL (button) DELETE (button) SEL/SAVE (button) #PAUSE SPEAKER (button) (button) MUTE (button) Connections & Setup NEW MESSAGE (indicator) INTERCOM... -
Page 10: Mportant Nstallation Uidelines Nstalling The Hone
As a precaution, you may want to write down any stored information you do not want erased. IMPORTANT: If you are not going to use the telephone for more than 30 days, remove the batteries because they can leak and damage the unit. - Page 11 NOTE: To use four lines, you must have four telephone lines with unique telephone numbers. If you only have one telephone line, this phone will still operate, but only as a single line telephone.
-
Page 12: Data Port
• To set your own Phone ID, or change your phone ID, follow the steps in the Phone ID section. You may connect up to 16 RCA 25423, 25424 and/or 25425 phones to the system at one time. Features like intercom, page and call transfer may be used among the units, but Line 1 must be common for all 25423, 25424, or 25425 units for these features to work properly. -
Page 13: System Verification
System Verification Use the following procedures to test system configuration and identify possible line con- nection errors. The phone must be connected to the power outlet, Line 1 must be con- nected to the LINE 1 + 2 jack, and the phone must have a phone ID. VERY IMPORTANT: In order to achieve full system operation (i.e. -
Page 14: Auto Attendant
Programming the Telephone Auto Attendant Turn on auto attendant function by pressing the ATTENDANT button, the blue indicator will light. For detail information on auto attendant setting, please refer to Auto Attendant section. Programming the Telephone When programming the phone, if at any time you wish to discontinue or stop program- ming, press the “Exit”... -
Page 15: Peakerphone Andset Inger One
Press the SEL/SAVE button. 7. Press the SEL/SAVE button to save. The cursor automatically moves to LINE 2. 8. Repeat steps 6 and 7 for each telephone line. After you select the ringer tone for LINE 4, press the EXIT button. -
Page 16: Hone Id
Programming the Telephone Delay Ring Use this setting to delay the Central Office ring. 1. Press the MENU button while in standby mode. 2. Use the VOL (+ or -) buttons to scroll up or down to SET PHONE OPTIONS. -
Page 17: Intercom Auto Answer
6. Use the VOL (+ or -) buttons to scroll up or down through the flash time options. The default setting is 600ms. 7. Press the SEL/SAVE button to save. NOTE: You may press the EXIT button at any time to exit. Programming the Telephone... -
Page 18: Call Alert Tone
Call Alert Tone Turn on the Call Alert to hear a tone for incoming calls while you are on the telephone. This function notifies you that there is a incoming call while you are using the phone. If you do not want this tone to disturb your conversation, you can set it to OFF. -
Page 19: Local Area Code
CID record is received. Call records matching any of the set regional area codes are displayed as 10 digits. NOTE: If the CID telephone number does not display correctly, you may not be able to dial back the number from the Caller ID menu. -
Page 20: Hour Format
Programming the Telephone Manually Setting the Time and Date The time and date is automatically set when you receive the first CID call. To manually reset the time and date, follow the steps below. 1. Press the MENU button while in standby mode. -
Page 21: Restoring The Default Settings
- If you have new messages, the unit answers after the 3rd ring. - If you have no new messages, the unit answers after the 5th ring. - You can hang up after the 3rd or 4th ring and save the pay telephone or long distance charge. -
Page 22: Message Length
Programming the Answering System Message Length This sets the maximum recording time for the caller to leave a message when the answer- ing function is on. 1. Press the MENU button while in standby mode. 2. Use the VOL (+ or -) buttons to scroll up or down to ANSWERING SYSTEM. 3. -
Page 23: Remote Password
6. Use the VOL (+ or -) buttons to scroll up or down to choose ON or OFF. The default is ON. 7. Press the SEL/SAVE button to save. Remote Password To set the remote access password; 1. Press the MENU button while in standby mode. 2. -
Page 24: Programming The Auto Attendant
Programming the Auto Attendant Programming the Auto Attendant Auto Attendant will pick up and redirect incoming calls to other extensions in the system per the caller’s input. After you have finished programming this feature, press the AT- TENDANT button on the base to activate. The button will light when Auto Attendant is activated. -
Page 25: Ttendant
6. Use the VOL (+ or -) buttons to scroll up or down to select the hour. AM or PM will be set accordingly with the selected hour. 7. Press the SEL/SAVE button to save, and the curser moves to the minutes field. 8. -
Page 26: Set Valid Id
Your phone provides the convenience of accessing four separate telephone lines, each ob- tained from the telephone company and each having its own phone number. This is gener- ally applicable to small offices. It provides for 16 telephones (or stations) to share multiple... -
Page 27: Aking C Alls With The H Andset
Making Calls with the Handset 1. Pick up the handset and the phone automatically selects the priority line. If the priority line is occupied, it selects an open line. Pick up the handset and press a LINE button to select a line. 2. -
Page 28: Pre-Dialing
1. With the phone idle and the handset on the cradle, manually enter the telephone num- ber. The telephone number shows in the display. 2. Press the DIAL or SPEAKER button, or lift the handset to take a line, and the telephone number is automatically dialed. -
Page 29: Do Not Disturb
Do Not Disturb This feature is set at individual telephones to disable (silence) an incoming ring signal, intercom ring, or page. When there is an incoming call or an intercom call, the status indi- cators function as normal but the phone will not ring. 1. -
Page 30: Reviewing The Redial Numbers
Basic Operation 2. Press the REDIAL/FORMAT button NOTE: The redial function will not operate if the number to be redialed contains more than 32 digits. If the number is longer than that, you will hear an error tone. Reviewing the Redial Numbers Your phone records up to six previously dialed phone numbers. -
Page 31: Privacy
This feature allows you to have a 3-way conversation using any combination of 2 lines. To connect and conference: 1. To make a call, press the line you want and dial the telephone number. If you already have someone on the line, skip to step 2. -
Page 32: Intercom Calls
Intercom Calls Intercom Calls One-Touch Intercom NOTE: If the INTERCOM indicator is turned on (solid red), the intercom is in use. You must wait until the indicator turns off before making an intercom call. 1. Press the INTERCOM/MEMORY LOG button (1-16) for the station you want to intercom with. -
Page 33: Intercom Conference Calls
4. Press the CONFERENCE button. 5. Speak to both parties. NOTE: If you have more than one party on hold (telephone line or intercom), you must select the line for the party you want to conference with. To disconnect one party: Press the line or intercom button for the person you want to continue speaking with, and the other party is automatically disconnected. -
Page 34: Aller Id
Saving a CID Record to the Intercom/Memory Log or to Phone Book Memory 1.While a name and telephone number shows in the display, if you need to edit the information, press the SEL/SAVE button and follow the steps for Storing a Name and Number in Memory. -
Page 35: Deleting A Cid Record
10-digits: 3-digit area code +7-digit telephone number (i.e.425-555-5555) 11-digits: long distance code 1 +3-digit area code +7-digit telephone number (i.e. 1-425-555-5555) 4. To dial the displayed number, select a line or press DIAL again. If You Did Not Program Your Local Area Code 1. -
Page 36: All Aiting Aller Id
NOTE: To cancel the storing procedure at any time, press EXIT. 1. Press the STORE button. ENTER NUMBER is displayed. 2. Use the touch tone pad on your telephone to enter the telephone number you want to store. The numbers you enter show in the display. -
Page 37: R Eviewing The I Ntercom /M
NOTE: If there is a record stored in selected memory location “OVERWRITE?” shows in the display. Press STORE to confirm overwrite or press the EXIT button, then select a new location. 7. Repeat steps 1-6 for any additional names and numbers you want to store, up to 94, in phone book memory. -
Page 38: Storing A Pause In Memory
Press the #PAUSE button twice to insert a pause in the dialing sequence of a stored telephone number when a pause is needed (for example, when you must dial a 9 to get an outside line or when you must enter codes to access your bank’s information line). -
Page 39: Ll M Emories
This process allows you to dial a succession of stored numbers from separate memory locations. This is useful when you must dial several sequences of numbers, such as with frequent calls via a telephone company long distance provider. For example... -
Page 40: Answering System
Answering System Operation Answering System You can set one or more additional phones to act as an Answering System (up to 16 units in the system), each Answering System can pick up only one line at a time. To prevent several Answering System units picking up the same call, you should assign different pickup delay times for each Answering System unit. -
Page 41: Ecording Ncoming Essages Onitoring Ncoming Alls
Recording Incoming Messages The unit will answer incoming calls or routed calls after X rings (pickup delay set in MENU) and play the outgoing greeting. After hearing the greeting followed by a long beep, the caller can leave a message. The message counter shows new number of messages. If there is a new message recorded in the unit, the “NEW MESSAGE”... -
Page 42: Message Playback
Answering System Operation Message Playback In idle mode, press the PLAY button once. The unit starts to playback the messages. If the unit has new messages, only the new messages will be played, otherwise all messages will be played. Unit will play messages to the end, then return to standby mode. During each message playback, you can press CID button to skip the current message OR press DIR button to replay the message playing. -
Page 43: Toll Saver Operation
Press 1 to review. Press 0 while playing a message to erase. Press 4 to turn on and off. Press 6 to play greeting. Press 9 to record a greeting, press 9 again to stop taking message. Press 7 to review menu again. 4. -
Page 44: Auto Attendant
Auto Attendant Operation Auto Attendant You can set this phone to function as the Auto-Attendant. A phone designated as an Auto- Attendant will pick up and redirect incoming calls to other extensions in the system. Each Auto-Attendant can pick up only one line at a time, so you may wish to have more than one Auto-Attendant within your system. -
Page 45: Playback And Erasing Auto Attendant Greetings
Auxiliary Greeting is played when an outside caller presses the “0” key twice after hearing the Day or Night message. It is supposed to be recorded by you to tell the caller about the extension number list. The Default Auxiliary Greeting is “Please enter your party’s exten- sion.”... -
Page 46: Using Multiple Auto Attendants
Auto Attendant Operation 9. To erase the recorded greeting, press DELETE button during greeting playback. Press DELETE again to confirm the deletion. The default greeting will play back once after deletion. NOTE: The default greeting cannot be deleted. 10. To stop playback, press EXIT. Using Multiple Auto Attendants An Auto Attendant is in use and cannot answer the incoming call when someone at that extension is:... -
Page 47: Operation By Battery
No dial tone • Check or repeat installation steps: • Make sure the telephone line cords are connected to the phone and the wall jack. Make sure the line cords are not damaged. • Make sure the hook switch pops up when the handset is lifted. -
Page 48: General Product Care
See “Changing the Phone ID (Station Address)”. General Product Care To keep your telephone working and looking good, follow these guidelines: • Avoid putting the phone near heating appliances and devices that generate electrical noise (for example, motors or fluorescent lamps). -
Page 49: Ervice
Warranty Assistance If trouble is experienced with this equipment, for warranty information, please contact customer service at 1-800-448-0329. If the equipment is causing harm to the telephone network, the telephone company may require that you disconnect the equipment until the problem is resolved. -
Page 50: Limited Warranty
Warranty Information Limited Warranty What your warranty covers: • Defects in materials or workmanship. For how long after your purchase: • Two years, from date of purchase. (The warranty period for rental units begins with the first rental or 45 days from date of shipment to the rental firm, whichever comes first.) What we will do: •... - Page 51 Product Registration: • Please complete and mail the Product Registration Card packed with your unit. It will make it easier to contact you should it ever be necessary. The return of the card is not required for warranty coverage. Limitation of Warranty: •...
-
Page 52: Ndex
Index Accessing the Answering System from Another Location Accessory Information 49 Answering an Intercom Call Answering Calls Answering System 13, 40 Auto Attendant Auto Attendant Auto Attendant Pickup Delay Auto Attendant Sequence for Callers Base Layout Basic Operation Call Alert Tone Call Screening Call Waiting Caller ID 36 Caller ID... -
Page 53: Reviewing Phone Book Memory
Playback and Erasing Auto Attendant Greetings Pre-dialing 28 Priority Line Privacy Programming the Answering System Programming the Auto Attendant 24 Programming the Telephone Providing Privacy Receiving a Transferred Call from Another Sta- tion 30 Receiving and Storing CID Records Recording a Greeting 40... - Page 54 Visit the RCA web site at www.rca.com Please do not send any products to the Indianapolis address listed in this manual or on the carton. This will only add delays in service for your product. Thomson Inc. 101 West 103rd Street Indianapolis, IN 46290-1102 ©...