
Related Manuals for RCA 25424RE1


Summary of Contents for RCA 25424RE1
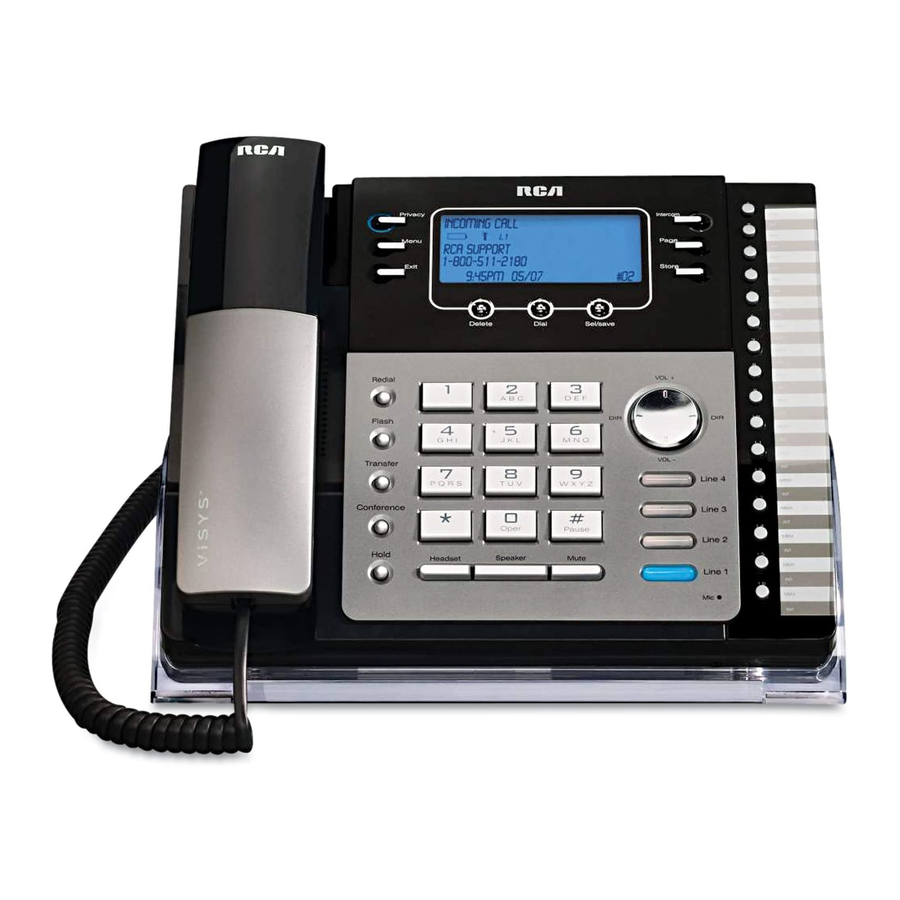
- Page 1 4-Line Intercom Speakerphone User’s Guide Quick Guide on Pgs. 7-14 Please read this manual before operating product for the first time. Model 25423/24...
-
Page 2: E Quipment A Pproval I Nformation
The REN is useful in determining the number of devices you may connect to your telephone line and still have all of these devices ring when your telephone number is called. In most (but not all) areas, the sum of the RENs of all devices connected to one line should not exceed 5. -
Page 3: Icensing
2 Rights of the Telephone Company Should your equipment cause trouble on your line which may harm the telephone network, the telephone company shall, where practicable, notify you that temporary discontinuance of service may be required. Where prior notice is not practicable and the circumstances warrant such action, the telephone company may temporarily discontinue service immediately. -
Page 4: I Nformation E Xposure
Important Information Interference Information This device complies with Part 15 of the FCC Rules. Operation is subject to the following two conditions: (1) This device may not cause harmful interference; and (2) This device must accept any interference received, including interference that may cause undesired operation. -
Page 5: Table Of Contents
quipmEnt pprovAl nformAtion ... 3 icEnsing ... 3 EAring ompAtibility ... 4 ntErfErEncE nformAtion fcc rf r AdiAtion xposurE ... 7 ntroduction ... 8 Arts HEcklist ElEpHonE EquirEmEnts ... 9 Ayout mportAnt nstAllAtion nformAtion mportAnt nstAllAtion uidElinEs ... 11 nstAlling tHE HonE ...13 ...13... - Page 6 Table of Contents eViewing hone ..32 emoRy eViewing nteRcom )...32 memoRy Location diting umBeR iRectoRy emoRy diting umBeR nteRcom emoRy )..33 emoRy ocation toRing umBeR toRing auSe emoRy iaLing toRed umBeR ...34 emoRy eLete LeaR ...34 LeaR emoRieS .
-
Page 7: Introduction
Your Four-Line Speakerphone is a full-featured phone ideally suited for home-office use. It is designed to receive calls on up to four incoming telephone lines and to serve up to 16 station users. Your phone features 16 memory locations, 94 phone book memories, hold, conference call, intercom, call transfer, Caller ID display, and speakerphone capabilities. -
Page 8: Arts C Hecklist
Make sure your package includes the following items: Base Telephone Jack Requirements To use this phone, you will need an RJ11C (for a single line) or a RJ14C (for two lines) type modular phone jack, which might look like the one pictured here, installed in your home or office. -
Page 9: Base Layout
Base Layout Privacy (button) Menu (button) Exit (button) Redial/Format (button) Flash (button) Transfer (button) Conference (button) Hold (button) (button) Headset (button) New Message (indicator) only applicable for Model 25424 Dial (button) Delete (button) Sel/Save (button) Speaker #Pause (button) (button) Mute (button) Connections &... -
Page 10: Important Installation Information
Important Installation Information • Never install telephone wiring during a lightning storm. • Never install telephone jacks in wet locations unless the jack is specifically designed for wet locations. • Never touch non-insulated telephone wires or terminals, unless the telephone line is disconnected from the network. -
Page 11: Installing The Phone
As a precaution, you may want to write down any stored information you do not want erased. IMPORTANT: If you are not going to use the telephone for more than 30 days, remove the batteries because they can leak and damage the unit. - Page 12 NOTE: To use four lines, you must have four telephone lines with unique telephone numbers. If you only have one telephone line, this phone will still operate, but only as a single line telephone.
-
Page 13: Ata P Ort
• To set your own Phone ID, or change your phone ID, follow the steps in the Phone ID section. You may connect up to 16 RCA 25423, 25424 and/or 25425 phones to the system at one time. Features like intercom, page and call transfer may be used among the units, but Line 1 must be common for all 25423, 25424, or 25425 units for these features to work properly. -
Page 14: Other System Phones
Programming the Telephone Other System Phones 1. Press Line 1. 2. Look at all the other stations. If they all indicate line 1 is being used, the connection is correct. 1. Press the Intercom button. The display shows INTERCOM and ENTER CALLING PHONE ID. -
Page 15: S Peakerphone ,.H Andset ,. And .H
NOTE: On Model 25423 you cannot select CID ON/OFF. 7. Press the Sel/Save button to save. The cursor automatically moves to Line 2. 8. Repeat steps 6 and 7 for each telephone line. After you select the ringer tone for Line 4, press the Exit button. -
Page 16: Delay Ring
Programming the Telephone Delay Ring Use this setting to delay the Central Office ring. 1. Press the Menu button while in standby mode. 2. Use the Vol (+ or -) buttons to scroll up or down to SET PHONE OPTIONS. -
Page 17: Phone Name
4. Use the Vol (+ or -) buttons to scroll up or down to INTERCOM AUTO ANS. 5. Press the Sel/Save button. 6. Use the Vol (+ or -) buttons to scroll up or down to choose YES or NO. 7. Press the Sel/Save button to save. Programming the Telephone... -
Page 18: Lash Ime
Call Alert Tone Turn on the Call Alert to hear a tone for incoming calls while you are on the telephone. This function notifies you that there is a incoming call while you are using the phone. If you do not want this tone to disturb your conversation, you can set it to OFF. -
Page 19: Display Contrast
CID record is received. Call records matching any of the set regional area codes are displayed as 10 digits. NOTE: If the CID telephone number does not display correctly, you may not be able to dial back the number from the Caller ID menu. -
Page 20: The .T Ime . And .D Ate
Programming the Telephone 1. Press the Menu button while in standby mode. 2. Use the Vol (+ or -) buttons to scroll up or down to SET AREA CODE. 3. Press the Sel/Save button. 4. Use the Vol (+ or -) buttons to scroll up or down to REGIONAL AREA CODES. -
Page 21: Estoring The Efault Ettings
Your phone provides the convenience of accessing four separate telephone lines, each obtained from the telephone company and each having its own phone number. This is generally applicable to small offices. It provides for 16 telephones (or stations) to share multiple lines. -
Page 22: Making Calls With The Speakerphone
Pre-dialing 1. With the phone idle and the handset on the cradle, manually enter the telephone number. The telephone number shows in the display. 2. Press the Dial or Speaker button, or lift the handset to take a line, and the... -
Page 23: S Witching .B Etween
Answering Calls If you receive a call on the priority line, 1. Pick up the handset (handset mode), OR 2. Press the Speaker button (speakerphone mode), OR 3. Press the Headset button (headset mode). 4. When finished, hang up the handset, or press the Speaker button or press the Headset button. -
Page 24: Do Not Disturb
Basic Operation Do Not Disturb This feature is set at individual telephones to disable (silence) an incoming ring signal, intercom ring, or page. When there is an incoming call or an intercom call, the status indicators function as normal but the phone will not ring. 1. -
Page 25: Redial
Redial 1. Pick up the handset (handset mode), or press the Speaker button (speakerphone mode), or press the Headset button (headset mode) and the priority line is automatically selected, Press a line button to select other line. 2. Press the Redial/Format button NOTE: The redial function will not operate if the number to be redialed contains more than 32 digits. -
Page 26: S Tation
This feature allows you to have a 3-way conversation using any combination of 2 lines. To connect and conference 1. To make a call, press the line you want and dial the telephone number. If you already have someone on the line, skip to step 2. -
Page 27: Intercom Calls
3. Press another line button and dial the telephone number of the party you want to conference with. 4. Press the Conference button. 5. Speak to both parties. NOTE: If you have more than one line on hold, and you want to have a conference call, you must first select the line on which you want to conference. -
Page 28: Ntercom .C All
4. Press the Conference button. 5. Speak to both parties. NOTE: If you have more than one party on hold (telephone line or intercom), you must select the line for the party you want to conference with. To disconnect one party: Press the line or intercom button for the person you want to continue speaking with, and the other party is automatically disconnected. -
Page 29: P Aging .A Ll .S Tations C Aller Id
Paging All Stations 1. Lift the handset. 2. Press the Page button and listen for the beep. The other stations not in use automatically activate their speakerphones and receive your page. 3. Speak into the handset. You have 30 seconds to page in this mode. After 30 seconds, the page is cancelled. -
Page 30: Ecords
Reviewing CID Records Saving a CID Record to the Intercom/Memory Log or to Phone Book Memory 1. While a name and telephone number shows in the display, if you need to edit the information, press the Sel/Save button and follow the steps for Storing a Name and Number in Memory. -
Page 31: Ode
NOTE: To cancel the storing procedure at any time, press Exit. 1. Press the Store button. ENTER NUMBER is displayed. 2. Use the touch tone pad on your telephone to enter the telephone number you want to store. The numbers you enter show in the display. -
Page 32: R Eviewing .P Hone .B Ook
Memory 4. Use the touch-tone pad to enter a name (up to 21 characters). More than one letter is stored in each of the number keys. For example, to enter Bill Smith, press the 2 key twice for the letter B. Press the 4 key 3 times for the letter I. Press the 5 key 3 times for the letter L. -
Page 33: E Diting . A .N Ame . Or .N Umber .S Tored B Ook .(D Irectory ).M Emory
Press the #Pause button twice to insert a pause in the dialing sequence of a stored telephone number when a pause is needed (for example, when you must dial a 9 to get an outside line or when you must enter codes to access your bank’s information line). -
Page 34: Memory Delete/Clear
Memory 2. Use the Vol (+ or -) buttons to scroll up or down through the phone book memories, or use the touch tone pad to enter the corresponding letters for the memory you want to review. For example, press the 5 key to display phone book memories that start with the letter J. -
Page 35: Chain Dialing
This process allows you to dial a succession of stored numbers from separate memory locations. This is useful when you must dial several sequences of numbers, such as with frequent calls via a telephone company long distance provider. For example... -
Page 36: Troubleshooting Guide
No dial tone • Check or repeat installation steps: • Make sure the telephone line cords are connected to the phone and the wall jack. Make sure the line cords are not damaged. • Make sure the hook switch pops up when the handset is lifted. -
Page 37: General Product Care
See “Changing the Phone ID (Station Address)”. General Product Care To keep your telephone working and looking good, follow these guidelines: • Avoid putting the phone near heating appliances and devices that generate electrical noise (for example, motors or fluorescent lamps). -
Page 38: Warranty Assistance
Warranty Assistance If trouble is experienced with this equipment, for warranty information, please contact customer service at 1-800-448-0329. If the equipment is causing harm to the telephone network, the telephone company may require that you disconnect the equipment until the problem is resolved. -
Page 39: Accessory Information
Accessory Information Accessory Information AC power adaptor 5-2777 To place order, have your Visa, MasterCard, or Discover Card ready and call toll-free 1-800-338-0376. A shipping and handling fee will be charged upon ordering. We are required by law to collect appropriate sales tax for each individual state, country, and locality to which the merchandise is being sent. -
Page 40: Limited Warranty
Warranty Limited Warranty What your warranty covers: • Defects in materials or workmanship. For how long after your purchase: • Two years, from date of purchase. (The warranty period for rental units begins with the first rental or 45 days from date of shipment to the rental firm, whichever comes first.) What we will do: •... - Page 41 Product Registration: • Please complete and mail the Product Registration Card packed with your unit. It will make it easier to contact you should it ever be necessary. The return of the card is not required for warranty coverage. Limitation of Warranty: •...
-
Page 42: Ndex
Index Accessory Information Answering an Intercom Call Answering Calls Base Layout Basic Operation Call Alert Tone Call Waiting Caller ID Caller ID Chain Dialing Clear All Memories Conference Calls Cordless Phone Option Data Port Delay Ring Deleting a CID Record Deleting All Call Records Dialing a Stored Number Dialing Back... - Page 43 Parts Checklist Phone ID Phone Name Placing a Call on Hold Pre-dialing Priority Line Privacy Programming the Telephone Providing Privacy Receiving a Transferred Call from Another Station Receiving and Storing CID Records 29 Redial Regional Area Codes Releasing a Call from Hold...
- Page 44 Visit the RCA web site at www.rca.com Please do not send any products to the Indianapolis address listed in this manual or on the carton. This will only add delays in service for your product. Thomson Inc. 101 West 103rd Street Indianapolis, IN 46290-1102 ©...