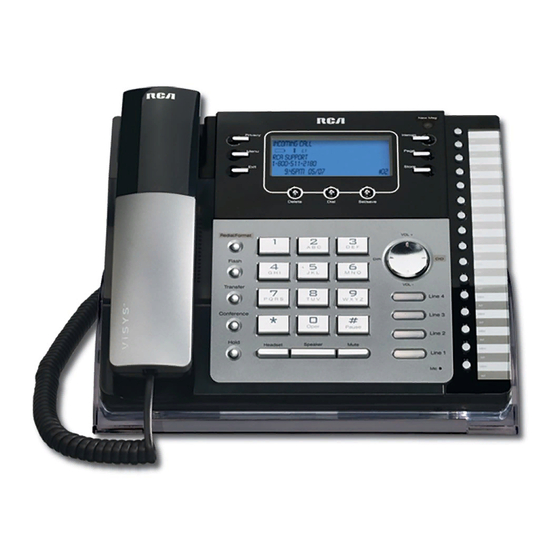
RCA 25423 User Manual
4-line intercom speakerphone
Hide thumbs
Also See for 25423:
- User manual (88 pages) ,
- Quick start manual (6 pages) ,
- User manual (44 pages)

Related Manuals for RCA 25423


Summary of Contents for RCA 25423
- Page 1 4-Line Intercom Speakerphone User’s Guide Quick Guide on Pgs. 6-13 Please read this manual before operating product for the first time. Model 25423/24...
-
Page 2: I Nterference I Nformation
Important Information Important Information NOTICE: This product meets the applicable Industry Canada technical specifications. Operation is subject to the following two conditions: (1) This device may not cause inter- ference, and (2) This device must accept any interference, including interference that may cause undesired operation of the device. -
Page 3: Telephone Network Information
Important Information Telephone Network Information Should your equipment cause trouble on your line which may harm the telephone network, the telephone company, where practicable, may notify you that temporary discontinuance of service may be required. Where prior notice is not practicable and the circumstances warrant such action, the telephone company may temporarily discontinue service immedi- ately. -
Page 4: Table Of Contents
Table of Contents ..........2 ................22 mportant nformatIon .......... 2 ............23 nterference nformatIon iStuRB ....... 3 ................23 elephone etwork nformatIon ren n ............3 .........23 umber Lacing fcc rf r ..... 3 ........23 adIatIon xposure tatement... - Page 5 Table of Contents ........32 toRing auSe emoRy ........32 iaLing toRed umBeR ..........33 emoRy eLete LeaR ..........33 LeaR emoRieS ............34 hain iaLing ..........34 Isplay essages ..........34 peratIon attery ........35 peratIon wIthout ower ..........35 ordless hone ptIon ...........35 roubleshootIng uIde ...........37 eneral roduct...
-
Page 6: Important Information
Number Caller ID Service to know who is calling when the phone rings and Call Waiting Caller ID Service to know who is calling while you are on the phone. NOTE: Features and options pertaining to Caller ID do not apply to Model 25423. -
Page 7: Parts Checklist
VERY IMPORTANT: In order to achieve full system operation (i.e. Wall plate intercom, page, etc.), Line 1 must be connected and must be Modular common to all phones connected to the system. Only other 25423, telephone line 25424, 25425, 25413, 25414, 25415, 25403 and 25404 models are jack compatible for full system operation. -
Page 8: Ase L Ayout
Connections & Setup Base Layout New Message (indicator) only applicable for Model 25424 Privacy Dial (button) Intercom (button) Menu (button) Delete (button) (button) Sel/Save Memory 1-16 Exit (button) (buttons) (button) Page (button) Store Redial/Format (button) (button) Flash Volume pq (button) (buttons) Transfer CID (button) -
Page 9: Important Installation Information
Connections & Setup Important Installation Information • Never install telephone wiring during a lightning storm. • Never install telephone jacks in wet locations unless the jack is specifically designed for wet locations. • Never touch non-insulated telephone wires or terminals, unless the telephone line is disconnected from the network. -
Page 10: Installing The Phone
Connections & Setup Installing the Phone The phone may be connected to two 2-line (RJ14C) wall jacks or four single line (RJ11C) wall jacks to accomodate all four lines. IMPORTANT: Install batteries and connect the AC power supply to the base unit as outlined in steps 1 through 3 below prior to connecting the telephone line cords to insure for proper base station ID assignment. - Page 11 Connections & Setup 4. Connect the telephone line cords: If you have two dual line wall jacks installed in your home or office, plug one end of the straight telephone line cord tagged as “LINE 1+2” into the jack marked LINE 1 + 2 and one end of the other straight line cord into the other jack on the back of the base.
-
Page 12: Data Port
Features like intercom, page and call transfer may be used among the units, but Line 1 must be common for all 25423, 25424, or 25425 units for these features to work properly. You may choose to share or privatize lines 2, 3 and 4. -
Page 13: Other System Phones
Programming the Telephone Other System Phones 1. Press Line 1. 2. Look at all the other stations. If they all indicate line 1 is being used, the connection is correct. 1. Press the Intercom button. The display shows INTERCOM and ENTER CALLING PHONE ID. 2. -
Page 14: S Peakerphone ,.H Andset
CID records for the corresponding telephone line. OFF disables the function for the corresponding telephone.) Press the Sel/Save button. NOTE: On Model 25423 you cannot select CID ON/OFF. 7. Press the Sel/Save button to save. The cursor automatically moves to Line 2. -
Page 15: Delay Ring
Programming the Telephone Delay Ring Use this setting to delay the Central Office ring. 1. Press the Menu button while in standby mode. 2. Use the Vol (+ or -) buttons to scroll up or down to SET PHONE OPTIONS. 3. -
Page 16: Phone Name
Programming the Telephone Phone Name 1. Press the Menu button while in standby mode. 2. Use the Vol (+ or -) buttons to scroll up or down to SET PHONE OPTIONS. 3. Press the Sel/Save button. 4. Use the Vol (+ or -) buttons to scroll up or down to SET PHONE NAME. 5. -
Page 17: Flash Time
Programming the Telephone Flash Time 1. Press the Menu button while in standby mode. 2. Use the Vol (+ or -) buttons to scroll up or down to SET PHONE OPTIONS. 3. Press the Sel/Save button. 4. Use the Vol (+ or -) buttons to scroll up or down to SET FLASH TIME. 5. -
Page 18: Display Contrast
Programming the Telephone 7. Press the Sel/Save button to save. NOTE: Not applicable to Model 25423. Display Contrast Adjust the display contrast to one of four contrast levels. 1. Press the Menu button while in standby mode. 2. Use the Vol (+ or -) buttons to scroll up or down to SET LCD CONTRAST. -
Page 19: M Anually .S Etting . The .T Ime
7. Press the Sel/Save button to save. NOTE: If you make a mistake, press the Delete button to erase all digits. NOTE: Not applicable to Model 25423. Manually Setting the Time and Date The time and date is automatically set when you receive the first CID call. To manually reset the time and date, follow the steps below. -
Page 20: Hour Format
Basic Operation Hour Format You may set this phone to a 12 or 24-hour format. The default is 12-hour format. 1. Press the Menu button while in standby mode. 2. Use the Vol (+ or -) buttons to scroll up or down to SET TIME & DATE. 3. -
Page 21: Making Calls With The Speakerphone
Basic Operation Making Calls with the Speakerphone 1. Press the Speaker button and the phone automatically selects the priority line. If the priority line is occupied, it selects an open line. Press a Line button to select a line. 2. Wait for a dial tone then dial a phone number. 3. -
Page 22: H Eadset
Basic Operation Answering Calls If you receive a call on the priority line, 1. Pick up the handset (handset mode), OR 2. Press the Speaker button (speakerphone mode), OR 3. Press the Headset button (headset mode). 4. When finished, hang up the handset, or press the Speaker button or press the Headset button. -
Page 23: Do Not Disturb
Basic Operation Do Not Disturb This feature is set at individual telephones to disable (silence) an incoming ring signal, intercom ring, or page. When there is an incoming call or an intercom call, the status indicators function as normal but the phone will not ring. 1. -
Page 24: Redial
Basic Operation Redial 1. Pick up the handset (handset mode), or press the Speaker button (speakerphone mode), or press the Headset button (headset mode) and the priority line is automatically selected, Press a line button to select other line. 2. Press the Redial/Format button NOTE: The redial function will not operate if the number to be redialed contains more than 32 digits. -
Page 25: R Eceiving . A .T Ransferred .C All . From .A Nother S Tation
While in use, a line can be secured so that no one else can listen to the conversation. This feature only applies to 25423, 25424, 25425, 25413, 25414, 25415, 25403 and 25404 phones. However, other phone which are not compatible with these models can still access the line. -
Page 26: Intercom Calls
Intercom Calls 3. Press another line button and dial the telephone number of the party you want to conference with. 4. Press the Conference button. 5. Speak to both parties. NOTE: If you have more than one line on hold, and you want to have a conference call, you must first select the line on which you want to conference. -
Page 27: Answering An Intercom Call
Intercom Calls Answering an Intercom Call When you receive an Intercom call, the Intercom indicator flashes red, and the display shows the caller’s name and phone ID. NOTE: If you want to answer with the speakerphone, press the Intercom or Speaker button. If you want to answer by headset, press the Headset button (the headset must be connected). -
Page 28: Paging All Stations
NOTE: Paging can be done with optional headset. plug in headset, press Headset button, the press Page button. Caller ID Note: The Caller ID section of this user’s guide is not applicable to Model 25423. Summary Screen The summary screen shows the current time, current date, number of CID records to be re- viewed and total number of records saved to CID memory. -
Page 29: Reviewing Cid Records
Caller ID Reviewing CID Records • Press the CID button , and then use the Vol (+ or -) buttons to scroll through the call records. • When you scroll to the start/end of the list, START/END appears in the display. Saving a CID Record to the Intercom/Memory Log or to Phone Book Memory 1. -
Page 30: Call Waiting Caller Id
Memory 7-digits: 7-digit telephone number (i.e.555-5555) 10-digits: 3-digit area code +7-digit telephone number (i.e.425-555-5555) 11-digits: long distance code 1 +3-digit area code +7-digit telephone number (i.e. 1-425-555-5555) 4. To dial the displayed number, select a line or press Dial again. If You Did Not Program Your Local Area Code 1. -
Page 31: Reviewing Phone Book (Directory) Memory
Memory 4. Use the touch-tone pad to enter a name (up to 21 characters). More than one letter is stored in each of the number keys. For example, to enter Bill Smith, press the 2 key twice for the letter B. Press the 4 key 3 times for the letter I. Press the 5 key 3 times for the letter L. -
Page 32: Storing A Pause In Memory
Memory Editing a Name or Number Stored in Phone Book (Directory) Memory 1. Press the DIR button. 2. Use the Vol (+ or -) buttons to scroll up or down to the desired memory record. 3. Press the Sel/Save button and edit the content according to the steps in the Storing a Name and Number in Memory section. -
Page 33: Memory Delete/Clear
Memory 2. Use the Vol (+ or -) buttons to scroll up or down through the phone book memories, or use the touch tone pad to enter the corresponding letters for the memory you want to review. For example, press the 5 key to display phone book memories that start with the letter J. -
Page 34: Chain Dialing
Memory Chain Dialing This process allows you to dial a succession of stored numbers from separate memory locations. This is useful when you must dial several sequences of numbers, such as with frequent calls via a telephone company long distance provider. For example Memory location Local access number of long distance company... -
Page 35: Operation Without Power
It is possible to enhance your phone to a cordless feature with the additional purchase of the H5401 accessory handset and module. The H5401 is packaged with an RF module, when the module is properly inserted into the back of the 25423/24 base, the antenna icon on the display will illuminate. -
Page 36: Troubleshooting Guide
Troubleshooting Guide Memory dialing doesn’t work • Did you program the memory location keys correctly? • Did you follow proper dialing sequence? Battery icon is blank or shows only one bar • The 4 “AAA” batteries need replacing or are improperly installed or not installed at all. Intercom does not function correctly •... -
Page 37: General Product Care
Troubleshooting Guide General Product Care To keep your telephone working and looking good, follow these guidelines: • Avoid putting the phone near heating appliances and devices that generate electrical noise (for example, motors or fluorescent lamps). • DO NOT expose to direct sunlight or moisture. •... -
Page 38: Service
Service Service Thomson Digital Technologies Ltd., warrants to the purchaser or gift recipient that if any manufacturing defect becomes apparent in this product within 1 year from the original date of purchase, it will be replaced free of charge, including return transportation. This warranty does not include damage to the product resulting from accidents, misuse or leaking batteries. -
Page 39: Accessory Information
Accessory Information Accessory Information AC power adaptor 5-2777 To order, call the nearest distributor for your area; Ontario: (905) 624-8516 Manitoba: (204) 783-2088 British Columbia: (604) 438-8001 Quebec: (514) 352-9071 A shipping and handling fee will be charged upon ordering. It is required by law to collect appropriate sales tax for each individual state, country, and locality to which the merchandise is being sent. -
Page 40: Index
Index Accessory Information FCC RF Radiation Exposure Statement 3 Answering an Intercom Call Flash Answering Calls Flash Time Base Layout General Product Care Basic Operation Hearing Aid Compatibility Call Alert Tone Hold Call Waiting Caller ID Hour Format Caller ID Chain Dialing Clear All Memories If You Did Not Program Your Local... - Page 41 Index Regional Area Codes Releasing a Call from Hold Making Calls with the Handset REN Number Making Calls with the Optional Headset 21 Restoring the Default Settings Making Calls with the Speakerphone Reviewing CID Records Manually Setting the Time and Date Reviewing Phone Book (Directory) Memory Delete/Clear Memory...
- Page 42 Visit the RCA web site at www.rca.com Please do not send any products to the Indianapolis address listed in this manual or on the carton. This will only add delays in service for your product. Thomson Digital Technologies Ltd. © 2007 Thomson Digital Technologies Ltd.
- Page 43 Téléphone-Intercom à 4 Lignes avec Haut-Parleur Guide de l’utilisateur Guide de Démarrage Rapide á la Pages 6-13 Veuillez lire ce guide avant l’utilisation initiale de ce produit. Modéle 25423/24...
- Page 44 Renseignements Importants Renseignements Importants AVIS: Ce produit est conforme aux spécifications techniques applicables d’Industrie Canada. Avant d’installer cet appareil, l’utilisateur doit vérifier s’il est permis de le raccorder aux installations de la compagnie locale de télécommunications. L’installation doit de plus respecter les méthodes de raccordement approuvées.
-
Page 45: Information Sur Le Réseau Téléphonique
Renseignements Importants Information sur le Réseau Téléphonique Si cet appareil provoque des dérangements sur la ligne et, par conséquent, sur le réseau téléphonique, la compagnie de téléphone signalera, s’il y a lieu, qu’elle doit temporairement interrompre le service. Si elle est dans l’impossibilité de le faire et que les circonstances dictent une telle mesure, la compagnie de téléphone peut immédiatement interrompre le service pendant un certain temps. - Page 46 Table des Matières ......2 .........23 enseignements mpoRtants éPondrE aux PPEls L’ ....2 enseignements suR inteRféRence ommuTaTion nTrE lE arlEur ...3 .......23 nfoRmation suR Le éseau éLéphonique omBinE ET lE asquE D’ ....3 .............24 acteuR équivaLence De onneRie ourdinE ’ ..........24 ommunication De La suR L exposition...
- Page 47 Table des Matières d’ onsulTaTion du éPErToirE inTErPhonE ) ....33 mémoirE EmPlacEmEnT mémoirE d’ d’ odiFicaTion om ou uméro l’ émorisé dans annuairE éléPhoniquE ) ..........33 éPErToirE d’ odiFicaTion om ou uméro d’ émorisé dans lE éPErToirE inTErPhonE ) ....
- Page 48 Pour savoir qui appelle pendant que vous êtes au téléphone, vous devez être abonné au service d’afficheur d’appel en attente. REMARQUE: Les fonctions et options de l’identification de l’appelant ne sont pas disponibles sur le modèle 25423.
-
Page 49: Liste De Pièces
(c.-à-d. interphone, recherche, etc.), la Ligne 1 doit être raccordée et doit être commune à tous les postes raccordés au système. Seuls les Prise de ligne autres modèles RCA 25413 , 25414, 25415, ou GE 29487 ou 29488 sont téléphonique compatibles et peuvent procurer un plein rendement. Le raccordement modulaire de téléphones autres que RCA 25413, 25414, 25415, ou GE 29487 ou... - Page 50 Raccordements et Installation Présentation de la Base New Message Indicator (Indicador de messages nouveau) applicable seulement pour le model 25424 Privacy (bouton Dial (bouton confidentialité) Intercom (bouton composition) interphone) Menu Delete (bouton (bouton) effacer) Sel/Save (bouton sélection/ Memory 1-16 Exit (bouton enregistrement) (bouton mémoire) quitter)
- Page 51 Raccordements et Installation Information Importante sur L’installation • Ne jamais installer les câbles téléphoniques pendant un orage électrique. • Ne jamais installer de prises téléphoniques dans des endroits humides, à moins qu’elles soient spécialement conçue pour endroits humides. • Ne jamais toucher les fils ou bornes téléphoniques non isolés, à moins que la ligne téléphonique ait été...
-
Page 52: Installation Du Telephone
Raccordements et Installation Installation du Telephone Le téléphone peut être raccordé à deux prises murales de 2 lignes (RJ14C) ou quatre prises murales à ligne simple (RJ11C) pour accepter les quatre lignes. IMPORTANT : Afin de vous assurer que l’attribution de l’identification de la base soit faite correctement, installez les piles et branchez l’alimentation CA à... - Page 53 Raccordements et Installation 4. Branchez les cordons téléphoniques: Si vous disposez de deux prises murales à deux lignes dans votre bureau/maison, branchez une extrémité du fil électrique droit marqué “Line 1+2” dans la prise marquée Line 1 + 2 et l’autre extrémité du fil électrique droit dans l’autre prise à l’arrière de la base.
- Page 54 • Pour programmer ou changer votre propre code d’identité de téléphone, suivez les étapes indiquées dans la section Code d’identité du téléphone. Vous pouvez raccorder un maximum de 16 téléphone 25423, 25424 and/or 25425 au système. Des fonctions comme l’interphone, la recherche et le renvoi d’appel peuvent être utilisées entre les appareils, mais la Ligne 1 doit être commune à...
- Page 55 TRÈS IMPORTANT : Pour utiliser le système à son plein rendement (c.-à-d. interphone, recherche, etc.), la Ligne 1 doit être raccordée et doit être commune à tous les postes raccordés au système. Seuls les autres modèles 25423, 25424, 25425, 25413, 25414, 25415, 25403 and 25404 ont entièrement compatibles.
- Page 56 CID ON ou OFF. (ON permet à l’appareil de détecter et d’afficher les dossiers d’appelants de la ligne téléphonique correspondante. OFF désactive la fonction du téléphone correspondant. Appuyez sur le bouton Sel/Save. REMARQUE: Sur le modèle 25423, vous ne pouvez pas sélectionner CID ON/OFF.
-
Page 57: Ligne Prioritaire
Programmation du Téléphone 7. Appuyez sur le bouton Sel/Save pour sauvegarder. Le curseur passe automatiquement à la Ligne 2. 8. Répétez les étapes 6 et 7 pour chaque ligne téléphonique. Après avoir choisi la tonalité de sonnerie de la Ligne 4, appuyez sur le bouton Exit. REMARQUE : Les indicateurs de ligne clignotent pendant les appels reçus, même si la sonnerie est désactivée. - Page 58 Programmation du Téléphone ID de Téléphone 1. Appuyez sur le bouton Menu en mode attente. 2. Utilisez les touches Vol (+ ou -) pour défiler vers le haut ou vers le bas pour REGLER OPTIONS TELE. 3. Appuyez sur le bouton Sel/Save. 4.
-
Page 59: Autoréponse D'interphone
Programmation du Téléphone 7. Appuyez sur le bouton Sel/Save. REMARQUE : Le nom et l’ID du téléphone sont affichés quand le téléphone est inactif. Autoréponse D’interphone Pour un fonctionnement “mains libres”, cet appareil peut être programmé pour répondre à un appel par interphone en utilisant automatiquement le haut-parleur. CONSEIL : Vous pouvez aussi utiliser cette fonction pour surveiller une pièce. - Page 60 6. Utilisez les touches Vol (+ ou -) pour défiler vers le haut ou vers le bas pour OUI ou NON. Le réglage par défaut est OUI. 7. Appuyez sur le bouton Sel/Save pour sauvegarder. REMARQUE : (Ne s’applique pas au modèle 25423).
- Page 61 7. Appuyez sur le bouton Sel/Save pour sauvegarder. REMARQUE : En cas d’erreur, appuyez sur Delete pour effacer le chiffre erroné. REMARQUE : (Ne s’applique pas au modèle 25423). Indicatifs Régionaux Selon l’emplacement, vous devrez programmer jusqu’à six indicatifs régionaux. Le fait de régler des indicatifs régionaux aide le téléphone à...
- Page 62 7. Appuyez sur le bouton Sel/Save pour sauvegarder. REMARQUE : En cas d’erreur, appuyez sur le bouton Delete pour effacer le chiffre erroné. REMARQUE : (Ne s’applique pas au modèle 25423). Réglage Manuel de L’heure et de la Date L’heure et la date sont automatiquement réglées quand vous recevez le premier appel extérieur.
- Page 63 Programmation du Téléphone 12. Utilisez les touches Vol (+ ou -) pour défiler vers le haut ou vers le bas pour choisir la date. 13. Appuyez sur le bouton Sel/Save ; le curseur passe au champ de le jour. 14. Utilisez les touches Vol (+ ou -) pour défiler vers le haut ou vers le bas pour choisir le jour.
- Page 64 Fonctionnement de Base Fonctionnement de Base Ce téléphone pratique permet d’accéder à quatre lignes distinctes, chacune obtenue de la compagnie de téléphone et chacune ayant son propre numéro. Cet système convient généralement aux petits bureaux. Il permet à 16 téléphones (ou postes) de partager plusieurs lignes.
- Page 65 Fonctionnement de Base ATTENTION : Utilisez seulement le casque 5-2425 Thomson Inc. compatible avec cet appareil. REMARQUE : Si le casque n’est pas branché, (ou si pas complètement inséré le cric d’ecouteur), une tonalité d’erreur se fait entendre quand vous appuyez sur le bouton Headset et l’affichage montrera l’erreur pendant plusieurs secondes.
- Page 66 Fonctionnement de Base Sourdine Utilisez la fonction Mute pour converser en privé, hors ligne. L’interlocuteur ne peut vous entendre, mais vous pouvez l’entendre. 1. Appuyez sur le bouton Mute pour activer le sourdine. L’indicateur Mute s’allume. 2. Appuyez de nouveau sur Mute pour la couper. REMARQUE : La commutation du haut-parleur au combiné...
- Page 67 Fonctionnement de Base Flash Utilisez le bouton Flash pour activer les services d’appel personnalisés, comme l’appel en attente ou le renvoi d’appel, offerts par la compagnie de téléphone. Recomposition 1. Décrochez le combiné (mode combiné), ou appuyez sur le bouton Speaker (mode haut-parleur), ou appuyez sur le bouton Headset (mode casque) ;...
- Page 68 Confidentialité Une ligne utilisée peut être sécurisée de manière à ce que personne d’autre puisse écouter la conversation. Cette fonction ne s’applique qu’aux téléphones 25423, 25424, 25425, 25413, 25414, 25415, 25403 et 25404. D’autres téléphones qui ne sont pas compatibles avec ces modèles peuvent toutefois accéder à...
-
Page 69: Appels D'interphone
Appels d’Interphone 3. Appuyez sur le bouton d’une autre ligne et composez le numéro de téléphone de la personne avec laquelle vous désirez parler. 4. Appuyez sur le bouton Conference. 5. Parlez aux deux interlocuteurs. REMARQUE : Si plus ligne a été mise en garde, et que vous souhaitez effectuer un appel conférence, vous devez d’abord choisir la ligne sur laquelle vous désirez discuter. - Page 70 Appels d’Interphone Repondre a un Appel D’interphone Quand vous recevez un appel par interphone, l’indicateur INTERPHONE clignote en rouge et l’afficheur indique le nom de l’appelant et l’ID du poste. REMARQUE : Pour répondre avec le haut-parleur, appuyez sur le bouton Intercom ou Speaker.
-
Page 71: Afficheur De Ce Guide De L'utilisateur
Afficheur de ce Guide de l’Utilisateur REMARQUE : La rubrique sur l’identification de l’appelant de ce guide de l’utilisateur ne s’applique pas au modèle 25423. Appels Conference D’interphoneecran Sommaire L’écran sommaire indique l’heure actuelle, la date actuelle, le nombre de dossiers d’appelant à... - Page 72 Afficheur Consultation des Dossiers D’appelants • Appuyez sur le bouton CID puis sur les boutons Vol (+ ou -) parcourir les dossiers d’appelants. • Quand vous atteignez le début ou la fin de la liste, DEBUT/FIN apparaît dans l’afficheur. Sauvegarde d’un Dossier D’appelant dans le Répertoire D’interphone/mémoire ou la Mémoire de L’annuaire Téléphonique 1.
-
Page 73: Afficheur D'appel En Attente
Afficheur Si Vous avez Programmé Votre Indicatif Local 1. Appuyez sur le bouton CID puis sur les boutons Vol (+ ou -) afficher le numéro à composer. 2. Si vous voyez un numéro à 7 chiffres (comme 555-1234), l’appelant est dans votre code régional. - Page 74 Mémoire Répertoire-Mémoire et Mémoire D’annuaire Téléphonique (Répertoire) Vous pouvez mémoriser des données dans l’annuaire téléphonique (maximum de 94 mémoires) ou dans le répertoire d’interphone/mémoire (16 boutons placés à la droite du clavier de la base). L’annuaire téléphonique et chaque répertoire d’interphone/mémoire permettent de mémoriser un maximum de 21 caractères et 32 chiffres.
- Page 75 Mémoire Consultation de Mémoire D’annuaire Téléphonique (Répertoire) 1. Appuyez sur le bouton DIR. La première mémoire de l’annuaire téléphonique est affichée (les mémoires apparaissent en ordre alphabétique). 2. Utilisez les touches Vol (+ ou -) pour défiler vers le haut ou vers le bas pour parcourir les mémoires d’annuaire téléphonique, ou utilisez le clavier numérique du téléphone pour entrer les lettres correspondant à...
- Page 76 Mémoire Memorisation d’une Pause Utilisez le bouton #Pause pour insérer une pause dans la séquence de composition quand une pause est requise (par exemple, si vous devez faire le 9 pour obtenir une ligne extérieure ou entrer des codes pour accéder au service d’information de votre banque). Composition D’un Numéro Mémorisé...
-
Page 77: Effacer T Outes Les M Émoires M
Mémoire Effacer Toutes les Mémoires 1. Appuyez sur le bouton Menu en mode attente. 2. Utilisez les touches Vol (+ ou -) pour défiler vers le haut ou vers le bas pour REGLER OPTIONS TELE. 3. Appuyez sur le bouton Sel/Save. 4. -
Page 78: Mémoire
Vous pouvez hausser votre téléphone au fonctionnement sans fil en vous procurant le combiné supplémentaire et module H5401. Le H5401 est livré avec un module RF; lorsque le module est enfiché correctement à l’arrière de l’appareil 25423/24, l’icône d’une antenne s’allume sur l’affichage. -
Page 79: Guide De Dépannage
Guide de Dépannage Guide de Dépannage Aucun signal de manœuvre • Vérifiez ou répétez les étapes d’installation: Assurez-vous que les cordons téléphoniques sont raccordés au téléphone et à la prise murale. Assurez-vous que les cordons téléphoniques ne sont pas endommagés. •... -
Page 80: Ente
Service Aprés-Vente Le renvoi ne fonctionne pas correctement • Assurez-vous que les téléphones récepteurs (postes) sont raccordés à la même ligne. L’indicateur d’interphone alterne entre le rouge et le bleu • L’adresse de poste doit être réattribuée parce qu’un autre poste du système utilise la même adresse. -
Page 81: Information Pour Accessoires
Autre Information Les dispositions de cette garantie s’ajoutent (sans les modifier ni les restreindre) aux garanties légales et autres droits ou recours prévus par toute législation applicable; pour autant que ces dispositions tendront à rejeter, exclure ou limiter toute garantie légale ou tout autre droit et recours, elles seront considérées comme modifiées dans la mesure nécessaire pour s’y conformer. - Page 82 Index Fonctionnement sans Alimentation 36 Format de L’heure Afficheur D’appel en Attente Afficheur de ce Guide de l’Utilisateur Alimentation par Pile Appels Conference Garde Appels Conférence D’interphone Guide de Dépannage Appels Conference D’interphoneecran Sommaire Appels d’Interphone ID de Téléphone Assurer la Confidentialité Importantes Lignes Directrices sur Autoréponse D’interphone L’installation...
- Page 83 Index Ne pas Déranger Sauvegarde d’un Dossier D’appelant dans Nom de Téléphone le Répertoire D’interphone/mémoire ou la Numéro Inconnu/Bloqué Mémoire de L’annuaire Téléphonique 30 Service Après-Vente Si Vous avez Programmé Votre Indicatif Local Option de Téléphone sans Fil Si Vous N’avez pas Programmé Votre Indicatif Local Soins et Entretien Sonnerie Retardée...
- Page 84 Visitez le site Web RCA à www.rca.com Veuillez ne pas envoyer de produits à l’adresse d’Indianapolis figurant dans ce guide ou sur la boîte. Ce faisant, vous retarderiez la réparation de ce produit. Thomson Digital Technologies Ltd. © 2007 Thomson Digital Technologies Ltd.