Table of Contents
Advertisement
Advertisement
Table of Contents

Related Manuals for RCA VC125HF


Summary of Contents for RCA VC125HF
- Page 1 DVD/VCR User’s Guide Changing Entertainment. Again.
-
Page 2: Important Information
Trade Name: RCA Model: VC125HF Equipment Classification: TV Interface Device Responsible Party: Thomson multimedia, Inc. -
Page 3: Key Features Overview
Key Features Overview Your DVD/VCR is equipped with features that will add to your recording and viewing experience. The following information summarizes a few of these features. SET CLOCK MENU Auto Clock Set Daylight Savings Auto Time Zone Auto Clock Set Channel Auto ________________________ To Move... -
Page 4: Universal Remote
TVs with no additional steps. You may also be able to program the remote control to operate your TV even if it is not an RCA, GE, or Proscan. Requirements: Point the remote at the TV and press the POWER button to see if your TV can be operated. -
Page 5: Table Of Contents
Table of Contents Key Features Overview ... 1 Connections & Setup ... 5 Choosing Your Connection ... 7 Cables Needed to Connect Components to Your DVD/VCR ... 7 TV + DVD/VCR ... 8 TV + DVD/VCR + Dolby Digital or DTS Receiver ... 10 TV + DVD/VCR + Satellite Receiver ... - Page 6 Table of Contents Playing Videotapes (Cont.) Repeating Sections ... 40 Marking and Finding Sections ... 40 Using the Counter ... 42 Searching for a Specific Time ... 42 Resetting the Counter ... 42 Returning the Counter to 0:00:00 ... 42 Adjusting Settings ...
-
Page 7: Connections & Setup
Chapter 1 Connections & Setup Chapter Overview: • Things to Consider Before Connecting Components • Choosing Your Connection • Turning on the TV and DVD/VCR • Completing the Auto Setup • Navigating On-Screen Menus • Types of Discs Your DVD/VCR will Play •... -
Page 8: Protect Components From Overheating
Connections & Setup Things to Consider Before Connecting Components Protect Components From Power Surges • Connect all components before plugging any power cords into the wall outlet. • Always turn off the TV and other components before you connect or disconnect any cables. Position Cables to Avoid Audio Hum or Interference •... -
Page 9: Choosing Your Connection
Choosing Your Connection There are several ways to hook up your VCR depending on the components connected. Please use the following chart to determine which connection is best for you and proceed to the appropriate page. Components Cables Needed to Connect Components to Your DVD/VCR The pictures below show the cables needed for the connections represented in this book. -
Page 10: Tv + Dvd/Vcr
Connections & Setup CABLE OR OFF-AIR SIGNAL Need Some Help? If you prefer, we can provide you with the name of an Authorized Service Representative who will visit your home for a fee to install your electronic entertainment system and to instruct you in its operation. - Page 11 Important! If you connect a DVD- only viewing connection (COMPONENT VIDEO OR S-VIDEO), you must also connect audio cables to the TV (either DIGITAL AUDIO, standard AUDIO, or coaxial cable) in order to hear DVD playback. COMPONENT VIDEO and S–Video cables only carry picture information, not sound.
-
Page 12: Tv + Dvd/Vcr + Dolby Digital Or Dts Receiver
Connections & Setup CABLE OR OFF-AIR SIGNAL Need Some Help? If you prefer, we can provide you with the name of an Authorized Service Representative who will visit your home for a fee to install your electronic entertainment system and to instruct you in its operation. - Page 13 About Dolby Digital ® and DTS ® Both Dolby Digital ® and DTS ® are audio formats used to record 5.1-channel audio signals onto the digital track of film (while the film is being made). Both of these formats provide up to six separate channels: left, right, center, left rear, right rear, and common subwoofer.
-
Page 14: Tv + Dvd/Vcr + Satellite Receiver
Connections & Setup CABLE OR OFF-AIR SIGNAL Need Some Help? If you prefer, we can provide you with the name of an Authorized Service Representative who will visit your home for a fee to install your electronic entertainment system and to instruct you in its operation. - Page 15 Important! If you connect an S-Video cable or component video cables (Step 5), you must also connect a video cable (Step 4). If you do not connect either a coaxial cable or A/V cables, you will not be able to properly view videotapes.
-
Page 16: Turning On The Tv And Dvd/Vcr
Turn on the TV and press the POWER button on the remote to turn the DVD/ VCR on. Note: If you have an RCA, GE, or Proscan TV, your DVD/VCR’s remote may be able to operate it without being programmed. Press the POWER button on the remote and both devices should turn on. -
Page 17: Completing The Auto Setup
Completing the Auto Setup The first time you turn on the DVD/VCR, or after an extended power outage, you will be able to set the on-screen menu language, you will be reminded to connect an antenna or cable if you have not already done so, and you will be able to acquire available channels and the current time. -
Page 18: Remote Control Buttons
AUTO Sets the VCR so it will automatically adjust the tracking. CH and Selects the next higher channel in the DVD/VCR’s memory. If your TV is GE, RCA, or Proscan, also controls your TV channels. CLEAR Clears menu options on certain screens. CLOCK/COUNTER When pressed repeatedly, cycles through the current time, the counter time, and time remaining on a videotape, if playing. -
Page 19: Programming The Remote
VCR deck is selected. VOL + and - Adjusts the volume level of the DVD/VCR. If your TV is GE, RCA, or Proscan, also controls your TV volume. ZOOM/MUTE During DVD playback or when paused, displays a small picture of a magnifying glass that specifies an area to be magnified. -
Page 20: Back Panel Jacks
Connections & Setup DVD & VCR Back Panel Jacks 1. RF OUT (TO TV) Use to connect an RF coaxial cable to the TV. 2. IN (FROM ANT.) Use to connect an antenna or cable feed to the DVD/VCR. 3. CH 3/4 SELECTOR Move this switch to the channel that does not carry a broadcast. This will be the channel that the TV must be tuned to in order to see the DVD/VCR’s picture (viewing channel). -
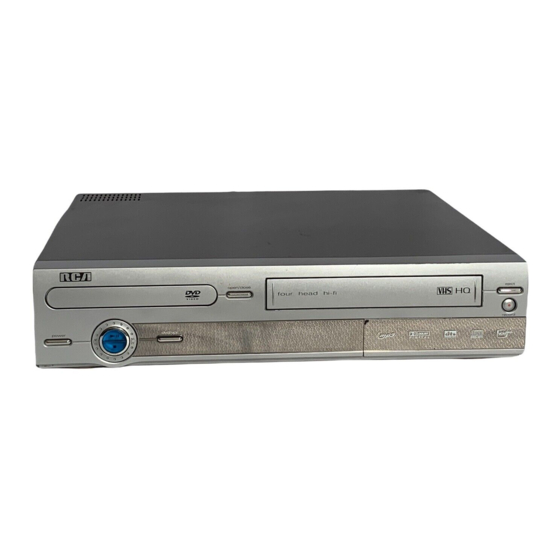
Page 21: Front Panel Buttons
Front Panel Buttons Note that front panel buttons are nonfunctional when Child Lock is on. 1. DVD deck Use to insert DVDs and CDs. 2. DVD Open/Close button Press to open and close the disc tray. 3. VCR deck Use to insert videotapes. 4. -
Page 22: Front Panel Display
Connections & Setup Front Panel Display The description below tells what each part of the front panel display mean when lit. 1. DVD icon Indicates the status of the DVD deck. The icon above signifies that the disc is moving. 2. -
Page 23: Playing Dvds
Chapter 2 Playing DVDs Chapter Overview: • Playing an MP3 Disc • DVD and CD Playback Options • Searching Through a Disc • Using the Counter • Zooming In and Out • Viewing a Different Angle • Using Subtitles • Marking Starting Points Changing Entertainment. -
Page 24: Before Playing A Disc
Playing DVDs Before Playing a Disc... Make sure that the disc is compatible with the DVD/VCR player. There are some discs that cannot be used with this player. Also, both the DVD player and discs are coded by region. These regional codes must match in order for the disc to play. -
Page 25: Accessing Disc Features
Accessing Disc Features Each disc is programmed with different features. To access a disc’s features: • Press the remote control’s disc menu button—The disc menu is part of each disc. The contents of each disc menu vary according to how the disc was composed and what features are included. -
Page 26: Pausing And Advancing One Frame At The Time
Playing DVDs POWER TRK- AUTO TRK+ ZOOM DISPLAY << -------SHUTTLE------>> MUTE CLOCK/ MODE COUNTER F.ADV REPEAT SKIP CLEAR button 3D SOUND A.DUB TV/VCR F.ADV 100+ TV VIEW PREV.CH INPUT ANGLE PLAY/PAUSE button Pausing and Advancing one Frame at the Time 1. -
Page 27: Working With Chapters
Working with Chapters Program content on a DVD can be divided into chapters. To find out if your DVD has chapters, you should access the disk’s menu, if available, by pressing DISC MENU on the remote while the disc is playing. The following sections describe what you can do with your DVD’s chapters. Skipping Chapters and Titles You can skip through a DVD or CD disc’s contents one chapter or track at a time by doing the following:... -
Page 28: Playing The Chapters In Random Order
Playing DVDs PLAYBACK MODE Random Play Programmed Play ________________________ To Move To Select Press GO BACK to Quit PROGRAMMED PLAY TITLE CHAP PROGRAM -- -- -- -- -- -- -- -- -- -- -- -- -- -- -- -- -- -- -- -- ________________________ =Move CLEAR=Change... -
Page 29: Zooming In And Out
Zooming In and Out You can zoom in at 2 or 4 times the normal magnification while watching a DVD. To do this: 1. During DVD playback, press the ZOOM button. A small picture of a magnifying glass will be displayed on the screen. -
Page 30: Repeating Specific Sections Of A Disc
Playing DVDs Repeat Enter to Set Chapter Title Mark Enter to Set - - - Mark Play or Clear 1 2 3 Repeating Specific Sections of a Disc You can repeat a section of a DVD or CD by first marking the starting point and the end point: 1. -
Page 31: Playing Videotapes
Chapter 3 Playing Videotapes Chapter Overview: • Pausing and Playing in Slow Motion • Forwarding and Rewinding • Recording • Adjusting the Tracking • Skipping Commercials • Repeating Sections • Marking and Finding Sections Changing Entertainment. Again. -
Page 32: Playing Tapes
Playing Videotapes Playing Tapes You can play S-VHS or VHS tapes in the DVD/VCR. To play a tape, turn on the TV and the DVD/ VCR (press ON•OFF on the player or the remote). Then follow the below steps. Safety Tab SETUP MENU Set Timer Recording Child Lock... -
Page 33: Forwarding And Rewinding
Pausing and Playing in Slow Motion You can pause a tape during playback. While a tape is paused, you can start forward slow motion playback. 1. Press PLAY/PAUSE once to pause playback. 2. Press FORWARD (>>) on the remote for forward slow motion playback. Press the button again to increase the speed. -
Page 34: Recording The Date And Time
Playing Videotapes Recording the Date and Time The date and time stamp allows you to overlay the date and time at the beginning of your recordings. VCR & CHANNEL SETUP VCR Plus Setup Channel Setup Date/Time Stamp Auto Play/Rewind Both Record Source Auto Panel Display... -
Page 35: Setting A Timer Recording
Setting a Timer Recording The timer recording feature lets you program up to 16 events at a time to record up to a year in advance. Once you have set a timer, a small picture of a clock appears on the front panel display. -
Page 36: Using The Vcr Plus+ System For Timer Recordings
Playing Videotapes Using the VCR Plus+ System for Timer Recordings You can use the VCR Plus+ system to simplify programming timer recordings if you have cable TV and don’t receive all channels through a cable box or if you receive your TV signal off-air. How to Set Up the VCR Plus+ System You will need to invest a little time to prepare the system. - Page 37 Cable TV Code Lists for the VCR Plus+ System Channel Numbers Refer to this table when you are setting up the VCR Plus+ system. It shows you the channel name and its corresponding number according to the national broadcasts. Use this table to help you complete the worksheet on the following page.
- Page 38 Playing Videotapes The VCR Plus+ System Worksheet Use this chart to record the channel number on which you receive particular channels. This will be useful when you set up the VCR Plus+ system. Broadcast or VCR Plus+ System Cable-TV Channel Number** Station Name ESPN Channel Number...
-
Page 39: Recording While Watching A Different Channel Or Dvd
To watch a different channel than the one you are recording: 1. Start the recording. 2. If your remote is programmed to control the TV, or your TV is RCA, GE, or Proscan, press the TV button on the remote to switch to your TV tuner. -
Page 40: Recording From An External Device
Playing Videotapes SETUP MENU Set Timer Recording Child Lock Set Clock DVD Setup VCR & Channel Setup Language/Langue/Idioma ________________________ To Move To Select GO BACK to Quit VCR & CHANNEL SETUP VCR Plus Setup Channel Setup Date/Time Stamp Auto Play/Rewind Both Record Source Auto... -
Page 41: Adding New Sound To A Videotape
Adding New Sound to a Videotape You can replace existing sound on a videotape with sound from: • A CD or DVD • A microphone connected to a sound system • A cassette player Note: Audio dubbing is applicable only to the mono audio track (normal audio). Do not perform an Audio Dub on a tape with mono sound or you will lose the old sound information. -
Page 42: Adjusting The Tracking
Playing Videotapes Adjusting the Tracking Tracking removes white lines that can appear during playback. Your VCR has an auto-tracking feature that automatically aligns the tracks with the playback heads on the VCR to remove the white lines. You can also set the tracking manually. To do this, during playback press the TRK- and TRK+ buttons on the remote to remove the white lines. - Page 43 INDEX MENU Index: -- SCAN: Press FF or REW SEARCH: 1-99 Then FF/REW GO BACK to Quit SEARCH MENU Index Search/Scan Blank Search Direct Time Search Return to 00:00:00 ________________________ To Move To Select GO BACK to Quit Chapter 3 Playing Videotapes To find a specific index mark (index search): 1.
-
Page 44: Using The Counter
Playing Videotapes Using the Counter Pressing the CLOCK/COUNTER button repeatedly cycles the front panel display through the current time, the current counter position, and the amount of time remaining on the tape in the VCR deck. Searching for a Specific Time You can locate a specific tape location in hours, minutes, and seconds if you know the counter time. -
Page 45: Adjusting Settings
Chapter 4 Adjusting Settings Chapter Overview: • Setting the Clock • Setting up Channels • Changing Languages • Setting Limits • Adjusting Audio Settings • Adjusting Video Settings • Controlling the Front Panel Display Light Changing Entertainment. Again. -
Page 46: Setting The Clock
Adjusting Settings Setting the Clock If you were unable to find a local station and set the clock using Auto Setup, you can set the date and time manually by following these steps: SET CLOCK MENU Auto Clock Set Daylight Savings Auto Time Zone Auto... -
Page 47: Creating And Working With A Channel List
VCR & CHANNEL SETUP VCR Plus Setup Channel Setup Date/Time Stamp Auto Play/Rewind Record Source Panel Display ________________________ To Move To Select GO BACK to Quit VCR & CHANNEL SETUP VCR Plus Setup Channel Setup Date/Time Stamp Auto Play/Rewind Record Source Panel Display ________________________ To Move... -
Page 48: Changing Languages
Adjusting Settings AUDIO LANGUAGE English Italiano Francais Nederlands Espanol Original Deutsch More... ________________________ To Move ENTER to Select SETUP MENU Set Timer Recording Child Lock Set Clock DVD Setup VCR & Channel Setup Language/Langue/Idioma ________________________ To Move To Select GO BACK to Quit LANGUAGE/AUDIO SETUP Audio [English]... -
Page 49: Changing Disc Menu Language
LANGUAGE/AUDIO SETUP Audio [English] Subtitle [Automatic] Disc Menu [English] Dynamic Compression Off Dolby D Decoder DTS Decoder ________________________ To Move To Select GO BACK to Go Back SETUP MENU Set Timer Recording Child Lock Set Clock DVD Setup VCR & Channel Setup Language/Langue/Idioma ________________________ To Move... -
Page 50: Setting Ratings
Adjusting Settings DVD SETUP TV Aspect Ratio 4:3 LB Language/Audio Setup Rating Control [None] Still Mode Auto Black Level High Alt Video Out ________________________ To Move To Select GO BACK to Go Back RATING CONTROL Require Password Changing Password Change Rating Level ________________________ To Move To Select... -
Page 51: Changing The Password
RATING CONTROL Enter Password ---- ________________________ Use 0 - 9 Keys GO BACK to Go Back Mono Pressing the AUDIO button on the remote control lets you choose from available audio modes. Chapter 4 Adjusting Settings Changing the Password 1. Press the SETUP/ENTER button on the remote. 2. -
Page 52: Enabling 3D Sound
Adjusting Settings {{3D}} Sound LANGUAGE/AUDIO SETUP Audio [English] Subtitle [Automatic] Disc Menu [English] Dynamic Compression Off Dolby D Decoder DTS Decoder ________________________ To Move To Select GO BACK to Go Back DVD SETUP TV Aspect Ratio 4:3 LB Language/Audio Setup Rating Control [None] Still Mode... -
Page 53: Adjusting The Black Level
DVD SETUP TV Aspect Ratio Language/Audio Setup Rating Control Still Mode Black Level Alt Video Out ________________________ To Move To Select GO BACK to Go Back DVD SETUP TV Aspect Ratio Language/Audio Setup Rating Control Still Mode Black Level Alt Video Out ________________________ To Move To Select... -
Page 54: Controlling Front Panel Display Light
Adjusting Settings VCR & CHANNEL SETUP VCR Plus Setup Channel Setup Date/Time Stamp Auto Play/Rewind Both Record Source Auto Panel Display Bright ________________________ To Move To Select GO BACK to Go Back Controlling Front Panel Display Light You can adjust the front panel display’s light by following these steps: 1. -
Page 55: Other Information
Chapter 5 Other Information Chapter Overview: • Limited Warranty • Accessories and Order Form • Index Changing Entertainment. Again. -
Page 56: Warranty
Other Information Limited Warranty What your warranty covers: • Defects in materials or workmanship. For how long after your purchase: • 90 days from date of purchase - Unit exchange, which includes parts and labor. • 91 days to 1 year from date of purchase - Unit exchange, which includes parts only; you pay the labor. •... -
Page 57: Product Registration
4. If the repairs are covered by your warranty, you will not be billed. Thomson assumes no responsibility for warranty shipments from the customer to the factory if not shipped in the manner prescribed by Thomson. Return transportation, storage, handling and insurance costs are your responsibility. We accept no responsibility in case of damage or loss. - Page 58 Other Information FCC Declaration of Conformity This device complies with Part 15 of the FCC Rules. Operation is subject to the following two conditions: (1) this device may not cause harmful interference, and (2) this device must accept any interference received, including interference that may cause undesired operation.
-
Page 59: Accessories
Accessories Optical Plug to Optical Plug DV3 (3 ft.) DV6 (6 ft.) Optical Plug to Mini Plug DV3M (3 ft.) DV6M (6 ft.) Mini Plug to Mini Plug DV3MM (3 ft.) DV6MM (6 ft.) (Coaxial Digital Audio Cable) busy protected wiring Surge Protector (SCTV160) -
Page 60: Accessories Order Form
Other Information Charge your order on your VISA, MasterCard, or Discover Card by filling in below USE YOUR CREDIT CARD IMPORTANT: Copy complete account number from your VISA card My card expires: IMPORTANT: Copy complete account number from your MasterCard Copy Number My card above your... - Page 61 Symbols 100+ Button 16 3/4 Switch 14 Icon 20 SOUND Button 16 A.DUB button 39 Accessories 57, 58 AM/PM Icon 20 Angles 27 Arrow Buttons 16 Audio equipment Dolby Digital 11 DTS 11 AUDIO LINE OUT TO TV Jack 18 AUDIO/RETURN Button 16 AUTO Button 16 Batteries 14...
- Page 62 Index Random Play 26 RECORD Button 17, 19 Recording 31 In 30-Minute Increments 37 Speeds 32 While Watching a Different Channel or DV 37 Region 1 22 Registration 55 Remote Programming 17 Remote, batteries 14 Repeating 28 Repeating Sections 40 REWIND Button 17 REWIND/REVERSE Button 19 Rewinding 30, 31...
- Page 63 This page left blank intentionally...
- Page 64 Thomson multimedia Inc. 10330 North Meridian Street Indianapolis, IN 46290 ©2001 Thomson multimedia Inc. Trademark(s)® Registered Marca(s) Registrada(s) Printed in Korea THOMSON TOCOM 15815340...