Table of Contents
Advertisement
Quick Links
Advertisement
Table of Contents
Troubleshooting

Related Manuals for Plustek OptiCard 820


Summary of Contents for Plustek OptiCard 820
- Page 1 Installation Usage & Maintenance Troubleshooting...
- Page 2 © 2004-2005. All rights are reserved. No portion of this document may be reproduced without permission. All trademarks and brand names mentioned in this publication are property of their respective owners. While all efforts have been made to ensure the accuracy of all contents in this manual, we assume no liability for errors or omissions or by statements of any kind in this manual, whether such errors are omissions or statements resulting from negligence, accidents, or any other cause.
-
Page 3: Table Of Contents
Software Installation Requirements ... 5 Hardware Requirements ... 5 Installing and Setting up the Scanner ... 6 Step 1. Connecting the Scanner to Your Computer ... 6 Step 2. Installing the Software... 7 Step 3. Testing the Scanner ... 9 Software Setup Troubleshooting ... -
Page 4: Introduction
3) By printing out and mailing the registration card directly to the Plustek office nearest you. See the last page of this user’s guide for a complete list of Plustek offices worldwide. As a registered customer, you will receive customer support, new product information and software upgrades. -
Page 5: Conventions Of This Guide
Chapter II describes how to use, maintain and clean your scanner. Appendix A contains technical support information that can help you solve simple problems. Before calling for help, please read through Appendix A: Troubleshooting. Appendix B contains the Specifications of the scanner you purchased. -
Page 6: System Requirements
2. Do use the USB cable provided with the scanner. Use of other cable may lead to malfunction. 3. Do not attempt to disassemble the scanner. There is danger of an electrical shock and opening your scanner will void your warranty. -
Page 7: The Scanner's Features
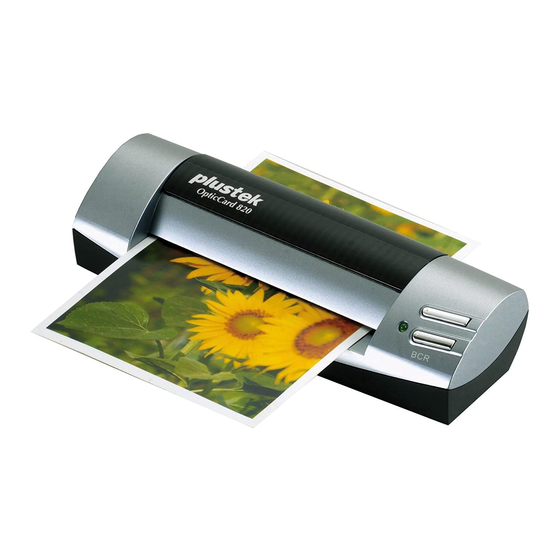
7. Travel Pouch The Scanner’s Features 1. USB port: It connects the scanner to a USB port on your computer by the included USB cable. 2. Page feed slot: Feed the document into the scanner from this direction. You can feel the document being grabbed by the scanner. -
Page 8: Chapter I. Installing The Scanner
Chapter I. Installing the Scanner Before installing your scanner, please verify that you have all of the proper components. A list of the package contents is provided in the Box Contents section of this guide. Software Installation Requirements Your scanner comes with the image-editing software, BCR software, the scanner’s driver, and the Smart Touch software. -
Page 9: Installing And Setting Up The Scanner
USB interface card to add USB capabilities to your computer. Installing and Setting up the Scanner Please follow the step-by-step procedures described below to install the Plustek scanner. 1. Plug the square end of the included USB cable to the USB port of the scanner. USB Connector(s) -
Page 10: Step 2. Installing The Software
Afterwards, please skip to Step 4. 3. For Windows XP & Me The USB hub is not included with the scanner. If using a hub, you are recommended to use a hub with its own external power adapter. , make sure that the hub is... - Page 11 7. After the computer is restarted, you will be prompted to perform the scanner calibration. 8. Insert the special calibration sheet, included with the scanner, face up into the page feed of the scanner. 9. Follow the on-screen instructions to complete the scanner calibration.
-
Page 12: Step 3. Testing The Scanner
To properly test your scanner, please perform the following steps: 1. Insert the document or image face up into the scanner. Align the paper to the arrow sign on the left of the scanner. -
Page 13: Installing Additional Software
1. Unplug the scanner’s USB cable from the rear of the computer. 2. From the Windows START menu, click on [Programs] and then [Plustek OptiCard 820]. In the pop-up menu that opens, click on [Uninstall Plustek OptiCard 820]. Follow the on-screen instructions to remove all the scanner software. -
Page 14: Chapter Ii. Usage And Maintenance
If you wish to use the scanner in this way you should install the Cardiris software that is included in the Setup/Application CD-ROM. -
Page 15: Using The Scanner Buttons
Using the Scanner Buttons Your scanner is equipped with two function buttons designed to make your scanning experience more convenient and efficient. With simply one touch of the button, you can scan to Presto! ImageFolio or Cardiris program. To use the buttons, ensure you have installed the relevant software (e.g., Newsoft Presto! ImageFolio is required for using the SCAN... - Page 16 From the menu that pops up, point to [SCAN Button Link] and then click [Continuous Scan]. 2. Insert the document or image face up into the scanner. Align the paper to the arrow sign on the left of the scanner.
-
Page 17: Bcr Button
Smart Touch window. Attention 3. Insert the document or image face up into the scanner. Align the paper to the arrow sign on the left of the scanner. 4. Press the SCAN button on the scanner. The scanning starts immediately. - Page 18 From the menu that pops up, point to [BCR Button Link] and then click [Continuous Scan]. 2. Insert the business card face up into the scanner. Align the paper to the arrow sign on the left of the scanner. 3. Press the BCR button on the scanner. The scanning starts immediately.
-
Page 19: Changing Button Settings
Close to close the Smart Touch window. Attention 3. Insert the business card face up into the scanner. Align the paper to the arrow sign on the left of the scanner. 4. Press the BCR button on the scanner. The scanning starts immediately. -
Page 20: Scanner Connection
The first step to take when troubleshooting connection problems with your scanner is to check all physical connections. The Smart Touch icon the Windows system tray, indicates if the scanner software is properly launched and the scanner and computer are communicating with each other. -
Page 21: Maintenance
Attention Maintenance Calibrate the scanner if colors appear in areas that should be white, or colors of the scanned image and the original vary a lot. compensate for variations which can occur in the optical component over time by its nature. -
Page 22: Cleaning The Scanner
Caution Avoid using the scanner in a dusty environment. Dust particles and other foreign objects may damage the unit. If you will not use the scanner for some time, please place it in the travel pouch. Do not insert any document into the scanner with small objects such as paper clips, pins, staples or any other fasteners attached. - Page 23 Do not insert damp, curled or wrinkled documents into the scanner for scanning. These documents can cause paper jams and possibly damage the unit. Your scanner operates best in temperatures between 10° C to 40° C (50° F to 104° F).
-
Page 24: Appendix A: Troubleshooting
Cause 1: Your software may have not been successfully installed. Solution 1: Please insert the CD-ROM and reinstall the scanner software. Follow the on-screen instructions carefully when installing the software. Cause 2: Some aspect of your computer system does not support USB. - Page 25 Cause 2: You are scanning at a high resolution (DPI). Solution 2: Reduce the resolution. Symptom: The scanner is not in the list of supported scanners in other commercial software. Solution: Select TWAIN as the scanner. Symptom: Unable to scan from other software other than the one that came with the scanner.
- Page 26 Make sure that the cables are connected tightly and to the proper port. Cause 2: The USB cable might be too long. Solution 2: Please use the USB cable that comes with your scanner. Cause 3: The scanner’s power cord is not connected properly.
-
Page 27: Common -How-To- Questions
Solution 3: Make sure that the AC adapter is connected to an outlet. If the scanner is connected to a Surge Protector, make sure that the Surge Protector is turned on. Symptom: The document or photo has been inserted into the scanner but is not fed through the scanner. - Page 28 Consult your Word Processor documentation for more information on how to import images. Symptom: How do I send a scanned image using my email program? Solution: Save your scanned image in a format that is supported by your email program (JPG, GIF or PNG are recommended). Once your picture is saved, consult the documentation of your email program on how to attach a file to a message.
-
Page 29: Appendix B: Specifications
Specifications Plustek OptiCard 820 Physical 174.5mm x 60.5mm x 38.5 mm dimensions Weight 194g Operating 10° C to 40° C (50° F to 104° F) Temperature Maximum 105 mm x 148 mm (4.13” x 5.83”) Scan Area Minimum 33mm x 43 mm Scan Method Single –Pass... -
Page 30: Appendix C: Customer Service And Warranty
Customer Service and Warranty If you encounter problems with your scanner, please review the installation instructions and troubleshooting suggestions contained in this guide. For further assistance call our customer support phone number listed on the last page of this guide. One of our representatives will be happy to assist you from Monday... -
Page 31: Fcc Radio Frequency Statement
Before presenting this product for warranty service, you must remove all programmes, data and removable storage media. Products returned without guides and software will be replaced without guides and software. This Limited Warranty service does not provide for carry-in exchange when the problem results from accident, disaster, vandalism, misuse, abuse, unsuitable environment, programme modification, another machine or non-vendor modification for this product. - Page 32 the equipment off and on), the user is encouraged to try to correct the interference by one or more of the following measures: • Reorient or relocate the receiving antenna. • Increase the separation between the equipment and receiver. • Connect the equipment to an outlet on a circuit different from that which the receiver is connected.
-
Page 33: Contacting Plustek
Contacting Plustek Plustek Technology GmbH Gutenbergring 38, 22848 Norderstedt, Germany Tel.: +49 (0) 40 523 03 130 Fax: +49 (0) 40 523 03 500 E-mail: support@plustek.de Website: www.plustek.de Worldwide except Plustek Inc. 13F-1, No.3 (Building F), Yuan Qu St., 115 Nankang, Taipei, Taiwan.