Advertisement
Available languages
Available languages
Quick Links
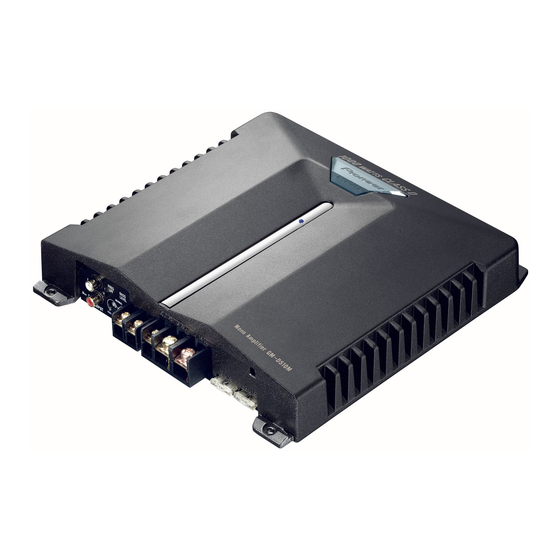
CLASS D MONO AMPLIFIER
AMPLIFICATEUR MONO DE CLASSE D
Owner's Manual
GM-D510M
Mode d'emploi
PIONEER CORPORATION
4-1, MEGURO 1-CHOME, MEGURO-KU, TOKYO 153-8654, JAPAN
PIONEER ELECTRONICS (USA) INC.
P.O. Box 1540, Long Beach, California 90801-1540, U.S.A.
TEL: (800) 421-1404
PIONEER EUROPE NV
Haven 1087, Keetberglaan 1, B-9120 Melsele, Belgium
TEL: (0) 3/570.05.11
PIONEER ELECTRONICS ASIACENTRE PTE. LTD.
253 Alexandra Road, #04-01, Singapore 159936
TEL: 65-6472-1111
PIONEER ELECTRONICS AUSTRALIA PTY. LTD.
178-184 Boundary Road, Braeside, Victoria 3195, Australia
TEL: (03) 9586-6300
Published by Pioneer Corporation.
Copyright © 2003 by Pioneer Corporation.
PIONEER ELECTRONICS OF CANADA, INC.
All rights reserved.
300 Allstate Parkway, Markham, Ontario L3R OP2, Canada
TEL: (905) 479-4411
Publication de Pioneer Corporation.
Copyright © 2003 Pioneer Corporation.
PIONEER ELECTRONICS DE MEXICO, S.A. de C.V.
Tous droits de reproduction et de traduction
Blvd.Manuel Avila Camacho 138 10 piso
réservés.
Col.Lomas de Chapultepec, Mexico, D.F. 11000
TEL: 55-9178-4270
Printed in U.S.A.
Imprimé aux Etats-Unis
<KNKNX> <03L00001>
<HRD0255-A> UC
Selecting fine audio equipment such as the unit you've just purchased is only the start of your
musical enjoyment. Now it's time to consider how you can maximize the fun and excitement your
equipment offers. This manufacturer and the Electronic Industries Association's Consumer
Electronics Group want you to get the most out of your equipment by playing it at a safe level.
One that lets the sound come through loud and clear without annoying blaring or distortion—and,
most importantly, without affecting your sensitive hearing.
Sound can be deceiving. Over time your hearing "comfort level" adapts to higher volumes of
sound. So what sounds "normal" can actually be loud and harmful to your hearing. Guard against
this by setting your equipment at a safe level BEFORE your hearing adapts.
To establish a safe level:
• Start your volume control at a low setting.
• Slowly increase the sound until you can hear it comfortably and clearly, and without distortion.
Once you have established a comfortable sound level:
• Set the dial and leave it there.
Taking a minute to do this now will help to prevent hearing damage or loss in the future. After all,
we want you listening for a lifetime.
We Want You Listening For A Lifetime
Used wisely, your new sound equipment will provide a lifetime of fun and enjoyment. Since
hearing damage from loud noise is often undetectable until it is too late, this manufacturer and the
Electronic Industries Association's Consumer Electronics Group recommend you avoid prolonged
exposure to excessive noise. This list of sound levels is included for your protection.
Decibel
Level
Example
30
Quiet library, soft whispers
40
Living room, refrigerator, bedroom away from traffic
50
Light traffic, normal conversation, quiet office
60
Air conditioner at 20 feet, sewing machine
70
Vacuum cleaner, hair dryer, noisy restaurant
80
Average city traffic, garbage disposals, alarm clock at two feet.
THE FOLLOWING NOISES CAN BE DANGEROUS UNDER CONSTANT EXPOSURE
90
Subway, motorcycle, truck traffic, lawn mower
100
Garbage truck, chain saw, pneumatic drill
120
Rock band concert in front of speakers, thunderclap
140
Gunshot blast, jet plane
180
Rocket launching pad
Information courtesy of the Deafness Research Foundation.
Before Using This Product
Thank you for purchasing this PIONEER
After-sales service for Pioneer
product. It is designed to give you many
products
years of enjoyment.
PIONEER SUGGESTS USING A PRO-
FESSIONAL INSTALLER DUE TO THE
Please contact the dealer or distributor from where
COMPLEXITY OF THIS PRODUCT.
you purchased the product for its after-sales ser-
Please read all instructions and WARN-
vice (including warranty conditions) or any other
information. In case the necessary information is
INGS in this manual before attempting
not available, please contact the companies listed
operation. Should you have any questions,
below:
contact your nearest Pioneer authorized
Please do not ship your product to the companies
dealer or installation specialist.
at the addresses listed below for repair without
advance contact.
Information to User
7 U.S.A.
Alteration or modifications carried out
Pioneer Electronics (USA) Inc.
without appropriate authorization may
CUSTOMER SUPPORT DIVISION
invalidate the user's right to operate the
P.O. Box 1760
equipment.
Long Beach, CA 90801-1760
800-421-1404
Important
7 CANADA
The serial number of this amplifier is writ-
Pioneer Electronics of Canada, Inc.
ten on the bottom of the unit. For your
CUSTOMER SATISFACTION
own security and convenience, write it
DEPARTMENT
down on the enclosed warranty card. Keep
300 Allstate Parkway
the card handy for future reference.
Markham, Ontario L3R OP2
(905) 479-4411
1-877-283-5901
For warranty information please see the Limited
Warranty sheet included with your product.
Product registration
WARNING
Visit us at the following site:
• Handling the cord on this product or cords associ-
ated with accessories sold with the product will
expose you to lead, a chemical known to the State
of California and other governmental entities to
cause cancer and birth defects or other reproduc-
tive harm. Wash hands after handling.
1 Register your product. We will keep the details of
• Always use the special red battery and ground
your purchase on file to help you refer to this
wire [RD-223], which is sold separately. Connect
information in the event of an insurance claim
the battery wire directly to the car battery positive
such as loss or theft.
terminal (+) and the ground wire to the car body.
2 Receive updates on the latest products and tech-
• Do not touch the amplifier with wet hands.
nologies.
Otherwise you may get an electric shock. Also, do
3 Download owner's manuals, order product cata-
not touch the amplifier when it is wet.
logues, research new products, and much more.
• For traffic safety and to maintain safe driving
conditions, keep the volume low enough so that
About This Product
you can still hear normal traffic sound.
• Check the connections of the power supply and
subwoofer if the fuse of the separately sold bat-
This product is a class D amplifier for the
tery wire or the amplifier fuse blows. Detect the
subwoofer. If both L (left) and R (right)
cause and solve the problem, then replace the fuse
channels are connected to the RCA input
with another one of the same size and rating.
of this product, output is mixed because
• To prevent malfunction of the amplifier and sub-
this product is a mono amplifier.
woofer, the protective circuit will cut the power
supply to the amplifier (sound will stop) when an
abnormal condition occurs. In such a case, switch
CAUTION
the power to the system OFF and check the
connection of the power supply and subwoofer.
Never replace the fuse with one of greater
Detect the cause and solve the problem.
value or rating than the original fuse. Use
• Contact the dealer if you cannot detect the cause.
of an improper fuse could result in over-
• To prevent an electric shock or short-circuit
heating and smoke and could cause dam-
during connection and installation, be sure to
age to the product and injury including
disconnect the negative (–) terminal of the battery
burns.
beforehand.
• Confirm that no parts are behind the panel when
drilling a hole for installation of the amplifier. Be
sure to protect all cables and important equipment
such as fuel lines, brake lines and the electrical
wiring from damage.
Advertisement

Related Manuals for Pioneer GM-D510M


Summary of Contents for Pioneer GM-D510M
- Page 1 300 Allstate Parkway, Markham, Ontario L3R OP2, Canada TEL: (905) 479-4411 Publication de Pioneer Corporation. Copyright © 2003 Pioneer Corporation. PIONEER ELECTRONICS DE MEXICO, S.A. de C.V. Tous droits de reproduction et de traduction Blvd.Manuel Avila Camacho 138 10 piso réservés.
-
Page 2: Setting The Unit
• When using with an RCA equipped car stereo (standard output of 500 mV), set to the NORMAL position. When using with an RCA equipped Pioneer car stereo with max. output of 4 V or more, adjust level to match the car stereo output level. -
Page 3: Installation
Connecting the Unit Connecting the Power Terminal 3. Attach lugs to wire ends. Lugs not Connecting the Speaker Terminals supplied. • Always use the special red battery and ground • Use pliers, etc., to crimp lugs to wires. 1. Expose the end of the speaker wires wire [RD-223], which is sold separately. -
Page 4: Avant D'utiliser Cet Appareil
Avant d’utiliser cet appareil Nous vous remercions d’avoir porté votre Cher Client: choix sur un appareil PIONEER. Il a été conçu et fabriqué pour vous apporter de La sélection d’un équipement audio de qualité comme l’unité que vous venez d’acheter n’est nombreuses années de satisfaction. -
Page 5: Réglage De L'appareil
équipé de prises Cinch (RCA) (niveau de sortie standard à 500 mV). Si cet appareil est utilisé conjointement avec un autoradio stéréo Pioneer pourvu de prises Cinch (RCA) sur lesquelles peuvent se trou- ver une tension de sortie de 4 V ou plus, réglez le niveau en fonction du niveau de... -
Page 6: Caractéristiques Techniques
Raccordement de l’appareil Raccordement de la borne 3. Fixez une cosse à l’extrémité de Raccordement des bornes des chaque câble. Les cosses ne sont pas d’alimentation haut-parleurs fournies. • Utilisez le faisceau de câbles de liaison à la bat- • Utilisez un outil spécial, etc., pour sertir la 1.