Table of Contents
Advertisement
Quick Links
CD RECEIVER
РЕСИВЕР С ПРОИГРЫBATEЛEM KOMПAKT-ДИCКOB
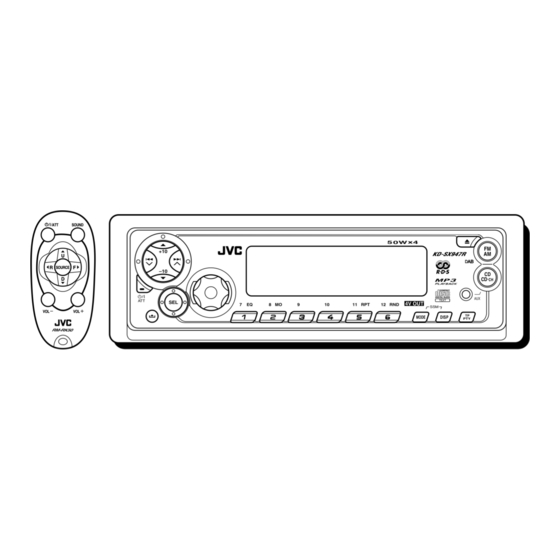
KD-SX947R
For installation and
connections, refer to
the separate manual.
Указания по
установке и
выполнению
соединений
приводятся в
отдельной
инструкции.
ATT
SOUND
U
R
SOURCE
F
D
VOL
VOL
В соответствии с Законом Российской Федерации "О защите прав
потребителей" срок службы (годности) данного товара "по истечении
которого он может представлять опасность для жизни, здоровья
потребителя, причинять вред его имуществу или окружающей среде"
составляет семь (7) лет со дня производства. Этот срок является
временем, в течение которого потребитель данного товара может
безопасно им пользоваться при условии соблюдения инструкции по
эксплуатации данного товара, проводя необходимое обслуживание,
включающее замену расходных материалов и/или соответствующее
ремонтное обеспечение в специализированном сервисном центре.
Дополнительные косметические материалы к данному товару,
поставляемые вместе с ним, могут храниться в течение двух (2) лет со
дня его производства.
Срок службы (годности), кроме срока хранения дополнительных
косметических материалов, упомянутых в предыдущих двух пунктах, не
затрагивает никаких других прав потребителя, в частности,
гарантийного свидетельства JVC, которое он может получить в
соответствии с законом о правах потребителя или других законов,
связанных с ним.
INSTRUCTIONS
ИНСТРУКЦИИ ПО ЭКСПЛУАТАЦИИ
KD-SX947R
GET0126-001A
[EE]
Advertisement
Table of Contents

Related Manuals for JVC KD-SX947R


Summary of Contents for JVC KD-SX947R
- Page 1 косметических материалов, упомянутых в предыдущих двух пунктах, не отдельной затрагивает никаких других прав потребителя, в частности, инструкции. гарантийного свидетельства JVC, которое он может получить в соответствии с законом о правах потребителя или других законов, связанных с ним. INSTRUCTIONS ИНСТРУКЦИИ ПО ЭКСПЛУАТАЦИИ...
-
Page 2: How To Reset Your Unit
Position And Reproduction Of Labels Bottom panel of the main unit CAUTION: Invisible laser ADVARSEL: Usynlig laser - VARNING: Osynlig laser- VARO: Avattaessa ja radiation when open and stråling ved åbning, når strålning när denna del är suojalukitus ohitettaessa interlock failed or defeated. sikkerhedsafbrydere er ude öppnad och spärren är olet alttiina näkymättö-... -
Page 3: Table Of Contents
Thank you for purchasing a JVC product. Please read all instructions carefully before operation, to ensure your complete understanding and to obtain the best possible performance from the unit. CONTENTS MP3 OPERATIONS ......26 How to reset your unit ....... -
Page 4: Location Of The Buttons
LOCATION OF THE BUTTONS Control panel Display window KD-SX947R ; TP/PTY (traffic programme/programme type) (standby/on/attenuator) button 2 5 (up) button button a AUX (auxiliary) input jack +10 button /¢ buttons Display window 4 Remote sensor 5 Display window s Disc information indicators... -
Page 5: Remote Controller
3 • Selects the preset stations while listening to Remote controller the radio (or the DAB tuner). Each time you press the button, the preset station (or service) number increases, and the selected station (or service) is tuned in. SOUND •... -
Page 6: Preparing The Remote Controller
Preparing the remote controller Return the battery holder. Insert again the battery holder by pushing it until you hear a clicking sound. Before using the remote controller: • Aim the remote controller directly at the remote sensor on the main unit. Make sure there is no obstacle in between. -
Page 7: Basic Operations
BASIC OPERATIONS Turning on the power Volume level appears. Turn on the power. Volume (or audio) level indicator Note on One-Touch Operation: (see page 33) When you select a source in step 2 below, the Adjust the sound as you want. (See power automatically comes on. -
Page 8: Setting The Clock
Setting the clock Set the clock system. 1 Select “24H/12H.” 2 Select “24H” or “12H.” You can also set the clock system to either 24 hours or 12 hours. Press and hold SEL (select) for more than 2 seconds so that one of the PSM item appears on the display. -
Page 9: Radio Operations
RADIO OPERATIONS Listening to the radio Start searching a station. To search stations of You can use either automatic searching or manual higher frequencies searching to tune in to a particular station. Searching a station automatically: Auto search To search stations of lower frequencies Select the band (FM1 –... - Page 10 Searching a station manually: When an FM stereo broadcast is hard to receive: Manual search Press MODE to enter the Select the band (FM1 – 3, AM). functions mode while listening to Each time you press the an FM stereo broadcast. button, the band changes as “MODE”...
-
Page 11: Storing Stations In Memory
Storing stations in memory Manual preset You can preset up to 6 stations in each band You can use one of the following two methods to (FM1, FM2, FM3, and AM) manually. store broadcasting stations in memory. • Automatic preset of FM stations: SSM (Strong- Ex.: Storing FM station of 88.3 MHz into the station Sequential Memory) preset number 1 of the FM1 band. -
Page 12: Tuning In To A Preset Station
Tuning in to a preset station Press and hold the number button (in this example, 1) for more than 2 seconds. You can easily tune in to a preset station. Remember that you must store stations first. If you have not stored them yet, see “Storing stations in memory”... -
Page 13: Rds Operations
RDS OPERATIONS What you can do with RDS To use Network-Tracking Reception You can select the different modes of network- RDS (Radio Data System) allows FM stations to tracking reception to continue listening to the send an additional signal along with their regular same programme in its finest reception. - Page 14 Using TA Standby Reception Press and hold SEL (select) for more than 2 seconds so that one of the TA Standby Reception allows the unit to switch PSM items appears on the display. temporarily to Traffic Announcement (TA) from (PSM: see pages 32 and 33.) the current source (another FM station, CD, or other connected components).
- Page 15 Using PTY Standby Reception 7 When the current source is FM, the PTY indicator either lights up or flashes. PTY Standby Reception allows the unit to switch • If the PTY indicator lights up, PTY Standby temporarily to your favorite programme (PTY: Reception is activated.
- Page 16 Searching your favorite programme Select one of the twenty-nine PTY codes. (See page 19.) You can search any one of the PTY codes. In addition, you can store your 6 favorite Selected code name programme types in the number buttons. appears on the display.
-
Page 17: Other Convenient Rds Functions And Adjustments
To search your favorite programme type • If there is a station broadcasting a programme of the same PTY code as you selected, that station is tuned in. Press and hold TP/PTY for more than • If there is no station broadcasting a programme 2 seconds while listening to an FM of the same PTY code as you selected, the station. - Page 18 Changing the display mode while Setting the TA volume level listening to an FM station You can preset the volume level for TA Standby Reception. When a traffic programme is received, You can change the initial indication on the the volume level automatically changes to the display to station name (PS NAME) or station preset level.
- Page 19 PTY codes NEWS: News CHILDREN: Entertainment programmes for AFFAIRS: Topical programmes expanding children on current news or affairs SOCIAL: Programmes on social activities INFO: Programmes which impart RELIGION: Programmes dealing with any advice on a wide variety of aspect of belief or faith, or the topics nature of existence or ethics SPORT:...
-
Page 20: Cd Operations
CD OPERATIONS Refer to “MP3 OPERATIONS” on pages 26 to 29 The display changes to show the following: for operating MP3 discs. Current source CD–in indicator indication* Playing a CD Open the control panel. Total playing time Total track number of the inserted disc of the inserted disc Notes:... -
Page 21: Locating A Track Or A Particular Portion On A Cd
To stop play and eject the CD To go to a particular track directly Press 0. Press the number button corresponding to the CD play stops and the control panel flips down. track number to start its playback. The CD automatically ejects from the loading slot. -
Page 22: Selecting Cd Playback Modes
To play back tracks repeatedly How to use the +10 and –10 buttons (Track Repeat Play) • Ex. 1: To select track number 32 while You can play back the current track repeatedly. playing track number 6 Press MODE to enter the functions mode while playing a “MODE”... -
Page 23: Playing A Cd Text
Playing a CD Text Prohibiting disc ejection In a CD Text, some information about the disc (its You can prohibit disc ejection and can lock a disc disc title, performer, and track title) is recorded. in the loading slot. This CD Text information will be shown automatically when you play a CD Text. -
Page 24: Mp3 Introduction
MP3 INTRODUCTION What is MP3? Precautions when recording MP3 files on a CD-R or CD-RW MP3 is an abbreviation of Motion Picture Experts This unit can only read MP3 files that are Group (or MPEG) Audio Layer 3. MP3 is simply a recorded in the format that is compliant with ISO file format with a data compression ratio of 1:10 9660 Level 1, Level 2, or Joliet. - Page 25 MP3 folder/file configuration ROOT 15 16 18 19 : Root ROOT : Folders : MP3 files Note: There is no limit on the number of the hierarchy levels (nested folders). However, up to 8 hierarchy levels is recommended for stable operations. MP3 playback/search order •...
-
Page 26: Mp3 Operations
MP3 OPERATIONS Refer also to “CD OPERATIONS” on pages 20 to The display changes to show the following: Current source CD–in indicator indication* Playing an MP3 disc Open the control panel. Notes: Total folder Total file • When an external component is connected to number number the AUX input jack on the control panel, be... -
Page 27: Locating A File Or A Particular Portion On An Mp3 Disc
Locating a file or a particular To stop play and eject the disc Press 0. portion on an MP3 disc Playback stops and the control panel flips down. The disc automatically ejects from the loading For “MP3 playback/search order” see page 25. slot. - Page 28 To go to a particular file quickly within the To go to a particular folder directly current folder (+10 and –10 buttons) IMPORTANT: Press MODE to enter the functions mode To directly select the folders using the number while playing an MP3 disc. button(s), it is required that folders are “MODE”...
-
Page 29: Selecting Mp3 Playback Modes
To skip to the next or previous folder Active Mode Plays at random indicator Press 5 (up) while playing FLDR RND and RND All files of the an MP3 disc to skip to the indicators current folder, then next folder. light up. -
Page 30: Sound Adjustments
SOUND ADJUSTMENTS Selecting preset sound modes Indication For: Preset values (C-EQ: custom equalizer) LOUD USER (Flat sound) You can select a preset sound mode (C-EQ: ROCK Rock or custom equalizer) suitable to the music genre. disco music CLASSIC Classical –02 •... -
Page 31: Adjusting The Sound
Adjusting the sound When you adjust the bass, treble, or loudness, the adjustment you have made is stored for the currently selected sound mode (C-EQ) including “USER.” You can adjust the sound characteristics to your If you are using a two-speaker system, set the fader preference. -
Page 32: Other Main Functions
OTHER MAIN FUNCTIONS Changing the general settings Adjust the PSM item selected. (PSM) You can change the items listed in the table below and on page 33 by using the PSM (Preferred Setting Mode) control. Basic Procedure Repeat steps 2 and 3 to adjust the Press and hold SEL (select) for more other PSM items if necessary. - Page 33 Factory-preset Indications Selectable values/items settings page DAB AF* Alternative frequency AF OFF AF ON AF ON search DAB VOL* DAB volume adjustment VOL–12 — VOL+12 VOL 00 AUDIO 1 AUDIO 2 LEVEL Level display AUDIO 2 DIMMER Dimmer mode AUTO AUTO Telephone muting MUTING 1...
- Page 34 To select the dimmer mode—DIMMER To select the external component to use —EXT IN When you turn on the car headlights, the display automatically dims (Auto Dimmer). You can connect the external component to the When shipped from the factory, Auto Dimmer CD changer jack on the rear using the Line Input mode is activated.
-
Page 35: Assigning Names To The Sources
Note: Select a character. If you change the setting from “TAG • See the table below for OFF” to “TAG ON” while playing an available characters. MP3 file, the tag display will be activated when the next file starts playing. •... -
Page 36: Detaching The Control Panel
Detaching the control panel Attaching the control panel Insert the right side of the control You can detach the control panel when leaving panel into the groove on the panel the car. holder. When detaching or attaching the control panel, be careful not to damage the connectors on the back of the control panel and on the panel holder. -
Page 37: Cd Changer Operations
CD CHANGER OPERATIONS We recommend that you use the JVC MP3- • When the current disc is an MP3 disc: compatible CD changer with your unit. Playback starts from the first folder of the current disc once file check is completed. - Page 38 To go to a particular disc directly • When the current disc is a CD: Playback starts from the first track of the Press the number button corresponding to the current disc. disc number to start its playback (while the CD Selected disc number* changer is playing).
- Page 39 * The first time you press +10 or –10 button, the track/file skips to the nearest higher or This is possible only when connecting a JVC CD lower track/file with a track/file number of changer equipped with CD Text and/or MP3 disc multiple ten (ex.
-
Page 40: Selecting The Playback Modes
Selecting the playback modes Active Mode Plays at random indicator To play back tracks/files at random FLDR RND* and RND All files of the (Folder Random/Disc Random/Magazine indicators current folder, then light up. files of the next Random Play) folder and so on. Press MODE to enter the functions DISC RND and RND All tracks/files of... - Page 41 To play back tracks/files repeatedly Active Mode Plays repeatedly (Track Repeat/Folder Repeat/Disc Repeat indicator Play) TRK RPT RPT indicator The current (or lights up. specified) track/ Press MODE to enter the functions file. mode during play. “MODE” flashes on the upper part FLDR RPT* and RPT All files of the...
-
Page 42: External Component Operations
EXTERNAL COMPONENT OPERATIONS * Not compatible with Portable MD player, etc. digital signals. Auxiliary input* Playing an external component • If “LINE IN”* does not appear on the display, see page 34 and select the external input (“LINE IN”). You can connect two external components to this * Displayed only when one of the following unit. -
Page 43: Dab Tuner Operations
We recommend that you use DAB (Digital Audio Broadcasting) tuner KT-DB1500 or KT-DB1000 one of the services with your unit. If you have another DAB tuner, consult your JVC IN-CAR ENTERTAINMENT dealer. A typical ensemble has 6 or more programmes (services) broadcast at the same time. After •... -
Page 44: Storing Dab Services In Memory
To tune in to a particular ensemble without Start searching for an ensemble. searching Press ¢ Before you start..search for ensembles Press FM/AM (DAB) briefly if CD, CD changer, or of higher frequency. external component is the current source. Press and hold FM/AM (DAB) to select DAB Press 4 tuner as the source. -
Page 45: Tuning In To A Preset Dab Service
Tuning in to a preset DAB Tune in to an ensemble you want. service You can easily tune in to a preset DAB service. Remember that you must store services first. If you have not stored them yet, “Storing DAB services in memory”... -
Page 46: What You Can Do More With Dab
What you can do more with To adjust the DAB volume level You can adjust the volume level of DAB tuner and store it in memory. By adjusting the volume level properly to match it to the FM sound level, Tracing the same program automatically you will not need to adjust the volume level each (Alternative Reception) -
Page 47: Troubleshooting
TROUBLESHOOTING What appears to be trouble is not always serious. Check the following points before calling a service center. Symptoms Causes Remedies • Sound cannot be heard The volume level is set to the Adjust it to the optimum level. from the speakers. - Page 48 Symptoms Causes Remedies • Disc cannot be played No MP3 files are recorded on Change the disc. back. the disc. MP3 files do not have the Add the extension code extension code—mp3 in their —mp3 to their file names. file names. MP3 files are not recorded in Change the disc.
- Page 49 Symptoms Causes Remedies • “NO DISC” appears on the No disc is in the magazine. Insert discs into the display. magazine. Discs are inserted upside Insert discs correctly. down. • “NO MAG” appears on the No magazine is loaded in the Insert the magazine.
-
Page 50: Maintenance
MAINTENANCE Handling discs When playing a CD-R or CD-RW Before playing back CD-Rs or CD-RWs, read This unit has been designed to reproduce CDs, their instructions or cautions carefully. CD-Rs (Recordable), CD-RWs (Rewritable), and • Use only “finalized” CD-Rs or CD-RWs. CD Texts. -
Page 51: Specifications
SPECIFICATIONS AUDIO AMPLIFIER SECTION CD PLAYER SECTION Maximum Power Output: Type: Compact disc player Front: 50 W per channel Signal Detection System: Non-contact optical Rear: 50 W per channel pickup (semiconductor laser) Continuous Power Output (RMS): Number of channels: 2 channels (stereo) Front: 19 W per channel into 4 Ω, 40 Hz to Frequency Response: 5 Hz to 20 000 Hz 20 000 Hz at no more than 0.8%... - Page 52 Having TROUBLE with operation? Please reset your unit Refer to page of How to reset your unit Затруднения при эксплуатации? Пожалуйста, перезагрузите Ваше устройство Для получения информации о перезагрузке Вашего устройства обратитесь на соответствующую страницу EN, RU 0103KKSMDTJEIN © 2003 VICTOR COMPANY OF JAPAN, LIMITED...
- Page 53 поправки в соответствии с типом Вашего автомобиля. Если у Вас есть какие-либо вопросы, JVC IN-CAR ENTERTAINMENT dealer or a company supplying kits. касающиеся установки, обратитесь к Вашему дилеру JVC IN-CAR ENTERTAINMENT или в компанию, поставляющую соответствующие принадлежности. Перед установкой: Нажмите кнопку...
- Page 54 • When using the optional stay • When installing the unit without using the sleeve • При использовании дополнительной стойки • При установке устройства без использования муфты In a Toyota for example, first remove the car radio and install the unit in its place. Stay (option) В...
- Page 55 • Желтый провод (А4) в этом случае не используется. JVC CD changer / DAB-Tuner / We recommend you to connect the JVC MP3-compatible CD changer. You can also connect other CH-X series CD changers (except CD-X99 and CD-X100). External component jack •...
- Page 56 Вы можете подключить еще один усилитель мощности для передних динамиков. CD Changer and DAB Tuner / Проигрыватель-автомат компакт-дисков и тюнер DAB You can connect a JVC CD changer and/or a JVC DAB (Digital Audio Broadcasting) tuner. Вы можете подключить проигрыватель-автомат компакт-дисков JVC и/или тюнер DAB (цифровое...
- Page 57 This file has been downloaded from: www.UsersManualGuide.com User Manual and User Guide for many equipments like mobile phones, photo cameras, monther board, monitors, software, tv, dvd, and othes.. Manual users, user manuals, user guide manual, owners manual, instruction manual, manual owner, manual owner's, manual guide, manual operation, operating manual, user's manual, operating instructions, manual operators, manual operator, manual product, documentation manual, user maintenance, brochure, user reference, pdf manual Downloaded from:...