Table of Contents
Advertisement
USER MANUAL
Enjoy peace of mind.
Register your appliance today.
Stay updated on better living services, safety notices and
shop for accessories.
1. Open the camera app on your smartphone and
point at the QR code to scan
Product Registration QR code is located on the
front of your appliance or inside the door rim*.
2. Tap the notification or link to open the registration form
3. Complete your details and enjoy peace of mind
*Exact location of QR code may vary depending on oven model
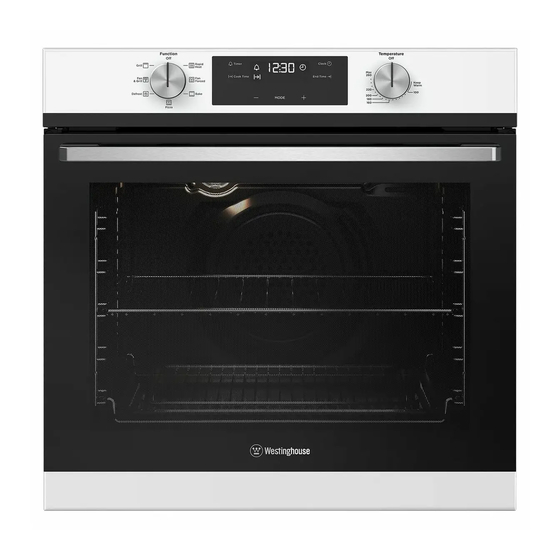
Timer
Clock
Cook Time
End Time
MODE
ELECTRIC BUILT-IN OVENS
WVE612, WVES613, WVE614, WVE615, WVEP615,
WVE616, WVE617, WVEP617, WVEP618, WVE625,
WVEP627, WVE636, WVE645, WVE655, WVE665
Advertisement
Table of Contents

Related Manuals for Westinghouse WVE612


Summary of Contents for Westinghouse WVE612
- Page 1 3. Complete your details and enjoy peace of mind *Exact location of QR code may vary depending on oven model Timer Clock Cook Time End Time MODE ELECTRIC BUILT-IN OVENS WVE612, WVES613, WVE614, WVE615, WVEP615, WVE616, WVE617, WVEP617, WVEP618, WVE625, WVEP627, WVE636, WVE645, WVE655, WVE665...
-
Page 2: Table Of Contents
Failure to strictly adhere to the requirements in this manual may result in personal injury, property damage and affect your ability to make a claim under the Westinghouse manufacturer’s warranty provided with your product. Products must be used, installed and operated in accordance with this manual. -
Page 3: Important Safety Instructions
IMPORTANT SAFETY INSTRUCTIONS Please read the user manual carefully and store in a handy Steam can be released. There is a risk of skin burns. place for later reference. There is a risk that steam causes moisture damage to cabinets. •... - Page 4 IMPORTANT SAFETY INSTRUCTIONS Cooktop only Cooktop only • If the ceramic glass on cooktop is accidently cracked, • Do not allow pots to boil dry as damage to both pan switch off the appliance to avoid the possibility of and cooktop may result. electric shock.
-
Page 5: Installing Your Appliance
MIN FUSE MAX POWER MAX CURRENT WIRE SECTION MODEL (H X W X D) MM RATING RATING RATING (MM²) WVE612 597 x 596 x 569 2.3kW 9.6A WVES613 597 x 596 x 569 2.3kW 9.6A WVE614 597 x 596 x 569 2.3kW... - Page 6 INSTALLING YOUR APPLIANCE (CONTINUED) • If a powerpoint is fitted it must be accessible with the Cabinet construction for your appliance appliance installed, as the plug must be accessible For the best integration within a kitchen, install the after installation. appliance in a standard 600mm wide cupboard that gives •...
- Page 7 Proud fit 560 min Refer to cooktop installation instructions for required clearance between cooktop and oven. WVE612 models come with 10A power cord for ‘Plug & Play’. 10A powerpoint is needed. NOTE: If a powerpoint upper infill is fitted it must be...
- Page 8 INSTALLING YOUR APPLIANCE (CONTINUED) Separate grill underbench oven Your underbench oven looks best when the control panel is directly under the benchtop. An upper infill panel may have to be added if the cooktop placed over the oven is too deep. Refer to cooktop installation instructions for required clearance between cooktop and oven.
- Page 9 Double oven GAS TYPE Flush fit 1086 581min Proud fit 1078 560min use black installation screws supplied mounting holes use black installation screws supplied 450mm min. Combo oven – cooktop cut-out dimensions COOKTOP DIMENSIONS A minimum gap of 40mm must be maintained between Overall Cooktop Dimensions the top of the underbench oven and the bottom of the Width...
-
Page 10: Product Description
PRODUCT DESCRIPTION WVE612/WVES613/WVE614 613SC 613SC WVE615 WVEP615 P615 P617 FUNCTION TEMP SET TIME Hold 3s P618 ON/OFF BACK FAVOURITE ALARM Function selector ‘Auto-off’ timer Oven/grill indicator light Function indicator light P627 Oven/grill temperature selector Electronic Clock PRODUCT DESCRIPTION... - Page 11 613SC WVE616 WVE617 613SC P615 P615 WVEP617 P617 P617 SET TIME FUNCTION TEMP Hold 3s WVEP618 P618 ON/OFF BACK FAVOURITE ALARM FUNCTION TEMP SET TIME Hold 3s P618 ON/OFF BACK FAVOURITE ALARM P627 P627 Function selector Function indicator light Oven/grill indicator light Electronic Clock Oven/grill temperature selector Programmable controller...
- Page 12 P615 PRODUCT DESCRIPTION (CONTINUED) P617 WVE625 FUNCTION TEMP SET TIME Hold 3s P618 ON/OFF BACK FAVOURITE ALARM WVEP627 P627 WVE636 Upper function selector Function indicator light Lower oven/grill temperature selector Oven/grill indicator light Electronic Clock Function selector P615 Upper oven/grill temperature selector Programmable controller Temperature selector ‘Auto-off’...
- Page 13 WVE645 WVE655 WVE665 P615 P615 P615 P617 Upper function selector Lower function selector Oven/grill function selector P617 Oven/grill indicator light Lower oven/grill temperature selector Oven/grill temperature selector Upper oven/grill temperature selector Bottom left hob full and half Oven function selector on/off/temperature ‘Auto-off’...
-
Page 14: Before First Use
BEFORE FIRST USE Preparing your appliance for the first time • Please remove all internal boxes and bags from the oven before operation. • Please wipe out the oven interior prior to operation with warm soapy water and polish dry with a soft clean cloth. -
Page 15: Installing Your Oven Accessories
INSTALLING YOUR OVEN ACCESSORIES Slides (Telescopic runners) Left hand side rack (For applicable models only) Obtain left hand side rack and left hand slide – see image to identify. The shaded wires indicate the wire the slide can be mounted on. Fit slide rear clips to the rear of wire at an angle as shown below. - Page 16 INSTALLING YOUR OVEN ACCESSORIES (CONTINUED) To fit a shelf or tray to telescopic slides Air Fry (For applicable models only) (For applicable models only): The Air Fryer can be placed onto slides or into side racks in the same manner as an oven shelf. Push the shelf or tray along the top of the slide until it hits the back post.
-
Page 17: Using Your Oven
USING YOUR OVEN Understanding your oven functions Bake Heat comes from two elements, one above and one below Your oven will have a selection of the following functions. the food. The bottom element is a clean heat element and Refer to “Description of your appliance” to confirm what is below the floor of the oven. - Page 18 USING YOUR OVEN (CONTINUED) Fan Assist & Grill” it is not necessary to turn the food over during the cooking cycle. Set temperature to 180°C. Heat comes from two elements, one above and one below the food. The fan circulates the hot air around the oven cavity so that you can put the food in different places in the oven and still cook them at the same time.
- Page 19 Maxi Grill (grill-in-oven models only) Fan Assist (duo small oven only) Heat comes from two elements, one above and one “Maxi grill” directs radiant heat from 2 powerful upper below the food. The fan circulates the hot air around the elements onto the food.
- Page 20 USING YOUR OVEN (CONTINUED) element switches on and the oven indicator light comes on again. TIPS & INFORMATION IMPORTANT Cooling/Venting fan WARNING CAUTION This appliance is fitted with a cooling fan. This prevents Once the food is cooked, turn the temperature selector your kitchen cabinet from overheating and reduces the back in an anti-clockwise direction.
- Page 21 Cooking with your timer (selected models only) disappear, confirming the time has been set. Once the time has been entered, the clock advances minute by minute. WARNING CAUTION NOTE: The clock has a 24 hour display. Set the timer clockwise. Do not force anticlockwise or Changing the time of day damage to the timer will result.
- Page 22 USING YOUR OVEN (CONTINUED) On completion of cooking This knob cannot be turned anticlockwise When the set time has elapsed, the oven will turn off, the from off position timer will beep and the indicators will flash. Turn the controls to the off position.
- Page 23 Cooking with the timer countdown to zero. When the set time has elapsed, a signal will sound and the appliance will turn off. To stop the signal, touch any button on the clock and then turn the oven function selector to OFF. NOTE: Cooking time cannot be set for the Rapid Heat function.
- Page 24 USING YOUR OVEN (CONTINUED) Activating the child-proof lock Pyrolytic cleaning of the oven cavity When the child lock is engaged, the oven cannot be The oven has the Pyrolytic self-cleaning function. It operated and the door cannot be opened. cleans by burning off the spatters and accumulated dirt and grease from the oven liner, at high temperature.
- Page 25 Pyrolytic Cleaning Operation Pyrolytic Cleaning Operation Turn on the oven. The pyrolytic cleaning function can be selected by turning the function selector switch clockwise to the pyrolytic Select: Menu/ Cleaning/ Cleaning. Press OK position. Use to toggle between a pyrolytic cleaning time of 1:30 hours or 2:30 hours.
- Page 26 USING YOUR OVEN (CONTINUED) Operating the Programmable Controller (WVEP618) FUNCTION TEMP SET TIME Hold 3s ON/OFF BACK FAVOURITE ALARM Use the sensor fields to operate the oven. FUNCTION DESCRIPTION ON/OFF To turn the oven on and off Press the sensor field once to choose a heating function. To turn Heating functions or Assisted Cooking the light on or off, press the sensor field for 3 seconds To go back one level in the menu.
- Page 27 Display Heating function 16:30 Time of day Heat-up indicator 00:15 140°C Function duration/end time Temperature Other indicators of the display: SYMBOL FUNCTION DESCRIPTION Minute minder The function is currently working Time of day The display shows the current time Duration The display shows the necessary time for cooking End time The display shows when the cooking time will be complete...
- Page 28 USING YOUR OVEN (CONTINUED) first time. Operate the oven(s), empty. Set the function to “Fan Bake” at a temperature of 180°C for approximately 30 minutes. Before first use Please ensure that the room is well ventilated during this process. Initial cleaning Remove all accessories and removable shelf supports Daily Use from the oven.
- Page 29 Submenu for “Basic Settings” SYMBOL FUNCTION DESCRIPTION Set time of day Sets the current time on the clock. When ON, the display shows the current time when you deactivate the Time indication appliance. Fast heat up When ON, the function decreases the heat-up time. Time extension Activates and deactivates the time extension function.
- Page 30 USING YOUR OVEN (CONTINUED) Setting a heating function Setting the clock functions 1. Turn on the oven. Before you use the functions: Duration, you must set a heating function and temperature first. The oven TIPS & INFORMATION 2. Select a heating function. turns off automatically.
- Page 31 Hints and tips Activating the program 1. Turn on the oven. The temperature and baking times in the tables are guidelines only. They depend on the recipes and the 2. Press quality and quantity of the ingredients used. 3. Select your favourite program name. Advice for special heating functions of the oven 4.
- Page 32 USING YOUR OVEN (CONTINUED) Oven shelves RECOMMENDED MINUTES MEAT RESULT TEMPERATURE PER KG Rare 35 - 40 TIPS & INFORMATION IMPORTANT Beef Medium 45 - 50 • Select the correct shelf location for food being cooked. Well done 55 - 60 •...
-
Page 33: Cooking Guide
COOKING GUIDE Choosing the best oven settings The following table is intended as a guide and experience may show some variation in cooking times necessary to meet individual requirements. It may be necessary to change some cooking times and temperatures from your previous oven. -
Page 34: Grilling Guide
GRILLING GUIDE Grilling hints Guide to better grilling WARNING WARNING TIPS & INFORMATION IMPORTANT Always clean the grill/oven dish after every use. Excessive Definite times can not be given for grilling as it is fat build up may cause a fire. dependant on the size of the food and your own tastes. -
Page 35: Steam Assisted Cooking
STEAM ASSISTED COOKING Cooking with steam is a great addition to straight ‘hot recipe suggestions. air’ cooking. Steam brings out all the natural flavours and Place food in the appliance and close the oven door. goodness in the food, cooks evenly from surface to centre and retains more nutrients and vitamins. - Page 36 STEAM ASSISTED COOKING (CONTINUED) Use measuring jug Draining the tank Select the cleaning function from the menu. The user interface will guide you through the procedure. The duration of the function is approximately 6 minutes. The light in this function is off. Put the baking tray on the cavity base underneath the drain pipe.
-
Page 37: Dealing With Cooking Problems
DEALING WITH COOKING PROBLEMS PROBLEM CAUSES REMEDY Uneven cooking • Incorrect shelf position • Select shelf suitable for cooking function. See cooking function tables in cooking guide • Oven tray too large • Experiment with other trays or dishes • Trays not centralised •... -
Page 38: Getting To Know The Oven
GETTING TO KNOW THE OVEN Get to know the oven with this ‘Simple Test Cake’ Although we strive for a perfect performing oven, it’s possible that there will be some variation in colour when baking. Therefore, we suggest this simple, easy and delicious to make Simple Test Cake, it can help you understand your new oven. -
Page 39: Care And Cleaning
CARE AND CLEANING WARNING WARNING WARNING WARNING Ensure the oven is electrically isolated before cleaning. The door glass on this appliance is made from a tough, This can be done by switching off the appliance via durable material that withstands heating and cooling the powerpoint or isolating switch (if available), or the without breaking. - Page 40 CARE AND CLEANING (CONTINUED) cover back into position. • A special high temperature resistant globe should be used. This can be purchased from Electrolux Customer Care Centre. NOTE: :Light globes are not covered by warranty WARNING WARNING Make sure the appliance is turned off before you remove or replace parts, to avoid the possibility of electric shock.
- Page 41 Stirrup in the open position Door column Retaining clips models - The upper grill elements is secured with 2 clips which can be removed to help clean the oven cavity ceiling. To disengage the lcips, push the edge of the clips towards back of the oven •...
- Page 42 CARE AND CLEANING (CONTINUED) Removing oven door top trim • Take hold of the grid embossed sections of the door trim at each end and press inwards to release the clips. Remove the door trim by pulling it towards you. Cleaning the door glass panels Removing the door glass panels WARNING...
- Page 43 Re-assembling the top door trim • Take hold of the top door trim at each side and position it to the inside edge of the glass. • Push the trim down with its top edge over glass panel until the clip snaps in on each side of the trim. Re-assembling the door glass panels •...
- Page 44 CARE AND CLEANING (CONTINUED) • Open the door fully to access the hinges. • Slowly close the oven door until it is stops against the ‘stirrups’ (about 30°). • Rotate the stirrups (see image below) until they lock into the hook. The oven door may now be closed. Stirrup in locked position Door...
- Page 45 Removing the door glass panels Chamfer to be located in this corner WARNING CAUTION Rough handling, especially around the edges can cause the glass to break. • Lift the black bordered glass panel out of the guide and place on something soft and flat to prevent scratches.
- Page 46 CARE AND CLEANING (CONTINUED) • Open the door fully to access the hinges. • Rotate the ‘stirrups’ (see the image below) until they lock into the hook. The oven door may now be closed. stirrup in locked position Replacing the top door trim •...
- Page 47 WARNING CAUTION Do not lift the door by the handle. Rough handling will cause glass to break. Removing the door glass panels WARNING CAUTION Rough handling, especially around the edges can cause the glass to break. • Take hold of the black bordered glass panel with a hand on its upper and lower edge.
- Page 48 CARE AND CLEANING (CONTINUED) • Repeat for the black bordered glass panel ensuring Before carrying out the Pyrolytic cleaning function the painted surface is facing towards the outside of the door. WARNING WARNING • Clean large deposits, spills or grease from the oven cavity.
- Page 49 (light clean) or 2:30 hours (normal clean) for the Cleaning steam parts (WVEP618 model only) appropriate level of cleaning. SUBMENU APPLICATION • After 5 seconds from the last change, the oven will begin heating and the “Remaining time” will Procedure for cleaning the steam be displayed.
- Page 50 CARE AND CLEANING (CONTINUED) Remove the baking tray after the end of the 10. Insert the water drawer. procedure. Press This activates the second part of the procedure: Steam Assisted Cleaning function Descaling. It will rinse the steam generation circuit. (WVE617 model only) The duration of this part is around 35 minutes.
- Page 51 temperature so that it lies flat on the glass surface Using Cooking areas will stay hot after they are when hot. retained turned off. Turn the cooking area off before heat cooking is finished and use the retained heat Cooking Do’s and Don’ts to finish cooking.
-
Page 52: Troubleshooting
TROUBLESHOOTING Cooktop Faults If there is a problem with the oven and/or grill, please: PROBLEM POSSIBLE CAUSE SOLUTION • Check the points listed below before calling for Heating • Power not • Check cooktop service. It may be possible to avoid a call by fixing the elements not switched on is plugged in and... - Page 53 TROUBLESHOOTING (CONTINUED) Oven PROBLEM POSSIBLE CAUSE Oven or grill • Time of day not set. not working • Power not turned on. • Controls are incorrectly set. • Oven is in ‘Demo’ mode, refer to Using your oven section. • Household fuse has blown or power supply is off. NOTE: If the household fuse continues to blow, call the Customer Care Centre.
-
Page 54: Notes
NOTES NOTES... -
Page 55: Warranty
(c) ‘ASC’ means Electrolux’s authorised serviced centres; the Appliance; (d) ‘Westinghouse’ is the brand controlled by Electrolux Home Products In addition, Electrolux is not liable under this warranty if: Pty Ltd of 163 O’Riordan Street, Mascot NSW 2020, ABN 51 004... - Page 56 WESTINGHOUSE are trademarks of Westinghouse Electric Corporation. Used under license by Electrolux Home Products Pty Ltd. All Rights Reserved. © 2022 Electrolux Home Products Pty Ltd. ABN 51 004 762 341 WMAN_EBIC_Nov22_A18857104 Rev A...