
Related Manuals for Canon imageCLASS X LBP1238 II


Summary of Contents for Canon imageCLASS X LBP1238 II
- Page 1 X LBP1238 II SERVICE MANUAL Canon November 24, 2021 Rev. 3 COPYRIGHT 2021 CANON INC. CANON imageCLASS X LBP1238 II Rev. 3 PRINTED IN U.S.A. ©...
- Page 2 When changes occur in applicable products or in the contents of this manual, Canon will release technical information as the need arises. In the event of major changes in the contents of this manual over a long or short period, Canon will issue a new edition of this manual.
- Page 3 Important Notices Explanation of Symbols The following symbols are used throughout this Service Manual. Symbols Explanation Symbols Explanation Check. Remove the claw. Check visually. Insert the claw. Check a sound. Push the part. Disconnect the connector. Connect the power cable. Connect the connector.
- Page 4 Important Notices 2. In the digital circuits, '1' is used to indicate that the voltage level of a given signal is "High", while '0' is used to indicate "Low". (The voltage value, however, differs from circuit to circuit.) In addition, the asterisk (*) as in "DRMD*" indicates that the DRMD signal goes on when '0'.
-
Page 5: Table Of Contents
Contents Contents Safety Precautions....................1 Laser..............................2 Laser Safety............................2 How to Handle the Laser Scanner Unit....................2 Power Supply / Lithium Battery......................2 Power Supply Guidelines........................2 Notes When Handling a Lithium Battery....................3 Toner Safety............................3 About Toner............................3 Handling Adhered Toner........................3 Notes on works............................3 Points to Note Before Servicing......................3 Points to Note at Cleaning........................ - Page 6 Contents Failure Detection..........................26 Image Formation System........................28 Functional Configuration........................28 Image Formation Process........................29 High Voltage Power Supply Control......................29 Cartridge............................30 Fixing System............................33 Functional Configuration........................33 Fixing Temperature Control......................... 33 Protection Function..........................34 Fixing Assembly Failure Detection......................35 Pickup Feed System......................... 36 Overview............................
- Page 7 Contents 5. Parts Replacement and Cleaning..............72 List of Parts............................73 Major Units............................73 Layout Drawing of Electrical Components..................... 76 External Cover System........................81 Removing the Cartridge........................81 Removing the Right Cover........................82 Removing the Left Cover........................85 Removing the Left Rear Cover......................89 Removing the Front Cover........................
- Page 8 Contents 7. Troubleshooting...................130 Test Print............................131 Engine Test Print..........................131 Controller test print..........................131 Cartridge Log Report........................137 Troubleshooting Items........................139 Remedy for Image Failure........................139 Image Failures Occur at Regular Intervals...................139 Checking the Nip Width of the Fixing Assembly................... 139 Debug Log............................141 Function Overview..........................141 Conditions for collecting logs......................141 Collection procedure..........................141 8.
- Page 9 Contents E732-0001--: Scanner communication error..................150 E733-0000--: Printer communication error...................151 E733-0001--: Received message parity error..................151 E733-0004--: Invalid message reception error..................151 E733-0005--: Message timeout error....................151 E733-0006--: Unknown Communication Error..................151 E733-0007--: SC Level Error......................151 E736-0000--: Fax communication error....................151 E736-0001--: Error in ROM for backing up fax data................151 E744-0001--: Invalid combination of language file versions..............
- Page 10 Contents Backup Data List..........................202 Soft counter specifications......................204 List of Items Which Can Be Imported....................205 Service Mode Settings........................205...
-
Page 11: Safety Precautions
Safety Precautions Laser............. 2 Power Supply / Lithium Battery..... 2 Toner Safety..........3 Notes on works........3... -
Page 12: Laser
Safety Precautions Laser Laser Safety Since radiation emitted inside this machine is completely confined with protective housings and external covers, the laser beam cannot escape from the machine during any phase of normal use by users. Therefore, this machine is classified as a Class 1 laser product under the international standard IEC60825-1 that is regarded as safe during normal use. -
Page 13: Notes When Handling A Lithium Battery
Safety Precautions Notes When Handling a Lithium Battery Dispose of used batteries according to the instructions. CAUTION: Risk of explosion if battery is replaced by an incorrect type. The following warnings are given to comply with Safety Principles (EN60950-1). CAUTION: Wenn mit dem falschen Typ ausgewechselt, besteht Explosionsgefahr. -
Page 14: Points To Note At Cleaning
Safety Precautions • Be careful not to be injured by burrs of edges, sharp corners or protrusions. CAUTION: Hazardous area such as corners, edges, springs and other sharp sections may be remaining on products. Always be aware of the presence of hazardous area to avoid injury caused by contacting and/or striking those area, by not over- concentrating on service work. -
Page 15: Product Overview
Product Overview Product Lineup........6 Features..........8 Specifications........9 Parts Name......... 12... -
Page 16: Product Lineup
1. Product Overview Product Lineup Host Machine <LBP1238 II/1238P II> <1238Pr II> LBP1238 II / 1238P II 1238Pr II Copy Print Remote UI 2-sided printing Control Panel 5-inch Color Touch Panel 5 lined LCD + Numeric keys MEAP Wired LAN Wireless LAN LBP1238 II/1238P II/1238Pr II UFR II... - Page 17 1. Product Overview Name Remark MiCARD Attachment Kit-B1 IC Card Reader (sales company's option) is required.
-
Page 18: Features
1. Product Overview Features Low to Middle Class A4/ LTR B&W Laser Beam Printer This machine is a system upgrade model of LBP1238 series which is the current model. • Usability improvement Wifi setting improvement Added linkage with cloud storage •... -
Page 19: Specifications
1. Product Overview Specifications Product Specifications Item Specification/Function Installation method of Host Desktop Machine Photoreceptor OPC Drum (24 mm dia.) Exposure method Laser beam exposure Charging method Roller charging Developing method Toner projection development Transfer method Roller transfer Separation method Curvature separation Pickup method Cassette: Simple retard method... -
Page 20: Paper Type
1. Product Overview Item Specification/Function Power consumption Maximum 120V: 1280 W or less 230V: 1330 W or less At operation 120V: Approx. 480 W 230V: Approx. 480 W At standby 120V: Approx. 8.5 W 230V: Approx. 9.0 W During sleep mode Approx. - Page 21 1. Product Overview Paper size Standard Cassette Multi-purpose Tray 2-sided 210.0 mm x 297.0 mm 182.0 mm x 257.0 mm 148.0 mm x 210.0 mm 210.0 mm x 148.0 mm 105.0 mm x 148.0 mm 215.9 mm x 355.6 mm 215.9 mm x 279.4 mm STMT 139.7 mm x 215.9 mm...
-
Page 22: Parts Name
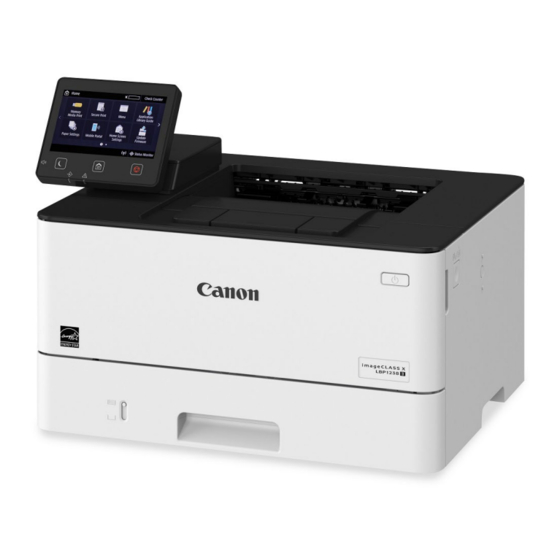
1. Product Overview Parts Name External Cover ■ Front Side of the Machine <LBP1238 II/1238P II> [10] [11] Name Name USB port Pickup Cassette Handle for carrying Delivery Tray Ventilation hole Front Cover Open Button Control Panel [10] Power Switch Front Cover [11] Multi-purpose Tray... - Page 23 1. Product Overview <1238Pr II> [10] Name Name Control Panel Pickup Cassette Handle for carrying Delivery Tray Ventilation hole Power Switch Front Cover Front Cover Open Button Delivery Stopper [10] Multi-purpose Tray...
- Page 24 1. Product Overview ■ Rear Side of the Machine <LBP1238 II/1238P II> <1238Pr II> Name Name Rear Cover USB port (for USB device) Rating name plate label USB port (for PC) Power Socket LAN Port...
-
Page 25: Cross Section View
1. Product Overview Cross Section View ■ Host Machine [10] [11] [12] [13] [14] [15] [21] [20] [19] [18] [17] [16] Name Name Fixing Delivery Roller [12] Delivery Roller Duplex Flapper [13] Cassette Feed Roller Delivery Roller [14] Cassette Separation Roller Pressure Roller [15] Cassette... -
Page 26: Control Panel
1. Product Overview Control Panel <LBP1238 II/1238P II> Name Name Display Error Lamp Volume key Home key Energy Saver Key Stop key Data Lamp... - Page 27 1. Product Overview <1238Pr II> [14] [15] [16] [17] [10] [18] [11] [12] [13] Name Name Display [10] [Authentication] key [Home] key [11] [Clear] key [Back] key [12] [Stop] key Numeric keys ([0] to [9]) [13] [Symbol] key [Kana/Alphabetic/Numeric] key [14] [Utility] key / [<] key [Data] Lamp...
-
Page 28: Technical Explanation (Device)
Technical Explanation (Device) Basic Configuration......19 Controller System........20 Laser Exposure System...... 26 Image Formation System....28 Fixing System........33 Pickup Feed System......36... -
Page 29: Basic Configuration
2. Technical Explanation (Device) Basic Configuration Functional Configuration Description This machine is roughly composed of the following five blocks. • Laser Exposure System • Controller System • Image Formation System • Pickup Feed System • Fixing System Delivery assembly Main controller Manual feed pickup unit... -
Page 30: Controller System
2. Technical Explanation (Device) Controller System Functional Configuration Description This machine is controlled by the Main Controller PCB and the DC Controller PCB. Parts name Role Main Controller PCB System control, image processing control, network control, and retaining various setting values. -
Page 31: Dc Controller Pcb
2. Technical Explanation (Device) Roles and Specifications Roles and Specifications J906 USB TypeB J919 *1 Speaker J907 USB TypeA J920 DC Controller PCB J908 CC-VI (OP) J922 ADF Motor I/F J909 SOFT-ID PCB I/F J923 Reader Motor I/F J910 New card reader (OP) J924 Contact Image Sensor I/F (Reader side) J911... -
Page 32: Fan Control
2. Technical Explanation (Device) Description Sym- Name Drive parts Failure Detection Main Motor Photosensitive Drum, Transfer Roller, Pressure Roller, Fixing Film, Delivery Roller, Duplex Flapper, Duplex Feed Roller, Cassette Pickup Roller, Cas- sette Feed Roller, Feed Roller, Registration Roller, Multi-purpose Tray Pickup Roller Laser Scanner Motor Scanner Mirror... -
Page 33: Door Open Detection
2. Technical Explanation (Device) Door Open Detection Overview This machine uses the Front Cover Switch (SW101) of the High Voltage Power Supply PCB (UN22) to detect whether the Front Cover is opened or closed. Description UN22 SW101 Symbol Name Remarks UN22 High Voltage Power Supply PCB SW101... -
Page 34: Protection Function
2. Technical Explanation (Device) AC input Low Voltage Power Supply Fuse FU101 Fixing control Fixing Assembly circuit Fuse Power Switch FU102 DC Controller FREQSNS LVT Frequency detect circuit +24VD Rectifying +24VA circuit +24VA +24V Generation circuit +3.3VC +3.3VB +3.3VA +3.3VA +3.3V Generation circuit... -
Page 35: Power-Saving Mode
2. Technical Explanation (Device) The machine has 2 power supply fuses (FU101 and FU102) inside the PCB as an additional protection function. If overcurrent occurs in the AC line, the power supply fuse blows and cuts off the power supply. NOTE: This machine has a function that stops supplying the +24VB and +24VC when the Cartridge Door Switch is turned OFF for the safety of users and service technicians. -
Page 36: Laser Exposure System
2. Technical Explanation (Device) Laser Exposure System Functional Configuration Overview The laser exposure system forms a static latent image on the Photosensitive Drum by laser exposure. Description The Laser Scanner Unit consists of the Laser Unit and the Scanner Motor Unit, and is controlled by the signal input from the DC Controller. - Page 37 2. Technical Explanation (Device) Scanner Motor failure detection • When the BD cycle is out of the specified range, an error code is notified. • If a motor error is detected while the Scanner Motor is being driven, an error code is notified. Error Code E100: Scanner area failure •...
-
Page 38: Image Formation System
2. Technical Explanation (Device) Image Formation System Functional Configuration Overview The image formation system forms a toner image on the paper. Description The DC Controller controls the Laser Scanner Unit and High Voltage Power Supply to form the toner image on the Photosensitive Drum, and transfers and fixes this to the paper. -
Page 39: Image Formation Process
2. Technical Explanation (Device) Image Formation Process Description : Paper path Latent image formation : Direction of the drum rotation 2. Laser-beam exposure : Functional block : Step 1. Primary charging Developing 3. Developing Drum cleaning 7. Drum cleaning Delivery Pickup 6. -
Page 40: Cartridge
2. Technical Explanation (Device) High Voltage Power Supply PCB Cartridge Primary charging To Primary Charging Roller bias circuit To Developing Roller DC Controller Developing bias circuit Photosensitive Drum Transfer Roller Transfer bias circuit Cartridge ■ Overview Overview The cartridge has the function to form a visible image on the Photosensitive Drum with toner. Description The cartridge consists of the Photosensitive Drum, Developing Assembly, Primary Charging Roller, Cartridge Memory, etc. - Page 41 When the Cartridge Memory cannot be detected or a non-genuine part is detected, it notifies the Main Controller and a message is displayed on the display. Display: Cartridge communication error| A counterfeit or non-Canon cartridge may be in use. Cartridge Memory Position ■ Cartridge Detection Execution Condition/Timing •...
- Page 42 2. Technical Explanation (Device) Description The DC Controller notifies the Main Controller when cartridge consumption reaches the specified value. Upon receipt of the notification, the Main Controller displays a warning or a message that the cartridge has reached the end of its life on the display.
-
Page 43: Fixing System
2. Technical Explanation (Device) Fixing System Functional Configuration Overview The fixing system forms a permanent image by melting the toner on the paper using pressure and heat. Description The fixing control circuit controls the temperature of the Fixing Assembly. The Fixing Assembly of this machine uses the on-demand fixing method. Fixing Film Pressure Roller Fixing Temperature Signal... -
Page 44: Protection Function
2. Technical Explanation (Device) AC Input Low Voltage Power Supply Unit DC Controller PCB Fixing Control Circuit FREQSNS Frequency Detection Circuit FSRD Fixing Heater +24V Control Circuit RLYD Relay Control Circuit RL101 FSRTH Fixing Heater Safety Circuit Fixing Film TP1:Thermoswitch TH1:Thermistor H1: Fixing Heater Pressure Roller... -
Page 45: Fixing Assembly Failure Detection
2. Technical Explanation (Device) DC Controller PCB The DC Controller PCB monitors the thermistor temperature of the Fixing Heater (Center). When it exceeds the specified temperature, it is judged that the temperature of the Fixing Assembly is abnormally high, and the fixing control signal (FSRD) output is stopped, the relay is turned OFF, and the power supply to the heater is turned OFF. -
Page 46: Pickup Feed System
2. Technical Explanation (Device) Pickup Feed System Overview Overview The pickup, feed, and delivery systems are controlled by the DC Controller. The DC Controller controls the blocks in the pickup, feed, and delivery systems to pickup, feed, and deliver paper inside the machine Description The pickup, feed, and delivery systems consist of the following three blocks. -
Page 47: Parts Configuration
2. Technical Explanation (Device) Parts Configuration Description [10] [11] [12] [21] [20] [19] [18] [17] [16] [15] [14] [13] Name Name Fixing Delivery Roller [12] Feed Roller Duplex Flapper [13] Cassette Feed Roller Delivery Roller [14] Cassette Separation Roller Fixing Film [15] Cassette Pickup Roller Fixing Assembly... -
Page 48: Drive Configuration
2. Technical Explanation (Device) Drive Configuration Sym- Name Sym- Name Main Motor Duplex Reverse Solenoid Cassette Pickup Solenoid Duplex Re-pickup Clutch Multi-purpose Tray Pickup Solenoid Layout of Sensors PS13 PS20 PS21 Symbol Name Symbol Name Cassette Paper Sensor PS13 Fixing Delivery Sensor TOP Sensor PS20 Paper Width Sensor... -
Page 49: Cassette Detection
2. Technical Explanation (Device) Cassette Detection Description Presence of the cassette is detected using the Cassette Paper Sensor (PS1). Symbol Name Cassette Paper Sensor Cassette Pickup Control Description The DC Controller rotates the Pickup Roller by rotating the Main Motor (M1). The Pickup Arm is lifted and lowered to feed the paper by rotating the Pickup Cam with the Cassette Pickup Solenoid (SL1). -
Page 50: Double Feed Prevention Mechanism
2. Technical Explanation (Device) Double Feed Prevention Mechanism Overview This equipment employs the retard separation method to prevent double feed. The retard separation method is the method to prevent double feed of paper, using the Separation Roller that has no drive. The Separation Roller rotates by following the Feed Roller. -
Page 51: Skew Correction
2. Technical Explanation (Device) DC Controller Main Motor MP Tray Pickup Solenoid Paper Multi-purpose Tray Paper Sensor MP Tray Pickup Roller Lifting plate MP Tray Separation Pad Skew Correction Description This machine can correct paper skew without lowering throughput. Skew is corrected as follows. 1. -
Page 52: Delivery Tray Full Detection
2. Technical Explanation (Device) Delivery Tray Full Detection Description The DC Controller detects paper full in the Output Tray using the Delivery Tray Full Sensor (PS4). The DC Controller judges that the Output Tray is full and notifies the Main Controller when the Delivery Tray Full Sensor detects paper for more than the specified period of time during printing. - Page 53 2. Technical Explanation (Device) PS13 PS20 PS21 PS461 This machine uses the following sensors to detect the presence of print paper and whether the print paper is being fed correctly. • TOP Sensor (PS2) • Paper Width Sensor (PS20) • Fixing Delivery Sensor (PS13) •...
-
Page 54: Technical Explanation (System)
Technical Explanation (System) Overview of System Management..45 Version Upgrade......... 46 Setting Information Export/Import Function (DCM)....... 51 Monitoring Function ......58 Security Functions.......64... -
Page 55: Overview Of System Management
3. Technical Explanation (System) Overview of System Management This chapter describes information for service technicians on the system of this machine. Although this chapter contains some information described in the User's Guide, for details on the functions for users, refer to the e-Manual. -
Page 56: Version Upgrade
3. Technical Explanation (System) Version Upgrade Function Overview The following firmware upgrade methods are available with this device. Version upgrade using User Support Tool (UST). Upgrade the firmware of the device using UST Open the file for UST version upgrade on a PC connected with the device and upgrade the firmware. Since the host machine and the PC are connected using a USB cable, version upgrades can be performed in an environment where a network is not available. -
Page 57: Version Upgrade Using Ust
3. Technical Explanation (System) Version Upgrade Using UST UST is included in the firmware for the machine that can be downloaded from the website of CINC. Firmware is downloaded as a zip file and a folder containing UST is extracted by decompressing the file. When executing UST on the PC connected to the machine with a USB Cable, the firmware can be upgraded by downloading it from the PC to the machine. -
Page 58: Version Upgrade Using A Usb Flash Drive
3. Technical Explanation (System) 2. Check if the serial number ("3 alphabetical characters + 5-digit number" or "1-digit number + 2 alphabetical characters + 5-digit number") is shown in [BODY No.] of the printed SPEC REPORT. ****************************** SPEC REPORT *** ****************************** Device Info ZZ999 Series... - Page 59 3. Technical Explanation (System) ■ Prerequisite In order to perform version upgrade of the machine using a USB flash drive, the following conditions must be met. There should be no other jobs being executed. Firmware cannot be upgraded while there is a job being executed. If there is a job being executed, wait for completion of the job and then perform the work.
- Page 60 3. Technical Explanation (System) NOTE: If you want to apply only firmware that is newer than the firmware currently applied in the machine, execute DOWNLOAD. If you want to apply all the firmware contained in the USB flash drive regardless of whether it is newer or older, execute DL_FORCE. DL-FORCE? Executing...
-
Page 61: Setting Information Export/Import Function (Dcm)
3. Technical Explanation (System) Setting Information Export/Import Function (DCM) Overview Various data is stored in the storage inside the device. Depending on the works to be done such as replacing parts, this data needs to be backed up and restored. There are some ways to back up and restore data, and the appropriate one should be used depending on the purpose and storage destination. - Page 62 3. Technical Explanation (System) ■ Combination of Information Exported/Imported by DCM, Means, and Storage Locations A DCM file is exported and imported using the Control Panel, remote UI, or the iW EMC server, depending on the situation of the site. The information exported/imported differs depending on the means.
-
Page 63: Import/Export Procedure From [Settings/Registration] Of Remote Ui
3. Technical Explanation (System) The following shows the procedure to turn ON replacement mode of the device to which the data is imported: 1. Set the following service mode setting value to "1": • COPIER > OPTION > USER > RPL-IMP NOTE: Refer to “List of Items Which Can Be Imported”... - Page 64 3. Technical Explanation (System) 3. After confirming that [Service Mode] is displayed/selected in [Select Item to Export], enter the password and click [Start Exporting]. Address Book Select the check box to export the address book data. Settings/Registration Select this check box to import the menu option data. Encryption password Enter 32 or less numeric characters set when the file was exported.
- Page 65 3. Technical Explanation (System) 2. Exit service mode, start remote UI, log in as a system administrator, and then select the following item: • [Settings/Registration] > [Import/Export] > [Import] 3. Configure the import settings, and click [Start Importing]. Entering the password and clicking [Start Importing] imports the menu option data. [Browse...] button Click to select the file to import.
-
Page 66: Procedure For Exporting/Importing Service Mode Setting Information
3. Technical Explanation (System) 6. Restart this machine, enter service mode, and confirm that the setting information is reflected. This completes the procedure for importing a setting information file. 7. Enter service mode, and set the following item to "0". •... - Page 67 3. Technical Explanation (System) 3. Enter service mode, and execute the following service mode. • COPIER > FUNCTION > SYSTEM > IMPORT 4. The message displayed during the process will disappear. When the display has returned to the original state, remove the USB flash drive.
-
Page 68: Monitoring Function
3. Technical Explanation (System) Monitoring Function Overview of System ■ Function Overview E-RDS (Embedded RDS) is a monitoring program that runs on the host machine. When the monitoring option is enabled by making the setting on this machine, information such as the status change of the machine, counter information, and failure information are collected. -
Page 69: Servicing Notes
3. Technical Explanation (System) Functional cat- Sub category Description egory Operation in- Operation check E-RDS contacts Remote Monitoring Server to check if there is processing to be exe- struction cuted next, and receives the following instructions if any. • Linkage with CDS •... -
Page 70: Maintenance
3. Technical Explanation (System) 2. Enable the E-RDS function in the following service mode, and perform a communication test. 1. Select the following item: • COPIER > FUNCTION > INSTALL > ERDS 2. Enter [1] from the keyboard, and press [Apply]. CAUTION: The following settings i.e. -
Page 71: Error Message List
3. Technical Explanation (System) 12/09 2015 10:14AM **************************** *** E-RDS-COM-LOG*** **************************** No.01 DATE 12/09 2015 TIME 03:21 AM CODE 05000003 Information SUSPEND: Communication test is not performed. No.02 DATE 12/09 2015 TIME 03:21 AM CODE 00000000 Information SUSPEND: mode changed. No.03 DATE 12/09 2015... - Page 72 3. Technical Explanation (System) Code Character strings Cause Remedy 8xxx 0004 Operation is not supported The user tried to execute a method which is Collect Debug log and contact the Support not supported by E-RDS. Dept. of the sales company. 8xxx 0101 Server response error ( NULL ) Remote Monitoring Server reply error: Pro- Perform and complete a communication test...
- Page 73 3. Technical Explanation (System) Code Character strings Cause Remedy 8xxx 2046 Server certificate expired • The root certificate registered on the Set the correct date and time on the device. device has expired. If the date and time set on the device is cor- •...
-
Page 74: Security Functions
3. Technical Explanation (System) Security Functions A technical description on the security-related functions implemented in this equipment and the works to be performed for servicing are shown below. Security Policy Function What is security policy function? The security policy function is a function for collectively configuring the security-related settings on devices located at various places. - Page 75 3. Technical Explanation (System) The system manager can operate/set all the items in the [Settings/Registration] menu of the device. However, if the security policy has been set by the security administrator described later, even the system manager cannot perform operation or change the settings against the security policy. The security administrator is an administrator who creates, applies, edits, backs up, and restores the security policy.
- Page 76 3. Technical Explanation (System) ■ Screen Displayed When Security Policy Is Applied If the security policy is applied, the message shown below appears when you access the [Settings/Registration] screen. Example of the remote UI screen Some settings are in read-only mode because the security settings are enabled.
- Page 77 3. Technical Explanation (System) 2. Display the screen shown below. • [Settings/Registration] > [Management Settings] > [Security Settings] > [Confirm Security Policy] Screen example NOTE: On the [Confirm Security Policy] screen, all the settings related to security policies are displayed regardless of the model. Therefore, policy settings related to functions that are not implemented in the model are also displayed.
-
Page 78: Periodical Service
Periodical Service Periodically Replaced Parts....69 Consumable Parts.......70 Periodical Services......71... -
Page 79: Periodically Replaced Parts
4. Periodical Service Periodically Replaced Parts This machine does not have any periodically replaced parts. -
Page 80: Consumable Parts
4. Periodical Service Consumable Parts This machine does not have any consumable parts. -
Page 81: Periodical Services
4. Periodical Service Periodical Services This machine does not require any periodical service. -
Page 82: Parts Replacement And Cleaning
Parts Replacement and Cleaning List of Parts......... 73 External Cover System....... 81 Controller System........97 Laser Exposure System....113 Image Formation System....115 Fixing System........116 Pickup Feed Delivery System... 119... -
Page 83: List Of Parts
5. Parts Replacement and Cleaning List of Parts Major Units ■ External Cover <LBP1238 II/1238P II> Name Upper Cover Output Tray Front Cover Left Cover Left Rear Cover Rear Cover Right Cover <1238Pr II>... - Page 84 5. Parts Replacement and Cleaning Name Upper Cover Output Tray Front Cover Left Cover Left Rear Cover Rear Cover Right Cover ■ Host Machine <LBP1238 II/1238P II>...
- Page 85 5. Parts Replacement and Cleaning Name Control Panel Unit Fixing Assembly Laser Scanner Unit Registration Unit <1238Pr II> Name Control Panel Unit Fixing Assembly Laser Scanner Unit Registration Unit CAUTION: Do not disassemble the Main Drive Assembly as it cannot be rebuilt after the disassembly.
-
Page 86: Layout Drawing Of Electrical Components
5. Parts Replacement and Cleaning Layout Drawing of Electrical Components ■ Motor/Fan Name Main Motor Laser Scanner Motor Main Fan ■ Heater/Etc. Name Fixing Heater Thermistor Thermo switch Transfer Roller Multi-purpose Tray Pickup Roller Multi-purpose Tray Separation Pad Cassette Separation Roller Unit Cassette Pickup Roller Unit... - Page 87 5. Parts Replacement and Cleaning ■ Switch/Clutch/Solenoid SW101 Name Duplex Re-pickup Clutch Cassette Pickup Solenoid Multi-purpose Tray Pickup Solenoid Duplex Reverse Solenoid Power Switch SW101 Front Cover Switch ■ Sensor PS21 PS20 PS13 Name Cassette Paper Sensor TOP Sensor Multi-purpose Tray Paper Sensor Delivery Tray Full Sensor PS13 Fixing Delivery Sensor...
- Page 88 5. Parts Replacement and Cleaning UN16 UN17 UN18 UN15 UN12 UN22 UN11 UN19 Name Power Switch PCB Relay PCB Laser Scanner Driver PCB DC Controller PCB UN11 Low Voltage Power Supply Unit UN12 Main Controller PCB UN15 USB PCB UN16 Touch Panel UN17 Control Panel PCB...
- Page 89 5. Parts Replacement and Cleaning UN17 UN12 UN22 UN11 UN19 Name Power Switch PCB Relay PCB Laser Scanner Driver PCB DC Controller PCB UN11 Low Voltage Power Supply Unit UN12 Main Controller PCB UN17 Control Panel PCB UN19 Wireless LAN PCB UN22 High Voltage Power Supply PCB UN10...
- Page 90 5. Parts Replacement and Cleaning Name Multi-purpose Tray Paper Sensor PCB Cassette Paper Sensor PCB Paper Width/ Duplex Feed Sensor PCB TOP Sensor PCB UN10 Delivery Tray Full Sensor PCB UN28 Fixing Delivery Sensor PCB...
-
Page 91: External Cover System
5. Parts Replacement and Cleaning External Cover System Removing the Cartridge ■ Procedure CAUTION: When handling the cartridge, be sure to follow the CAUTION shown below. • When removing the cartridge, be sure to block light to the Photosensitive Drum. Cover the removed drum with 5 or more sheets of paper to block light. -
Page 92: Removing The Right Cover
5. Parts Replacement and Cleaning Removing the Right Cover ■ Preparation “Removing the Cartridge” on page 81 ■ Procedure NOTE: This procedure is described using a touch panel model. The work procedure is the same for 5 line panel models, so follow the contents of this procedure to work. 100 mm CAUTION: When removing the cover, moving the product 50 mm or more while the cassette is pulled out will disturb the balance of... - Page 93 5. Parts Replacement and Cleaning CAUTION: If it is moved too much when removing the Cover, pressure will be applied to the Cassette Rear Cover and the cover may be damaged. 50 mm...
- Page 94 5. Parts Replacement and Cleaning NOTE: The positions and removal order of the hook [1], protrusions [2] and claws[3] of the Right Cover are shown below.
-
Page 95: Removing The Left Cover
5. Parts Replacement and Cleaning CAUTION: Shift the host machine back to the center of the working table to prevent it from falling down. NOTE: When installing the Right Cover, be sure to push in the Cartridge Door Button if it is not installed properly. Removing the Left Cover ■... - Page 96 5. Parts Replacement and Cleaning 100 mm...
- Page 97 5. Parts Replacement and Cleaning CAUTION: When removing the cover, moving the product 70 mm or more while the cassette is pulled out will disturb the balance of the product and may cause it to fall down; therefore, do not completely pull out the cassette. 70 mm CAUTION: If it is moved too much, pressure will be applied to the Cassette Rear Cover and the cover may be damaged.
- Page 98 5. Parts Replacement and Cleaning NOTE: The positions and removal order of the protrusions [1] and claws[2] of the Left Cover are shown below.
-
Page 99: Removing The Left Rear Cover
5. Parts Replacement and Cleaning CAUTION: The positions and removal order of the protrusions [1] and claws[2] of the Left Cover are shown below. Removing the Left Rear Cover ■ Preparation “Removing the Cartridge” on page 81 “Removing the Left Cover” on page 85 ■... -
Page 100: Removing The Front Cover
5. Parts Replacement and Cleaning Removing the Front Cover ■ Preparation 1. Remove the cassette. “Removing the Cartridge” on page 81 ■ Procedure... -
Page 101: Removing The Rear Cover
5. Parts Replacement and Cleaning Removing the Rear Cover ■ Preparation “Removing the Cartridge” on page 81 “Removing the Left Cover” on page 85 “Removing the Left Rear Cover” on page 89 “Removing the Right Cover” on page 82 ■ Procedure... -
Page 102: Removing The Upper Cover + Output Tray(5 Line Panel Model)
5. Parts Replacement and Cleaning Removing the Upper Cover + Output Tray(5 Line Panel Model) 5 Line Panel Model only <1238Pr II> ■ Preparation “Removing the Cartridge” on page 81 “Removing the Left Cover” on page 85 “Removing the Left Rear Cover” on page 89... - Page 103 5. Parts Replacement and Cleaning “Removing the Right Cover” on page 82 “Removing the Control Panel Unit ” on page 97 ■ Procedure...
-
Page 104: Removing The Upper Cover + Output Tray(Touch Panel Model)
5. Parts Replacement and Cleaning Removing the Upper Cover + Output Tray(Touch Panel Model) Touch Panel Model only <LBP1238II/1238P II> ■ Preparation “Removing the Cartridge” on page 81 “Removing the Left Cover” on page 85 “Removing the Left Rear Cover” on page 89 “Removing the Right Cover”... - Page 105 5. Parts Replacement and Cleaning...
- Page 106 5. Parts Replacement and Cleaning...
-
Page 107: Controller System
5. Parts Replacement and Cleaning Controller System Removing the Control Panel Unit ■ Preparation “Removing the Cartridge” on page 81 “Removing the Left Cover” on page 85 ■ Procedure... -
Page 108: Removing The Control Panel Unit
5. Parts Replacement and Cleaning Removing the Control Panel Unit ■ Procedure... - Page 109 5. Parts Replacement and Cleaning...
- Page 110 5. Parts Replacement and Cleaning...
-
Page 111: Removing The Wireless Lan Pcb
5. Parts Replacement and Cleaning Actions after replacement: “After Replacing the Control Panel” on page 127 Removing the Wireless LAN PCB ■ Preparation “Removing the Cartridge” on page 81 “Removing the Left Cover” on page 85 ■ Procedure NOTE: When installing, turn over the gloss surface of the Flat Cable to the front side facing upward. -
Page 112: Removing The Wireless Lan Unit
5. Parts Replacement and Cleaning Removing the Wireless LAN Unit ■ Preparation “Removing the Cartridge” on page 81 “Removing the Left Cover” on page 85 ■ Procedure NOTE: When installing, turn over the gloss surface of the Flat Cable to the front side facing upward. Removing the USB Unit ■... -
Page 113: Removing The Usb Pcb
5. Parts Replacement and Cleaning Removing the USB PCB ■ Preparation “Removing the USB Unit” on page 102 ■ Procedure... -
Page 114: Removing The Main Fan
5. Parts Replacement and Cleaning Removing the Main Fan ■ Preparation “Removing the Cartridge” on page 81 “Removing the Left Cover” on page 85 ■ Procedure NOTE: When installing, install to 2 hooks at the lower side. -
Page 115: Removing The Main Controller Pcb
5. Parts Replacement and Cleaning Removing the Main Controller PCB ■ Preparation CAUTION: Make sure to perform“Before Replacing the Main Controller PCB” on page 127before replacing the Main Controller PCB. “Removing the Cartridge” on page 81 “Removing the Left Cover” on page 85 “Removing the Wireless LAN Unit”... -
Page 116: Removing The Main Controller Unit
5. Parts Replacement and Cleaning Actions after replacement: “After Replacing the Main Controller PCB” on page 127 Removing the Main Controller Unit ■ Preparation “Removing the Cartridge” on page 81 “Removing the Left Cover” on page 85 “Removing the Wireless LAN Unit” on page 102 ■... -
Page 117: Removing The Dc Controller Pcb Cover
5. Parts Replacement and Cleaning <LBP1238II/1238P II> J918 J902 J927 J920 J926 J907 J908 J904 J906 J905 J920 J911 J909 J912 <1238Pr II> J902 J914 J920 J907 J908 J904 J906 J905 J920 J911 J909 J912 Removing the DC Controller PCB Cover ■... -
Page 118: Remove The Dc Controller Pcb
5. Parts Replacement and Cleaning Remove the DC Controller PCB ■ Preparation “Removing the Cartridge” on page 81 “Removing the Left Cover” on page 85 “Removing the Wireless LAN Unit” on page 102 “Removing the Main Controller Unit” on page 106 “Removing the DC Controller PCB Cover”... - Page 119 5. Parts Replacement and Cleaning ■ Procedure CAUTION: When installing, make sure that the groove [A] of High Voltage Power Supply PCB and Contact Spring are in contact.
-
Page 120: Removing The Low Voltage Power Supply Unit
5. Parts Replacement and Cleaning Removing the Low Voltage Power Supply Unit ■ Preparation “Removing the Cartridge” on page 81 “Removing the Left Cover” on page 85 “Removing the Left Rear Cover” on page 89 “Removing the Right Cover” on page 82 “Removing the Rear Cover”... -
Page 121: Removing The Relay Pcb
5. Parts Replacement and Cleaning Removing the Relay PCB ■ Preparation “Removing the Cartridge” on page 81 “Removing the Front Cover” on page 90 “Removing the Left Cover” on page 85 “Removing the Left Rear Cover” on page 89 “Removing the Right Cover” on page 82 “Removing the Control Panel Unit”... - Page 122 5. Parts Replacement and Cleaning ■ Procedure...
-
Page 123: Laser Exposure System
5. Parts Replacement and Cleaning Laser Exposure System Removing the Laser Scanner Unit ■ Preparation “Removing the Cartridge” on page 81 “Removing the Left Cover” on page 85 “Removing the Left Rear Cover” on page 89 “Removing the Right Cover” on page 82 “Removing the Control Panel Unit”... - Page 124 5. Parts Replacement and Cleaning NOTE: When installing it, tighten the screws in the order of numbers in the illustration.
-
Page 125: Image Formation System
5. Parts Replacement and Cleaning Image Formation System Removing the Transfer Roller ■ Preparation “Removing the Cartridge” on page 81 ■ Procedure CAUTION: Do not touch the surface of the roller with bare hands, as doing so will attach skin oil on it and decrease feedability. NOTE: Procedure for Installing the Transfer Roller. -
Page 126: Fixing System
5. Parts Replacement and Cleaning Fixing System Removing the Fixing Assembly ■ Preparation “Removing the Cartridge” on page 81 “Removing the Left Cover” on page 85 “Removing the Left Rear Cover” on page 89 “Removing the Right Cover” on page 82 “Removing the Rear Cover”... - Page 127 5. Parts Replacement and Cleaning CAUTION: Points to Note when Installing the Link Arm. Be sure to check that the Link Arm is installed properly, otherwise the Cartridge Cover cannot be closed.
-
Page 128: Removing The Fixing Motor
5. Parts Replacement and Cleaning Removing the Fixing Motor ■ Preparation “Removing the Cartridge” on page 81 “Removing the Right Cover” on page 82 ■ Procedure NOTE: When installing it, tighten the screws in the order of numbers in the illustration. -
Page 129: Pickup Feed Delivery System
5. Parts Replacement and Cleaning Pickup Feed Delivery System Removing the Cassette Pickup Roller Unit. ■ Preparation 1. Remove the cassette. ■ Procedure CAUTION: Do not touch the surface of the roller with bare hands, as doing so will attach skin oil on it and decrease feedability. Removing the Cassette Separation Roller Unit ■... -
Page 130: Removing The Multi-Purpose Tray Pickup Roller Unit
5. Parts Replacement and Cleaning ■ Procedure CAUTION: Do not touch the surface of the roller with bare hands, as doing so will attach skin oil on it and decrease feedability. Removing the Multi-purpose Tray Pickup Roller Unit ■ Preparation 1. - Page 131 5. Parts Replacement and Cleaning “Removing the Multi-purpose Tray Pickup Roller Unit” on page 120 ■ Procedure CAUTION: Do not touch the surface of the roller with bare hands, as doing so will attach skin oil on it and decrease feedability.
-
Page 132: Removing The Registration Unit
5. Parts Replacement and Cleaning CAUTION: Points to Note at Installation • When installing it, be sure that the grooves on the left and right and the spring are fitted correctly. • Be sure to slide the MP Tray Roller Holder until it clicks. Removing the Registration Unit ■... - Page 133 5. Parts Replacement and Cleaning ■ Procedure CAUTION: Do not touch the Gear Unit of the Registration Unit. Grease is applied on the Gear Unit. If you have accidentally touched grease, wipe with lint-free paper so as not to smear other parts with your greasy hand.
- Page 134 5. Parts Replacement and Cleaning...
- Page 135 5. Parts Replacement and Cleaning CAUTION: Points to Note when Installing the Link Arm. Be sure to check that the Link Arm is installed properly, otherwise the Cartridge Cover cannot be closed.
-
Page 136: Adjustment
Adjustment Actions at Parts Replacement...127... -
Page 137: Actions At Parts Replacement
6. Adjustment Actions at Parts Replacement NOTE: After replacing the Main Controller PCB or DC Controller PCB, upgrade the firmware as necessary. When upgrading the firmware, it has to be executed before restoring the data or entering the value of the service mode. After Replacing the Control Panel 1. - Page 138 6. Adjustment 2. Enter service mode. A Setup Guide screen (in English) for setting the time and date will appear. Forcibly open the service mode screen. 3. Location information setting [Setting value] 1: Japan, 2: North America, 3: Korea, 4: China, 5: Taiwan, 6: Europe, 7: Asia, 8: Oceania, 9: Brazil, 10: Latin America •...
- Page 139 6. Adjustment ■ Reinstalling the Drivers (Only When the MFNP Port Is Used) NOTE: • In the case of setting the print port in a TCP/IP environment, the drivers do not need to be reinstalled. Refer to "Setting Up the Network Environment" in the User's Guide, and set up the network environment again. •...
-
Page 140: Troubleshooting
Troubleshooting Test Print...........131 Cartridge Log Report......137 Troubleshooting Items.......139 Debug Log.........141... -
Page 141: Test Print
7. Troubleshooting Test Print Engine Test Print This machine has an engine test print function to check whether the printer engine is operating normally. NOTE: The engine test print can be performed by using only the DC Controller. Therefore it can be output even when the Main Controller is failed. - Page 142 7. Troubleshooting Follow the procedure shown below to output the test print. 1. Select the following service mode. TESTMODE > PRINT > PG-TYPE 2. Enter the PG number using the numeric keypad, and press the [Apply] key. NOTE: If necessary, change the settings for test print in the following service mode. If the settings are not changed, a test print will be executed with the initial values of service mode settings.
- Page 143 7. Troubleshooting ● Halftone Pattern (TYPE = 1) Check item Checking method Assumed cause Transfer failure Check the evenness of density. Failure of transfer system Failure of Transfer Roller Black line Check that no black line appears on the image. Failure of developing system Failure of cleaning (drum) Failure of Transfer Roller...
- Page 144 7. Troubleshooting Check item Checking method Assumed cause Transfer failure Check the evenness of density. Failure of transfer system Failure of Transfer Roller White line Check that no white line appears on the image. Failure of developing system Uneven Pitch Check that no line appears in the horizontal scanning direction Failure of Photosensitive Drum of the image.
- Page 145 7. Troubleshooting ● Gradation 17 Pattern (TYPE = 4) Check item Checking method Assumed cause Gradation Check that gradation in density is made appropriately. Failure of Photosensitive Drum Failure of laser exposure system Failure of developing system Fogging Check that no fogging appears in the blank area. Failure of Photosensitive Drum Failure of laser exposure system Failure of developing system...
- Page 146 7. Troubleshooting Check item Checking method Assumed cause Black line Check that no black line appears on the image. Failure of developing system Failure of cleaning (drum) Failure of Transfer Roller White line Check that no white line appears on the image. Soiling on the laser light path Failure of developing system...
-
Page 147: Cartridge Log Report
7. Troubleshooting Cartridge Log Report Logs such as history of cartridge replacement are output as a report. There are two types of cartridge log reports; one for users and one for service technicians. CAUTION: Do not provide users with the cartridge log report for service technicians because it contains detailed information that is not disclosed to end users. - Page 148 7. Troubleshooting Replacement logs The record of replacement and usage of cartridges will be printed. CAUTION: Just after the cartridge has been replaced with a genuine cartridge or when a non-genuine cartridge is used, accurate information cannot be obtained and a random or approximate value may be printed. Item Description Remarks...
-
Page 149: Troubleshooting Items
When an image failure occurs, perform the remedy by referring to the following material. • User's Guide > Top > Troubleshooting > When You Cannot Print Properly NOTE: URL of User's Guide -> http://canon.com/oip-manual Image Failures Occur at Regular Intervals Overview Foreign matters or scratches on rollers may cause image failures of the regular intervals in the vertical scanning direction of the image. - Page 150 7. Troubleshooting 1. In the following service mode, print solid black using A4/LTR size paper. • TESTMODE > PRINT > PG-TYPE = 2 • TESTMODE > PRINT > START 2. Load the printed paper with the solid black side facing up in a cassette of the machine. 3.
-
Page 151: Debug Log
7. Troubleshooting Debug Log Function Overview The debug log is a log that analyzes the program behavior of the machine to enable developers to identify problems. This machine is embedded with a function that compiles the log of the behavior of each software module as debug log and outputs it as integrated log for analyzing problems. - Page 152 7. Troubleshooting "Executing..." is displayed while log collection is executed. When it is completed, the screen shows the service mode screen again. 4. Remove the USB flash drive by the correct procedure. Connect the USB flash drive to the PC, and check that the log file shown below has been saved. •...
-
Page 153: Error/Jam/Alarm
Error/Jam/Alarm Overview........... 144 Error Code.........148 Jam Code..........154 Alarm Code........156... -
Page 154: Overview
8. Error/Jam/Alarm Overview This chapter describes codes that are displayed when a failure has occurred on the product. These codes are classified in 3 categories. Each code can be checked by printing the device log list. Code type Description Error Code This code is displayed when a failure (disabling of host machine's operation) occurs which affects printing. -
Page 155: Jam/Err Log Report
8. Error/Jam/Alarm Alarm log SERVICE MODE > COPIER > DISPLAY > ALARM-2 SERVICE MODE > COPIER > DISPLAY > ALARM-3 For R&D use Alarm details code 090831 1624 3-1234567-123456 Year/Month/Day Time/Minute Alarm Code Indication example ALARM-2 090831 1624 3-1234567-123456 ------ ---- ------ ---- ------ ---- ------ ---- ------ ---- JAM/ERR LOG REPORT... -
Page 156: Location Overview Code
8. Error/Jam/Alarm Item Alarm Code Alarm details code (for R&D use) Total counter Location Overview Code The location overview is displayed in a single digit and has the meaning shown below. Device Location overview code Host machine Location Code The jam codes of this machine contain information on the location. The location information is displayed in a single digit and has the meaning shown below: Device Location code... - Page 157 8. Error/Jam/Alarm Paper size Paper size code Control Panel (UI) Jam/Err Log Report *1 Foolscap (Australia) 00202 LGL (India) 00215 3 x 5 inch 00064 Envelope No.10 (COM10) 00022 Envelope Monarch 00023 Envelope C5 00021 Envelope DL 00024 *1: Size code on the JAM/ERR LOG REPORT.
-
Page 158: Error Code
8. Error/Jam/Alarm Error Code E000-0000-- Error in temperature rising of Fixing Assembly Detection Description Temperature of the Fixing Assembly did not reach certain temperature within the specified period of time. Remedy 1. Check the harness/connector between the Fixing Assembly and the Engine Controller PCB (UN1). -
Page 159: E015-0000--: Main Motor Error
8. Error/Jam/Alarm E015-0000-- Main Motor error Detection Description An error was detected in the Main Motor. Remedy 1. Check the harness/connector between the Main Motor (M701) and the Low Voltage Power Supply PCB (UN2). 2. Check the harness/connector between the Low Voltage Power Supply PCB (UN2) and the Engine Controller PCB (UN1). -
Page 160: E196-3001-- Rom-Id Mismatch (Emmc)
8. Error/Jam/Alarm E196-3001-- ROM-ID mismatch (eMMC) Detection Description The eMMC has been replaced wrongly. The eMMC failure occurred. Remedy 1. Update the firmware. 2. Replace the Main Controller PCB (UN30). E198-0000-- Engine Controller memory failure Detection Description An error in the nonvolatile memory on the Engine Controller PCB. Remedy 1. -
Page 161: E733-0000-- Printer Communication Error
8. Error/Jam/Alarm E733-0000-- Printer communication error Detection Description A communication error between the Engine Controller PCB and the Main Controller PCB occurred. Remedy 1. Check the harness/connector between the Engine Controller PCB (UN1) and the Main Controller PCB (UN30). 2. Install the set of controller firmware. 3. -
Page 162: E744-0002-- Language File Error
8. Error/Jam/Alarm E744-0002-- Language file error Detection Description The size of the language file exceeded the allowed size. Remedy 1. Update the firmware. E744-1001-- Version mismatch between BOOTABLE and BOOTROM Detection Description A version mismatch between the main program and the start-up program. Remedy 1. -
Page 163: E840-0000-- Pressure Release Mechanism Error
8. Error/Jam/Alarm E840-0000-- Pressure release mechanism error Detection Description An error in the pressure release mechanism of the Fixing Assembly was detected. Remedy 1. Check the harness/connector between the Fixing Pressure Release Switch (SW2) and the Engine Controller PCB (UN1). 2. -
Page 164: Jam Code
8. Error/Jam/Alarm Jam Code PS13 PS20 PS21 PS461 Location Code Jam code Jam Type Sensor Name Sensor No. Residual Paper Area 0901 Pickup Delay Jam TOP Sensor Host Machine Pickup Cassette 0902 Multi-purpose Tray 0A01 Host Machine Pickup Cassette 1107 Pickup Stationary TOP Sensor Registration to Drum... - Page 165 8. Error/Jam/Alarm Location Code Jam code Jam Type Sensor Name Sensor No. Residual Paper Area Delivery Stationary Delivery Tray Full 2909 Fixing to Delivery Level Sensor Area 290A Delivery Area 3107 Delivery Stationary Delivery Tray Full Registration to Drum Level Sensor Area 3108 Drum to Fixing Area...
-
Page 166: Alarm Code
8. Error/Jam/Alarm Alarm Code Alarm Code Details 10-0100 Toner Cartridge replacement notification alarm (K) A. Operation / B. Cause / Detail Code: 0071 C. Remedy When the replacement with a genuine Toner Cartridge was detected. 10-0100 Unidentified Toner Cartridge replacement notification alarm (K) A. -
Page 167: Service Mode
Service Mode Overview........... 158 COPIER (Service mode for printer)...161 TESTMODE (Service mode for test print, operation check, etc.)... 195... -
Page 168: Overview
9. Service Mode Overview Entering Service Mode For information on how to enter service mode, contact the Support Dept. of the sales company. Backing up Service Mode Because setting values and management data of the host machine are stored in the eMMC of the Main Controller PCB, they need to be backed up before replacing the Main Controller PCB. - Page 169 9. Service Mode • Service mode is not used on the Control Panel. If service mode is accessed from the Control Panel of the host machine, "Log-in user exists already." is displayed when service mode is accessed from Remote UI. •...
-
Page 170: Service Mode Explanation
9. Service Mode 2. Enter the password, and click [LOGIN]. Password required for authentication differs depending on the following service mode setting: COPIER > OPTION > BODY > PSWD-SW Combinations of service mode settings and required passwords PSWD-SW Password required for authentica- Authentication screen setting tion... -
Page 171: Copier (Service Mode For Printer)
9. Service Mode COPIER (Service mode for printer) DISPLAY (State display mode) COPIER (Service mode for printer) > DISPLAY (State display mode) ■ VERSION COPIER (Service mode for printer) > DISPLAY (State display mode) > VERSION MAIN Display of Bootable version Detail To display the firmware version of Main Controller PCB. -
Page 172: Adjust (Adjustment Mode)
9. Service Mode COPIER (Service mode for printer) > DISPLAY (State display mode) ■ USER COPIER (Service mode for printer) > DISPLAY (State display mode) > USER SPDTYPE Display of engine speed type Detail To display the engine speed type (ppm) of this machine. Use Case When checking the engine speed type Adj/Set/Operate Method... - Page 173 9. Service Mode COPIER (Service mode for printer) > ADJUST (Adjustment mode) > FEED-ADJ ADJ-MFX Adjustment of write start position in horizontal scanning direction at Multi-purpose Tray pickup (1-sided print/2nd side of 2-sided print) Detail To adjust the write start position in the horizontal scanning direction for the image on the 1st side at the time of pickup from the Multi-purpose Tray.
- Page 174 9. Service Mode COPIER (Service mode for printer) > ADJUST (Adjustment mode) > FEED-ADJ ADJ-MFXR Adjustment of write start position in horizontal scanning direction at Multi-purpose Tray pickup (1st side of 2-sided print) Detail To adjust the write start position in the horizontal scanning direction for the image on the 2nd side at the time of pickup from the Multi-purpose Tray.
- Page 175 9. Service Mode COPIER (Service mode for printer) > ADJUST (Adjustment mode) > FEED-ADJ ADJ-C1X Adjustment of write start position in horizontal scanning direction at Cassette 1 pickup (1- sided print/2nd side of 2-sided print) Detail To adjust the write start position in the horizontal scanning direction for the image on the 1st side at the time of pickup from the Cassette 1.
- Page 176 9. Service Mode COPIER (Service mode for printer) > ADJUST (Adjustment mode) > FEED-ADJ ADJ-C1XR Adjustment of write start position in horizontal scanning direction at Cassette 1 pickup (1st side of 2-sided print) Detail To adjust the write start position in the horizontal scanning direction for the image on the 2nd side at the time of pickup from the Cassette 1.
- Page 177 9. Service Mode COPIER (Service mode for printer) > ADJUST (Adjustment mode) > FEED-ADJ ADJ-C2X Adjustment of write start position in horizontal scanning direction at Cassette 2 pickup (1- sided print/2nd side of 2-sided print) Detail To adjust the write start position in the horizontal scanning direction for the image on the 1st side at the time of pickup from the Cassette 2.
- Page 178 9. Service Mode COPIER (Service mode for printer) > ADJUST (Adjustment mode) > FEED-ADJ ADJ-C2XR Adjustment of write start position in horizontal scanning direction at Cassette 2 pickup (1st side of 2-sided print) Detail To adjust the write start position in the horizontal scanning direction for the image on the 2nd side at the time of pickup from the Cassette 2.
-
Page 179: Function (Operation / Inspection Mode)
9. Service Mode COPIER (Service mode for printer) > ADJUST (Adjustment mode) > VIFADJ FU-TMP Adjustment of Fixing Film surface temperature setting value Detail To adjust the setting value of the surface temperature of the Fixing Film. Use Case When an image failure occurs Adj/Set/Operate Method Enter the setting value (switch negative/positive by +/- key), and then press Apply key. - Page 180 9. Service Mode COPIER (Service mode for printer) > FUNCTION (Operation / inspection mode) > INSTALL RGW-PORT Setting of Remote Monitoring Server port number when using Embedded-RDS Detail To set the port number of Remote Monitoring Server to be used for Embedded-RDS. Use Case When using Embedded-RDS Adj/Set/Operate Method...
- Page 181 9. Service Mode COPIER (Service mode for printer) > FUNCTION (Operation / inspection mode) > INSTALL RGW-ADSW Remote Monitoring Server connection destination settings for Embedded-RDS Detail To change the server URL that the Embedded-RDS uses. Adj/Set/Operate Method Enter the setting value, and then press OK key. Caution Com-TEST needs to be executed to reflect the settings.
- Page 182 9. Service Mode ■ CLEAR COPIER (Service mode for printer) > FUNCTION (Operation / inspection mode) > CLEAR SRVC-DAT Clearing of service mode setting values Detail To clear the service mode setting values. The user mode setting values are not cleared. The factory adjustment values of the Reader/DADF are not initialized.
- Page 183 9. Service Mode COPIER (Service mode for printer) > FUNCTION (Operation / inspection mode) > CLEAR CRGL-CNT Clearing of cartridge replacement log Detail To clear the cartridge replacement log. Adj/Set/Operate Method Select the item, and then press Yes key. Related Service Mode COPIER >...
- Page 184 9. Service Mode COPIER (Service mode for printer) > FUNCTION (Operation / inspection mode) > SYSTEM PANEL-UP Upgrading of Control Panel CPU PCB firm Detail To upgrade the firmware of the Control Panel CPU PCB using a USB flash drive. Upgrading is performed when PANEL exists in the root directory of the USB flash drive.
- Page 185 9. Service Mode COPIER (Service mode for printer) > FUNCTION (Operation / inspection mode) > SYSTEM RSTR-SM Restore of service mode setting info Detail To restore the service mode setting information (excluding those related to Reader/DADF, but including those related to Finisher) which has been backed up with SAVE-SM from the USB flash drive using DCM function.
- Page 186 9. Service Mode COPIER (Service mode for printer) > FUNCTION (Operation / inspection mode) > SPLMAN SPL65677 Increase of paper leading edge margin Detail To increase the margin on the leading edge of paper. As the value is incremented by 1, the margin is increased by 0.1 mm. Actually, a value where the setting value of SPL68676 is subtracted from the setting value of this item is applied.
- Page 187 9. Service Mode COPIER (Service mode for printer) > FUNCTION (Operation / inspection mode) > SPLMAN SPL93822 Setting of department ID count all clear Detail To set whether to disable clearing of all department ID counts. Use Case When prohibiting clearing of all department ID counts Adj/Set/Operate Method 1) Enter the setting value, and then press Apply key.
- Page 188 9. Service Mode COPIER (Service mode for printer) > FUNCTION (Operation / inspection mode) > SPLMAN SPL84194 ON/OFF of Embedded-RDS Detail To set ON/OFF of Embedded-RDS function. Use Case When using Embedded-RDS Adj/Set/Operate Method 1) Enter the setting value, and then press Apply key. 2) Turn OFF/ON the main power switch.
- Page 189 9. Service Mode COPIER (Service mode for printer) > FUNCTION (Operation / inspection mode) > SPLMAN SPL78148 ON/OFF of gradation characteristics compatible mode Detail To set whether to make the density gradation characteristics of halftone the same as those of conventional machines.
- Page 190 9. Service Mode COPIER (Service mode for printer) > FUNCTION (Operation / inspection mode) > SPLMAN SPL50444 Select paper source for PCL5 Detail To select a paper source for PCL5.. Display/Adj/Set Range 0 to 3 0: HP compatible 1: Lexmark compatible 2: Zoran PCL compatible 3: Not used Default Value...
-
Page 191: Option (Specification Setting Mode)
9. Service Mode OPTION (Specification setting mode) ■ BODY COPIER (Service mode for printer) > OPTION (Specification setting mode) > BODY LOCALE Setting of location Detail To set the location. Set the location in this item and the paper size configuration in SIZE-LC, and then clear the setting information in ALL. - Page 192 9. Service Mode COPIER (Service mode for printer) > OPTION (Specification setting mode) > BODY MIBCOUNT Set of charge counter MIB scope range Detail To set the range of counter information that can be obtained as MIB (Management Information Base). Adj/Set/Operate Method 1) Enter the setting value, and then press Apply key.
- Page 193 9. Service Mode COPIER (Service mode for printer) > OPTION (Specification setting mode) > BODY NS-LGN Restriction on the use of LOGIN authentication at SMTP authentication Detail To restrict use of LOGIN authentication at the time of SMTP authentication. Use Case Upon user's request Adj/Set/Operate Method 1) Enter the setting value, and then press Apply key.
- Page 194 9. Service Mode COPIER (Service mode for printer) > OPTION (Specification setting mode) > BODY PSWD-SW Set password type to enter service mode Detail To set the type of password that is required to enter when getting into service mode. 2 types are available: one for "service technician"...
- Page 195 9. Service Mode COPIER (Service mode for printer) > OPTION (Specification setting mode) > FNC-SW CDS-FIRM Set to allow firmware update by admin Detail To set whether to allow the user (administrator) to perform firmware update linked with CDS and collection of log files.
- Page 196 0: OFF 1: ON Default Value GEN-CRG ON/OFF of Canon Genuine Mode display Detail To set whether to display Canon Genuine Mode. Adj/Set/Operate Method Enter the setting value, and then press Apply key. Display/Adj/Set Range 0: Hide 1: Display Default Value Supplement/Memo Enabled only for Cartridge model.
- Page 197 9. Service Mode COPIER (Service mode for printer) > OPTION (Specification setting mode) > DSPLY-SW RMT-CNCT Sw mssg dspl on machine w/o Remote Monitoring Server connect Detail To set whether to display the message "Contact your service representative." to the customer who uses the machine without having Remote Monitoring Server connected.
- Page 198 9. Service Mode COPIER (Service mode for printer) > OPTION (Specification setting mode) > USER COUNTER3 Setting of software counter 3 Detail To set counter type for software counter 3 on the Counter Check screen. Use Case Upon user/dealer's request Adj/Set/Operate Method 1) Enter the setting value, and then press Apply key.
- Page 199 9. Service Mode COPIER (Service mode for printer) > OPTION (Specification setting mode) > USER TNRB-SW ON/OFF of toner replacement counter display Detail To set whether to display the toner replacement counter on the Counter Check screen. When 1 is set, the user can check the toner replacement counter. Use Case Upon user's request Adj/Set/Operate Method...
- Page 200 9. Service Mode COPIER (Service mode for printer) > OPTION (Specification setting mode) > USER RPL-IMP ON/OFF of replacement mode Detail To set whether to import the setting information of a machine which has been exported to a different one of the same model using DCM function. When 0 is set, the setting information which has been exported can be imported only to the same machine.
-
Page 201: Counter (Counter Mode)
9. Service Mode COUNTER (Counter mode) ■ TOTAL COPIER (Service mode for printer) > COUNTER (Counter mode) > TOTAL SERVICE1 Service-purposed total counter 1 Detail To count up when the printout is delivered outside the machine. Large size: 1, Small size: 1 A blank sheet is not counted. - Page 202 9. Service Mode COPIER (Service mode for printer) > COUNTER (Counter mode) > TOTAL MD-PRT Media print counter Detail To count up when the media print is delivered outside the machine. Large size: 1, Small size: 1 The counter is not advanced by blank paper or delivery in service mode. Adj/Set/Operate Method N/A (Display only) Display/Adj/Set Range...
- Page 203 9. Service Mode COPIER (Service mode for printer) > COUNTER (Counter mode) > PICK-UP 2-SIDE 2-sided pickup total counter Detail To count up the number of sheets picked up in duplex mode. Large size: 1, Small size: 1 The counter is advanced by printout in service mode. Adj/Set/Operate Method N/A (Display only) Display/Adj/Set Range...
- Page 204 9. Service Mode COPIER (Service mode for printer) > COUNTER (Counter mode) > JAM Cassette 2 jam counter Detail To count up the number of jam occurrences in the Cassette 2. The counter is advanced even in the case of paper size mismatch or misprint. Use Case When checking the jam counter Adj/Set/Operate Method...
-
Page 205: Testmode (Service Mode For Test Print, Operation Check, Etc.)
9. Service Mode TESTMODE (Service mode for test print, operation check, etc.) PRINT (Print test mode) TESTMODE (Service mode for test print, operation check, etc.) > PRINT (Print test mode) PG-TYPE Setting of PG number Detail To set the PG number of the test print. Use Case At trouble analysis Adj/Set/Operate Method... - Page 206 9. Service Mode TESTMODE (Service mode for test print, operation check, etc.) > PRINT (Print test mode) THRU Setting of image correction table at test print Detail To set the image correction table that is used at the time of test print output. When 0 is set, normal gamma LUT is used so that the density characteristics by the density correction process can be checked.
- Page 207 9. Service Mode TESTMODE (Service mode for test print, operation check, etc.) > PRINT (Print test mode) START Output of test print Detail To output a test print with the PG pattern set in PG-TYPE, MODE, etc. Use Case At trouble analysis Adj/Set/Operate Method Select the item, and then press Yes key.
-
Page 208: Appendices
APPENDICES Service Tools........199 General Circuit Diagram....200 Backup Data List....... 202 Soft counter specifications....204 List of Items Which Can Be Imported ............205... -
Page 209: Service Tools
Service Tools Service Tools Special Tools • No special tools are required when servicing the machine. Solvents and Oil List Type Purpose Remark Ethyl alcohol • Cleaning: • Purchase locally metal part, oil stains, toner stains • Keep away from flame... -
Page 210: General Circuit Diagram
General Circuit Diagram General Circuit Diagram General Circuit Diagram (1/2) Laser Scanner Unit UN22 High Voltage Laser Scanner Multi-purpose Tray Power Supply PCB Motor Pickup Solenoid SW101 Memory Front Cover Switch Cassette Pickup Solenoid Main Motor Main Fan Laser Scanner Driver PCB Power Switch Power Switch PCB... -
Page 211: General Circuit Diagram (2/2)
General Circuit Diagram General Circuit Diagram (2/2) UN16 5inc LCD Touch Panel 5 lined LCD UN17 Control Panel PCB UN15 USB PCB UN17 Control Panel PCB UN18 Control Panel LED PCB UN19 Wireless LAN PCB UN12 Main Controller PCB UN20 Memory PCB UN21 SOFT-ID PCB... -
Page 212: Backup Data List
Backup Data List Backup Data List Deletion Menu > Prefer- Menu > Management Settings Service Mode ences Replace Backup by User Backup by Service COPIER Data Location > FUNC- Network Data Management COPIER > FUNCTION > CLEAR TION > Initialize SPLMAN All Data / Settings... - Page 213 Backup Data List Deletion Menu > Prefer- Menu > Management Settings Service Mode ences Replace Backup by User Backup by Service COPIER Data Location > FUNC- Network Data Management COPIER > FUNCTION > CLEAR TION > Initialize SPLMAN All Data / Settings Initialize Menu DC Con-...
-
Page 214: Soft Counter Specifications
Soft counter specifications Soft counter specifications The numbers entered for software counters are classified as follows: Counter Details 100 to 199 Total 100 to 199 Counter Name Total 1 Total 2 Total (Black & White/Small) Total 1 (2-Sided) Cartridge Replacement (Black) -
Page 215: List Of Items Which Can Be Imported
List of Items Which Can Be Imported List of Items Which Can Be Imported The following shows items to be imported for this function. Note that the setting values are not imported in cases such as below: • Items which are originally not included in a DCM file (e.g.:"Settings/Registration Basic Information" of a DCM file exported using service mode) •... - Page 216 List of Items Which Can Be Imported Initial screen Main item Intermediate Sub item Case A Case B Case C item COPIER FUNCTION INSTALL RGW-PORT COPIER OPTION BODY MIBCOUNT COPIER OPTION BODY NS-CMD5 COPIER OPTION BODY NS-PLN COPIER OPTION BODY NS-LGN COPIER OPTION...
- Page 217 List of Items Which Can Be Imported Initial screen Main item Intermediate Sub item Case A Case B Case C item SSSW SW32 MENU MENU MENU MENU MENU MENU TONE TONE PULSE FORM PULSE PULSE PULSE PULSE DIALTONE DIALTONE DIALTONE DIALTONE DIALTONE *1.
- Page 218 List of Items Which Can Be Imported Initial screen Main item Intermediate Sub item Case A Case B Case C item DIALTONE DIALTONE DIALTONE DIALTONE 2ND DLTN 2ND DLTN 2ND DLTN 2ND DLTN 2ND DLTN 2ND DLTN 2ND DLTN 2ND DLTN 2ND DLTN BUSTONE0 BUSTONE0...
- Page 219 List of Items Which Can Be Imported Initial screen Main item Intermediate Sub item Case A Case B Case C item AUTO RX AUTO RX CNGDTCT CNGDTCT CNGDTCT CNGDTCT CNGDTCT CNGDTCT CNGDTCT CNGDTCT SPECIALB SW01 SPECIALB SW02 SPECIALB SW03 SPECIALB SW04 SPECIALB SW05...
- Page 220 List of Items Which Can Be Imported Initial screen Main item Intermediate Sub item Case A Case B Case C item SPECIALN SPECIALN SPECIALN SPECIALN SPECIALN SPECIALN SPECIALN SPECIALN SPECIALN SPECIALN SPECIALN SPECIALN SPECIALN SPECIALN SPECIALN SPECIALN SPECIALN SPECIALN SPECIALN SPECIALN SPECIALN SPECIALN...