Table of Contents
Advertisement
Quick Links
USE AND CARE GUIDE
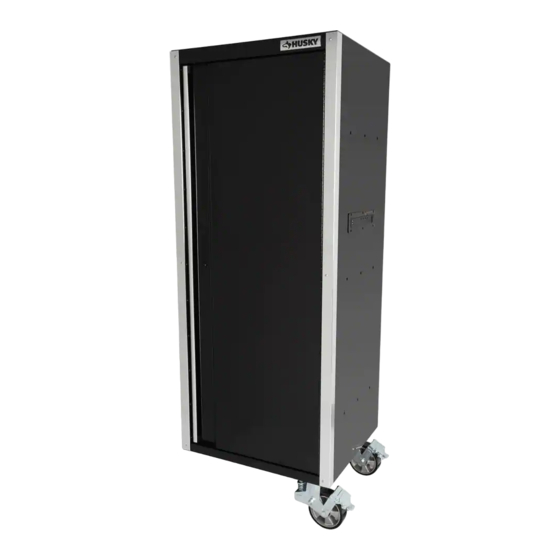
Husky Professional Duty 27.5 in. Side Locker
Questions, problems, missing parts?
Before returning to the store, call
Husky Customer Service
8 a.m – 7 p.m., EST, Monday-Friday
9 a.m – 6 p.m., EST, Saturday
1-888-HD-HUSKY
HUSKYTOOLS.COM
We appreciate the trust and con dence you have placed in Husky through the purchase of this
create quality products designed to enhance your home. Visit us online to see our full line of products available for your home
THANK YOU
improvement needs. Thank you for choosing Husky!
Store SKU # 1006636654
Internet SKU # 1006581373
Model # HPRO27SLOCKERBL
side locker.
We strive to continually
Advertisement
Table of Contents

Related Manuals for Husky HPRO27SLOCKERBL


Summary of Contents for Husky HPRO27SLOCKERBL
- Page 1 THANK YOU side locker. We appreciate the trust and con dence you have placed in Husky through the purchase of this We strive to continually create quality products designed to enhance your home. Visit us online to see our full line of products available for your home...
-
Page 2: Table Of Contents
Table of Contents Table of Contents ..........2 Assembly ............... 6 Safety Information ..........2 Cordless Power Tool Battery Chargers ....14 Warranty ..............4 .... - Page 3 CAUTION: RISK OF ELECTRICAL SHOCK: This unit has one power supply cord. Make sure the cord is unplugged before any servicing or cleaning. HUSKYTOOLS.COM Please contact 1-888-HD-HUSKY for further assistance.
-
Page 4: Warranty
Warranty This Husky Professional Grade product includes a Limited Lifetime Warranty, whereas the manufacturer warrants the product to be free from defects in materials and workmanship for the product’s useful life. If any part of this product is found to be defective, the manufacturer’s only obligation, and purchaser’s exclusive remedy, is to provide replacement parts at the manufacturer’s discretion, provided that the product has not... - Page 5 Package Contents (continued) NOTE: Locker keys are attached to door. Part Description Quantity Locker Swivel caster Power outlet Outlet panel cover Blank plate Magnetic Husky® logo badge HUSKYTOOLS.COM Please contact 1-888-HD-HUSKY for further assistance.
-
Page 6: Assembly
Assembly This Husky 27.5 in. Side Locker is only intended to be used with the Husky Professional Duty system, which includes the following products: 72 in. 20-Dr. Professional Duty Workbench Model # HPRO72MWC20BLK SKU # 1006636633 / 1006581370 72 in. Professional Duty Hutch... - Page 7 Remove the Power outlet (C) from the left wall of the Locker (A) by removing the 6 Phillips head screws from the outlet panel cover (D) and gently pulling the Power outlet (C) and holder from the cabinet. Opening direction HUSKYTOOLS.COM Please contact 1-888-HD-HUSKY for further assistance.
- Page 8 □ Remove from the HPRO72MWC20BLK Workbench, the side handle, rubber grommet, 2 power cord storage hooks, power outlet and holder. □ Remove the Power outlet from the Workbench by removing the 6 Phillips head screws from the outlet panel cover and gently pulling the Power outlet and the holder out of the cabinet.
- Page 9 Note: If assembling Locker (A) to the left side of the Workbench, then casters will mount to the left side. If assembling Locker (A) to the right side of the Workbench, then casters will mount to the right side. HUSKYTOOLS.COM Please contact 1-888-HD-HUSKY for further assistance.
- Page 10 Attach Locker Support Base Plate □ Attach the Support Base Plate (CC) to the bottom of the Workbench by inserting 5 M8 (AA) and washers (BB) through the Base Plate (CC). Use the Hex Key (HH) to tighten the bolts to the bottom frame . Note: If assembling Locker (A) to the left side of the Workbench,then Base Supported will mount to the left side.
- Page 11 Install the Storage Hooks (EE) on the back of the Side Locker (A) with 4 pcs Hexagon socket button cap bolts (DD). □ Wrap any loose or excess cord around the cord Storage Hooks. HUSKYTOOLS.COM Please contact 1-888-HD-HUSKY for further assistance.
- Page 12 Adjustable Height Sliding Trays To adjust the height of the sliding trays: □ Remove by fully extending the empty tray. □ Push up on one slide release lever while pulling down on the other release lever. □ Gently pull the tray outward until it releases from the outer slides. Drawer slide release lever □...
- Page 13 Plastic Plugs □ Insert the Plastic Plugs (HH&II) into the remaining open holes on the side walls of the Side Locker (A) per the diagram below. HUSKYTOOLS.COM Please contact 1-888-HD-HUSKY for further assistance.
-
Page 14: Cordless Power Tool Battery Chargers
Kwikset Smartkey® Lock Operation □ This product has been equipped with the Kwikset Smartkey® locks which allow you to easily program each lock cylinder to a specific key code to match other Kwikset keyed products. □ The lock cylinders have been factory keyed to the corresponding alphabetic lettering found on the Kwikset Smartkey® label located on the back of the key chain, as well as af xed to the product itself. -
Page 15: Replacement Parts
Replacement Parts For assistance with replacement parts please call 1-888-HD-HUSKY. Part Part# Description Quantity PA18022700 Magnetic Badge AY04016400 Kwikset Smartkey® Lock MB15003700 AA99014600 Outlet DB126478R5 Outlet Panel Cover DB127557R5 Blank Plate RA99020100 Rubber Grommet Storage Hook ML990558R5 MF05018900 Storage Hook Bolt... - Page 16 Questions, problems, missing parts? Before returning to the store call Husky Customer Service 8 a.m. - 7 p.m., EST, Monday-Friday 9 a.m. - 6 p.m., EST, Saturday 1-888-HD-HUSKY HUSKYTOOLS.COM Retain this manual for future use.