Table of Contents
Advertisement
Quick Links
USE AND CARE GUIDE
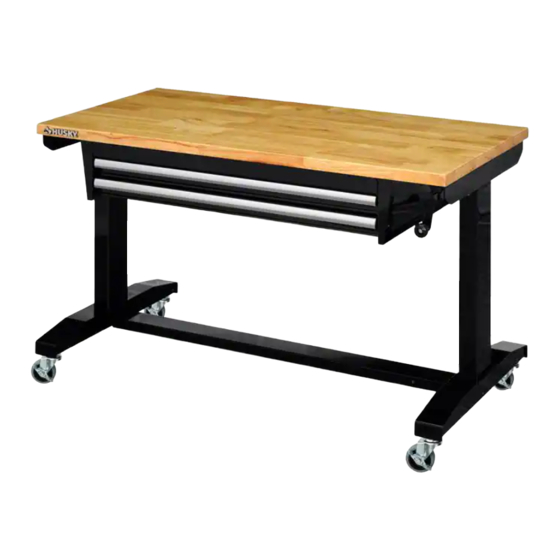
HUSKY 46 IN. ADJUSTABLE HEIGHT WORK TABLE WITH 2 DRAWERS
Questions, problems, missing parts?
Before returning to the store, call
Husky Customer Service
8 a.m. - 7 p.m., EST, Monday-Friday, 9 a.m. - 6 p.m., EST, Saturday
1-888-HD-HUSKY
HUSKYTOOLS.COM
We appreciate the trust and confidence you have placed in Husky through the purchase of this work table. We strive to continually
create quality products designed to enhance your home. Visit us online to see our full line of products available for your home
THANK YOU !
improvement needs. Thank you for choosing Husky!
SKU # 100x
SKU # 100x
Model # HOLT4602B12
Model # HOLT4602BJ2
Advertisement
Table of Contents

Related Manuals for Husky HOLT4602B12


Summary of Contents for Husky HOLT4602B12
- Page 1 THANK YOU ! We appreciate the trust and confidence you have placed in Husky through the purchase of this work table. We strive to continually create quality products designed to enhance your home. Visit us online to see our full line of products available for your home...
-
Page 2: Table Of Contents
Table of Contents Table of Contents ............Assembly ............... 2 Safety Information ............Operation ..............2 Warranty ................ Care and Cleaning ........... 3 Pre-Assembly ............Service Parts ..............4 .............. Tools Required 4 ............Hardware Included 4 ..............Specifications 4 .......... -
Page 3: Warranty
The manufacturer specifically disclaims any liability and shall not be liable for any consequential or incidental loss or damage, including but not limited to any labor/expense costs involved in the replacement or repair of said product. Contact the Customer Service Team at 1-888-HD-HUSKY or visit www.huskytools.com. HUSKYTOOLS.COM 3 ... -
Page 4: Pre-Assembly
Pre-Assembly TOOLS REQUIRED Phillips Safety 10 mm 13 mm goggles Wrench Wrench screwdriver HARDWARE INCLUDED NOTE: Hardware not shown to actual size. Part Description Quantity Screw M6 x 15L Bolt M8 x 15L Washer M8 5/8 in. Wrench SPECIFICATIONS Maximum capacity (drawer) 35 lbs Maximum capacity 300 lbs... -
Page 5: Package Contents
Quantity Part Description Quantity Wood top Support rail Leg (Right) Caster Crank handle Drawer Slide (pair) Leveling feet Drawer Leg (Left) Drawer side panel Top rail Back panel Rotating rod Front panel HUSKYTOOLS.COM 5 Please contact 1-888-HD-HUSKY for further assistance. -
Page 6: Assembly
(E). Determine the front and back of the top before starting. The front of the wood top (A) has the Husky badge on the edge. Attach the right leg (B) to the wood top (A) as shown using four M6x15L screws (AA). - Page 7 Note: Leveling feet have been pre-assembled on the leg. Caster installation 11. Attach the back panel (M) to the drawer side panels (L) by using two screws (AA) for each side. HUSKYTOOLS.COM Please contact 1-888-HD-HUSKY for further assistance.
-
Page 8: Operation
Assembly (continued) 12. Attach the front panel (N) to the drawer side panels (L) by using one Remove the drawers using the steps below screw (AA) for each side. □ Fully extend and empty the drawer. □ Depending on the slide, either lift or lower the release lever on both sides so the slides can ride over the stops. -
Page 9: Care And Cleaning
Windex . □ Do not allow chemicals, water, or other substances to remain on the wood top for extended periods of time to reduce the risk of damage to the wood. HUSKYTOOLS.COM 9 Please contact 1-888-HD-HUSKY for further assistance. -
Page 10: Service Parts
Service Parts Part Description Quantity Wood top Leg (Right) Crank handle Leveling feet Leg (Left) Top rail Rotating rod Support rail Caster Drawer Slide (pair) 10 ... - Page 11 Questions, problems, missing parts? Before returning to the store, call Husky Customer Service 8 a.m.-7 p.m., EST, Monday-Friday, 9 a.m. - 6 p.m., EST, Saturday 1-888-HD-HUSKY HUSKYTOOLS.COM Retain this manual for future use.