Table of Contents

Related Manuals for Siemens ER3A6AD70A


Summary of Contents for Siemens ER3A6AD70A
- Page 1 Built-in gas hob ER3A6AD70A User manual and installation instructions Register your product on My Siemens and discover exclusive ser- vices and offers. siemens-home.bsh-group.com/welcome The future moving in. Siemens Home Appliances...
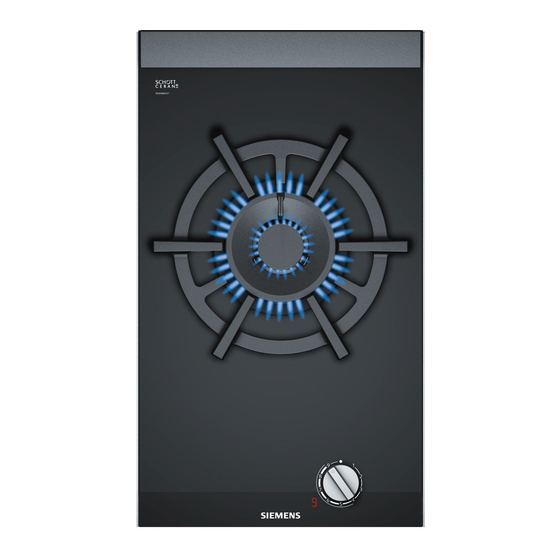
- Page 2 ER3A.AD7.A Component Pan support Control knobs Dual-wok multi-crown burner with an output of up to 6,10 kW The images shown in these instructions are for guid- ance only.
- Page 3 Safety en Futher information and explanations are available online: Table of contents 1.2 Intended use The appliance can only be used safely if it is INFORMATION FOR USE correctly installed according to the safety in- structions. The installer is responsible for en- Safety .............. 3 suring that the appliance works perfectly at its 1.4 Safe installation .......... 4...
- Page 4 en Safety 1.4 Safe installation 1.5 Safe use Follow these safety instructions when in- WARNING ‒ Risk of explosion! stalling the appliance. Escaping gas may cause an explosion. WHAT ¡ Read the installation instructions carefully. TO DO IF YOU SMELL GAS OR IF THERE → "Installation instructions", Page 6 ARE FAULTS IN THE GAS INSTALLATION ¡...
- Page 5 Safety en Escaping gas may ignite. WARNING ‒ Risk of poisoning! ▶ If the burner does not ignite after Using the gas cooking appliance leads to a 10 seconds, turn the control knob to the build-up of heat, moisture and combustion "Off" position and open the door or window products in the room where the appliance is in the room.
-
Page 6: Installation Instructions
en Installation instructions ▶ Never pull on the power cord to unplug the connect the appliance from the power sup- appliance. Always unplug the appliance at ply. the mains. ▶ Shut off the gas supply. ▶ If the appliance or the power cord is dam- ▶... - Page 7 Installation instructions en ¡ In recesses of 500 mm, the appliance must be in- ¡ Height of the pan support above the worktop sur- stalled on the front edge of the recess. face: up to 60 mm. ¡ Seal the cut surfaces of wooden work surfaces with a special glue seal to protect them from moisture.
- Page 8 en Installation instructions ¡ After installation of the shield the clearance around 2.6 Electrical connection the top and sides of shield will allow adequate vent- Follow the instructions for electrical connection. ilation. Ensure the side and top clearances are not ¡ An electrical 10 amp socket needs to be within 1 m obstructed.
- Page 9 Installation instructions en ¡ The cooktop must be connected to the gas supply ¡ Refer to AS/NZS 5601.1 for piping size details. with upstream connection of an isolation valve in ac- ¡ Remove plastic cap from gas supply line prior to in- cordance with the respectively valid regulations.
- Page 10 en Installation instructions Tools ATTENTION! The circuit board can be damaged by improper hand- Contact technical customer service to purchase the rel- ling. evant tools. Handle the circuit board carefully. ▶ Removal lever 483196 Use anti-static shields or hold the circuit board at ▶...
- Page 11 Installation instructions en Replacing the injectors Tighten the fastening screw. Replace the nozzles using the appropriate wrench ▶ and tighten them carefully to guarantee the seal. Ensure that the nozzle does not become detached during removal or fastening. Replacing the outer flame nozzle on the multi-crown burner Requirement: The upper part of the appliance has been removed.
- Page 12 en Preventing material damage Remove the inner flame nozzle from the sleeve and Calibrating the electronics screw in the new nozzle. ▶ Screw the sleeve and the tube back into their ori- ginal position. Reinstalling the appliance Install the appliance components in reverse order. ▶...
-
Page 13: Familiarising Yourself With Your Appliance
Environmental protection and saving energy en 4 Environmental protection and saving energy 4.1 Saving energy Use a glass lid. ¡ You can see into the pan through a glass lid If you follow these instructions, your appliance will use without having to lift it. less energy. - Page 14 Accessories vary from one appliance to another. When purchasing accessories, always quote the exact product number (E no.) of your appliance. → Page 19...
-
Page 15: Basic Operation
Basic operation en 7 Basic operation ¡ The burner holes and grooves must be clean to en- 7.1 Igniting a gas burner sure a correct flame. The cooktop has automatic ignition of the burners. → "Cleaning the burners", Page 17 WARNING ‒ Risk of fire! Escaping gas may ignite. 7.2 Safety system If the burner does not ignite after 10 seconds, turn ▶... -
Page 16: Cleaning And Servicing
en Recommended settings for cooking Do not use deformed Deformed cookware is Place the cookware right The cookware may tip cookware. Only use cook- not stable on the cooktop in the centre of the over if it is not placed in ware with a thick, flat and may tip over. -
Page 17: Troubleshooting
Troubleshooting en Clean using a sponge and soapy water. Insert the burner parts. Ensure that the burner caps Dry with a soft cloth. are correctly positioned on the flame spreader. → "Burner", Page 14 Tip: Remove spilled liquids immediately. This prevents food remains from sticking, and the time and effort re- quired for subsequent cleaning is reduced. - Page 18 en Service Fault Cause and troubleshooting Automatic ignition is The appliance is not earthed or has not been connected correctly, or the earth cable is not working. damaged. Contact an electrician. ▶ The burner flame is The burner parts are positioned incorrectly. not uniform.
-
Page 19: Customer Service
Customer Service en 13 Customer Service Detailed information on the warranty period and terms 13.1 Product number (E-Nr.) and production of warranty in your country is available from our after- number (FD) sales service, your retailer or on our website. You can find the product number (E-Nr.) and the pro- If you contact Customer Service, you will require the duction number (FD) on the appliance's rating plate. - Page 20 BSH Hausgeräte GmbH Carl-Wery-Straße 34 81739 München, GERMANY siemens-home.bsh-group.com Manufactured by BSH Hausgeräte GmbH under the trademark licence of Siemens AG *8001262286* 8001262286 (021201)