Advertisement
INTRODUCTION
Thank you for selecting the Oregon Scientific RF Projection Clock with Indoor Thermometer (RM331P/RM331PU). This device bundles precise time keeping, alarm and temperature features into a single timepiece. Keep this manual handy as you use your new product. It contains practical step-by-step instructions, as well as technical specifications and warnings you should know.
PACKAGE CONTENTS

OVERVIEW
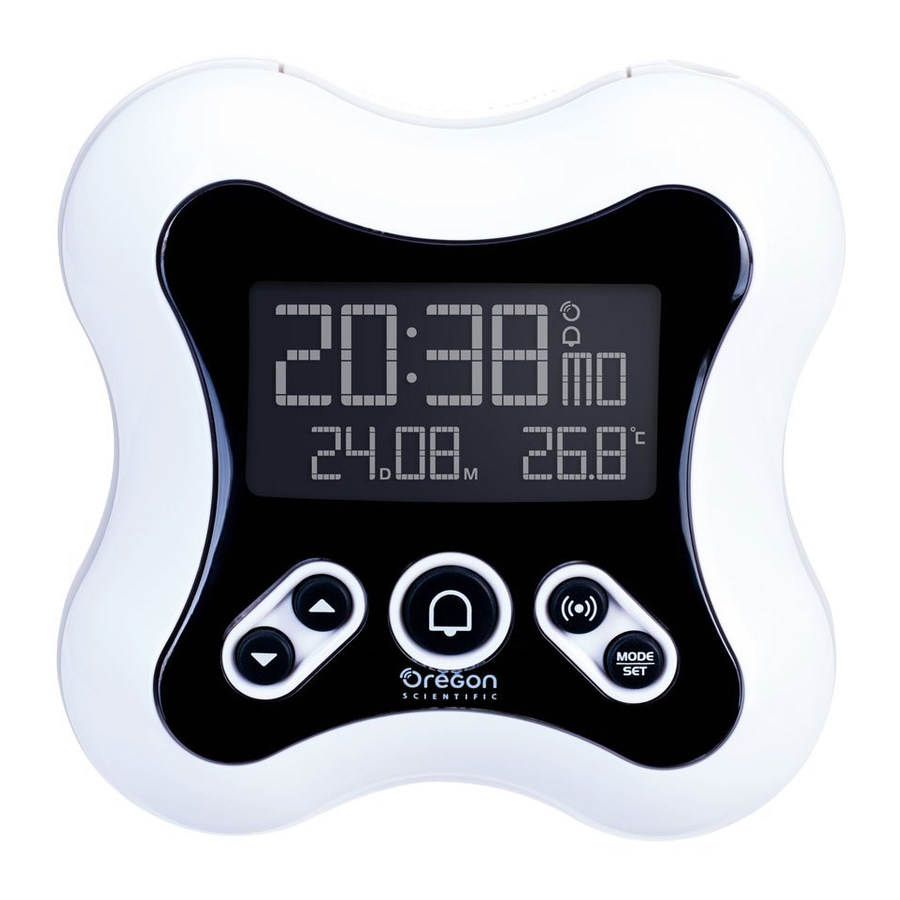
MAIN UNIT


- Press to decrease a value in setting mode
- Press and hold to decrease a value rapidly in setting mode
- Press to flip the projection light by 180° in idle
- Press and hold to turn off the RF clock signal reception in idle

- Press to increase a value in setting mode
- Press and hold to increase a value rapidly in setting mode
- Press to flip the projection light by 180° in idle
- Press and hold to turn on the RF clock signal reception in idle

- Press to turn on / off the alarm function.
- Press to turn off the alarm sound when alarm is ringing (alarm will activate in the next day).

- Press to toggle between calendar display mode and alarm display mode.
- In alarm display mode, press and hold for 2 seconds to enter alarm setting mode.

- Press to toggle between clock: second /clock: weekday display mode.
- Press and hold for 2 seconds to enter clock time setting mode.
- Snooze/Light
- Press to turn on the backlight and projection for 5 seconds
- Snooze the alarm
- Press and hold until the unit beeps to turn on the projection for 5 minutes.
- Projection lens
- Battery compartment
- RESET - Press to reset the unit to factory default
- AC power adaptor jack
LCD DISPLAY

- Time/Weekday/Seconds display
- Calendar (Month/Date/; Date/Month) /Alarm display, Indoor temperature display
| Symbol | Description |
 | RCC signal received |
 | Alarm is on |
 | Low battery |
 | Time zone selection indicator |
 | Alarm display mode |
GETTING STARTED
INSTALL BATTERIES
- Remove the battery compartment cover.
- Install the supplied 2 x 1.5 V AAA alkaline batteries, matching the polarity symbols (+ and -).
- The alarm clock enters standby mode and the time appears on the display.
NOTE
- Replace the batteries when
![]() displays, or when the display/backlight is dim. Press RESET after each battery replacement before replace the battery compartment cover.
displays, or when the display/backlight is dim. Press RESET after each battery replacement before replace the battery compartment cover.
 displays, or when the display/backlight is dim. Press RESET after each battery replacement before replace the battery compartment cover.
INSTALL METAL STAND
Attach the metal stand to the main unit to put it on a flat surface.
Push the metal stand to the end of the installation hole.

CONNECT AC ADAPTER
Connect the supplied AC adapter to the power jack on the bottom of the unit and plug into a standard outlet. Plug the connector of the AC adapter from above the metal stand into the power jack.

NOTE The batteries are only for back-up power source to save the time, alarm and calendar information. Always connect the unit to the power grid source via AC/DC adapter.
CLOCK
CLOCK RECEPTION
This clock synchronizes automatically with a clock signal.
Press and hold  to turn on and search for the clock signal.
The main unit is able to receive RF clock data with different RCC signal:
| Model Number | Region | Signal |
| RM331P | EU | DCF |
| RM331PU | UK | MSF |
NOTE Not applicable to Asia and non-designated areas.
Clock signal reception indicator:
| Icons | Description |
 | Main unit is searching for clock signal strength |
 (flash) | Main unit is searching for clock signal |
| | No clock signal |
 | Strong RCC signal received |
 | Weak RCC signal received |
NOTE
It takes 2 - 10 minutes to receive the clock signal. If the signal is weak, it could take up to 24 hours to receive a valid signal.
SETTING THE CLOCK MANUALLY
- Press and hold
![]() to disable signal reception. The
to disable signal reception. The ![]() icon turns off.
icon turns off. - Press and hold
![]() for 2 seconds to enter clock setting mode.
for 2 seconds to enter clock setting mode. - Press once or press and hold
![]() /
/ ![]() to quickly adjust the settings for 12/24 hour format -> time-zone offset (+/-23 hours) -> hour -> minute -> year -> calendar format (month-day/day-month) -> month -> date -> temperature unit ( °C/ °F ) and weekday language.
to quickly adjust the settings for 12/24 hour format -> time-zone offset (+/-23 hours) -> hour -> minute -> year -> calendar format (month-day/day-month) -> month -> date -> temperature unit ( °C/ °F ) and weekday language. - Press
![]() to confirm and go to the next setting.
to confirm and go to the next setting.
 to disable signal reception. The
  icon turns off.
 for 2 seconds to enter clock setting mode.
 /
/ NOTE
- Complete each step within 20 seconds or the clock radio will exit the clock setting mode.
- In clock setting mode, press and hold
![]() for 2 seconds to exit the setting mode.
for 2 seconds to exit the setting mode. - The language options are English (EN), German (GE), French (FR), Italian (IT) and Spanish (SP).
- The RCC signal reception is on after each reset or battery replacement.
- The RCC signal turns off automatically when you set time, year, month or date manually.
ALARM
SETTING ALARM
- Press and hold
![]() for 2 seconds to enter alarm setting mode. The clock digits flash.
for 2 seconds to enter alarm setting mode. The clock digits flash. - Press once or press and hold
![]() /
/ ![]() to quickly adjust the settings.
to quickly adjust the settings. - Press
![]() to confirm and go to the next setting.
to confirm and go to the next setting.
 for 2 seconds to enter alarm setting mode. The clock digits flash.
To turn on/off the alarm, press  .
.
OPERATION
When the alarm sounds, the backlight will flash. You may:
- Press SNOOZE to stop the alarm for 8 minutes. The alarm indicator will flash.
- Press
![]() to stop the alarm for 24 hours.
to stop the alarm for 24 hours.
PROJECTION/BACKLIGHT
Press SNOOZE to turn on the projection and backlight for 5 seconds, or press and hold until the unit beeps to turn on the projection for 5 minutes. For the optimal projection results, place the unit within 1.5 - 2 m (5 - 6.5 ft) from the ceiling or wall
To use the continuous projection feature, connect the AC power adaptor to a suitable outlet.
| PROjECTION ON | |
| With Adapter |
|
| Without Adapter |
|
NOTE
When you press and hold the Snooze/Light to turn on/off the projection, the device beeps once.

VideosOregon Scientific RM331P Product Video
Documents / ResourcesDownload manual
Here you can download full pdf version of manual, it may contain additional safety instructions, warranty information, FCC rules, etc.
Download Oregon Scientific RM331P, RM331PU - RF Projection Clock Manual
Advertisement
Thank you! Your question has been received!


Need Assistance?
Do you have a question about the RM331P that isn't answered in the manual? Leave your question here.