Table of Contents
Advertisement
Instructions for Set-up, Operation, Maintenance & Storage
T
M
RAILER
OUNTED
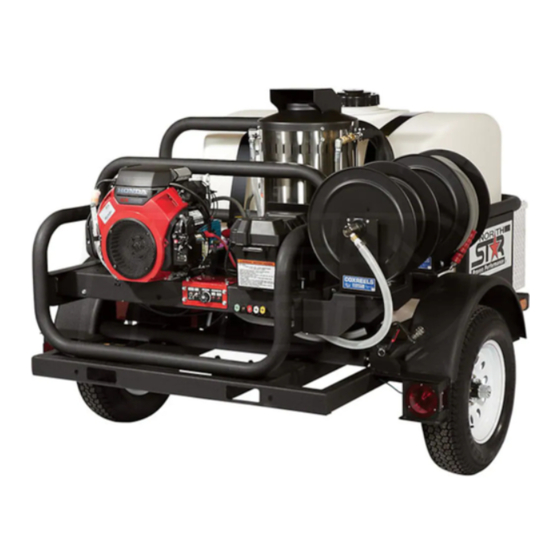
This pressure washer produces both cold and hot water high pressure spray. Cleaning chemicals may be
incorporated into the spray if desired. The pressure pump for this equipment is powered by a gasoline internal
combustion engine and the water is heated by a kerosene/fuel-oil fired, open flame burner.
READ and UNDERSTAND this Owner's Manual and the Engine Owner's Manual completely before
attempting to set up and use the pressure washer! Failure to properly set up, operate, and maintain this
pressure washer could result in serious injury or death to operator or bystanders.
CO Poisoning
Skin/Eye Injury
Burns
Slips/Falls
Flying Debris
Fire/
Explosion
Chemical
Exposure
Electric shock
Trailer
tip over
A summary of important safety information is provided at the end of the manual.
Any Questions, Comments, Problems, or Parts Orders
Owner's Manual
, H
W
OT
Portable Outdoor-Use Only
WARNING – READ THIS MANUAL
WARNING – SPECIAL HAZARDS
•
Exhaust from both the engine and burner contains carbon monoxide, a poisonous gas
that can cause carbon monoxide poisoning and possible death if inhaled. ONLY run
pressure washer OUTDOORS and at least 20 feet from the home, away from
windows, vents and air intakes, to allow proper ventilation. If you start to feel sick,
dizzy, or weak while using the pressure washer, shut off the engine and get to fresh air
RIGHT AWAY.
•
High-pressure spray can cause serious skin or eye injury, including injection injury if
fluid pierces the skin. Injection injury can result in blood poisoning and/or severe
tissue damage.
•
Hot spray can scald and burn skin.
•
Hot surfaces of wand, engine and burner, as well as hot exhaust from both the engine
and burner can cause burns.
•
Spray discharge can cause puddles and slippery surfaces.
•
Spray-gun kickback can cause operator loss of balance and falls.
•
High-pressure spray can cause surface damage and flying debris.
•
Engine and burner sparking can ignite fuel or other flammable liquids or vapors in the
vicinity.
•
Hot exhaust from engine and burner can ignite combustible materials.
•
Cleaning chemical vapors or contact with skin may be hazardous.
•
Spray contact with electrical sources can cause electric shock.
•
Sudden stopping or turning while towing the pressure washer with a filled water tank
can result in driving instability and/or trailer tip over.
Call NorthStar Product Support 1-800-270-0810
M157595BE
ITEM NUMBER: 157595
SERIAL NUMBER: _____________
P
ATER
RESSURE
W
4000
ASHER
/ 4
PSI
GPM
Advertisement
Table of Contents

Related Manuals for North Star M157595BE


Summary of Contents for North Star M157595BE
- Page 1 M157595BE ITEM NUMBER: 157595 SERIAL NUMBER: _____________ Owner's Manual Instructions for Set-up, Operation, Maintenance & Storage 4000 RAILER OUNTED ATER RESSURE ASHER Portable Outdoor-Use Only This pressure washer produces both cold and hot water high pressure spray. Cleaning chemicals may be incorporated into the spray if desired.
- Page 2 Hazard Signal Word Definitions Equipment Protection Quick Facts STOP! Closely inspect to make sure no components are missing or damaged. See the Inspect Upon "Assembly and Initial Set-Up" section for instructions on whom to contact to report Delivery missing or damaged parts. STOP! Engine is shipped without oil.
-
Page 3: Table Of Contents
Table of Contents About Your Pressure Washer .................... 4 Specifications ......................... 5 Component Identification ....................6 Safety Labeling ........................8 Special Equipment Safety Features ..................10 Assembly and Initial Set-Up ....................11 Step 1. Unpacking & Delivery Inspection ..............11 Step 2. -
Page 4: About Your Pressure Washer
About Your Pressure Washer Thank you for purchasing a NorthStar hot water pressure washer! Your machine is designed for long life, dependability, and the top performance you demand. This pressure washer is designed to: 1) Produce a high-pressure spray of heated or unheated water (up to 5 gallons per minute at 4000 psi). 2) Incorporate cleaning chemicals into a low-pressure water spray. -
Page 5: Specifications
Specifications MODEL Model # 157595 FLOW OUTPUT Pressure Rating 4000 psi Flow Rate 4 gpm Maximum Temperature 210 F DIMENSIONS / COMPONENTS Length 129" Width 76" Height 60" 970 lbs. – dry Weight 2500 lbs. – water tank full Pump Type CAT 66DX Engine Displacement 630cc... -
Page 6: Component Identification
Component Identification Ref # Description Ref # Description Ref # Description Unloader Ball Valve Engine Key Switch (feed tank) Engine Ball Valve Circuit Breaker (see engine manual) (city tap water) Inlet Plumbing Water Filter Heat Switch Diesel Tank Control Panel Thermostat Gasoline Tank Battery Box... - Page 7 Component Identification REFERENCE GUIDE 1. Unloader Valve that regulates pressure and directs flow into bypass when trigger is closed. 2. Engine The air-cooled engine powers the pump. 3. Inlet Plumbing Means of connecting garden hose to pump inlet. 4. Diesel Tank Diesel fuel storage container.
-
Page 8: Safety Labeling
Safety Labeling Always make sure safety labels are in place and in good condition. If a safety label is missing or not legible, order new labels or unsafe operation could result. To order replacement safety labels, call NorthStar Product Support at 1-800-270-0810. - Page 9 Safety Labeling On-Product Warning Labels Ref # Part # Description 782325 Danger & Warning 305410 Caution Hot 777721 Operating Instructions 777778 Towing/Moving Instructions 786633 Towing Warning 782397 Battery Hazard 798057 Rupture Disk Warning 32821 TFG Lanyard DANGER FOR OUTDOOR USE ONLY ! Using this pressure washer indoors CAN KILL YOU IN MINUTES. Engine exhaust and burner exhaust contain carbon monoxide.
-
Page 10: Special Equipment Safety Features
Special Equipment Safety Features High Pressure WARNING: If the high-pressure safety device ever discharges water, Safety Device turn the engine off and do not use the machine. The device will no longer (Rupture Disc) function properly. See a dealer or call Product Support at 1-800-270-0810. -
Page 11: Assembly And Initial Set-Up
Assembly and Initial Set-Up Steps for Assembly / Initial Set-Up Step 1. Unpacking & Delivery Inspection Step 2. Trailer Assembly Step 3. Initial Pump & Engine Preparation Step 4. Battery Installation Each of these steps is discussed in the below: Step 1. - Page 12 Assembly and Initial Set-Up 1/2" Flat Washer Qty-2 Part # 82122 1/2 x 5" Bolt Qty-1 Part # 82119 1/2" Class G Nut 1/2 x 4" Bolt Qty-3 Qty-2 Part # 82291 Part # 82250 5/16 x 1-1/4" Bolt 3/8 x 1" Bolt Qty-4 Qty-3 Part # 82480...
-
Page 13: Step 2. Trailer Assembly
Assembly and Initial Set-Up Step 2. Trailer Assembly WARNING: The pressure washer is heavy. It can crush and cause serious injury if it rolls out of control or tips over. Follow all assembly instructions exactly as presented below. 1.) Remove the top and four sides of the wooden crate. - Page 14 Assembly and Initial Set-Up Step 2. Trailer Assembly (continued) 9.) Crank jack down farther (so A-frame goes up) to take weight off front shipping posts. 10.) Remove front shipping posts and slide front pallet out of the way. 11.) Crank jack up as far as it will go (so A-frame goes down and weight is applied to wheels) 12.) Disconnect rear shipping posts from frame (remove only the bolts at the top of the rear...
-
Page 15: Step 3. Initial Pump, Engine & High Pressure Hose Preparation
Assembly and Initial Set-Up Step 3. Initial Pump, Engine & High Pressure Hose Preparation Prepare Verify pump oil level. Water Pump Note: The pump is shipped with oil. *Change oil after first 40 hours, then every 3 months or 500 hours 1. -
Page 16: Step 4. Battery Installation
Assembly and Initial Set-Up Step 4. Battery Installation Install a 12-volt standard automotive battery (Group 75/86) with a minimum 18 amp-hour rating. The engine will run but the burner will not fire unless a battery is installed. The battery is to be supplied by the customer and should be installed in the protective battery compartment located near the engine. -
Page 17: Moving And Towing
Moving and Towing WARNING The filled pressures washer is heavy. It can crush and cause serious injury if it rolls out of control or tips over. • ALWAYS keep the jack cranked down to help balance the trailer when it is not connected to a vehicle hitch. - Page 18 Moving and Towing Attach safety Two safety cables must be used while towing. cables Cross safety cables under the coupler, allowing only enough slack for vehicle turns. Plug in lights Plug light pin connector into vehicle. Raise the jack Always crank the jack into the UP position before towing. Tow the pressure washer to your desired work location.
-
Page 19: Before Each Use
Before Each Use Follow the steps below prior to each use of the pressure washer. Steps to Follow Before Each Use Step 1. Check Equipment Step 2. Add Fuel(s) Step 3. Select Suitable Worksite Step 1. Check Equipment Check/add Check/add pump oil. *Change oil after first 40 hours, then every 3 months or pump oil 500 hours Caution: Never run the pump without sufficient lubrication! -
Page 20: Step 2. Add Fuel(S)
Before Each Use • Never attempt to repair a high-pressure hose or component – Always replace it with a part that is rated at or above the pressure rating of this machine. 1) Check hoses, fittings, wand, trigger gun and connections for signs of wear, cracks, looseness, or leaks. - Page 21 Before Each Use Always follow these general safety rules when fueling: 1) Turn pressure washer off and allow to cool for at least two minutes before removing any fuel cap. Note: A running, or still-hot engine or burner is hot enough to ignite fuel. 2) Fill fuel tank OUTDOORS –...
-
Page 22: Step 3. Select A Suitable Worksite
Before Each Use Step 3. Select Suitable Outdoor Worksite Before using the pressure washer, you must understand the criteria for selecting a suitable location for operation. Note that this pressure washer is for OUTDOOR USE only. WARNING You must choose a suitable site for operating your pressure washer to avoid equipment damage and/or injury and possible death from carbon monoxide poisoning, fire/explosion, uncontrolled equipment movement/tip over, or slips and falls. - Page 23 Before Each Use WARNING Never attempt to attach ductwork to the engine muffler or burner exhaust to allow for installation inside an enclosure. This could cause hot air deflection, heat build-up, and increased exhaust back-pressure, resulting in possible exhaust leakage or overheating and damage to the pressure washer.
-
Page 24: Operation
Operation After you have checked and fueled the equipment and positioned it in a suitable worksite, it is time to start your pressure washer. The following are the procedures necessary for safe, successful operation of your pressure washer. WARNING Carefully read and follow all instructions and safety information for using this pressure washer. Improper use or maintenance of the pressure washer can result in serious injury or death to the operator or bystanders from: •... - Page 25 Operation Connect your If using tap water: water supply Follow these instructions when supplying water from a pressurized source such as city tap water: Acquire a suitable garden hose and attach to the water supply: 1. Acquire a suitable garden hose: a.
- Page 26 Operation If using water tank: Follow these instructions when supplying water from the feed tank: 1. Ensure that you have the tank feed ball valve OPEN, and the city tap water ball valve CLOSED, as indicated in the diagram below. Open this ball valve Close this ball valve...
- Page 27 Operation 3. Release the collar, making sure it springs back and re-seats to its original (non-retracted) position. (Figure 8b). Check the connection by pulling on the hose to ensure a positive connection. Correct Insertion Not Fully Inserted Collar Seated Collar NOT Seated Figure 8b Select spray Your pressure washer is equipped with four high-pressure nozzles and one...
-
Page 28: Step 2. Set Up For Chemical Spray (If Desired)
Operation 1. Make sure the engine is off and the hose line depressurized. 2. To install the nozzle, pull the collar back and twist the nozzle firmly into the coupler on the end of the wand. (Figure 9a) Lance Coupler Nozzle Collar Figure 9a... - Page 29 Operation low pressure adhere better to the surface being cleaned, allowing the formula time to react and remove dirt more effectively. Note: An external chemical injector pump is not recommended for use with this pressure washer. WARNING: Chemical spraying • Never spray acids, corrosives, or abrasive or flammable liquids. Breathing hazards, surface burns/corrosion, or fire/explosion could result.
-
Page 30: Step 3. Spraying
Operation 4. Submerge the suction strainer connected to the braided chemical hose into a bucket containing the chemical solution. See Figure Step 3. Spraying Safety rules for Before starting the pressure washer, review the following general safety operation rules for operation: Conditions for Use Know how to stop. - Page 31 Operation well as hose whipping. Avoid sharp objects. Keep hose away from sharp objects. Bursting hoses may cause injury. No load bearing. Do not use the pump to support other items of equipment that impose unacceptable loads on the pump. Do not attempt to use this machine as a prop.
- Page 32 Operation • Purge air from the water supply hose by squeezing the trigger until a steady stream of water flows out of the nozzle at low pressure. (Air in the hoses can cause damage to the pump, so always make sure all the air is out of the hoses before starting the pressure washer engine.) •...
- Page 33 Operation 3. You can apply chemicals with either warm or cold water. Check chemical label. If warm water is specified, start burner according to instructions provided below. 4. Apply chemicals by squeezing the spray gun trigger. The chemical injector will draw the chemical into the water stream. 5.
- Page 34 Operation the "Oil Burner Adjustment Instructions" step in the "Set-Up" section of this manual. 5. When the trigger is released, a pressure switch automatically turns the burner off. Also, when the temperature setting is reached, the thermostat automatically turns the burner off. WARNING It is important that the burner stops firing when the trigger is released.
- Page 35 Operation pressure first and follow instructions for attaching a nozzle). 2. Clear the cleaning area of all persons. Keep children and pets away. 3. Hold the spray gun firmly with two hands and a sturdy stance -- Gun kicks back when triggered. CAUTION Spray gun metal gets extremely hot when using the burner and can burn you on contact.
-
Page 36: Step 4. Stopping
Operation 9. If temporarily interrupting spraying, rotate trigger safety latch downward to the locked position to guard against accidental trigger release. 10. Always turn off the engine and activate spray gun trigger to relieve system pressure when: • the sprayer is unattended, or •... -
Page 37: Storage
Storage Storage When you are finished using the pressure washer, you must prepare the sprayer for storage and store it in a proper location. Note: o If you will be storing the sprayer in freezing conditions, follow the instructions for preparing the sprayer for storage in freezing conditions. - Page 38 Storage 3. Using a wrench, disconnect the plumbing that connects to the heating coil inlet. The water will flow out of the heating coil. This will protect the coil from freeze damage. 4. Open both water inlet ball valves and remove the cap from the water filter.
- Page 39 Storage Prepare pressure Prepare the pressure washer for storage. washer for storage 1. Disconnect the battery, remove it from the battery compartment, and store it indoors. 2. Make sure the engine start switch is OFF and fuel valve is OFF. 3.
-
Page 40: Burner Adjustment
Burner Adjustment Oil Burner Adjustment (only needed if white exhaust smoke appears) The oil burner is preset and performance tested at the factory (elevation 1100 feet). Different altitudes may require a one-time initial burner adjustment. CAUTION: If white smoke appears from the burner exhaust vent during start-up or operation, discontinue use and readjust air bands. - Page 41 Burner Adjustment 5. Slowly open the air band until white smoke just starts to appear. 6. Turn air band halfway back to the black smoke position previously noted. Tighten the locking screw. 7. Now fine tune the burner air by adjusting the shutter: a.
-
Page 42: Maintenance And Repair
Maintenance & Repair Inspect and maintain your pressure washer as specified below in order to keep it in safe and optimal working order. Follow all safety rules and recommended maintenance instructions. WARNING ALWAYS shut off water supply, bleed water pressure, turn off engine and disconnect the spark plug before cleaning, adjusting, or servicing the pressure washer. - Page 43 Maintenance & Repair 270-0810. • Replacement parts. If a part needs replacement, only use factory approved repair parts. Replacement parts that do not meet specifications may result in a safety hazard or poor operation of the pressure washer and will void the warranty.
- Page 44 Maintenance & Repair Good Water dripping or spraying, or localized moisture Exposed wire mesh due Figure 15 to wear Clean water filter Clean the water filter before each use. WARNING: When cleaning filters, check whether dangerous chemicals have been used with the filter and take any precautions that may be recommended by the manufacturer of these chemicals.
- Page 45 Maintenance & Repair Recharge and Inspect, recharge, and maintain battery according to your battery maintain battery manufacturer's instructions. Do not store with battery charger always connected. Batteries that are over- charged can boil themselves dry and produce excessive amounts of hydrogen, an explosive gas.
- Page 46 Maintenance & Repair Maintain burner's Drain water from burner's filter bowl as needed and replace filter after fuel filter/water every 500 hours of use or as needed. separator 1) After each use of the burner, visually check the filter bowl. If any water has accumulated, drain it via the water drain at the bottom of the bowl.
- Page 47 Maintenance & Repair Outlet Inlet Figure 18 Inspect heating coil Inspect and desoot coil annually. and desoot as Most coils never require desooting. However, poor grades of fuel oil or needed inadequate combustion air will cause heavy soot build-up on the outside surface of the heating coil tubing.
- Page 48 Maintenance & Repair Inspect electrodes Inspect electrodes yearly and make adjustments as needed. 1) Remove the 4 nuts that attach the burner to the heating chamber. You do not have to disconnect the fuel lines or the electric cords. Heating chamber Nuts Burner Figure 20...
- Page 49 Maintenance & Repair NOTE TO COMMERCIAL USERS: All mechanical equipment, no matter how well designed, will need maintenance and repairs. A Northstar pressure washer is no exception. At times, a Northstar pressure washer may become inoperable because repairs are required. Northstar Product Support will assist in these repairs as needed, but if an inoperable pressure washer creates a major expense to your business, then we strongly recommend the following:...
-
Page 50: Troubleshooting
Troubleshooting Engine Will Not Start Causes Solutions Low Oil Shutdown Fill engine with the adequate amount of oil. Cold Engine Choke engine to start. No Fuel Add gas to engine, make sure fuel shutoff valve is open. Dead Battery Recharge/Replace battery. Spark plug wire not attached Attach spark plug wire to spark plug. -
Page 51: Parts Explosion
Parts Explosion 157595 – Rev BE... - Page 52 Parts Explosion 157595 – Rev BE PART # DESCRIPTION PART # DESCRIPTION 783394 Honda engine 18hp 790561 Thermostat 783396 Honda muffler kit 777855 Toggle switch 777837 3/8" NPT plug 31085 Circuit breaker, 20A 38198 CAT pump, 4gpm 777644 Control box cover 777347 3/8"...
- Page 53 Parts Explosion 157595 – Rev BE...
- Page 54 Parts Explosion 157595 – Rev BE PART # DESCRIPTION PART # DESCRIPTION 3.83’ 802080 Hose Reel 791252 Hose, 3/4" ID PVC Suction ¾” NPT x ¼” HB Nylon Hose 793851 Frame, Skid 799839 Barb 796782 200 Gal Tank Assembly 777834 1/4"...
-
Page 55: Pump Explosion
Pump Explosion – Rev BE... -
Page 56: Wiring Diagram
Wiring Diagram – Rev BE... -
Page 57: Summary Of Important Safety Information
Do not allow anyone to operate the pressure washer who has not read the Owner's Manual and been instructed on its safe use. Owner's Manuals are available from North Star at 1-800-270-0810. • Adult control only. Only trained adults should set up and operate the pressure washer. Do not let children operate. - Page 58 Summary of Important Safety Information Installation / Initial Set-up • Level, heat-resistant surface. Situate pressure washer on a firm, level, and heat-resistant surface with good drainage. Ensure it sits level and will not slide or shift during operation. Block wheels to prevent movement. •...
- Page 59 Summary of Important Safety Information • Vehicle handling. Be aware that vehicle handling will be affected when towing the filled pressure washer. Exercise caution to avoid loss of control or pressure washer overturning: Keep speed to a minimum so you can maintain control at all times. Reduce speed prior to turns. Allow for wider turns and for more distance to stop.
- Page 60 Summary of Important Safety Information • Incoming water supply on. Do not run the pump without the water supply connected and turned on. Operating the pressure washer without an incoming flow of water will damage the pump. • Wait before re-lighting burner. NEVER attempt to immediately run or re-light the burner if it doesn't ignite the first time.
- Page 61 Summary of Important Safety Information • Smoking/sparks. Never smoke near the running engine, and never operate near sources of sparks or flames as flammable fuel vapors are in the vicinity of the pressure washer. • Lock trigger safety latch when not spraying. Spray gun is equipped with a built-in trigger safety latch to guard against accidental trigger release.
- Page 62 This page has intentionally been left blank.
-
Page 63: Limited Warranty
Limited Warranty Dear Valued Customer: The NorthStar Product you just purchased is built with the finest material and craftsmanship. Use this product properly and enjoy the benefits from its high performance. By purchasing a NorthStar product, you show a desire for quality and durability. Like all mechanical equipment this unit requires a due amount of care. -
Page 64: California Proposition 65 Information
WARNING : This product can expose you to chemicals including gasoline engine exhaust, which is known to the State of California to cause cancer, and carbon monoxide, which is known to the State of California to cause birth defects or other reproductive harm. For more information go to www.P65Warnings.ca.gov.