Table of Contents
Advertisement
Installation, Operation, and Maintenance Manual
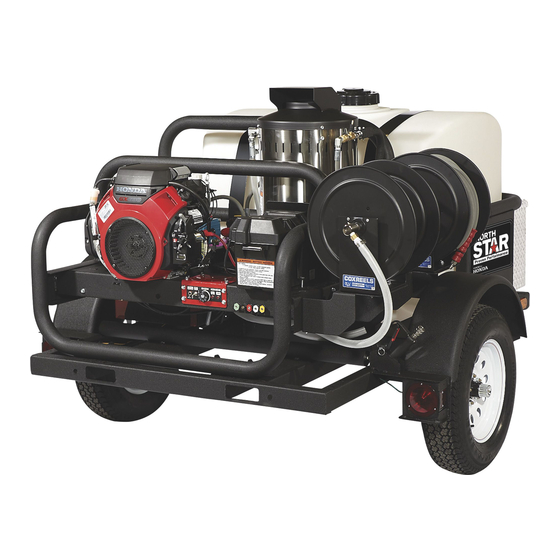
HOT WATER PRESSURE WASHER
To the Owner:
Thank you for purchasing a NorthStar hot water pressure washer. Your machine is designed for long life,
dependability, and the top performance you demand! Take time now to read through this manual so you better
understand the machines' operation, maintenance and safety precautions. Everyone who operates this machine
must read and understand this manual. The time you take now will prolong your machine's life and prepare you
for its safe operation. Enjoy the exceptional performance of your NorthStar hot water pressure washer, the
industry leader! The manufacturer reserves the right to make improvements in design and/or changes in
specifications at any time without incurring any obligation to install them on units previously sold.
Engine Oil
Engine is shipped with out oil. Fill before starting. Use SAE 10W-30 motor oil.
Pump Oil
Pump is shipped with oil. Check pump oil level before starting.
Water
Make sure your water flow is 20% higher than the pressure washer's flow rate.
Make sure your water is clean and particle free.
Storage
Do not allow water to freeze in the pump, hose, coil, or spray gun.
Spraying
Use any NorthStar brand or equivalent pressure washer chemicals.
Chemicals
Adjust soap adjustment knob to regulate cleaning power.
Maintenance
Engine:
Schedule
Pump:
Read and understand all manuals before operating.
Any Questions, Comments, Problems, or Parts Orders
Call NorthStar Product Support 1-800-270-0810
Quick Facts
Oil: change after first 20 hours, then annually or every 100 hours.
Spark Plug: clean every 100 hours, replace annually or every 300 hours.
Air Filter: clean every 100 hours, replace annually or every 300 hours.
Oil: change after first 40 hours, then every 3 months or 500 hours.
M157594I
ITEM NUMBER: 157594, 157595
SERIAL NUMBER:
Engine Model:
Pump Model:
Flow:
Hose Length:
TM
Nozzle Size:
Cleans dirty surfaces with high
:
pressure hot water.
Pressure:
Lance Length:
Advertisement
Table of Contents

Related Manuals for North Star M157594I


Summary of Contents for North Star M157594I
-
Page 1: Quick Facts
HOT WATER PRESSURE WASHER To the Owner: Thank you for purchasing a NorthStar hot water pressure washer. Your machine is designed for long life, dependability, and the top performance you demand! Take time now to read through this manual so you better understand the machines’... -
Page 2: Table Of Contents
Important Safety Instructions Specifications Machine Component Identification Installation Instructions Operation Instructions Safety Features Important Safety Instructions WARNING -Risk of injection or injury to persons - Do not direct discharge stream at persons. - Do not use a hose if exterior damage is evident. -Risk of explosion. -
Page 3: Specifications
Pressure Rating Flow Output Pump Type Water Supply Engine Horsepower BTU Output Maximum Temperature Approved Fuels Fuel Capacity Gasoline Capacity Discharge Hose Dimensions (skid only) Weight (skid only) Specifications for Trailer Mounted Models Trailer GVWR Hitch Ball Size Skid Dimensions Weight (tank empty) Weight (tank full) Specifications... -
Page 4: Machine Component Identification
Machine Component Identification Ref # Description Unloader Lifting Eye Engine (see engine manual) Inlet Plumbing Diesel Tank Gasoline Tank Pump Water Inlet (feed tank) Ref # Description Ball Valve (feed tank) Ball Valve (city tap water) Water Filter Water Inlet (city tap water) (trailer models use hose reel) Control Panel Battery Box... -
Page 5: Installation Instructions
#222815 call 1-800-270-0810 to order) on the water supply hose is recommended and may be required by local code. Place the pressure washer on a solid level surface in a protected area where it is not readily influenced by outside... - Page 6 Consult local heating contractors. If the pressure washer is to be used in an enclosed area, a flue must be installed to vent burner exhaust to the outside atmosphere. Be sure the flue is the same size as the burner exhaust vent on the pressure washer lid.
-
Page 7: Operating Instructions
Read and understand the entire manual before operating the pressure washer. Follow these instructions every time you use the pressure washer. I.) Pre-Operation Read entire manual, especially the important safety instructions. 1.) Check hoses, fittings, wand, trigger gun and fuel... - Page 8 Follow manufacturer’s recommendations. safety precautions and first aid for all chemicals. NOTE: Your pressure washer is equipped with a low pressure chemical injector. The proper chemical used for the proper application can speed up cleaning jobs tremendously. Operating Instructions A.) Snap the quick couple chemical injector onto the high...
-
Page 9: Safety Features
Safety Latch 00417 A.) Hold the lance with two hands, have a sturdy stance. B.) The pressure washer is set and locked to the maximum rated pressure when it leaves the factory. . WARNING: Do not alter the unloader valve’s maximum pressure. -
Page 10: Maintenance Instructions
WARNING: Do not use a finger or skin to check for leaks. Escaping fluid under pressure has sufficient force to penetrate the skin, causing serious injury. Do not operate the pressure washer if the hose is cracked, worn, or leaking. Before each use check all hoses for leaks and worn areas. -
Page 11: Long Term/Winter Storage
2.) Fill feed tank with 5 gallons of RV antifreeze. 3.) Run the pressure washer in cold mode until RV antifreeze comes out the water outlet. Make sure excess antifreeze is disposed of safely. RV antifreeze will save the components from freeze damage and keep them lubricated. -
Page 12: Troubleshooting Guide
Defective Pressure Switch Defective Burner Causes Partially clogged or damaged nozzle Clogged water filter Low water flow Pressure Washer Surges Or Cycles While In Bypass Causes Leak between unloader and gun. Gun leaking internally Causes Air band not adjusted properly... -
Page 13: Parts Breakdowns
Parts Breakdown 157594I... -
Page 14: Battery Box
PART # DESCRIPTION 777222 HONDA engine 18hp 32842 muffler kit, HONDA 30511 1/2npt plug 777837 3/8npt plug 38198 CAT pump, 4gpm 777347 3/8npt tee 777378 hose, 18" 5400psi 777682 pressure guage, 6000psi, 1/4npt 777338 reducer 3/8npt x 1/4npt MxF 777410 elbow 3/8npt MxF 17141 hose clamp 3/4 hose 30289... - Page 15 PART # DESCRIPTION 779257 Hose Reel 777903 Frame, Skid 30198 200 Gal Tank 777707 Tank Strap 82080 Eye Bolt, ¼” 780200 15” Wheel 777771 Trailer Frame 127432 Trailer Light Kit (rear, front, wires) 38485 128480 Jack 12736 Wheel for Jack 777775 Coupler 777698...
-
Page 16: Electrical Schematic
Wiring Diagram... -
Page 17: Trailer Assembly Instructions (157595)
Trailer Assembly Instructions (157595 only) 1.) Remove the top and four sides of the steel crate. 2.) Remove a-frame from trailer frame. (keep fasteners for step 7) 3.) Slide a-frame into holders under trailer frame (built into the front posts). 4.) Install jack onto a-frame with 3/8x1”...